Further reading…
Making a garden resilient, stronger in the face of the repeated heatwaves our countries now suffer, is one of the challenges of the Chaparral garden, which draws on flora from extreme climates, such as those found in New Mexico or California. The multiple heatwaves of summer 2026 confirm this reality and will certainly steer us towards undemanding plants that are also hardy in our winters. Discover this new type of garden, inherently waterwise, low-maintenance and very promising.
What is a chaparral?
Chaparro is a Spanish word referring to several oak species (Quercus ilex, holm oak, but also Quercus coccifera and sometimes cork oak). The term also covers less well-known species such as Castela tortuosa, a shrub native to arid areas of Mexico and southern United States.
Chaparral is nothing more than an area of scrub and shrubs, forming a specific ecosystem in Mediterranean climates. It generally resembles a stand of holm oaks, in other words a garrigue or maquis, terms and landscapes more familiar to us. The name in Spanish denotes a biome found mainly from Mexico to California, and in Europe around the Mediterranean such as Andalusia or Sardinia. These areas are wooded, populated by shrubs and undershrubs able to withstand very hot conditions.
Plants able to grow in chaparral are often sclerophyllous (small, leathery leaves covered by a protective cuticle), sharing unique adaptations to this dry environment: deep roots, grey-green leaves that reflect light, and essential oils that limit evaporation.

We imagined three scenes to reproduce, in spirit, this ultra-resilient type of landscape. You can create a single area of the garden that receives particularly strong summer sun, or treat the whole garden in this style, provided you live in temperate valleys or mild zones of the country.
Adapting the chaparral to a dry exotic garden
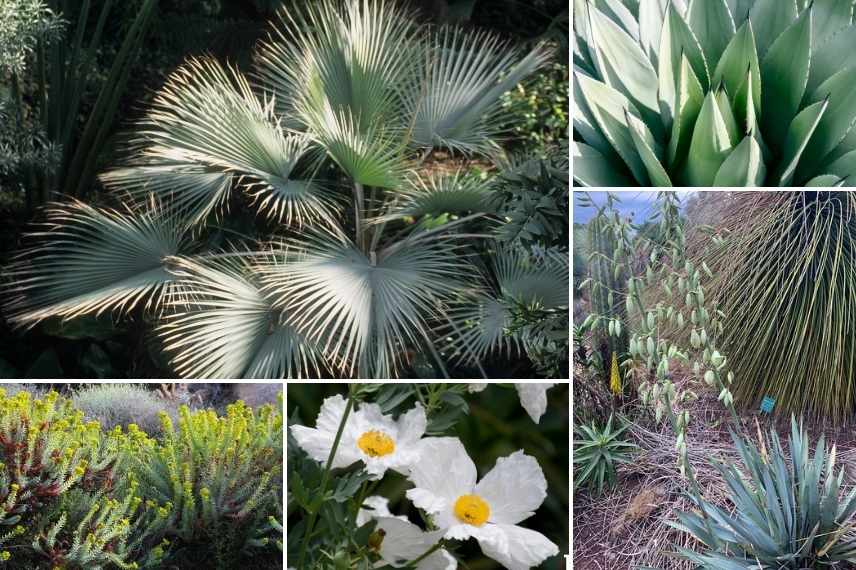
A dry garden can create a sublime scene with exceptional plants.
Here we play with a palette of blue-tinged foliage using plants surprisingly resistant to short frosts in winter, not exceeding −10°C. The tree poppy, a Californian and Mexican plant with wonderful white flowers, and the Mexican blue palm for an original backdrop, have proven able to withstand very dry summers. Once well established, Romneya poses no real hardiness issues. A Yucca pallida joins them to form that superb silvery-blue base, accompanied by an agave hardy enough such as Agave parryi or Agave montana.
A Mediterranean perennial, Euphorbia pithyusa, a Balearic spurge that stays low, and a Mexican-origin plant, Mathiasella bupleuroides 'Green Dream' with jade-green flowers, naturally fit among these plants. We bring in chartreuse and blue-green tones for a duet of colours evoking Mediterranean aridity.
NB: this blue planting can easily be part of a blue garden, located in the sunniest, driest part of the garden!
Transport yourself to Lanzarote
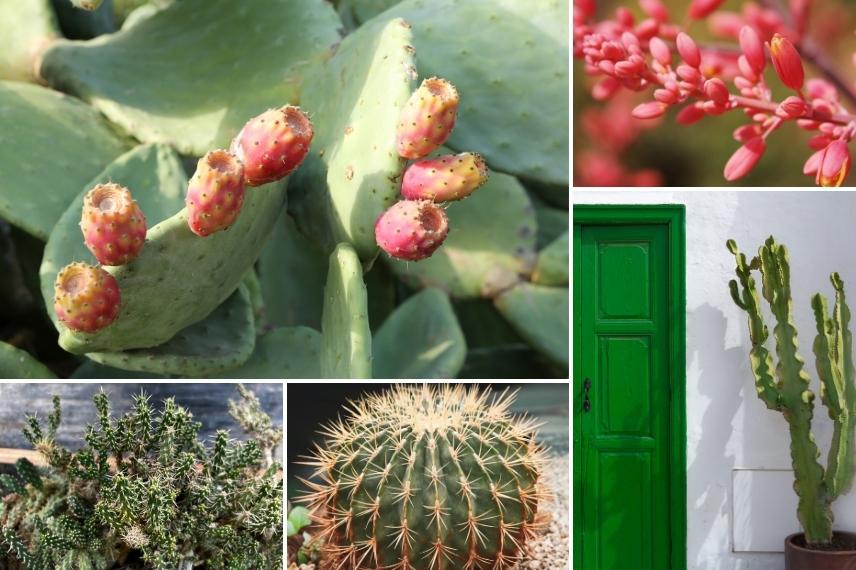
Lanzarote's cactus gardens are exceptionally photogenic. On this volcanic archipelago grow sclerophyllous plants with small leathery leaves adapted to drought, and spiny cacti. Drawing inspiration from them, while carefully selecting cacti cold-hardy enough for our winters, allows creation of a unique area within a dry garden, ready to face repeated summer heat spikes. Ensure perfect drainage, as this type of garden cannot tolerate any standing moisture in winter.
A prickly pear, well adapted to sea spray, is interesting for its slightly greater hardiness (down to around −15°C for some) and its unique habit with large spiny pads. Plant them liberally; choices include Opuntia scheeri or Opuntia engelmannii var. rastrera, among many others. In this distinctive setting, succumb to oddity of Cylindropuntia kleiniae, a cousin of opuntias, quite cold-hardy and producing a beautiful magenta summer bloom. Complement the area with a Hesperaloe parviflora and an Echinocactus grusonii, the golden barrel cactus often seen on the island.
This type of garden is intended for warm, mild regions of the country with less severe winters and dry summers.
Use pumice or black volcanic stones to simulate island soils and to ensure drainage. Finishing touch? a whitewashed house with green shutters to reproduce another characteristic of this island close to African coasts.
... or to landscape a poor, unproductive slope
A south-facing, dry and unproductive slope can also be transformed into a resilient space by imitating the chaparral, an ecosystem adapted to extreme conditions.
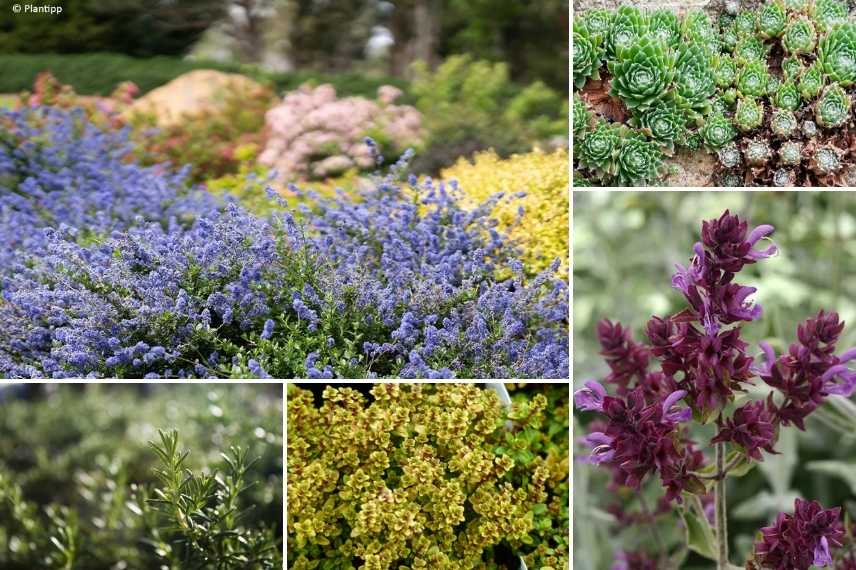
To turn poor soil into a semi-desert rockery, favour low, hardy shrubs such as cistus (Cistus), a California lilac like the ceanothus ' Pacific Wave' or its groundcover form (C. thyrsiflorus 'Repens'), a prostrate rosemary and some sempervivums. These plants, with deep roots and leathery or fleshy leaves, tolerate drought and poor soils perfectly. Add a golden thyme, and some sages (such as Canary Island sage 'Lancelot'), aromatic plants that will scent the garden while attracting pollinators.
Once established, these plants require little watering and maintenance. Their dense foliage will protect soil from erosion and limit growth of weeds that are unwanted on the slope. A mineral mulch will help conserve moisture and enhance the slope's natural appearance. A few ochre or orange boulders placed here and there will also help evoke Californian or Andalusian maquis while enhancing the area.
Discover our selection of succulents and perennials on our "Dry garden" page online, and our inspiration in the trend booklet 2026!
Since Beth Chatto, the dry garden movement has increasingly been seen among landscapers and in gardening magazines and books. We cover it in detail in Designing a dry exotic garden, Laying out a gravel garden, the Californian-style garden and the garrigue garden, as well as strong trends recently seen at the Chelsea Flower Show in London, such as the antipodal garden and the sand garden.
Find all garden trends for 2026 in: What are the five major trends for 2026?
Making a garden resilient, stronger in the face of the repeated heatwaves our countries now suffer, is one of the challenges of the Chaparral garden, which draws on flora from extreme climates, such as those found in New Mexico or California. The multiple heatwaves of summer 2026 confirm this reality and will certainly steer us […]
Terraces, courtyards, patios and small bohemian balconies are the new stars of summer! This very colourful "boho" trend that has invaded our interiors and wardrobes also appears in our summer green retreats. It matches the sunny cheerfulness of a season when we spend a lot of time outdoors.
Let’s take inspiration from the gypsy world to prepare bright alcoves on balconies, terraces and inner courtyards from the first fine days, with planting ideas and decorative elements. We explore this Boho Patio in three scenes easy to recreate at home!
Boho Patio codes
The bohemian atmosphere dresses itself in vivid, deep and variegated colours that answer one another, but also in associations of warm tones in the blooms: intense reds, deep violets, Indian pinks and spicy oranges, not forgetting bicoloured flowers. Bluish, golden or purplish foliage helps to reinforce this playful mood, bringing red or variegated splashes.

This mixed-up planting borrows from gypsy culture a festive, hybrid universe that laughs at convention and pairs a whole spectrum of colours, provided they are warm and bright.
This style is also based on improvisation, like manouche music, and on bold accents. This temperament appears in the garden in temporary scenes created especially for the summer months, and in the accumulation of mismatched small objects (side tables, stools, small cushions, etc.).
On the décor side, important for dining and relaxation areas, have fun with mismatched pairings: rustic furniture repainted turquoise or green, rattan chairs, fabric pouffes, Provençal floral and ethnic patterns juxtaposed with strong colours: turquoise, pink, orange and bright yellow. The advantage of this bohemian décor is that you can mix disparate objects and accessories, using what you already have at home or stored in the attic, to give them a second life: bring out granny’s lace and embroidery for the summer, macramé and trimmings, old rattan armchairs, baskets and fruit crates, airy curtains. In a joyful mix of materials, the décor is done!

On a sun-drenched terrace
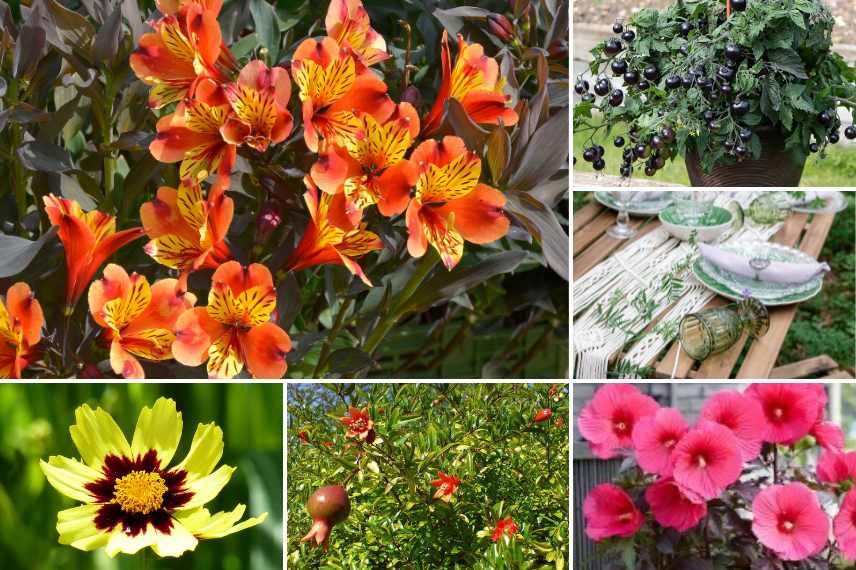
Terrace or balcony are often west- or south-facing. They can be radically transformed into an ultra-cheerful cocoon with sun-tolerant plants that do well in pots. Explore a plant colour palette ranging from saffron yellow to violet for a truly bohemian vibe.
Alstroemerias 'Indian Summer', orange and yellow contrasting against bronze foliage, will look stunning alongside Coreopsis 'Cosmic Eye', a bright yellow spotted with purple, or the pretty all-yellow 'Full Moon Madness'. Add other long-flowering plants such as a common Rose mallow 'Pink Passion' with giant flowers and dark purple foliage, and provide more foliage interest with a pomegranate that can be grown in a pot, such as Punica granatum 'Nana', whose brilliant flowers will pair beautifully with the other perennials. For snacking at aperitif time, invite, for example, the surprising cherry tomatoes 'Akoya', whose fruits turn almost black.
In a semi-shaded urban patio
Small city courtyards benefit from focusing on colour and variegated or golden foliage to lift them out of the shade. In a semi-shaded patio receiving enough light and warmth in summer, opt for sunny flowers and a few "indestructibles":
Hosta 'The King', Hakonechloa macra and an Aucuba japonica 'Crotonifolia' for their golden and variegated foliage (Aucuba will reward you with pretty red berries a little earlier) together with the bold flowers of Hibiscus syriacus 'Hibisa rosada', and the Peruvian lily 'Duc d'Anjou'.
The bohemian spirit will also be present in accessories, essential in less bright areas and in smaller spaces.
Beyond plants, bring colour without fearing the boldest mixes. Dare genre-mixing: antique rug + Italian ceramics + small disparate or oversized objects and a cosy bench, etc. Here, the evening atmosphere will be especially worked on: lanterns, paper lanterns and candles, and don’t forget a crochet throw in these patios that are often cooler at night.

Garden refuge as an improvised alcove
This bohemian trend can also be expressed in a corner of the garden used as an improvised summer retreat.
In front of a shed, garden shelter or at the foot of a fine tree from which a rattan chair is hung, set up a summer hideaway using bohemian codes. A temporary terrace, improvised with clip-together wooden decking tiles readily available from DIY stores, is easy to install. In summer it becomes a true green cocoon perfect for relaxing on a garden sofa made of a few stacked pallets or large pouffes, in a fairground style.
Here, a few colourful annuals join the party: multicoloured zinnias and orange calendulas (marigolds) sown in pots in spring, or beds of African marigold 'Mango Tango' around the area, as well as sun-loving perennials such as the charming Delosperma 'Ocean Sunset Orange Glow'. Count on two striking pots of dahlias with evocative names, the fiery 'Bohemian Spartacus' and the more restrained compact 'Melody Gipsy', for a long and remarkable display. Sunflowers 'Mongolian Giant' will bring pep and height, while a pot of basil 'Everleaf Emerald Tower' will be handy for salads at barbecues or sunny lunches.
Gather your most colourful pots, bring in lace, hangings, vintage crockery and cushions: job done!

Discover other plants ideal for composing this bohemian green décor on a terrace in our "Boho Patio" selection online and in our trend booklet!
Feeling the bohemian spirit? Find our advice on creating a bohemian garden, and our inspirational sequences: Catalane and Peach Raspberry.
This Boho Patio trend also draws on recycling second‑hand objects. Explore our topics to let your creativity run free: Decor idea: plants in unusual containers; How to make a planter from a pallet?; Recycling in the garden and How to use and properly integrate terracotta pots in the garden?
Terraces, courtyards, patios and small bohemian balconies are the new stars of summer! This very colourful “boho” trend that has invaded our interiors and wardrobes also appears in our summer green retreats. It matches the sunny cheerfulness of a season when we spend a lot of time outdoors. Let’s take inspiration from the gypsy world […]
Here’s a distinctive trend emerging in outdoor spaces, and not only among landscapers fond of conceptual gardens or in coastal areas! While a sand garden is particularly suited to coastal gardens, it proves to be an undemanding, on-trend garden, halfway between a gravel garden and a dry garden, perfectly in tune with current climate upheavals.
We invite you to discover it in three scenes that demonstrate its aesthetic appeal and sunny atmosphere!
Sand garden: a landscaping trend between frugality and aesthetics
Far from the image of the traditional Japanese zen garden with raked gravel or pale sand, the sand garden imposes itself as a new version of the garden. It retains a sense of serenity but transposes it into a warmer register, where maintenance and watering are reduced to an absolute minimum. It answers a need created by climate change: how to introduce more Mediterranean plants into northern regions? Even if rising temperatures allow it, the problem of waterlogged winter soils, often fatal to these plants, remains. The sand garden is one solution, providing effective drainage.
It is a functional garden, still experimental globally, which showcases plants that ripple in the wind, like a reminder of a sea that is not always present. It also emphasises contrasting materials and textures, often using Corten steel as a support, woven willow in tontines or sculptures, large stones or retaining walls.
Undemanding plants grow in a substrate made up of a thick layer of sand. They therefore need to draw water from deep down to survive. For this reason we choose the most drought-tolerant plants and xerophilous plants, those whose taproot systems mean they will withstand heatwave summers.
We also seek to enhance the golden aspect of the sand using a palette of warm tones available to us, both in plants and materials. Plants will generally be low-growing, mat-forming or supple, also incorporating some greyed foliage to reinforce the impression of warmth.
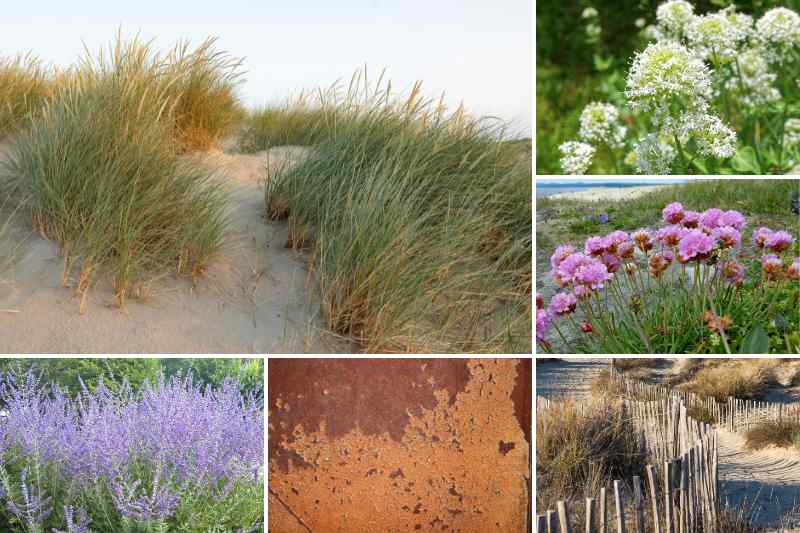
A holiday feel
Coastal gardens, and especially those located right on the coastline, are difficult to plant because of the omnipresence of sand on site. They are perfectly suited to the constraints of a sand garden. In a beach-return spirit, the focus is fully on the sand-and-beach duo, taking inspiration from the dune ecosystem.
Essential plants: valerian, Lagurus ovatus and oyat (Ammophila arenaria), Armeria maritima 'Vesuvius' (sea thrift), sandwort, Erigeron glaucus 'Sea Breeze' or Erigeron karvinskanius, sand carnations, Perovskia, blue fescue, sea holly (Eryngium maritimum), milk thistle, etc.
To bring back vegetal blond tones, use wooden slats as decking, mini sand fences, and pair with coppery accents such as a brazier, useful for summer evenings.
Our tip: take care not to multiply beach clichés. Restrict decoration to sand alone, without superfluous additions of pebbles, shells or other seaside trimmings to avoid caricature. Plants create the scene, not the other way round!
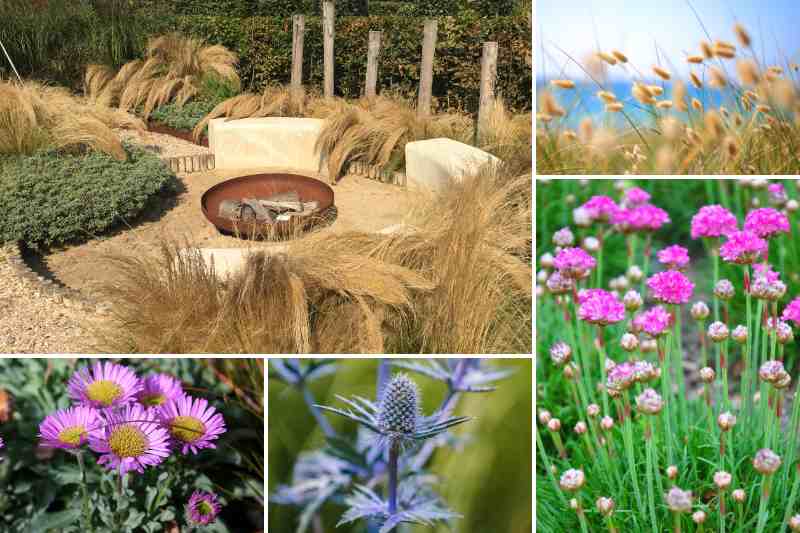
Contemporary sand garden
At the opposite end from the dune garden that naturally links to its environment, the idea of undemanding plants and sand also evokes minimalism and the mineral feel of modernist gardens. The sobriety of the sand, combined with an appropriate plant palette, allows creation of a sand garden that suggests a coast not necessarily nearby, in perfect harmony with contemporary architecture.
Here, colour is conceived in monochrome, or in white/black, white/mauve or purple and green duos, to name a few pertinent combinations. Plants are chosen for their prostrate habit, their original textures or the shapes of their inflorescences. Greyed tones for foliage are also favoured to blend well with often anthracite outdoor furniture. Corten steel, used for boards or attractive windbreaks, stands out as a material that enhances the sand’s sheen, as does brick, which can serve as a path.
Essential plants: silver santolina, Artemisia 'Powis Castle', Ballota pseudodictamnus, medium to tall grasses such as coppery Carex (Carex testacea), the movement of Hordeum jubatum, graphic silhouettes (Cordylines, Yuccas) on flat ground, and low to medium plants as on a shaped sand mound (sea thrift, creeping gypsophila, wild thyme, etc.).

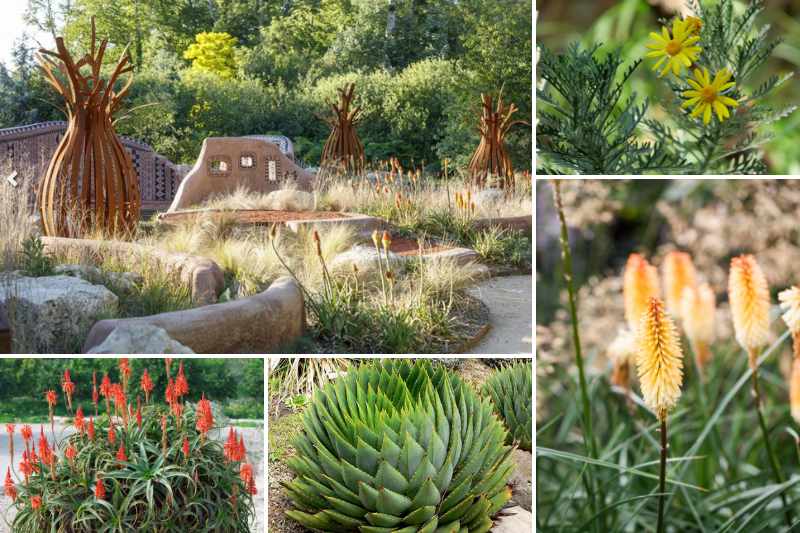
South African atmosphere
One attractive idea with the sand garden is to travel to an arid, heat-baked world. You can plant stunning perennials and ultra-resilient grasses and lean towards a Californian vibe, or, as here, a South African feel.
Let’s take inspiration from Léon Kluge’s work, the world-renowned South African landscaper, at Domaine de Chaumont-sur-Loire in France: few plants for a spectacular effect in this full-sun garden. The scene draws from the African bush, where red sand and oversized stylised baobab sculptures mainly make up the decor, with waves of Stipa tenuifolia and torch lilies. At home, imagine tall red-willow tontines or large woven willow spheres to add volume and blend into this atmosphere.
Key plants: succulents and light grasses (Aloes, Euphorbia myrsinites, Stipas, Sesleria argentea, Lomandra longifolia), and perennials with sunny yellow to orange blooms (Kniphofias, Euryops pectinatus, bulbines, Leonotis leonurus, gazanias…). Plants native to South Africa, Patagonia or Tasmania are favoured, some tolerating down to -8°C in sheltered conditions.
The naturalistic garden and the English garden also draw on this avant-garde technique, and we could just as well have developed scenes in these two worlds, which lend themselves to experimentation currently being carried out notably across the Channel.
Find our selection of plants suited to the Sand Garden spirit on our online nursery as well as on our inspiration page in the 2026 Trend Book !
Do you enjoy these distinctive atmospheres? Discover other inspiring scenes in related worlds:
Here’s a distinctive trend emerging in outdoor spaces, and not only among landscapers fond of conceptual gardens or in coastal areas! While a sand garden is particularly suited to coastal gardens, it proves to be an undemanding, on-trend garden, halfway between a gravel garden and a dry garden, perfectly in tune with current climate upheavals.We […]
Cinnamon, this fragrant and sweet spice found in many sweet and savoury dishes, has a fascinating history that spans continents and centuries. Its use is not limited to cooking: it has played a crucial role in global trade and has contributed to major voyages and explorations. In this article, we will explore the origins of cinnamon, its role in the history of trade, and the explorations it has inspired.
Origins of Cinnamon: A Treasure from Southeast Asia
Cinnamon primarily comes from the inner bark of trees in the Cinnamomum genus, native to tropical regions. There are several types of cinnamon, but the two most well-known are Ceylon cinnamon (or "true" cinnamon) and Chinese cinnamon (or cassia).
- Ceylon cinnamon (Cinnamomum verum) originates from Sri Lanka and southern India. It is sweeter and more subtle than its cousin cassia and is considered the most prized form of the spice.
- Chinese cinnamon (Cinnamomum cassia) comes, as its name suggests, from China, but it also grows in Vietnam, Indonesia, and other regions of Southeast Asia. This variety has a stronger taste, is more robust, and is often used in Asian cuisine and as an alternative to Ceylon cinnamon in many commercial products.

In the Cinnamomum genus, you can also find the Cinnamomum camphora, more commonly known as the camphor tree.
Good to know: the paperbark maple (Acer griseum) gets its name from the way its bark peels with age, resembling cinnamon. It’s very beautiful, but it’s not edible!
Did you know?: the harvesting of cinnamon is a delicate and manual process, usually done twice a year during the rainy season. Growers cut the young branches of the tree and remove the rough outer bark. They then scrape the thin layer of inner bark, which is then dried. As it dries, this bark naturally curls to form the characteristic cinnamon sticks. Once dried, it is cut into sections and sorted by quality. The amount of cinnamon obtained depends on the age of the tree and the growing conditions, but generally, a tree can provide about 50 to 100 kg of bark each year.
Cinnamon in Antiquity: A Precious and Mystical Spice
The use of cinnamon dates back thousands of years. Traces of its use have been found in ancient Egypt, where it was used in embalming processes and as a perfume. The Egyptians believed that this spice had mystical powers and incorporated it into sacred rituals.
In the Greco-Roman world, cinnamon was considered a luxury product. It was so rare and precious that it was sometimes worth more than its weight in gold. Herodotus, the Greek historian, mentioned that cinnamon came from mysterious and distant lands, further heightening the mystery and value of this spice.
Arab merchants, who controlled the cinnamon trade, deliberately maintained this mystery to protect their sources. They invented fantastic stories, claiming that cinnamon came from nests of great birds perched on inaccessible cliffs.
The Age of Discoveries: In Search of Cinnamon and Spices
During the Middle Ages, the demand for cinnamon, like other spices such as pepper and cloves, increased significantly in Europe. Spices were used not only to enhance the flavour of food but also to preserve meats. They also played a symbolic role of wealth and power.
It was during this period that European explorers began undertaking great voyages to find new trade routes to the sources of spices. European powers, particularly Portugal, Spain, and the Netherlands, initiated the age of great explorations.
- The Portuguese were the first to establish direct relations with cinnamon producers in Ceylon, present-day Sri Lanka. In 1505, they colonised the island and began exploiting this lucrative trade.
- The Dutch followed closely behind. In the 17th century, the Dutch East India Company (VOC) took control of Sri Lanka after expelling the Portuguese. They imposed a strict monopoly on the cinnamon trade, carefully controlling production and exports to maximise their profits.
- The British eventually supplanted the Dutch in Sri Lanka by the late 18th century, but by that time, cinnamon had already lost some of its status as a rare product, as other spices had gained popularity and accessibility.

Trade Routes and the Stakes of Cinnamon
The cinnamon trade was one of the first drivers of the creation of maritime trade routes between Asia and Europe. These routes were of paramount importance for the economic rise of the great maritime powers.
- Land routes, which were part of the ancient Silk Road, had long remained the main way to transport cinnamon to Europe. But with the rise of maritime routes, which were faster and more efficient, the trade of cinnamon, along with other spices, experienced unprecedented expansion.
- Portuguese maritime routes, for example, followed the west coast of Africa, rounded the Cape of Good Hope, and ascended the Indian Ocean to Ceylon. These routes were also taken by other European nations as competition for control of spices intensified.
The spice trade, particularly that of cinnamon, greatly enriched colonial empires, but it also had profound consequences for local populations, who were often exploited or displaced in the process.
The Evolution of Cinnamon Trade to Today
Today, cinnamon is widely available around the world, but the two main varieties continue to be primarily cultivated in Southeast Asia. Sri Lanka, formerly Ceylon, remains the leading producer of Ceylon cinnamon, while cassia is mass-produced in Indonesia and China.
With the evolution of agricultural practices and transportation methods, cinnamon is no longer the rare and precious spice it once was, but it retains a special status in many cultures. It is still highly valued in cuisines worldwide and is used not only for its flavour qualities but also for its medicinal properties. Indeed, cinnamon is renowned for its antioxidant, anti-inflammatory, and antibacterial properties.
Cinnamon, this fragrant and sweet spice found in many sweet and savoury dishes, has a fascinating history that spans continents and centuries. Its use is not limited to cooking: it has played a crucial role in global trade and has contributed to major voyages and explorations. In this article, we will explore the origins of […]
When discussing reforestation or the planting of new trees, the images that come to mind are often those of young shoots, symbols of hope and renewal for our environment. However, while planting new trees is essential for many ecological reasons, it cannot replace the value and ecological functions of old trees. These green giants, often forgotten or neglected in favour of their younger successors, possess irreplaceable attributes that deserve special attention.
Old trees are true ecological pillars in their ecosystems. Their imposing size, the result of decades or even centuries of growth, allows them to play a crucial role in absorbing carbon dioxide, far exceeding that of young trees. Their complex structure provides a rich and diverse habitat for many animal and plant species, thus contributing to robust and resilient biodiversity.

The ecological benefits of old trees
Carbon storage capacity
Old trees are champions in the fight against climate change due to their remarkable ability to store carbon. Over their long lives, they accumulate a significant amount of carbon in their wood, which reduces the amount of carbon dioxide, a greenhouse gas, in the atmosphere. An old tree can contain hundreds of kilograms of carbon, stored not only in its trunk but also in its branches and roots. This carbon sequestration capacity is much higher in old trees than in young ones, as they have greater standing crop and more stabilised growth.
For example: a large pedunculate oak 20 m tall and around a hundred years old can store over 1 tonne of carbon in its structure, which is equivalent to absorbing about 3.67 tonnes of carbon dioxide from the atmosphere. A young tree (let's say, 10 years old) of the same species can store about 9.5 kg of carbon per year. If we consider a small wood composed of 100 individuals of these young trees, the total would be 950 kg of carbon stored annually, nearly the same as a single old oak.
Biodiversity associated with old trees
In addition to their role in carbon storage, old trees are ecosystems in their own right. Their size and structural complexity provide varied habitats for many species. Cavities in aging trunks and branches can serve as nests for birds and refuges for small mammals and insects. Their broad canopies provide shade and an essential micro-habitat for different varieties of plants, mosses, and ferns. This diversity of habitats contributes to greater species diversity, making old trees true pillars of local biodiversity.
Role in microclimatic regulation
Old trees also influence the microclimate of their environment. Their broad canopy helps to moderate local temperatures, providing shade and reducing the urban heat island effect. This shade lowers the temperature of the ground and surrounding air, which can be particularly beneficial in urban areas where concrete and asphalt absorb and re-emit the sun's heat. Additionally, the transpiration of old trees adds moisture to the air, which can improve air quality and contribute to a more pleasant and healthier environment.
Aesthetic and cultural importance of ancient trees
Landscape and heritage value
Ancient trees play a crucial role in the landscape, bringing majestic beauty that is often the result of decades or centuries of growth. Their size, the shape of their canopy, and textured bark attract the eye and serve as focal points in various landscaping designs, offering character and continuity. These trees are at the heart of natural heritage conservation efforts, as they represent a living link to the past and are valued for their contribution to the identity and beauty of a region.
Trees as witnesses to local and global history
Ancient trees are also witnesses to history. Each of these trees can tell stories of the past, having survived major historical events or having witnessed significant changes in their immediate environment. For example, specific trees can be identified as sites where historical events took place, serving as landmarks for local communities and historians. They can also represent historical or cultural symbols, linked to legends, poems, or cultural practices.
Beyond their role as silent witnesses to human history, these trees often hold spiritual or religious significance, embedded in local practices and beliefs. They are sometimes regarded as sacred or as protectors by communities, reinforcing their role in the cultural fabric of society.

The challenges associated with the growth of young trees
Unlike annual plants or bushes, trees typically require several decades to fully develop their root structure, trunk, and canopy. During this growth period, they do not yet have the capacity to provide the same ecological services as mature trees, such as significant carbon sequestration, support for high biodiversity, and effective microclimate regulation. This long delay before they become fully "functional" in the ecosystem can be seen as a long-term investment, but one that does not immediately compensate for the loss of old trees.
Young trees also face relatively low survival rates, particularly in urban or disturbed environments. Challenges include competition for resources such as light, water, and nutrients, especially if space is limited or if the soil is of poor quality. Young trees are more vulnerable to environmental stresses such as droughts, floods, extreme temperatures, and diseases. Furthermore, they can be damaged by human activities, such as construction and pollution. In other words, it is not always a given, and it is therefore better to keep older trees.
Conservation strategies for old trees
Effective conservation of old trees requires appropriate care and sustainable management policies that value their ecological and cultural importance in urban and rural environments. These strategies include regular inspections, careful pruning, structural support, and adjustments in irrigation and soil quality, as well as integration into urban planning, legal protection, public awareness, and adequate funding for conservation programmes. These joint efforts are essential to preserve these trees, which are crucial elements of our natural heritage and vital contributors to biodiversity and environmental well-being.
When discussing reforestation or the planting of new trees, the images that come to mind are often those of young shoots, symbols of hope and renewal for our environment. However, while planting new trees is essential for many ecological reasons, it cannot replace the value and ecological functions of old trees. These green giants, often […]
Whether shrubby or herbaceous, peonies beautify the garden every spring. With their vibrant white, cream, yellow, pink, or red dresses, they captivate and play the divas… and sometimes, they can be quite elusive when it comes to taking the stage. Imagine for a moment that you decide to deliberately sabotage the show, not out of malice, but simply for the pleasure of seeing how these grand ladies would react?
In this article, we will explore with a dash of irony and a pinch of sarcasm the most effective methods to fail with your peonies, while inadvertently slipping in the secrets to achieving success. Because yes, even in failure, there are lessons to be learned, right?
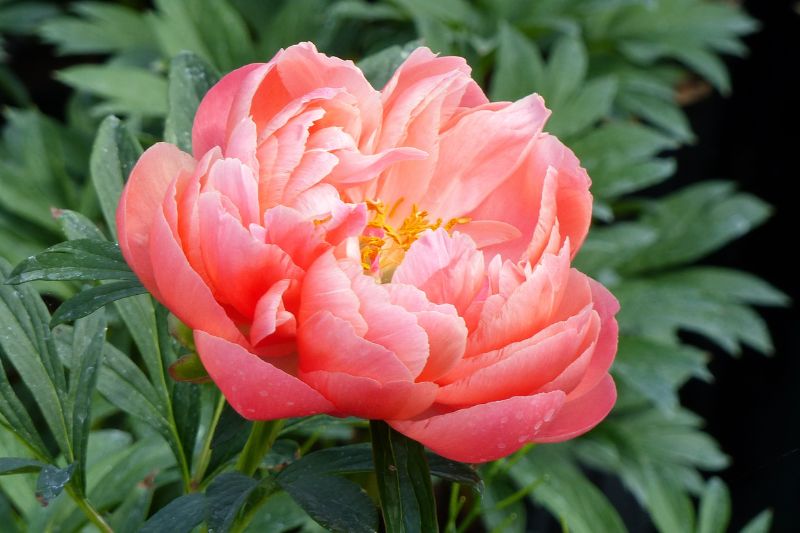
Lesson 1: Ignore the sunlight needs of the peony
To fail with your peonies right from the planting stage, placing them in the shade is a masterstroke. It is there, under the cover of trees and shielded from the sun's rays, that you unknowingly create the perfect setting for a despairing performance. Peonies, deprived of their main light source, will become leggy... or worse, may not flower at all!
But what if, in a fit of rebellion against this scenario of shade and sadness, you decided to change the script? Yes, these garden divas demand sunlight as their spotlight, and that for at least six hours a day! This is their secret to spectacular flowering.
Lesson 2: Neglect the type of soil
In this second act of our gardening opera, the soil plays the role of the conductor, dictating the tempo and quality of our plant stars' performance. By deliberately choosing compact, clayey soil that is, of course, waterlogged, you compose a dissonant symphony for your peonies. Their roots, like frustrated musicians, struggle to find their rhythm, suffocated in an environment that does not allow them to breathe… or to thrive.
Yet, in a surge of rebellion against this underground cacophony, what if you decided to tune the violins? For the secret lies in the composition of the soil! Indeed, peonies appreciate well-drained soil enriched with organic matter (compost will be your friend) and preferably with a neutral pH. The roots of the peonies will then find a vibrant echo, nourishing and allowing for a flowering worthy of the loudest ovations.
Lesson 3: Water too much or not enough
Let’s continue our improvisational theatre, with the main character being: watering. Alternate between abundant watering, worthy of a torrent, and the dryness of a desert. You will plunge your peonies into a state of constant stress. The roots of your plants, like dancers trying to follow chaotic music, are sometimes drowned by a wave of water, sometimes desperately searching for a drop to drink in cracked, thirsty soil. There, it’s certain: the dance will soon come to an end!
However, if you feel inclined not to let them drown or dry out, the key lies in seeking the middle ground. Practice the dance of measured watering, watering when the soil becomes dry to a depth of 2 cm. This balance will provide your peonies with the ideal stage to shine brightly.
Lesson 4: Ignore diseases and pests
Let’s return to our garden scene, where you decide that diseases and pests also have a role to play in this play, without being countered, thus taking centre stage. Your peonies, the main actresses, find themselves vulnerable, exposed to a scenario where they struggle alone against sometimes invisible… but dreadfully effective adversaries. Without your intervention, the garden becomes a tragic scene where fungal diseases and pests become the leading roles. That’s what you wanted, right?
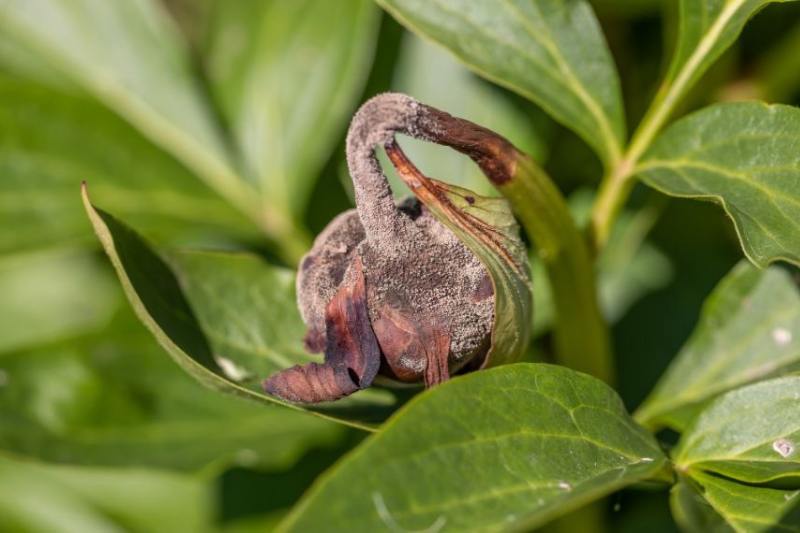
However, by taking on the role of the attentive gardener-director, scrutinising the set for signs of impending harmful intrigue, you can take the necessary measures to protect your peonies. Intervening with targeted treatments and preventive care is like rewriting the script in favour of your peonies, allowing them to play their role with brilliance.
Lesson 5: Improvised pruning
And for the final act of this article, what if you transformed into "Edgar with the silver hands," a doppelgänger of the famous Edward, but with less talent? Prune the peonies with scissors that you haven’t cleaned beforehand, without a plan or discernment. You might think you’re shaping an avant-garde masterpiece, while in reality… you’re just improvising, cutting here and there, in the middle of the flowering period! This reckless approach is the perfect scenario for a botanical drama, where the peonies, the actresses of their own tragedy, find themselves stripped and weakened… The perfect melodrama!
However, for gardeners who, in a burst of controlled creativity, aspire to sculpt their garden, wait until after flowering to intervene, when the curtain falls and the peonies are ready to regenerate backstage. This thoughtful pruning, far from being an improvisation, is a meticulous rehearsal for next year’s show. It not only helps keep the plant healthy but also encourages even more spectacular flowering, ensuring that the next act is welcomed with even more brilliance.
Whether shrubby or herbaceous, peonies beautify the garden every spring. With their vibrant white, cream, yellow, pink, or red dresses, they captivate and play the divas… and sometimes, they can be quite elusive when it comes to taking the stage. Imagine for a moment that you decide to deliberately sabotage the show, not out of […]
Roses have always been the undisputed stars of gardens, symbolising both love and beauty. However, for these queens of the garden to bloom their petals splendidly, planting requires special care. One of the most common and effective methods is planting bare root roses, a technique that promises vigorous growth and abundant flowering. In this article, we will detail the crucial steps to successfully plant your bare root rose supplied in a pot of substrate, from soaking methods to the secrets of perfect watering. Follow our guide to transform your garden into a haven of resplendent roses!
Bare root rose or potted? It’s all Greek to me
" Don't you order your roses bare root? - Well, yes. Look! - Oh no, these are potted. - Yes, but they are still bare root... just potted. - Oh. Well, if I were you, I would have bought bare root plants in pots. - Oh, very funny! That's clever...."
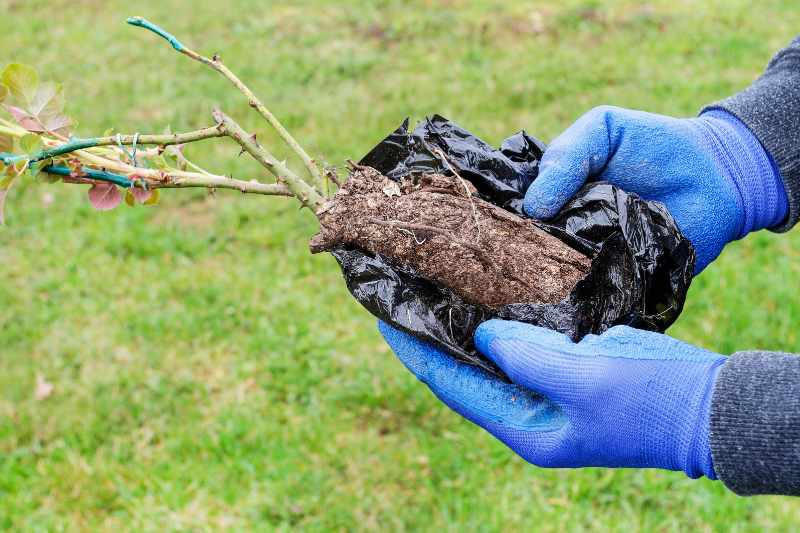
Bare root roses delivered with a pot of substrate surrounding them represent an excellent option for all gardeners. This proposal combines the advantages of the two most commonly used plant delivery types: bare root and containerised.
When a rose (or another plant) is delivered bare root, it means it is shipped without soil around the roots. This process has several advantages, including reduced transport costs and better recovery of the plant once planted. However, it requires that the plant be planted quickly after receipt to minimise stress and the risk of root desiccation.
The addition of a pot of potting soil around the roots during transport offers a clever compromise. This pot hydrates the roots during transit, thereby reducing transport-related stress and increasing the chances of successful recovery. It also allows gardeners to gain a little time (but don’t take too long!) before needing to plant their new rose.
When to order? When to plant?
Bare root roses are generally available for purchase between November and March, which coincides with their dormancy period. This helps to minimise stress on the plant and increases the chances of successful recovery once planted. The best time to plant these roses is also during their dormancy, when the plant is less likely to suffer from thermal shock or water stress.
How to plant a bare root rose bush?
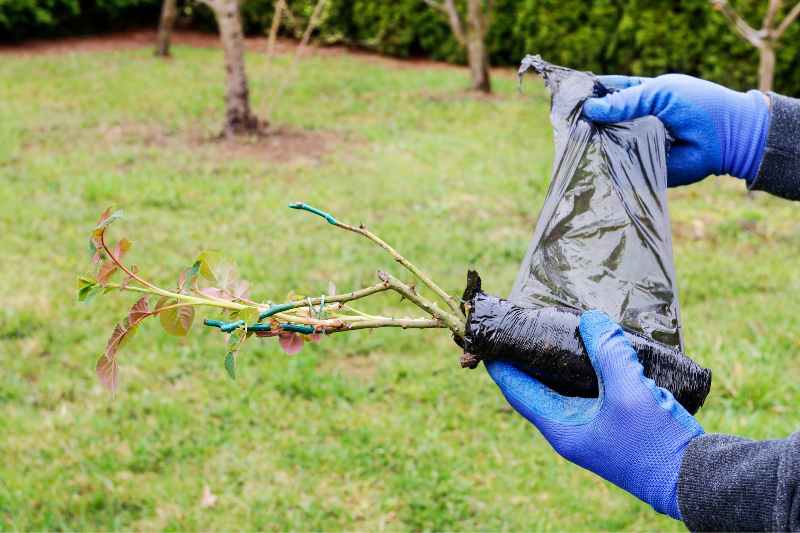
First, unpack the pot by removing the plastic that holds it in place. When you do this, you may take some substrate on your feet or even in your boots: this is perfectly normal (it happens to me every time too!) and in any case, you don’t really need it anymore. However, you can keep it to bring to the planting if your soil is very heavy.
- Choosing the location: Select a well-sunny spot with well-drained soil. Roses prefer at least six hours of direct sunlight each day.
- Inspecting the roots: First, carefully inspect the roots of your rose. Remove any damaged or rotten parts with sharp, disinfected pruning shears. Healthy roots are essential for good recovery of the plant.
- Hydration and soaking: Soak the roots of the rose in a bucket of water for a few hours to hydrate them. You can also proceed with soaking the roots. This operation involves soaking the roots in a mixture of soil, preferably clay, compost or manure, and water, all forming a thick mud. This step promotes recovery and root growth by improving contact between the roots and the soil.
- Preparing the planting hole: Dig a hole large enough to accommodate the spreading roots of the plant, generally 50 cm deep and 60 cm wide is sufficient.

- Soil amendment: Mix the removed soil with well-decomposed compost to improve the soil, providing essential nutrients to the plant.
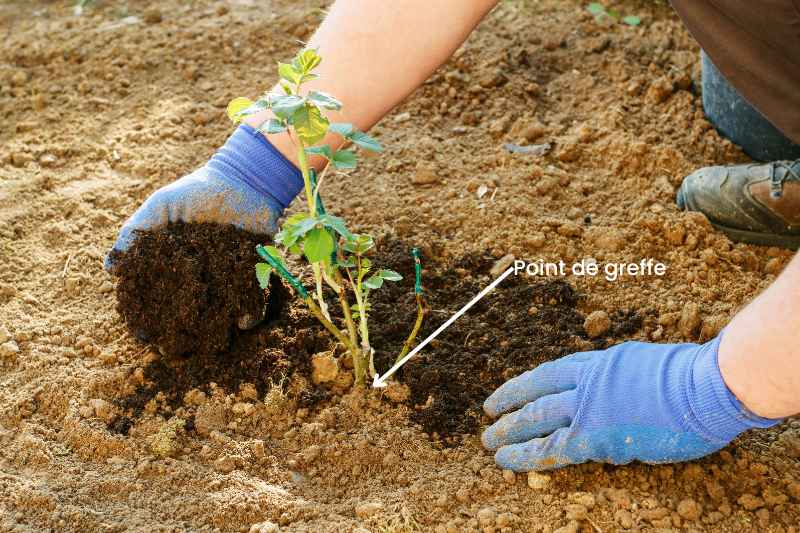
- Placing the rose: Position your rose in the middle of the hole, ensuring the roots are well spread out. The grafting point, identifiable as a swelling at the base of the stem, should be level with the soil or slightly above (see picture below).
- Backfilling and tamping: Fill the hole with the enriched soil and compost mixture, lightly tamping down by hand to eliminate air pockets.
- Watering: Water thoroughly immediately after planting to establish good contact between the roots and the soil.
- Mulching: Apply a layer of mulch such as straw or wood chips to retain moisture and limit weed growth.
- Post-planting care: Keep the soil moist but not waterlogged during the first few weeks, and consider applying a rose-specific fertiliser when the first signs of growth appear.
Roses have always been the undisputed stars of gardens, symbolising both love and beauty. However, for these queens of the garden to bloom their petals splendidly, planting requires special care. One of the most common and effective methods is planting bare root roses, a technique that promises vigorous growth and abundant flowering. In this article, […]
Far from being inert, soil is home to a vast number of organisms, most of which are invisible to the naked eye. It is estimated that a single handful of soil contains between 10 and 100 million living beings. However, the pesticides sprayed on plants to combat pests and harmful insects have a significant impact on these organisms. Although it is known that they have consequences for biodiversity and human health, between 55,000 and 70,000 tonnes of synthetic pesticides are still used each year in France.
Pesticides encompass all plant protection products used to protect plants and combat harmful organisms to crops: insecticides (against insects), fungicides (against fungi), acaricides (against mites), herbicides (against "weeds"). They are most often sprayed on plants, and some of them reach the soil directly. Those that settle on the foliage can be leached away with watering or rain, or end up in the soil when the leaves fall and decompose. Pesticides can also coat seeds. Finally, some pesticides are integrated directly into the soil in granule form. However, they contaminate the soil and have a long-term impact.
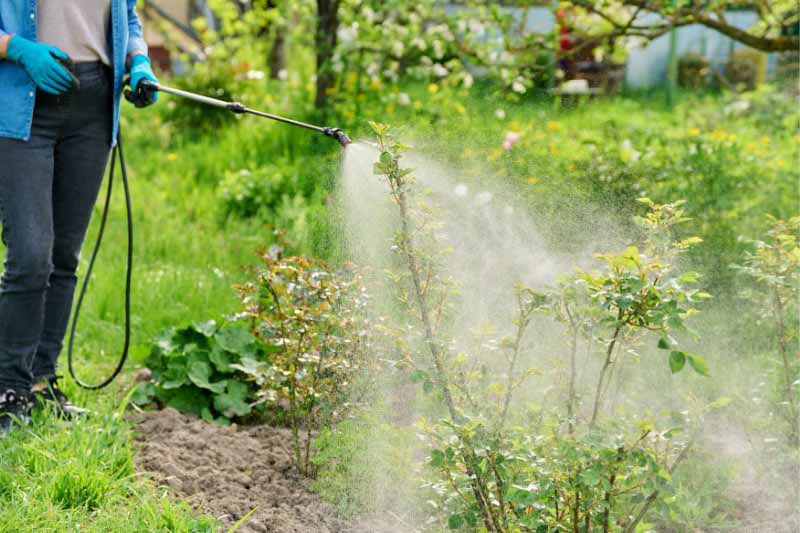
Soil fauna plays a key role in soil fertility and plant health
The soil contains many organisms: the most visible among them are earthworms and insects. Earthworms play a crucial role in the structure and fertility of the soil. They aerate it by burrowing tunnels, which facilitates plant rooting, allows their roots to breathe better, combats erosion, and improves water infiltration. Additionally, they decompose organic matter, transforming it into essential nutrients for plants. Generally, there are between 50 and 400 earthworms per m². Soil insects also help aerate the soil and increase its porosity. A decrease in their population can lead to soil compaction, making plant cultivation more difficult.
Many living organisms are invisible to the naked eye: these include microorganisms such as bacteria, fungi, and nematodes… They represent 75 to 90% of the standing crop of the soil. They enable the mineralisation of organic matter: this makes mineral elements (nitrogen, phosphorus, sulphur, potassium, magnesium…) assimilable for plants. They produce organic molecules that enhance soil cohesion. Some bacteria allow for the storage of atmospheric nitrogen. These organisms play a key role in ensuring soil fertility. They facilitate the degradation of organic matter… They also aerate the soil, allowing for better water infiltration. All these organisms help keep plants healthy.
By consuming plant debris (dead leaves, roots, etc.), insects and soil microorganisms decompose organic matter, which literally helps create soil, particularly humus. The more alive the soil is, the more fertile and nourishing it will be for plants. Without them, organic matter would accumulate. These organisms that feed on organic matter are called detritivores. This includes particularly worms, mites, and springtails…
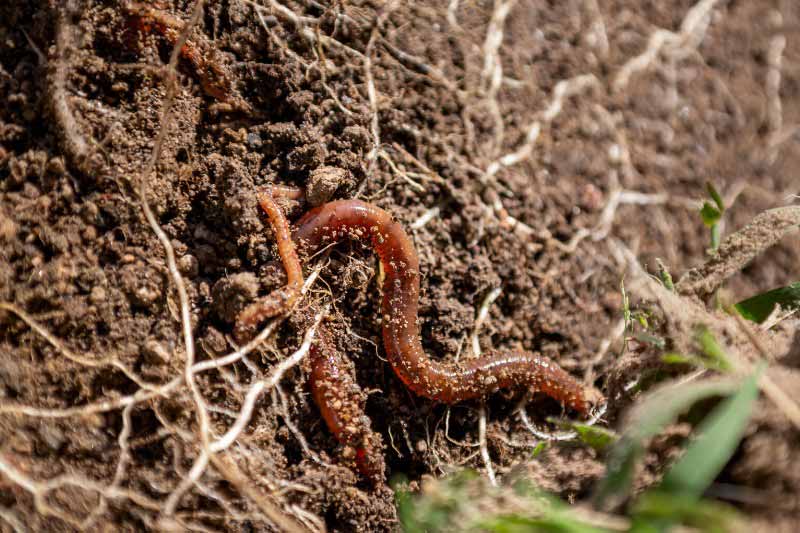
The impact of pesticides on soil life
Soil microorganisms, such as bacteria and fungi, are the first to be affected by pesticides. These small creatures play an essential role in the decomposition of organic matter, nitrogen fixation, and soil formation. When pesticides are applied, they can disrupt the delicate balance of these organisms, thereby reducing their number and diversity.
As for earthworms, it is insecticides and fungicides that have the most impact on them. They are responsible for the decline in earthworm populations.
Many pesticides, even those intended to target specific pests, can negatively impact non-target insects. Many insects spend the early part of their lives underground, in the form of eggs or larvae (notably dipterans, such as flies, hoverflies, and gnats…) and are therefore directly affected when soils are contaminated.
Moreover, the presence of different pesticides in the soil creates a cocktail effect: the combined effect of the active substances in these products can either cancel each other out or, conversely, be exacerbated, with a multiplied impact. Thus, the presence of several molecules together creates unpredictable effects.
Pesticides contaminate the food chain, as many animals feed on insects and earthworms, including birds, but also small mammals like hedgehogs, etc.
In France, almost all soils are contaminated by pesticide residues (mainly fungicides and herbicides). A study by INRAE covering 47 French sites studied between 2019 and 2021 showed that 98% of them contain at least one substance. In total, 67 different molecules were found, with glyphosate being among the most frequently detected. These molecules harm soil organisms in more than 70% of the 2,800 experiments conducted. Glyphosate-based herbicides, for example, are harmful to bacteria and mycorrhizae, reduce earthworm reproduction, and force springtails to surface, making them vulnerable to predators.
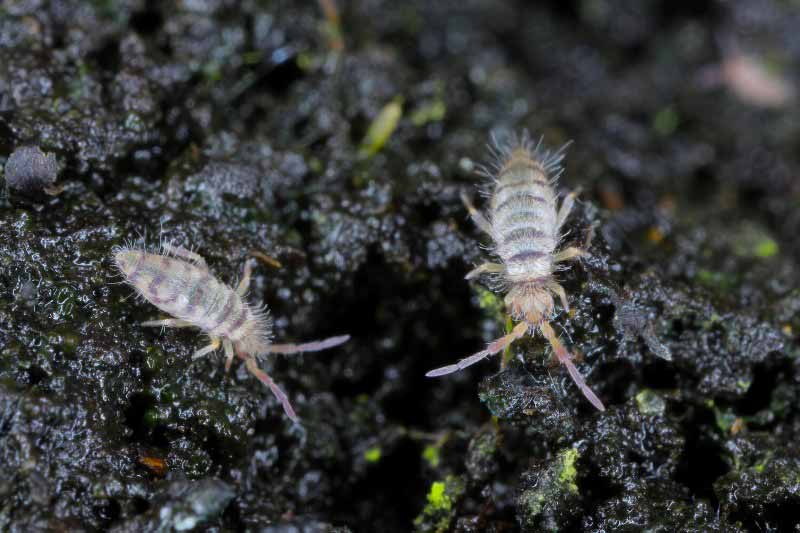
How to maintain a living soil?
To maintain a living soil, you will have understood, it is important to avoid using pesticides. Instead, turn to more ecological alternatives: beneficial insects, pheromone traps to capture certain harmful insects and prevent them from reproducing, mulching or manual weeding against adventive plants… Encourage significant biodiversity in your garden by installing insect hotels, nesting boxes, hedgehog shelters, etc. We also advise adding organic matter to nourish these insects and microorganisms, and avoiding turning the soil (simply aerate it with a broadfork). Similarly, it is important to mulch to avoid leaving the soil bare: this protects it from direct sunlight and rain (erosion).
Far from being inert, soil is home to a vast number of organisms, most of which are invisible to the naked eye. It is estimated that a single handful of soil contains between 10 and 100 million living beings. However, the pesticides sprayed on plants to combat pests and harmful insects have a significant impact […]
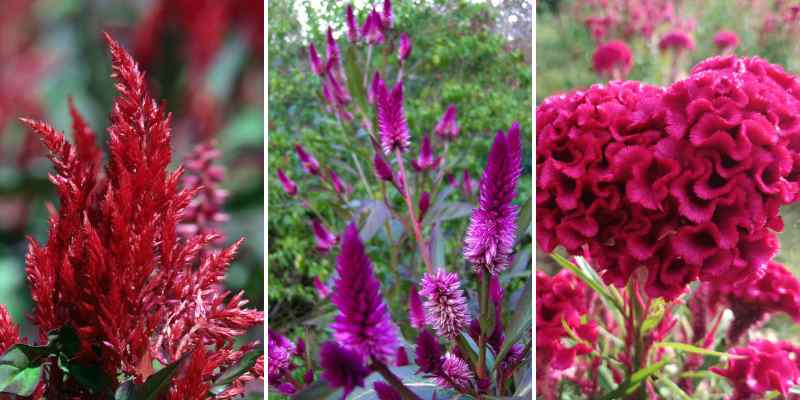
Celosia, this quirky summer plant with vibrant colours, features flame-shaped inflorescences that are almost surreal. With its feathery or crested flowers, it feels like a plant from another era, often enlivening window boxes and flower beds with its bright hues. Used in floral art for its originality, the eccentric Celosia is also edible. This lesser-known culinary tradition could spark renewed interest in this plant among those who appreciate plant-based cooking.

Celosia, an exotic eccentric
Cock's comb, known by its Latin name Celosia, belongs to the Amaranthaceae family. Its name derives from the Greek 'kêleos', meaning "burning", in reference to its shimmering colours. Native to tropical regions of Africa, Southeast Asia, and Central America where it grows as a perennial, it has naturalised in all warm regions of the globe. It is cultivated here as an annual (except in zone 10, which includes the Mediterranean fringe), often used to create borders in warm colours. The flowers, either upright or pendulous, indeed take on very vivid shades, ranging from yellow and orange to fuchsia pink and crimson red. It blooms for a long time: all summer until the frosts. There are about 60 species worldwide, with the most common being Celosia argentea or silver celosia, along with its many variations, Celosia argentea 'Cristata' and Celosia argentea 'Spicata' or 'Plumosa'. Some, in pink, have a resemblance to Astilbe, but… they thrive in the sun!
Reaching up to 2 m in the tropics, silver celosia (Celosia argentea) is much more modest in the northern hemisphere, where it measures between 20 and 60 cm for the tallest varieties.
While the flowers, striking for their colours, capture attention, it is undoubtedly the extravagance of their feathery or velvety and undulating texture that surprises. This has earned it the widely used nickname of velvet flower or cockscomb. A true comfort plant!
In terms of cultivation, they prefer well-drained, rich soil, but ordinary soil is also suitable, along with sunny exposure and regular watering. The soil should remain moist, so a thick mulch is more than necessary during the height of summer.
Celosia as a vegetable plant
What is less known is that this plant has been cultivated for a long time in the tropics for its leaves. These are indeed edible, and in Africa (especially in Senegal, Nigeria, and Cameroon), India, and China, the Celosia argentea var. argentea is considered a common leafy vegetable, alongside chard, spinach, or sorrel in our cuisine. It is also known in English as Lagos spinach, named after the city of Lagos in Nigeria where it is popular.
Silver celosia belongs to the same family as amaranths, whose leaves are also edible (though those of amaranth are slightly more bitter).
It is primarily the young shoots that are cooked. The leaves are harvested before flowering, as they are more flavourful and tender than when the Celosia is in bloom. The taste varies by species, ranging from mild to slightly spicy. Silver celosia has a less harsh and earthy flavour than spinach.
The leaves of silver celosia are rich in calcium and iron (almost 10 times more than regular spinach), as well as vitamins A and C. However, be sure to correctly identify your plant and only use Celosia argentea for consumption.
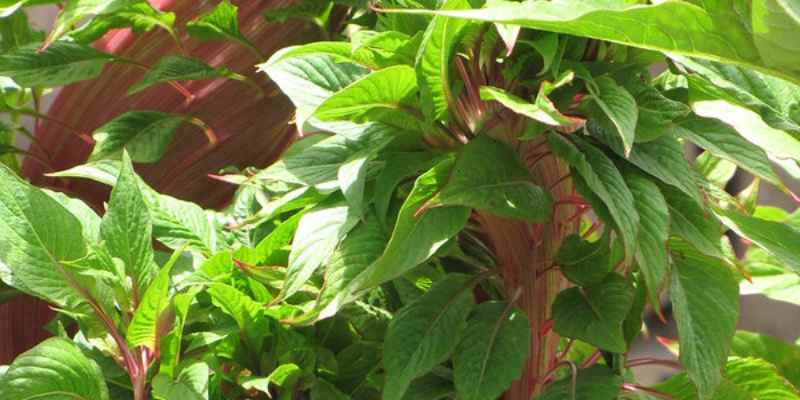
Cooking with Celosia
The tender leaves will primarily be used in cooking, by cooking them and incorporating them into various dishes.
They are consumed like spinach. Generally, they are sautéed in butter, just as one would do with a batch of spinach. However, it is essential to always blanch them beforehand to remove the oxalic acid they contain.
Celosia leaves can be sautéed with other vegetables and spices, especially incorporated into Indian vegetable dal, with lentils or chickpeas.
Also, try adding them, chopped, to green soups, or using them as a topping on pizza at the end of cooking, or as an aromatic herb in tacos, or simply chopped into a potato salad.
Silver celosia (Celosia argentea var. argentea) produces very small seeds that are used as grains or pseudo-grains (similar to amaranth seeds). In India, they are often cooked in water or ground into flour, recognised for their high nutritional value.
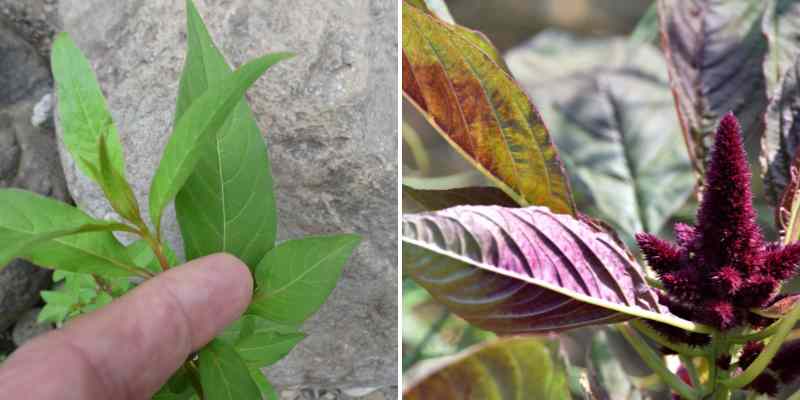
Celosia: a health asset
In addition to its vitamin and mineral content, celosia is known for its anti-diarrhoeal and haemostatic properties. It also has antioxidant properties. In Ayurvedic medicine, it is used to treat headaches, diarrhoea, and skin rashes.
Learn more in the study published in 2018 in the Research Journal of Pharmacology and Pharmacodynamics.
Celosia, this quirky summer plant with vibrant colours, features flame-shaped inflorescences that are almost surreal. With its feathery or crested flowers, it feels like a plant from another era, often enlivening window boxes and flower beds with its bright hues. Used in floral art for its originality, the eccentric Celosia is also edible. This lesser-known […]
Ah, gardening! This sweet art of patience, precision, and skill. But wait a minute, who said everyone wanted a garden worthy of a decor magazine? If you've always dreamed of transforming your green space into a wild jungle or an arid desert, then you're in the right place. Yes, you read that right, we're going to teach you how to fail at planting shrubs!
From poor species selection to random watering, you'll discover how to ensure your shrubs won't survive beyond their first season, and perhaps not even beyond the first week! So, without further ado, here's your ultimate guide to failing at shrub planting in 5 unforgettable lessons.
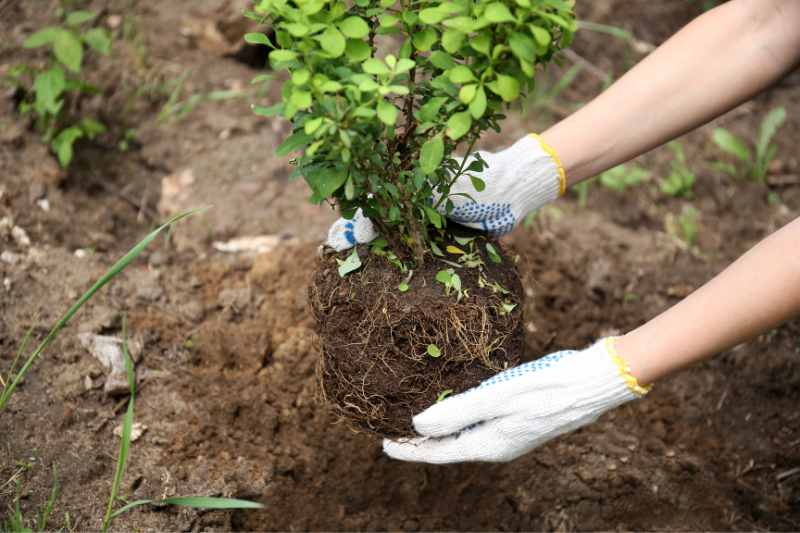
Lesson 1: plant anything!
You might think that any shrub will do, but think again! If you really want to fail at your planting, you need to choose the least suitable species or varieties for your garden. Moderately hardy exotic species (or not at all, for that matter!) are often ill-suited to the local climate, ensuring a resounding failure.
But soil is important too! Choose shrubs that hate your type of soil. If your soil is acidic, go for shrubs that prefer alkaline soil, and vice versa. The result? Shrubs struggling to survive and ultimately perishing in no time.
To ensure you plant without success, try our Plantfit app.
If you really want your garden to resemble an uncontrollable jungle, opt for fast-growing shrubs. Not only will they smother other plants, but they will quickly become unmanageable. A double failure! In the same vein, choose species that will grow far too large for your small garden.
Finally, the last tip for truly failing at your choice of shrubs is simple: don't ask anyone for advice. Ignore nursery staff, gardening advice articles, and even that uncle who always had a green thumb. After all, failure is a solitary path.
Lesson 2: Plant anytime!
Who needs to wait for spring or autumn to plant shrubs? Not you! Gather your courage and go out and plant in the middle of winter. The frozen ground will add an extra challenge to your shrubs' growth, which is perfect for guaranteed failure. But if the freezing cold doesn't appeal to you, why not choose the extreme opposite? Plant your shrubs in the height of summer, under a blazing sun. High temperatures and lack of water will ensure your plants suffer from water stress, leading them straight to disaster.
Is a storm forecast for tomorrow? Perfect, it's the ideal time to plant! Excess water combined with poor soil preparation (see Lesson 3) will turn your garden into a swamp.
Finally, why plan when you can do everything at the last minute? Buy your shrubs on the same day and plant them without a second thought. Or better yet, wait weeks before finally planting your bare-root shrubs carelessly stored at the back of a garage. Lack of preparation is always a great recipe for disaster.
Autumn or spring? To choose the best time, you can refer to these two advice sheets: What to plant in spring? & What to plant in autumn? as well as The best planting times.

Lesson 3: plant any old way!
If you've followed the first two lessons, you already know that haste is your best friend. So, don't waste time preparing the soil. Dig a hole in a hurry, toss in your shrub and hope for the worst!
Forget about soil drainage! Poor drainage guarantees your shrubs will have "wet feet", especially in winter, which is excellent for encouraging diseases and root rot.
Also ignore the soil pH: acidic, alkaline, neutral... all that is for gardeners who want to succeed. If you disregard your soil's pH, you'll have every chance of choosing totally unsuitable shrubs, which is perfect for a memorable failure.
Chemistry classes may be a distant memory. To learn more about the subject, read: Soil pH: what is it?
Your soil is poor, compact, low in humus...? Don't try to fix the situation by adding organic matter, manure, compost, or dried blood... Your shrubs will struggle to obtain the nutrients they need, making them weak and sick. Well done!
Take a quick look at Soil fertility: rich or poor, how to tell?
Have you managed to choose the wrong shrubs, ignore the planting calendar, and neglect soil preparation? Bravo! But don't rest on your laurels, as there are still ways to sabotage your gardening project. One of the most effective is to plant the roots upside down. Yes, you read that right! Take your shrub and plant it headfirst into the soil. Guaranteed results. (Note: don't laugh, we've had this exact case with a customer who had bare-root roses...).
To add an extra layer of failure, use the wrong tools to plant your shrubs. A small spoon or a beach shovel will do just fine. The more unsuitable, the better!
Lesson 4: forget about watering!
You've already done a great job sabotaging the previous steps of planting your shrubs. But why stop there? Watering is another golden opportunity to guarantee the failure of your gardening project.
One day, turn your garden into a swamp, and the next, let it become an arid desert. Your shrubs won't know what to expect and will suffer from water stress. Or simply forget to water your young shrubs for several days, even weeks. When you remember, it will probably be too late, and you can add this failure to your list of gardening mishaps.
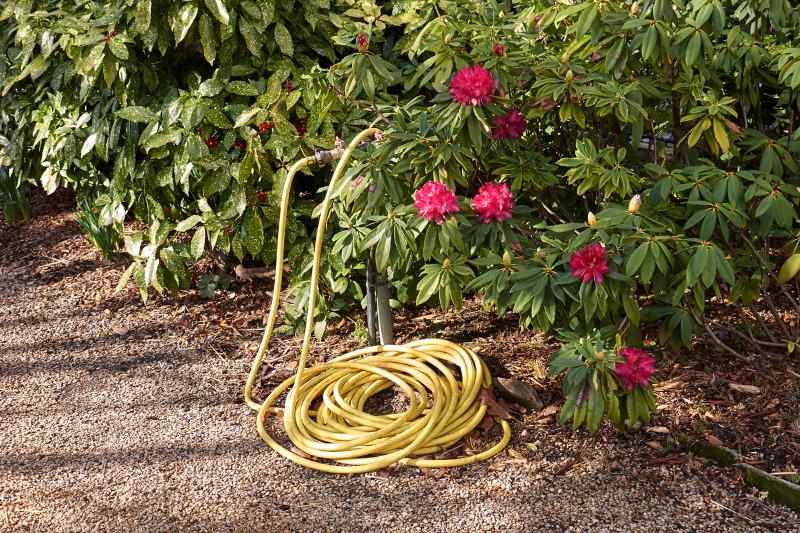
Oh yes, and forget about the watering can or a suitable irrigation system; a high-pressure hose is much more fun!
Watering isn't that simple. Jean-Christophe tells you everything about the art of watering in his article: Watering the garden: How to do it?
Lesson 5: ignore maintenance!
Congratulations, you've almost succeeded in completely failing at planting your shrubs! But don't celebrate too soon. There's one last step to seal the fate of your garden: thoroughly ignore the maintenance of your plants. Even if most shrubs, if well chosen, will grow without much care, never tending to them, pruning them, pampering them, or even looking at them will always add a little extra to the overall failure of your garden. After all, maintenance is for the weak, and you are a hardcore gardener.
Lastly, if someone asks you why your shrubs aren't growing properly (what business is it of theirs!), deny all responsibility. Stay in total denial! Blame the weather, the birds, the nursery staff who sold you the plants, or even the moon. After all, it's not your fault if nothing grows in your garden...
Ah, gardening! This sweet art of patience, precision, and skill. But wait a minute, who said everyone wanted a garden worthy of a decor magazine? If you’ve always dreamed of transforming your green space into a wild jungle or an arid desert, then you’re in the right place. Yes, you read that right, we’re going […]
With climate change, dry spells are becoming longer and earlier. Roses are not spared and sometimes suffer from this lack of water over an extended period, which can gradually lead to their decline if timely intervention is not made. It is therefore important to manage watering well and implement certain techniques to protect roses. Discover how to recognise a thirsty rose and how to save it!
1 - What are the symptoms of water stress?
Not all plants react the same way to drought. Certain physiological reactions indicate that the plant is suffering from a lack of water. It is important to know how to recognise when a rose is thirsty, so you can respond quickly:
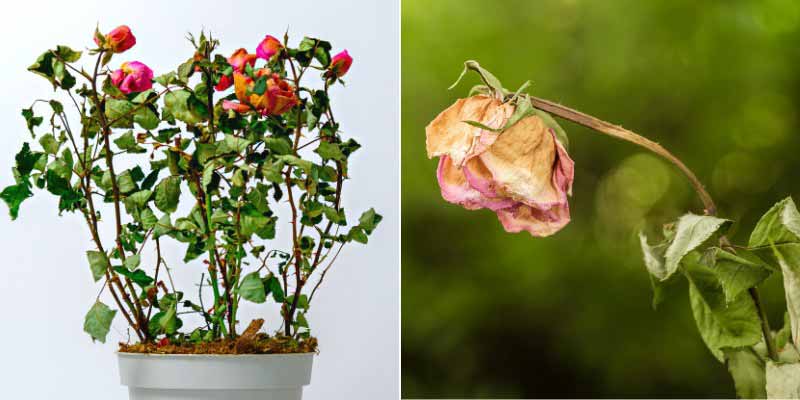
- Leaves wilt, droop towards the ground, and begin to yellow. They dry out then detach and fall. If nothing is done, the branches will gradually become bare.
- Young shoots also wilt. They may turn brown and stop growing.
- Flowers and flower buds will also dry out and turn brown. The flowers and the tops of the stems become soft and droop towards the ground.
- If nothing is done, the rose will gradually dry out, starting from the tips of the shoots: no longer supplied with water, they become brown and brittle.
Lack of water can sometimes be confused with chlorosis: the foliage yellows, but between the veins, whereas in the case of drought, the foliage yellows uniformly. Similarly, the rose may be affected by root rot (a fungal disease), in which case it will dry out suddenly. However, it is clear that if your region is experiencing a heatwave or a dry spell, and other plants are showing signs of water stress, your rose is also suffering from this drought.
2 - Anticipating risk situations
Some situations make your rose more susceptible to drought. Here are a few of these risk situations:
- Heatwave: a prolonged period of intense heat can quickly dry out the soil and deprive your rose of the water it needs to survive.
- Container cultivation: potted roses are also at risk as the substrate dries out much more quickly than for roses in the ground.
- Recent planting: roses that have been recently planted have a less developed root system, making them more vulnerable to drought. It is therefore important to be vigilant and water regularly during the first year.
The best approach is to anticipate dry spells, by monitoring the weather and watering the garden accordingly. If you plan to be away, ask a neighbour to water your plants, or set up automatic watering or oyas. Also, consider adding a layer of mulch around your plants, and shade the roses that are in full sun if possible. If your rose is in a pot, repotting it into a larger plastic pot rather than a terracotta one will help it withstand drought better.
Be aware that some roses are particularly well-suited to heat and drought. This is the case, for example, with the Banks rose, 'Old Blush' rose, chinensis 'Mutabilis' rose, as well as rugosa roses (Rosa rugosa).
3 - How to save a rose bush suffering from drought?
Now that you have identified the problem, let's move on to the solutions. To protect your rose from heat and drought, here are some measures you can take:
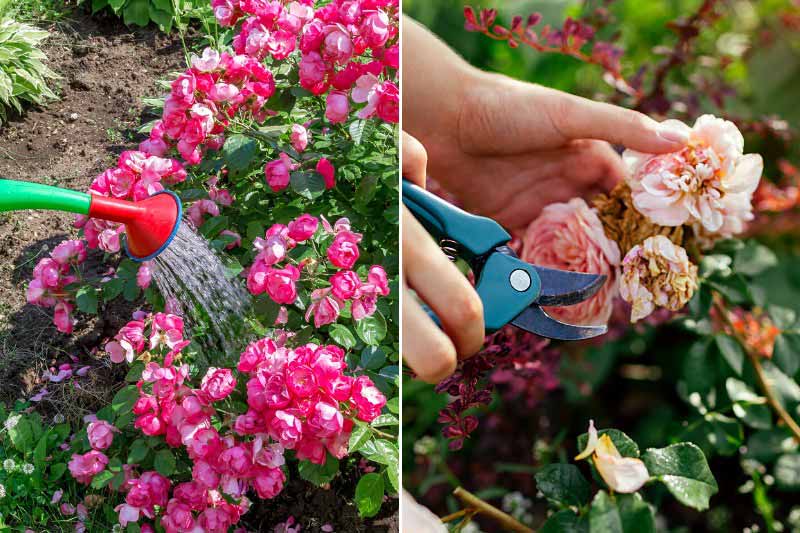
- Water generously: Obviously, the most important thing is to water as soon as you realise your rose is thirsty! During periods of intense heat, increase the frequency of watering. We recommend watering early in the morning or late in the evening to minimise evaporation. Direct the stream at the base of the plant, avoiding wetting the foliage. Indeed, water droplets on the leaves create a "magnifying glass" effect, which can burn the plant by amplifying solar radiation. Additionally, this promotes fungal diseases.
Better to water generously than to water several times superficially. This way, the water penetrates deeper into the soil, encouraging the plant to develop deep roots, whereas with superficial watering, the water remains near the surface, and the soil dries out more quickly.
- Mulch: Mulching is an excellent way to retain soil moisture. Apply a good layer of organic mulch (at least 6 cm thick) around your roses. You can use, for example, dead leaves, straw, wood chips, bark, or RCW (ramial chipped wood). Mulching also limits water runoff in case of heavy rains or if the ground is sloped.
- Prune: Light pruning can help your rose manage drought better. Remove scorched stems and dry or damaged leaves. This will allow the plant to conserve its energy.
- Remove faded flowers: Indeed, flowering, followed by fruit formation (hips), requires a lot of energy from the rose. Removing them allows it to focus on survival. For fully bloomed flowers that are not yet faded, in case of severe water stress, you can remove every other one. It is indeed better to sacrifice part of the flowering to preserve the rose! This will help it recover.
- Shade: Prolonged exposure to sunlight during a heatwave can be particularly damaging to roses. You can protect them by installing shade cloths. The idea is to shelter them from direct sunlight at least during the hottest hours of the afternoon. If your roses are grown in pots or containers, simply move them to the shade.
Further reading
- Feel free to check out our articles: "Heatwave: 10 tips to protect your plants" and "Watering a garden during a heatwave"
- Our advice sheet: "Watering plants during or after a drought"
- "How to save garden plants after a drought?"
With climate change, dry spells are becoming longer and earlier. Roses are not spared and sometimes suffer from this lack of water over an extended period, which can gradually lead to their decline if timely intervention is not made. It is therefore important to manage watering well and implement certain techniques to protect roses. Discover […]
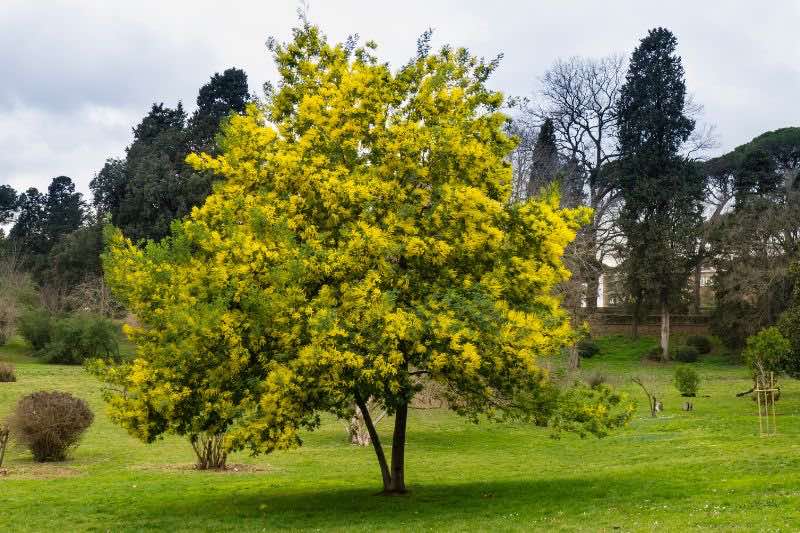
Acacia dealbata, or wattle, is a small tree that dazzles with its ornamental qualities, the delicacy of its foliage, and its sunny and delightfully fragrant flowering at the end of winter. It also generates concerns, both rightly and wrongly. Let’s explore together the reasons behind these concerns and their foundations, as well as what it truly means for an individual in their garden who is questioning the possibility of planting a mimosa. Before delving into the heart of the matter, let’s clarify the confusion sometimes made regarding its name: wattle, or Acacia dealbata, should not be confused with the false acacia, or Robinia pseudoacacia, which is sometimes incorrectly referred to as Acacia.
The wattle in France
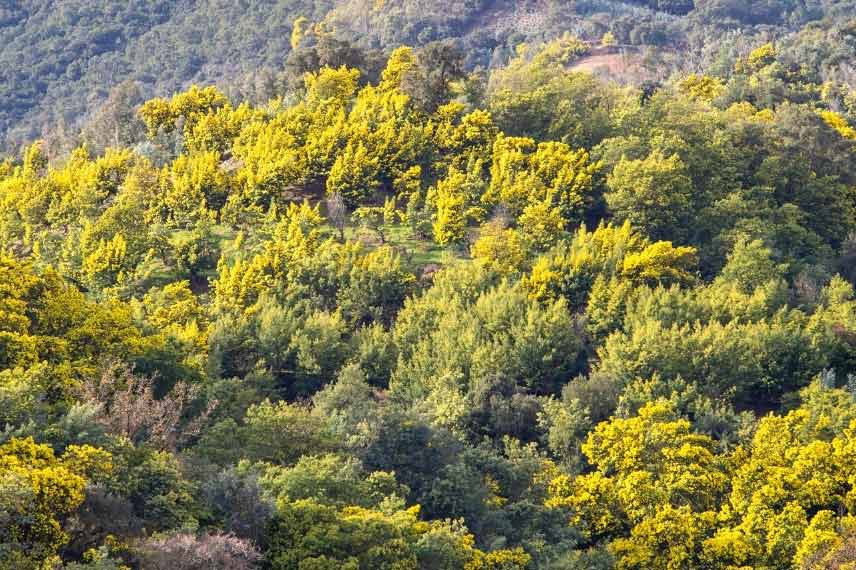
Introduced to the Côte d'Azur in the early 19th century, Acacia dealbata was subsequently mass-planted after 1850 in this same region, which has a very favourable climate for it. It has thus naturalised thanks to these massive plantings and this climate, and it is now considered invasive in this same region. It is classified as an "Invasive exotic species." It is present throughout the Mediterranean region and can also be found along the Atlantic coast, particularly at the shoreline. It has become very prevalent in a large quarter of the south-west of the country, and it can be found as far as the English Channel. Its strong ability to sucker, especially after damage such as frost or intense fire, along with its capacity to produce shoots, explains its propensity to multiply rapidly. It also reproduces sexually through its numerous seeds, but the main mode of propagation in Europe is its vegetative reproduction. The mimosa can form dense stands that are impenetrable, thus preventing the development of other local and native species. It poses significant management issues in southern France, particularly in Provence and on the Côte d'Azur. Its proliferation in the natural environment is not controlled: it thus very directly threatens biodiversity, where it multiplies rapidly on its own. It is also considered invasive in Spain, Portugal, and Italy, to name a few nearby countries, as well as in other regions of the world. In some French regions, it is considered to be monitored (South Atlantic and Midi-Pyrénées), while in Pays de la Loire, it is classified as a potential invasive plant.
Moreover, this high concentration of a single species, which is necessarily detrimental to ecosystems, has a significant impact on water flow, drainage, and soil erosion. Finally, this species, as a member of the Fabaceae family, plays a role in nitrogen fixation, which increases its concentration in the soil, and it is this excessive presence that creates this imbalance.
The methods of control are therefore substantial: manual removal of young plants, removal of fallen seeds, and cutting of large specimens. In the latter case, it is also necessary to treat the stump mechanically or chemically to prevent shoots.
Are you concerned about the invasive nature of wattle in your garden?
In fact, no, because while the wattle we are discussing here, Acacia dealbata, does exhibit this characteristic of significant suckering, today we offer for sale grafted specimens onto another species of wattle, Acacia retinodes, which is less hardy but not very suckering. It is also more sensitive to cold.
Other aspects often mentioned regarding wattle
Wattle is sometimes blamed for its potential allergenic nature for those sensitive to pollen allergies or hay fever. Its contribution to these seasonal allergies, while not impossible, should be quite limited, as wattle is an entomophilous plant. Its pollen is dispersed by insects. The most allergenic plants have pollen that is wind-borne, which are anemophilous plants. Moreover, the pollen grains of wattle are grouped into small conglomerates: being heavier, they fall to the ground more quickly and, being denser, they are less likely to traverse the respiratory pathways. Measurements taken in Australia (where wattle originates) in 2008 found only 2.5% of pollen from Acacia dealbata in the total pollen of the surrounding air.

Another issue encountered is that Acacia dealbata has a significant and powerful root system that can cause damage to underground pipes, crack foundations, and lift flooring. Once again, to mitigate this risk, one chooses a grafted specimen on Acacia retinodes, also known as the four-season wattle.
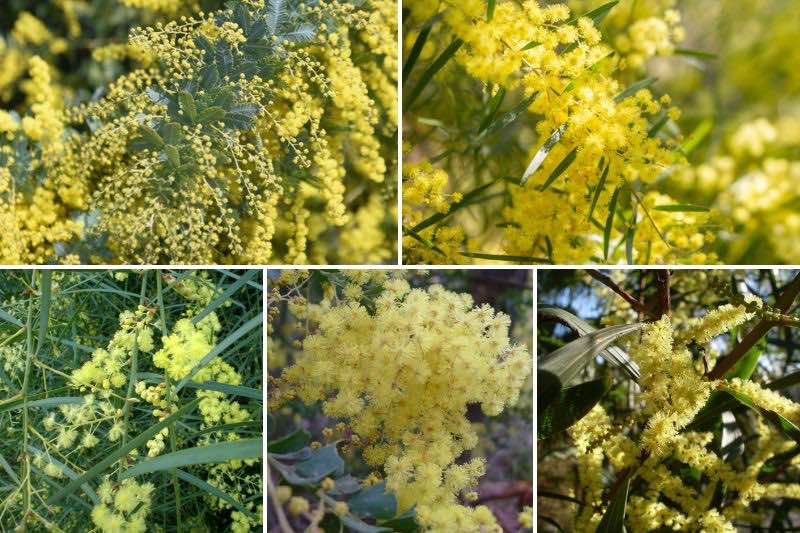
Acacia retinodes as a rootstock also has the advantage of tolerating calcareous soils, whereas Acacia dealbata alone thrives only in acidic soil. The variety Acacia dealbata 'Gaulois Astier', which is also grafted onto Acacia retinodes, is also frequently encountered. Otherwise, discover other species of wattle, whose flowers are similar, grouped in racemes of yellow globules, but with different foliage, habit, and height.
Finally, Acacia dealbata emits allelopathic substances through its leaves and flowers during the flowering period, so in this case, the rootstock does not change anything. Between January and March, these compounds negatively impact the development of multiple seeds in the soil, which is their germination period. Many plants are thus likely to struggle to grow under its canopy, while others will be indifferent to its presence. Grasses, spurges, periwinkle, are not likely to be bothered by its proximity, and surely many other plants as well.
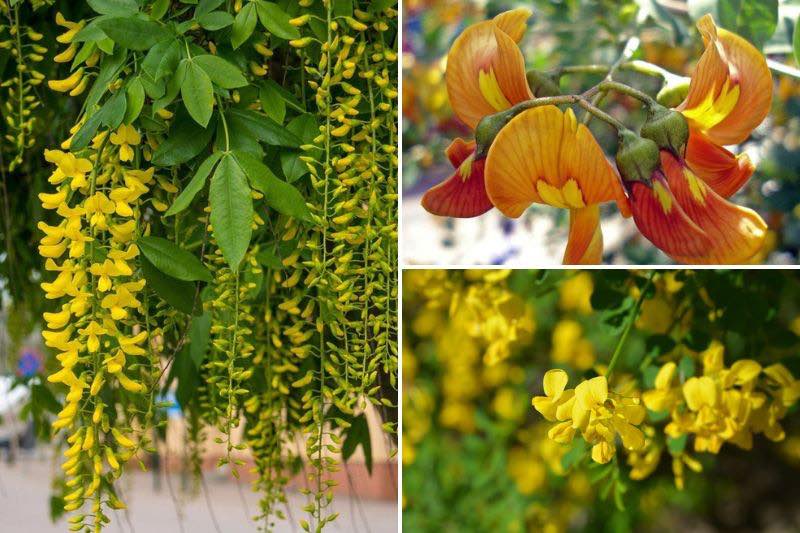
If this last reason makes you want to consider another choice, you can plant a beautiful Baguenaudier or Colutea arborescens instead of a wattle. Also consider Coronilla, a lovely shrub with wattle-like yellow flowers, or even Laburnum or cytisus.
Acacia dealbata, or wattle, is a small tree that dazzles with its ornamental qualities, the delicacy of its foliage, and its sunny and delightfully fragrant flowering at the end of winter. It also generates concerns, both rightly and wrongly. Let’s explore together the reasons behind these concerns and their foundations, as well as what it […]
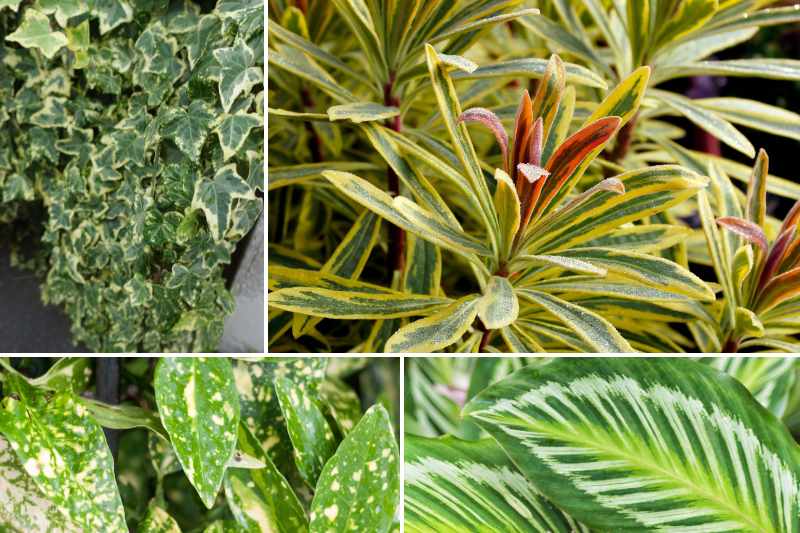
We love variegated foliage... or not. But in any case, it never fails to leave gardeners indifferent. You can find perennials, trees or shrubs with variegated or marbled foliage in white, cream, yellow, or another colour... Sometimes simply marginate, sometimes almost entirely devoid of green... But the question we are asking today is: what causes this foliage or another part of the plant to become bicoloured or multicoloured?
What is a variegated foliage?
We refer to variegation when a part of a leaf, flower, or even fruit appears "discoloured." These discoloured parts are completely or partially devoid of chlorophyll, the pigment that gives the green colour and enables photosynthesis.
It is important to know that a green leaf contains chlorophyll (we should even say chlorophylls, as there are several types), but also a certain amount of other pigments that are more or less hidden: carotin, xanthophyll, anthocyanin... When chlorophyll disappears, the other pigments become visible. This is what gives the yellow, orange, red, or brown colours of leaves in autumn when chlorophyll naturally fades. For variegations, it works on a similar principle, except that it is not the decrease in light that causes chlorophyll to disappear, but other reasons. When chlorophyll partially disappears, we end up with white, cream, yellow... and sometimes even pink or red spots.
Where do these variegations come from?
Variegations in a leaf can arise from various causes:
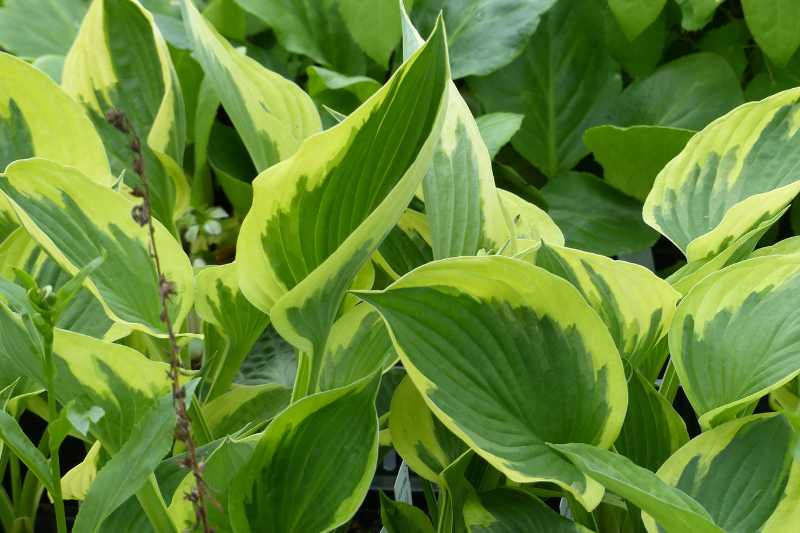
The most common case is mutation-induced variegation. A young seedling or part of a plant mutates and suddenly becomes variegated. Since the variegation is not stable, and therefore not sexually reproducible, these plants should be propagated vegetatively (cuttings, layering, grafting). Be on the lookout for such mutations in your own garden. You never know, you might obtain a remarkable new variety.
Variegations can also be caused by a virus. This is rarer, but it does happen. A benign virus infects the plant, which in response produces variegated parts (leaves, flowers, fruits). This is the case with most variegated-leaved Hibiscus, such as Hibiscus 'Summer Ruffle', or with bicoloured tulip varieties;
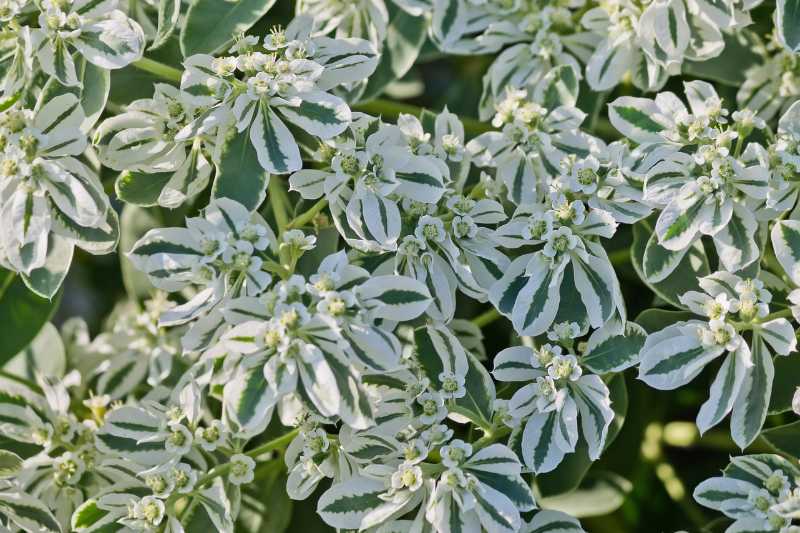
Finally, some variegations are entirely natural. Indeed, certain plant species have evolved to develop variegated or punctate parts. Botanists do not have explanations for all these species. However, it can be said that the natural variegation of certain species is a defence mechanism, as seen in Hypoestes which produce leaves speckled with small dots or in Adelonema walisii which reveals very variegated leaves of yellow-cream. The former gives the illusion that the plant has already been eaten by an insect, while the latter is camouflaged in the decor to avoid being browsed by herbivores. Some species may also use variegations to more effectively attract pollinators, as seen in Euphorbia marginata.
But is it serious, doctor?
As mentioned, even if variegation is caused by a virus, this virus is completely benign. However, having a low chlorophyll content within a leaf can lead to reduced vigour. In other words, a variegated variety will often grow a little slower than its green-leaved counterpart. But don’t let that stop you from planting them!
One small note, however: some variegated mutations are so low in chlorophyll that it would be impossible to propagate them by cuttings, as the cutting would not have enough energy to produce roots. These mutations are therefore propagated by grafting (which significantly increases the purchase price).
A bit of botany
We find Latin terminologies in some species names or the names of old variegated varieties such as: variegata, marginata, pulverulenta...
- Variegata for variegation: meaning variegated, as in Cornus controversa 'Variegata';
- Maculata: meaning maculate, thus a large coloured spot, as in Phlox maculata or Begonia maculata;
- Marginata: meaning marginate, thus bordered by a fine coloured band, as in Agave angustifolia 'Marginata';
- Striata : meaning striate or marbled, thus marked by coloured bands of varying widths, as in Bletilla striata;
- Punctata : meaning punctate, thus sprinkled with small coloured dots or spots, as in Lysimachia punctata;
- Pulverulenta : meaning it seems to have been sprinkled with a lighter substance, as in Catalpa speciosa 'Pulverulenta';
- Reticulata : which colouring follows the pattern of the veins, as in Iris reticulata;
- Crotonifolia : with Croton-like leaves (a famous houseplant - Codiaeum variegatum), thus exhibiting irregular discolouration, as in Aucuba japonica 'Crotonifolia'.
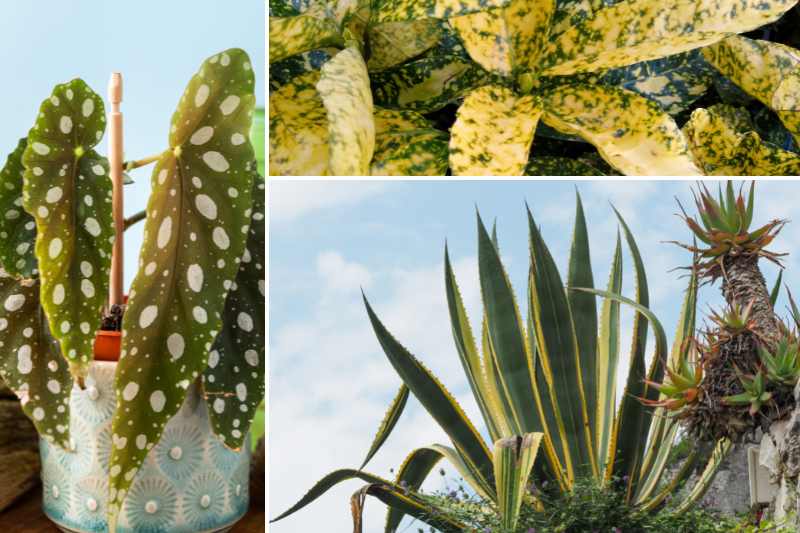
Did you know? Since 1956, breeders have not been able to use Latin to name new varieties and cultivars. The choice has mainly fallen on the English language, although exceptions exist. This is why we find words like 'Gold', 'Silver', 'Rainbow', 'Cream'... in the names of plant varieties featuring variegations.
We love variegated foliage… or not. But in any case, it never fails to leave gardeners indifferent. You can find perennials, trees or shrubs with variegated or marbled foliage in white, cream, yellow, or another colour… Sometimes simply marginate, sometimes almost entirely devoid of green… But the question we are asking today is: what causes […]
Trees or woody plants (which produce wood) are fascinating in many ways. So fascinating that they are even the subject of a science in its own right: dendrology. But what exactly is dendrology? What does a dendrologist study and why? Let's clarify in this short article.
Dendrology in a nutshell
Dendrology, from the Greek "dendron" meaning tree and "logos" meaning study, is the science that studies woody plants (trees, bushes, shrubs, and lianas). The term was coined in 1688 by an Italian naturalist Ulisse Aldrovandi. A person who studies this science is a dendrologist. They may work in forestry operations or wood processing, within government agencies or nature conservation organisations.
In France, there is the French Society of Dendrology and in Belgium, you can find the Belgian Society of Dendrology.

Dendrology is a multifaceted science
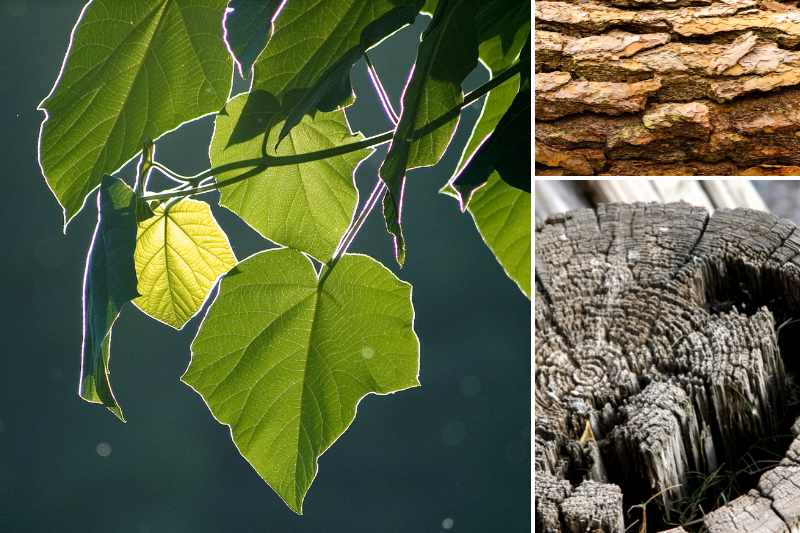
In dendrology, various species of trees are studied: botanical classification and species recognition by morphology, such as the shape of leaves for example (the classical classification known as Cronquist) or by common evolution among species (phylogenetic classification). The boundary between plant taxonomy and dendrology is relatively blurred, but dendrology also deals with many other areas beyond botanical classification.
However, dendrology has several other branches (which is fitting when studying... trees): dendrochronology, which can determine the age of a tree or date a piece of wood using growth rings (or tree rings), and dendrometry, which allows for measuring the diameter, height, and volume of a tree, as well as its age or the thickness of its bark. There is also dendrogeomorphology, which studies geological and climatic processes through the observation of tree growth rings.
Nota bene: in archaeology, dendrochronology is often used to date an element, as well as xylology, a science that studies wood as a material and its physical and chemical properties. The two disciplines are complementary and help determine what type of wood was used, thus providing insights into the flora surrounding our ancestors. The science that studies fossilised wood is called paleoxylology.
What is the purpose of dendrology?
Dendrology, and especially dendrometry, serves various fields:
- Forestry (wood exploitation): calculating the size, age, shape... of cultivated trees (such as poplar plantations) and in forests, general tree management;
- Forest management and protection: combating diseases and wood-eating pests, protection against fires...;
- Wood industry: calculating volume (dendrometry) and studying the physical properties of wood;
- Ecology: studying the distribution and range of botanical species as well as the evolution of wooded environments, and also studying forest ecosystems and their evolution in the face of climate change;
- Archaeology: dating and determining the wood present at an excavation site, allowing for dating and gaining insights into the flora and lifestyle of people who once lived in that area;
- Customs: through the identification of a wood species in the context of combating deforestation and the importation of protected or prohibited species;
- Judicial: a (almost) personal anecdote, one of my botany professors was called in a homicide investigation (in the 1980s) to determine the exact species of a log that had been used to commit a murder. When we say that dendrology leads to everything... Nowadays, forensic police have botanical experts in their ranks.

Trees or woody plants (which produce wood) are fascinating in many ways. So fascinating that they are even the subject of a science in its own right: dendrology. But what exactly is dendrology? What does a dendrologist study and why? Let’s clarify in this short article. Dendrology in a nutshell Dendrology, from the Greek “dendron” […]
It's easier than you think to fail at sowing your vegetable or flower seeds; even the best among us are caught off guard each year. Follow our tips, and soon you'll be able to boast about successfully failing your sowing!
Lesson No. 1: to fail at sowing, sow anytime!
Sowing experts will tell you: if there is a sowing calendar for each variety of vegetable and ornamental plants, it's for a reason! Indeed, each seed has an appropriate sowing period that spans several weeks. Seed purists take into account the right temperature and humidity levels of the air and substrate, as well as an optimal duration of sunlight. But if you don't want to bother with all these quirky parameters or waste time inspecting each seed packet, jotting down notes on your calendar to avoid missing the boat... you might as well follow your whims or trust your instincts. So, sow your seeds at any time: during a heatwave, when it's freezing, or even out of season. That way, you'll be sure to fail at your sowing.
- Make an early sowing indoors in a heated environment! You'll have the chance to see your young plantlets stretch their stems excessively due to a lack of light. As a good Samaritan, you'll have to embark on a rescue operation, but don't expect a miracle. Moreover, by sowing very early, you'll end up with a multitude of pots and containers in the house that you won't be able to plant in the garden because it's still too cold outside. Don't pay attention to your climate zone! If sowing directly in the ground, be prepared for the likelihood that you will never see any shoots emerge.
- Make a late sowing: this will impact production or flowering. For example, if you don't like peas, sow them in summer. It won't yield anything, and you'll have a good excuse not to eat them. Or, sow tomatoes in July, and you can be sure you won't harvest any before the cold returns in autumn. Finally, some salads should be sown early in spring, as they will bolt to flower and seed as soon as it gets warm.
You understand, ignoring the sowing calendar is almost guaranteed failure!

Lesson No. 2: to fail at sowing, sow anyhow!
There are several techniques that those who succeed at sowing will recommend: broadcasting, sowing in rows, in clusters... while respecting a certain depth according to the size of the seeds (this is indicated on the seed packets). Each of these methods is better suited to the type of seeds: in clusters in pots for larger seeds, spaced in rows in a seed tray... But if you have a rebellious spirit, just sow a seed here, another there, or empty your packet entirely, leaving it to chance; that will be good enough. Here are some tips to ensure you fail at your sowing:
- For temperamental seeds with unpredictable germination, sow only one seed per pot instead of 2 to 5 seeds to save money. "Less is more"; if the seed doesn't germinate, so be it.
- For small seeds, the most sadistic will put a thick layer of compost on top. The young plantlets will never see the light and will die before reaching the surface. For example, sow carrot seeds in a lovely trench of 30 cm; their roots grow deep after all!
- If you're competitive by nature, sow thickly! You'll enjoy watching your plantlets compete for light and nutrients. These young plants will either shoot up on spindly stems (this is called "bolting") or, conversely, stagnate. They will die if you don't intervene with thinning, which will be complicated due to the number of plantlets. Do you know the saying: "He who sows thickly, reaps sparingly"?
- Forget to soak certain seeds (parsley, sweet peas, cobaea...) overnight in room temperature water; after all, they don't know how to swim!
Lesson No. 3: to fail at sowing, ignore the temperature!
Gardening manuals tell us that a minimum temperature, depending on the type of seed, is necessary to start the germination phase. Radishes and salads germinate well between 5 and 10°C, while tomatoes, aubergines, and peppers need an ideal temperature of 20°C to germinate. In summary, if it's too cold, nothing will happen. At best, the seed will take longer to germinate. But often, it will rot in that cold, damp soil. So no bottom heat: no germination. To fail spectacularly at your sowing:
- Sow your sun-loving vegetables in an unheated greenhouse in February,
- Sowing needs warmth, so sow and place your seed tray directly on the radiator. Guaranteed overheating!
- It's a beautiful day and the sun is shining; place your sowings outside in full sun without any acclimatisation period. You'll get to admire some lovely sunburn on your plantlets.
- Don't open the frames! No need to ventilate; your sowings might catch a chill.
- It's spring... go for it! Sow directly in the ground, especially if you have heavy, clay soil that warms up slowly in spring.
- Here's a gift: transplant your vegetable plants before the Ice Saints; there's a good chance they'll be fried by the frost.

Lesson No. 4: to fail at sowing, either let them dry out or drown them!
This is probably where the difficulty of sowing lies, especially indoors: managing moisture. Young plantlets have very specific water needs: not too much, but enough for their survival. Watering pros soak the bottoms of their trays and pots in a basin of water or use a spray bottle. In the garden, they water with a fine spray using a watering can. To ensure they meet their demise without further ado:
- Forget your sowings in a corner; the substrate will dry out quickly, the seeds won't germinate, and if some dare to poke through a cotyledon, they will be finished off later;
- Or, give them the mephitic atmosphere of a putrid swamp; it will be a breeding ground for fungal diseases like damping off.

Lesson No. 5: to fail at sowing, use the wrong substrate!
The most suitable substrate for good germination and excellent growth of young plantlets should be fine and very well-drained. It must allow gases and water to pass through easily. The "special sowing and cutting compost" is obviously the best solution. In the ground, for the finest seeds (salads, carrots...), meticulous gardeners do not hesitate to create a seedbed with finely crumbled soil, compost, or well-matured compost. To fail at your sowing indoors:
- Nothing beats using an old bag of dry or mouldy compost;
- Or taking heavy garden soil full of stones, poorly drained and teeming with pests.
That way, you can be sure of a result close to nothing.
Lesson No. 6: to fail at sowing, sow in the dark!
Remember? We learn in school, from a young age, that a plant needs light to perform photosynthesis. If you weren't paying enough attention, try this experiment:
- Sow in a dark room; the plantlets will seek out the light and grow... grow... grow... on spindly stems that will quickly break. Sowing will bolt, and this phenomenon is exacerbated indoors due to the heat. You can also observe this when seeds have been sown too thickly.
- No more space at home to store your young sowings? Set them up in the cellar or the darkest room in your house! Besides getting them out of the way, you'll soon forget about them, and the darkness will prevent you from seeing them die.
As a bonus: don't label anything!
Don't forget to note nothing, to label nothing, to avoid any inconveniences later on. This isn't really a method to fail at sowing, but it's nonetheless a fantastic way to mix everything up. Nothing looks more like a young tomato plant than another young tomato plant, but of a different variety.
- Sow freely and forget the labels: you'll have a good laugh later.
- Annotate with ink that washes away at the slightest drop of water! After all, you can surely recognise your young plantlets: no need to fuss.
And if you ever want to succeed at your sowing, read our article: Gardening for beginners: succeed with your first sowing in 7 easy steps
It’s easier than you think to fail at sowing your vegetable or flower seeds; even the best among us are caught off guard each year. Follow our tips, and soon you’ll be able to boast about successfully failing your sowing! Lesson No. 1: to fail at sowing, sow anytime! Sowing experts will tell you: if […]
Uncontrolled frenzy around the tulip, tulipomania is considered the first speculative bubble in history. This enthusiasm for a small, familiar bulb, now affordable for everyone, seems unimaginable! Yet, before becoming the most popular flower in its category, the tulip indeed travelled and became a coveted item exchanged for a fortune.
So why this tulip crisis? What legacy have tulips left us? Let’s travel back a few centuries to trace the tulip and its incredible journey in Europe…
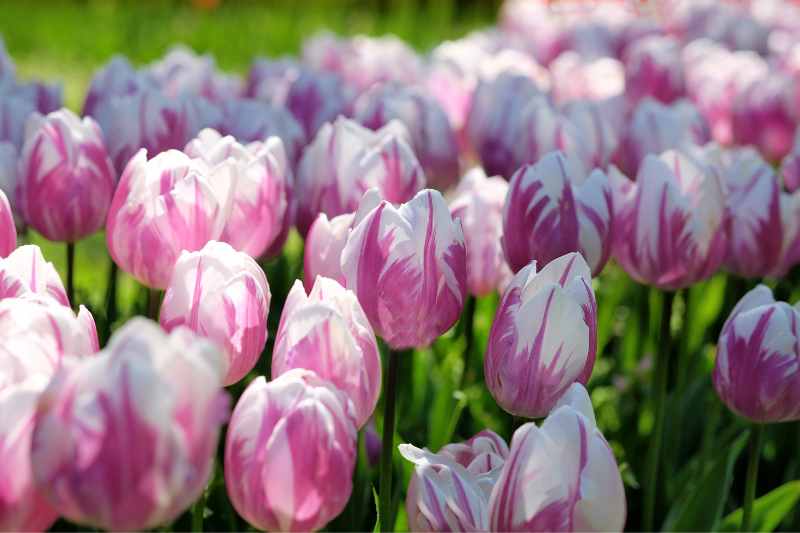
What is tulipomania?
Much has been said and written about tulipomania, that moment in European history when tulips were sold for exorbitant prices on the market. A troubled period, a fascinating and worrying phenomenon… It all unfolds in the 17th century, during the Dutch Golden Age, which radiates across the world, the seas, and trade.
Introduced around 1560 in the United Provinces (now the Netherlands), tulips first sparked the interest of botanists, and soon that of the general public. They garnered admiration in the Netherlands, but also in France, where they were planted in the gardens of the Louvre, with Louis XIII making them a symbol of luxury, and Louis XIV adopting this flower as the official flower of the court…
It was Charles de l’Ecluse (Carolus Clusius), a botanist and professor at the University of Leiden, who began planting the bulb in the sandy soils of the university garden in 1594, thus reproducing the tulip.
Horticulture was already developing in the province of Holland, where around fifty varieties were known by 1580. But by 1630, everything accelerated: over 100 different species of tulips arrived in less than a century.
The tulip became synonymous with success, an outward sign of wealth, and the powerful elite of the country understood this well. One must have them in their garden. Flemish bourgeois, nobles, and tavern owners began cultivating tulips, with some even abandoning their flourishing businesses and shops…
It became so coveted that sales now took place on a secondary market. The tulip became an object of speculation. A financial system was even established around what were called effect notes: from 1635 onwards, this mechanism allowed bulbs to be sold year-round, even while still in the ground, whereas previously tulips were sold in spring when one could assess the flower's conformity. A simple paper was signed, a sort of tulip share, where the merchandise was no longer visible... This sparked unparalleled enthusiasm, exchanging titles multiple times a day to drive prices up.
Tulips were exchanged for astronomical prices, or for land, livestock, silver cups, tons of grain, and other absurdities. It was said that the price of a beautiful bourgeois house on the Dutch canals could buy a single tulip or that it cost ten to twenty times the annual salary of a skilled artisan to procure the precious bulb at the height of the crisis. Even in France, tulipomania raged, as in Lille, where a tulip bulb became the currency of exchange for a brewery, which would bear the name of the tulip brewery. Between 1633 and 1637, tulips were the subject of frenzied trading, with gardens even being raided to unearth the precious bulb. The 'Viceroy' tulips streaked with lilac, and ‘Semper Augustus’, rare with marbled white petals (actually afflicted by a virus, difficult to reproduce), reached records, equivalent to 110,000 euros for a single bulb today. The bursting of the first speculative bubble in history was not far off…

In February 1637, after two years of uncontrolled growth, tulips suddenly found no buyers in Haarlem, and sold poorly, even causing a discount… unprecedented! The government had to intervene to regulate sales. Prices collapsed, word of mouth did the rest, leading to a dizzying drop in market prices.
All those who had bet on the tulip found themselves ruined overnight, while large fortunes, empires built around the tulip, had emerged a few years earlier. The enthusiasm for tulips fell almost overnight. However, the real impact on the economy of the United Provinces was not as severe as that, as the merchants involved remained a restricted elite of the country. In contrast, a moral crisis emerged, denouncing, often in the arts, the indecent profits of a part of society, as seen in Jan Brueghel the Younger's painting satirising the tulip in 1640, where he caricatures speculators as monkeys. Later, other painters would also take up this subject, such as Jean-Léon Gérôme and The Duel at the Tulip (1882), followed by various authors. This was also followed by a number of works on tulip cultivation, including the famous Treatise on Tulips in 1765.
The fascination for tulips continued to be felt until the 19th century, with the famous novel The Black Tulip by Alexandre Dumas (father) which takes us back to the previous 17th century in Holland, where the main character dreams of creating a black tulip to win a fabulous reward.

Turkey: the other land of tulips
But let’s go back even further in time to find the origins of this small bulb… and the first fans of tulips!
Tulips actually come from the East, where they grew wild in the steppes of Central Asia, between Iran, the Caspian Sea, and as far as Afghanistan. These are botanical species of very small size, in warm colours, from yellow to red. They were known and cultivated as early as the 11th century in these regions. They gradually made their way to Anatolia, first through caravans returning from the Silk Road. Then Suleiman the Magnificent conquered some of these regions in the mid-16th century, and nomadic tribes brought back these beautiful flowers in large numbers, landing in Constantinople, now Istanbul. The tulip then became the flower of the sultans.
During the reign of Suleiman the Magnificent, the tulip was everywhere: in the sumptuous gardens of the Ottoman palaces, but also on the ceremonial caftans of the sultans, fabrics, and on the Iznik ceramics, this city that would make ceramic art shine throughout the country. Tulips were a recurring motif, along with the carnation, in the ceramics of the Topkapi Palace, as well as in mosques where floral representation was common. Tulips also adorned the sultan's turbans: Suleiman was known to stick one in his. Fashion did the rest… It was indeed the Turks who first became enamoured with this small, colourful bulb! In Ottoman art, the tulip symbolised the divine.

The word tulip comes from the Persian word, tülbend, which became türban in Turkish: originally a traditional turban of the Turks, they had taken to adorning their headgear when the tulip was introduced to the country. By confusion, the name tulipan was soon attributed to the flower. The Latin name tulipa became widespread in Europe from 1593. However, in Turkey, the flower still retains its original name of lale.
It is reported that in 1554, Suleiman the Magnificent offered some bulbs to a Flemish diplomat, the ambassador of Austria in Constantinople, Ogier Ghislain de Busbecq. He is credited with introducing the tulip to Europe, as he met Charles de l'Ecluse in Vienna a few years later, to whom he handed over some bulbs. Clusius would soon leave to work in Leiden, in the Netherlands, and successfully attempt to multiply tulips there... The rest is tulipomania and its excesses...
In Istanbul, since 2005, every April, the Tulip Festival takes place, a vibrant spectacle, a true open-air exhibition, celebrating the arrival of spring by honouring the tulip in many parks across the city. This is the direct legacy of the tulip festival that took place during the time of the sultans, up to Ahmed III, in the early 18th century, the peak of tulipomania in Turkey, more commonly known by historians as the "Tulip Era".
Tulips today around the world
Since tulipomania… not much has changed in tulip production, as today, they are still primarily produced in the Netherlands, which is the world's leading producer. The tulip has become the emblematic flower of the country. Holland even has a world-renowned showcase at Keukenhof, where millions of tourists flock each year to admire the mass-planted flowerbeds. Over twenty thousand hectares are dedicated to bulb flowers in Holland, half of which is solely for tulips, still in the same region of Lisse, the cradle of production in the Netherlands, between Leiden and Haarlem.
Today, there are over 150 different varieties of tulips, and thousands of hybrids. Some producers continue to uphold a French tradition by producing and developing bulb plants, including tulips, particularly in Anjou where the sandy and loamy soil along the Loire is conducive to their cultivation, or in the Landes region.
At Promesse de fleurs, one in three spring bulbs sold is a tulip... There is no doubt that this wonderful little bulb - now affordable - has a bright future ahead!

Further reading
- Everything you need to know about the history of the tulip, with a reference book: The Tulip by Anna Pavord, (2001). Ed. Actes Sud;
- Read or reread The Black Tulip by Alexandre Dumas, a classic;
- Browse online at the BNF, the book by Charles Malo, History of Tulips (1821);
- Explore The ABC of Tulips, by Yves-Marie Allain and Catherine Garnier. 1996. Ed. Flammarion;
- Visit the Keukenhof park near Amsterdam where 7 million bulbs are planted each year, and explore the Amsterdam Tulip Museum.
- Bulbs 2026: 7 spring novelties to plant now!
Uncontrolled frenzy around the tulip, tulipomania is considered the first speculative bubble in history. This enthusiasm for a small, familiar bulb, now affordable for everyone, seems unimaginable! Yet, before becoming the most popular flower in its category, the tulip indeed travelled and became a coveted item exchanged for a fortune. So why this tulip crisis? […]
With its lovely oval, light green fruit containing highly aromatic seeds, cardamom adds a refreshing flavour to teas, pastries, and dishes. This tropical plant with evergreen foliage originates from India, where it thrives in the shade of dense forests, under a warm and humid climate. Discover the history, cultivation, and use of this spice, which, despite its humble appearance, has become one of the three most expensive spices in the world, preceded only by saffron and vanilla.
What is the origin of cardamom ?
Since ancient times, cardamom has been cultivated in India on the Malabar coast. Like other spices, it was traded in antiquity and the Middle Ages. It was highly valued by Arabs, Greeks, and Romans. In antiquity and during the medieval period in Europe, it was particularly used in the composition of hypocras, a sweet red wine spiced drink consumed during festive meals. In India, it was and still is used for its medicinal benefits and culinary qualities in cooking and teas.
Today, cardamom is among the top three most expensive spices, following saffron and vanilla. It is cultivated in India, but also in Guatemala, Sri Lanka, and Cambodia. It is increasingly used to flavour teas in the West, such as in chai latte, a delicious spiced milk tea of Indian origin.

A few words about the plant Elettaria cardamomum
Cardamom or Elettaria cardamomum is a plant from the Zingiberaceae family, which also includes turmeric and ginger. This perennial grows in tropical forests and enjoys proximity to rivers and streams. It can reach a height of 2 to 5 metres and bears large lanceolate green leaves measuring 40 to 60 cm, as well as flowers resembling irises, white with a hint of pink. It is a rhizomatous plant, with roots that develop very quickly and can be propagated.
Cardamom produces fruits that take the form of capsules or pods with three compartments, containing aromatic brown seeds. It is these whole capsules that are hand-picked and dried to preserve all their aromas. The harvest of the fruits is done by hand, and the time it takes for a plant to flower is 2 to 3 years, making cardamom a very expensive spice today.
In our regions, it is possible to grow cardamom in pots and indoors, at home or in a greenhouse. Indeed, it requires warmth, as it freezes at temperatures below 5 °C. It enjoys humidity and light but should be protected from direct sunlight. In summer, it can be taken outside. In theory, it flowers in summer and then produces fruit in autumn, but in practice, this remains difficult to achieve in our climates. The plant prefers rich, well-drained substrates and needs pollinating insects to bear fruit. As the rhizomes can quickly become invasive in a pot, they should be divided regularly to prevent the plant from suffocating.
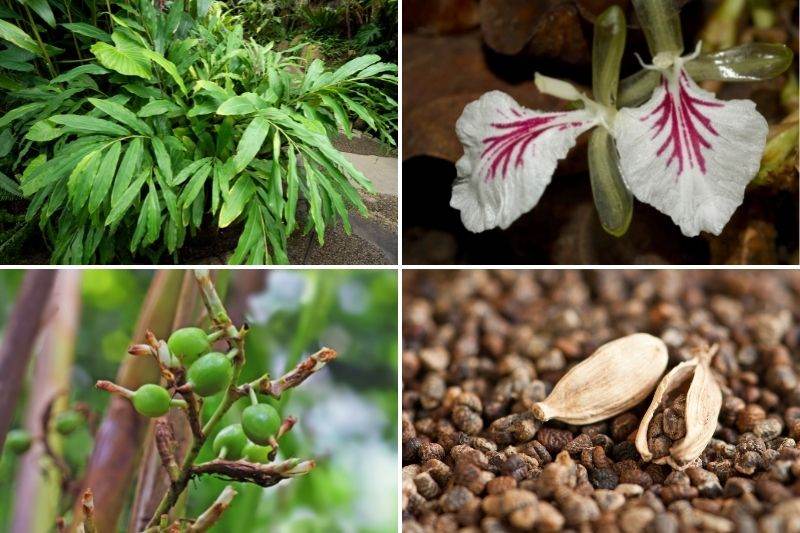
What are the uses of cardamom ?
There are different types of cardamom: green, which is the most aromatic, white, obtained after treatment with sulphur and less fragrant, and brown. The most commonly used for its flavour qualities is, of course, green cardamom.
It serves as a spice in Indian, Eastern, and Asian cuisines. In Indian cooking, it accompanies rice, meat, and fish dishes, and is part of the composition of curries and the spice blend known as garam masala. It adds a lemony and fresh touch to tea, as well as to pastries. In North Africa, it is added to coffee and is one of the ingredients in Moroccan raz el hanout, a spice blend used to flavour vegetables, couscous, and tagines.
To fully appreciate the taste of cardamom, it is best to buy it in whole capsules rather than ground into powder. To store cardamom under the best conditions, place the whole fruits in an airtight container and keep them cool and away from light. You can add them to your milk tea whenever you like or try an Indian recipe soon !
Note: Cardamom should be consumed in small quantities, as consuming more than 5 g of powder per day can pose health risks. It is not recommended for individuals with heart conditions.

With its lovely oval, light green fruit containing highly aromatic seeds, cardamom adds a refreshing flavour to teas, pastries, and dishes. This tropical plant with evergreen foliage originates from India, where it thrives in the shade of dense forests, under a warm and humid climate. Discover the history, cultivation, and use of this spice, which, despite […]
Failing to design a garden can leave even the most skilled among us feeling perplexed. Style, plant selection, decoration... so many factors come into play that sometimes, we don't know where to start or which path to follow. So follow our step-by-step advice to, like some particularly tenacious gardeners, successfully fail at designing your little piece of nature!
Lesson 1: Embrace improvisation!
Meticulous minds first recommend planning the layout of their garden: taking measurements, defining different spaces with their various functions, organising pathways, considering orientation, etc.
To fail at designing your garden, don’t plan too much! Drawing a plan might give you a headache, requires knowing your garden's orientation, in short, it makes you think instead of act! When the urge strikes, rush out to buy plants, grab your spade, and plant without overthinking. The layout of the flowerbeds will happen naturally, as you progress. If you decide to install a few trees, follow the advice in our excellent article on how to fail at planting your trees in 5 lessons. And if you fancy flowers of all kinds, discover how to fail at planting your perennials in 6 lessons. You’ll see, it’s very easy!
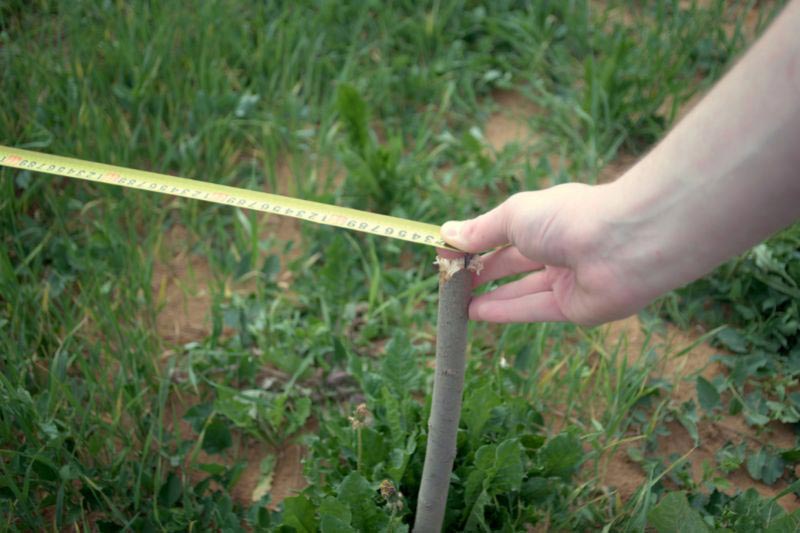
Lesson 2: Mix styles
The best landscapers advocate choosing a style for the garden, which should also be in harmony with the architectural style of the house. They might even say that a small Norman cottage in the middle of a Japanese garden would verge on bad taste!
But why choose between the English garden with its abundant mixed borders, the zen atmosphere of Japanese gardens, rockeries showcasing plants and stones, and the flowerbeds reminiscent of those from your grandmother, so vibrant and colourful? To fail beautifully at your garden, don’t hesitate: mix the atmospheres, even within the same flowerbed! Your eye will never get bored, and your neighbours will envy your creativity!
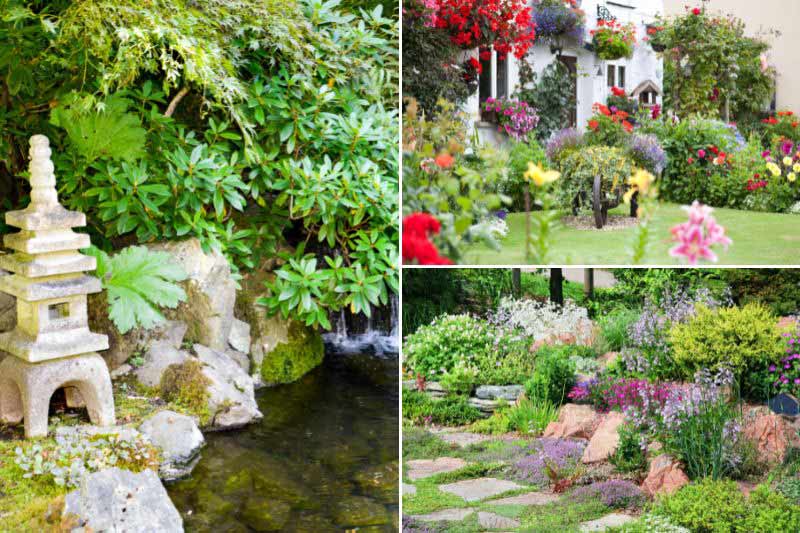
Lesson 3: Trust your instinct for plant selection and placement
Experts will tell you that you need to "organise" the plantings: the largest specimens at the back, the medium ones in the middle, and the smallest plants at the front. You might also read that evergreen plants help "structure" the space, punctuating the garden, and that you should play with volumes and textures.
To properly fail at your garden, choose plants that you like: all are welcome in your garden, big or small, evergreen or not, let’s not be picky! As a result, your lovingly planted hedge might consist of bushes - certainly very colourful - but all deciduous, and your neighbours always have an eye on your garden? No matter: lay down a plastic weed barrier, it will stay green all year round. Some artificial hedges even mimic foliage very well, so don’t bother.
Lesson 4: Choose plants without worrying about your region's climate or soil type
Yes, we sometimes stray into urging you to adapt the plants in your garden to your local climate or soil type... We even developed an app called Plantfit, allowing wise gardeners to meet a whole range of criteria for "suitable planting". What an idea!
Why couldn’t this lovely Bougainvillea be planted in your little garden in Haute-Savoie? It would remind you of your holidays in the South! And why couldn’t these magnificent rhododendrons find a place in your second home garden in Bormes-les-Mimosas, next to the palm tree planted last summer by the terrace? Again, the idea is to please yourself; if the plants don’t survive, you can always replace them.

Lesson 5: Simplify your planting
Timing and planting distances, hole sizes, adding organic matter, drainage, watering, staking... so many parameters are considered by the gardening purists at the time of planting.
The best time for your plantings to be doomed to failure is whenever you choose, and good for you if you prefer to enjoy those lovely summer days to do it! As often happens at this time, the soil may be hard and dry: don’t hesitate to grab a pickaxe. Make a hole for each plant while conserving your energy and install them. If the hole isn’t big enough, you can force it a bit or cut part of the root ball. What’s underground won’t be seen in the end, and the main thing is that you are satisfied with the composition. Water with the equivalent of a glass of water and don’t bother with a stake; if the tree leans a bit later, it will add character.

Lesson 6: Don’t over-finesse the details
The saying goes: "the devil is in the details." So yes, we take care when laying the new tiles in the bathroom because we see them every day, and overly perfectionist gardeners apply the same attention to detail to their outdoor spaces, thinking that the elements structuring the garden must be well cared for.
Tell yourself that to beautifully fail at what you’ve undertaken, things can remain "as they are" and a few small imperfections will enhance the overall result! The beautiful coloured gravel in your latest flowerbed doesn’t completely hide the green tarp laid underneath? From the terrace, it will hardly be noticeable! Some fence posts aren’t completely level? The bushes will grow, and soon it won’t be visible (unless they all die...). In short, there’s no need to nitpick. If the wires holding your tree to the stake aren’t particularly aesthetic, you really have to look closely to see them.
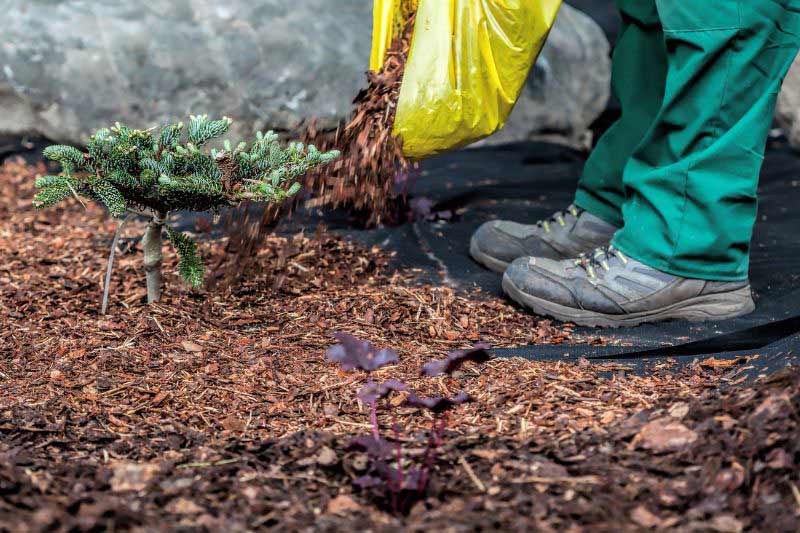
Lesson 7: Fountains, statues, and decorations of all kinds... Treat yourself!
Life is short, and the important thing is to enjoy it and treat yourself! In the garden, put this saying into practice, make your green oasis a place that reflects you, and forget the grumpy ones who will tell you that the most beautiful gardens are also the simplest.
A set of fabulous garden gnomes is at an unbeatable price during the sales? Why not splurge and scatter them around the garden to make it more attractive for your guests? A little romantic fountain is calling your name, and you can picture it on your terrace next to the recently installed Buddha head? It’s the perfect opportunity to create a unique and relaxing atmosphere! In short, don’t hesitate on the decoration, the little extra of your piece of nature, what will definitely set it apart from other gardens...
Failing to design a garden can leave even the most skilled among us feeling perplexed. Style, plant selection, decoration… so many factors come into play that sometimes, we don’t know where to start or which path to follow. So follow our step-by-step advice to, like some particularly tenacious gardeners, successfully fail at designing your little […]
Throughout history, plants and gardens have attracted people, both for nourishment and for relaxation while admiring nature at work. The history has thus been marked by numerous individuals who have distinguished themselves through their contributions to gardens. From André Le Nôtre to Gilles Clément, including La Quintinie and Capability Brown, join us to discover the journeys of some of the most creative gardeners, botanists, and landscape architects in history.
Carl von Linné, inventor of binominal nomenclature
Between the 15th and 18th centuries, many European naturalists embarked on expeditions around the world. Their goal was to catalogue the unknown fauna and flora in their countries and bring back samples to try to harden them. Physician, naturalist, and gardener, Carl von Linné (1707-1778) is one of these individuals. He notably travelled to Lapland in 1732 to study plants. His greatest work remains the invention of the classification of living beings, which he undertook with Peter Artedi, reserving the domain of flowers for himself. He published numerous works on this subject, particularly Systema naturae and Species plantarum. His major scientific contribution is the invention of binominal nomenclature, which allows for the precise and universal designation of living beings, including plants, by using a genus followed by a species name.
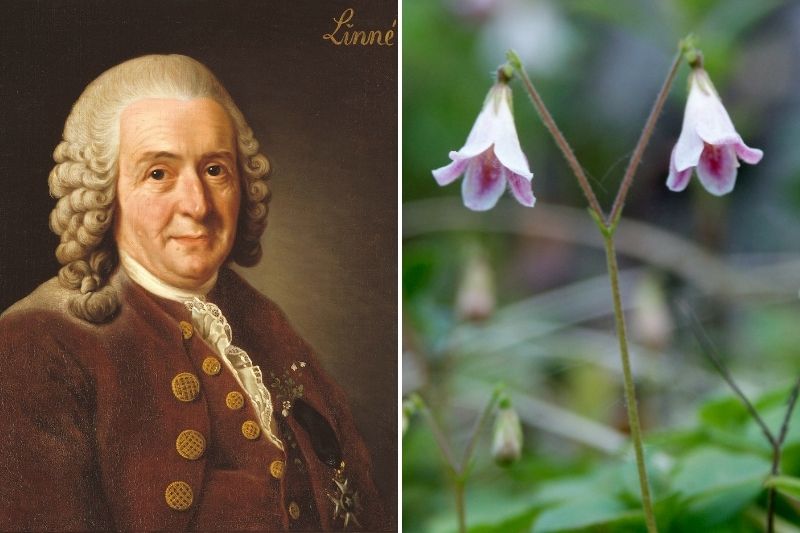
André le Nôtre, creator of French gardens
Gardener to King Louis XIV, André Le Nôtre (1613-1700) is undoubtedly the most famous of gardeners. Born into a family of gardeners, he is known for inventing the art of the French garden, with its floral embroidery, topiary, and well-aligned geometric shapes. He began creating the gardens of the Château de Vaux-le-Vicomte, after which he was hired by Louis XIV to design the grand gardens of the Château de Versailles. Since then, the art of the French garden has brought fame to France around the world and made André Le Nôtre very famous, who also designed the Tuileries garden, where he created the perspective that still leads today to the Champs Élysées.

La Quintinie, creator of the King's Kitchen Garden
A contemporary of Le Nôtre, with whom he collaborated, Jean-Baptiste de La Quintinie (1626-1688) is the creator of the King's Kitchen Garden at the Château de Versailles, as well as other kitchen gardens in Sceaux, Chantilly, and Rambouillet. This fabulous gardener dedicated himself to improving the production of fruits and vegetables. He particularly experimented with growing under frames and glass bells, hardening new species, training fruit trees in espaliers, and using grafting in arboriculture. Le Nôtre recorded all his reflections on the art of the kitchen garden in a book published in 1690 entitled Instruction pour les jardins fruitiers et potagers.

Capability Brown, one of England's greatest gardeners
While the French garden continues to enjoy enduring success today, the English garden was born in the 18th century from the mind of Lancelot Brown (1716-1783) and his contemporaries William Kent and Charles Bridgeman. This new form of garden takes the opposite approach to the geometric French garden, adopting a wilder style where nature is given greater freedom. Lancelot Brown is also known as Capability Brown, because he systematically mentions to his clients all the potential (capability in English) of the gardens he creates. He is notably the author of the gardens of Blenheim Palace, Warwick Castle, Burghley Park, and Croome Court.

Gilles Clément, for a garden in motion
Let’s leap into the 20th century! Renowned horticultural engineer, landscape architect, and gardener, Gilles Clément invents a new way of thinking about gardens through three concepts: the Garden in Motion, the Planetary Garden, and the Third Garden, which have led to the publication of several works. The principle of the Garden in Motion is inspired by the idea of fallow land and has been applied in Gilles Clément's personal garden La Vallée, located in his native Creuse, and in his public garden projects such as the André Citroën Park, the garden of the Quai Branly Museum, both in Paris, as well as the Rayol estate in Var. This principle can be summarised as: “doing as much as possible with nature, as little as possible against it.” The idea of the Planetary Garden was the subject of a major exhibition led by Gilles Clément in 2000 at the Grande Halle de la Villette. It is a project of humanist ecology aimed at attempting to exploit biodiversity without destroying it.

Patrick Blanc, inventor of the living wall
Botanist and researcher at CNRS, Patrick Blanc is the inventor of one of the most innovative forms of garden: the living wall. This type of garden contributes to the well-being of the urban population and the development of biodiversity. Patrick Blanc is known for creating the living wall of the Quai Branly Jacques Chirac Museum, which houses 376 species from around the world. Subsequently, he continued his work by creating many other living walls in France and around the world. For example, you can admire in Paris those at the Natural History Museum (vegetal ceiling), the Cartier Foundation, the Pershing Hall Hotel, and BHV Homme. An insatiable researcher for new plants around the world, he discovered a new species in the Philippines called Begonia blancii.

For further reading...
Over the past centuries, many gardeners and landscape architects have contributed to a better understanding of flowers and the creation of increasingly beautiful gardens and parks. Notable figures include Frederick Law Olmsted (1822-1903), designer of Central Park in New York in 1857 and a pioneer of urban parks; Adolphe Alphand (1817-1891), engineer and creator of the parks of Paris; Louis Benech, landscape architect who renovated the Tuileries garden in 1990; Alain Baraton, current head gardener of the Château de Versailles; André Eve, creator of numerous roses; Christopher Lloyd, creator of the Great Dixter garden in England; as well as landscape architects Michel Corajoud, Michel Desvignes, Alexandre Chemetoff, Pascal Cribier, Jacques Sgard, Charles Jencks, ... Discover their ideas and creations by consulting the works they have published. They are wonderful sources of inspiration for your own garden!
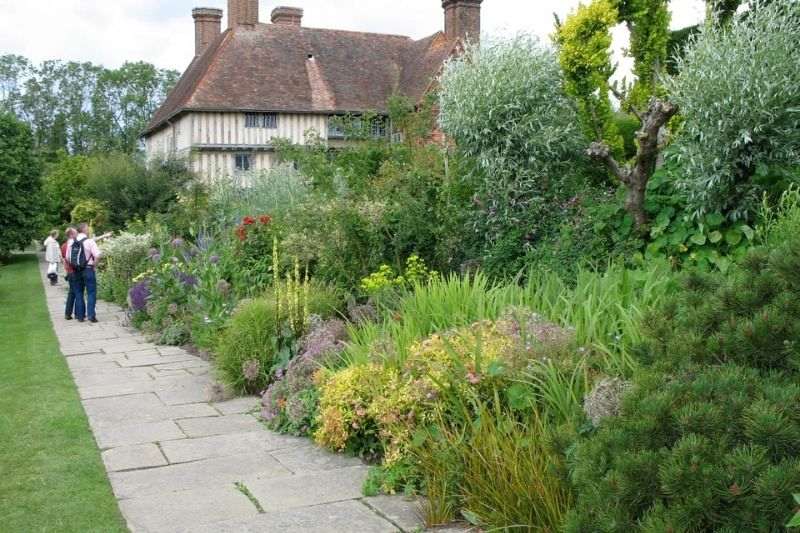
Throughout history, plants and gardens have attracted people, both for nourishment and for relaxation while admiring nature at work. The history has thus been marked by numerous individuals who have distinguished themselves through their contributions to gardens. From André Le Nôtre to Gilles Clément, including La Quintinie and Capability Brown, join us to discover the […]
The Cutie Pie rose is a brand new miniature rose with generous flowering reminiscent of the delicacy of apple blossom. Initially carmine pink with a white centre at the start of flowering, its petals lighten to pale pink in summer. Highly appreciated by pollinators, its flowers continuously renew until the first autumn frosts. Requiring little maintenance, it has a very healthy compact foliage and thornless branches.
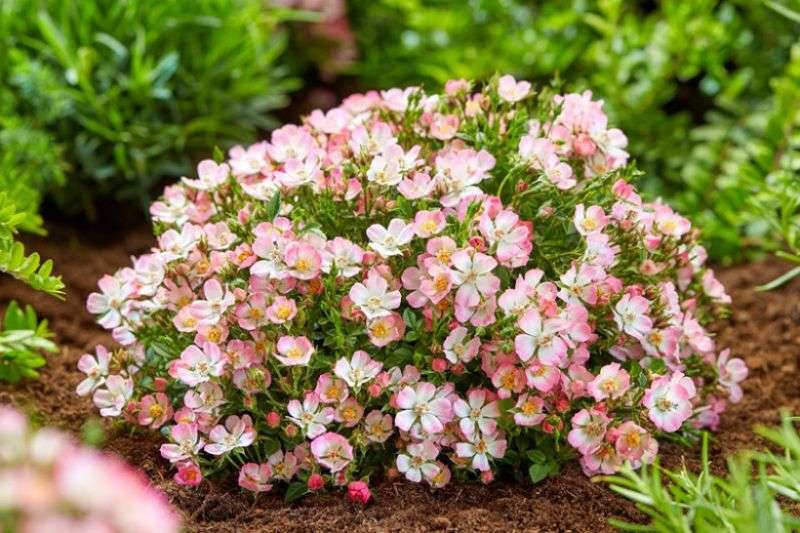
Whatever the style of your garden or terrace, this miniature rose is very easy to grow if you give it a lovely spot in the sun. Like a perennial plant, its small size, 15-20 cm high and 30 cm wide, allows you to tuck it in anywhere. At the edge of a path or to fill a space in the foreground of a border. Used as groundcover, three plants spaced 30 cm apart create a beautiful dense and flowering cushion in my rockery, accompanied by hardy geraniums, carnations, phlox, or nepeta.
On your terrace, it will thrive in a pot (30-40 cm) in dark grey tones that will enhance its beauty. By the second year, it will form an incredible dome of flowers.
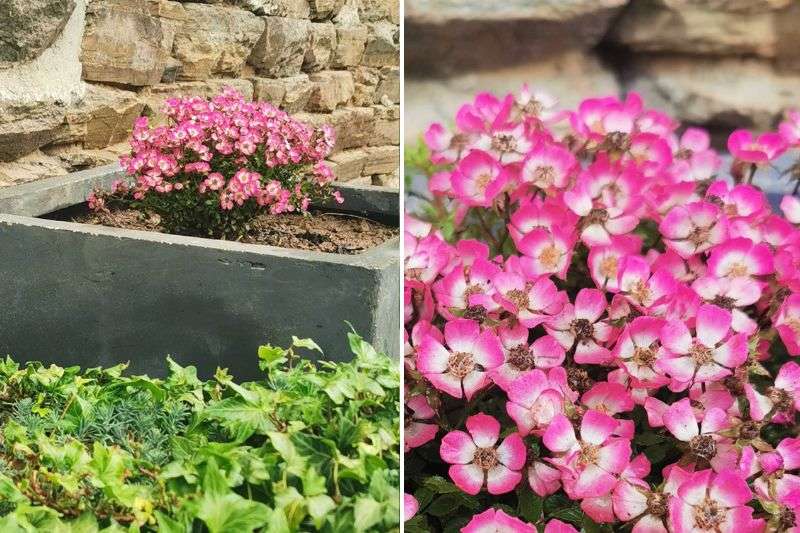
In terms of maintenance, regularly remove faded roses to encourage it to produce even more new flowering shoots. In the ground, it shows itself to be perfectly resistant to cold and drought. Water it once a week during the first year after planting, and it will manage very well on its own thereafter. In pots, protect it in regions with very harsh winters and ensure proper watering and fertilisation.
Don't miss out on this little gem; it will undoubtedly become a must-have!
The Cutie Pie rose is a brand new miniature rose with generous flowering reminiscent of the delicacy of apple blossom. Initially carmine pink with a white centre at the start of flowering, its petals lighten to pale pink in summer. Highly appreciated by pollinators, its flowers continuously renew until the first autumn frosts. Requiring little […]
What’s new in the garden? Not much, really. My garden sits in the Lille region, and you have to admit that in the middle of February it’s a bit dull and dreary. A few Galanthus are showing their white and green bell-shaped flowers, the hellebores begin their lovely season, the wood dogwoods (the show goes on...) display their shimmering colours and... oh yes! What was I thinking? It’s the start of the ament season!

Nothing to do with our whiskered companions, but rather with the blooming of willows. But not just any willows! The first to bloom, and thus to produce these famous aments, are Asian willows. Our native willows (Salix alba, Salix viminalis, Salix fragilis, Salix caprea, Salix aurita…), for their part, are patiently waiting for their moment to flower. Which won’t be long, by the way.
The willow 'Mount Aso'
The Salix chaenomeloides 'Mount Aso' is extraordinary in more ways than one! In season, it forms a handsome shrub about 2.5 m in all directions, in our climate. The green foliage is deciduous and hints at bright red new shoots in winter. But it’s at flowering time that it proves truly spectacular. From February onwards and for several weeks, large fluffy pink-red aments will emerge. It’s stunning both for the colour and for the shrub’s overall silhouette. And all this in a season when little else happens in the garden.
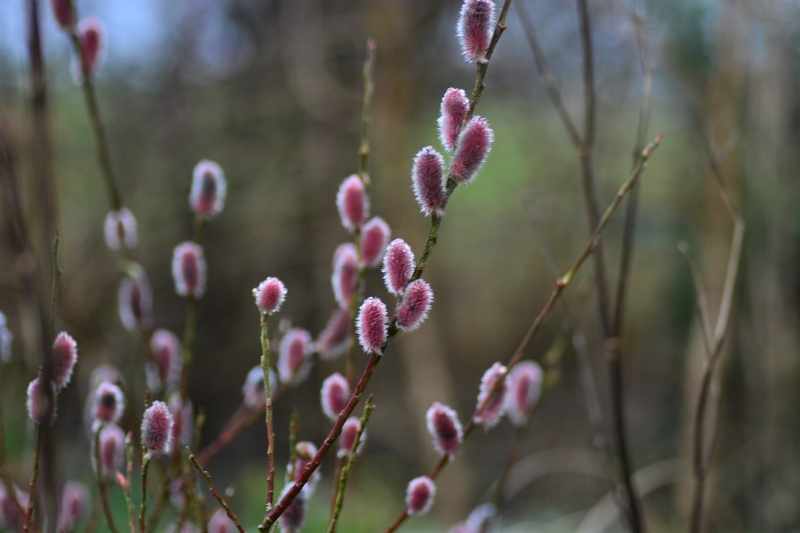
Willow 'Wolf's Claw'
The Salix gracilistyla var. melanostachys (Bless you!) is a willow that looks unimpressive if you don’t pay attention. But if you look closer... I was given a cutting last year; the shrub is therefore still very young. But despite its young age, this willow 'Wolf's Claw' already rewards me with two aments... completely black. All this is borne on very red shoots. I leave you to imagine the beauty of the shrub when it reaches its mature size. I can’t wait to see that in two or three years.
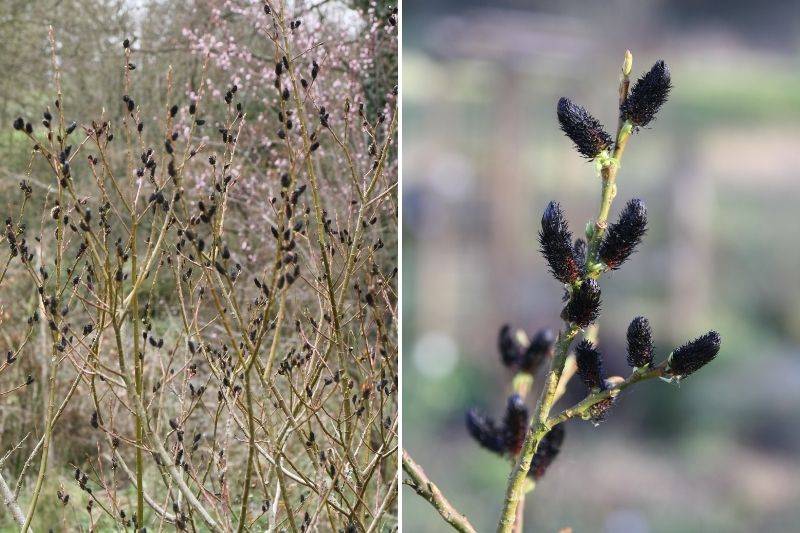
Salix koriyanagi
It’s a Korean willow (also found in China and Japan), little known and hard to obtain outside of a few specialist plant-collectors. I had the good idea to plant a very young specimen about two years ago. And I’m delighted! The young shoots look slender and upright like 'i's. They are used in basketry in Asia. And from February onwards, the shrub is covered with a multitude of mini female aments. A striking visual effect! The deciduous foliage resembles a bit the basket willow (Salix viminalis), but the leaves are smaller and orange at bud burst.
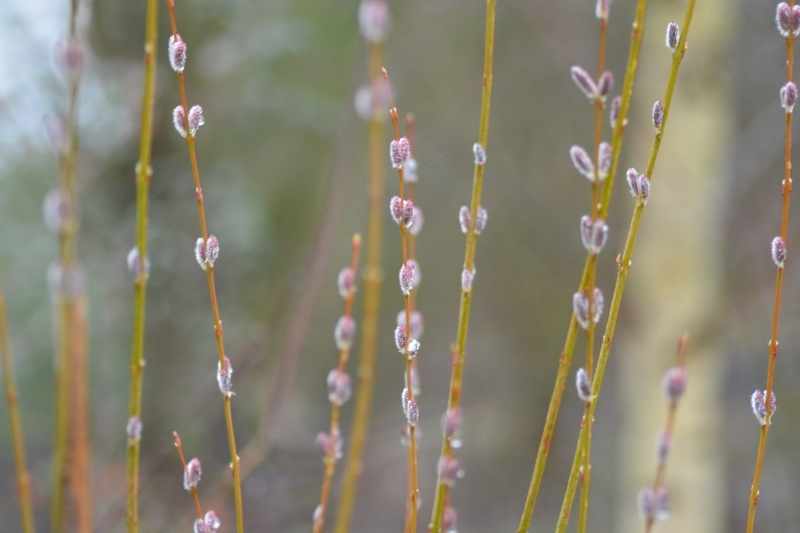
Growing conditions for these 3 willows
All three are very hardy: -15°C without any problem in winter. They require sun and soil that stays cool and moist all season. However, they prove to be quite drought-tolerant once well established. Ordinary soil suits them, regardless of pH. The soil can even be heavy and clayey: in fact, they absolutely love it! An occasional pruning after winter, if you feel the need. They are trouble-free shrubs with fast growth. In short, shrubs that deserve to be planted more widely!
Also discover beautiful aments in Virginie's garden.
February is often a rather dreary month in the garden. Nevertheless, some flowering has begun.
Waste is part of everyday life. While we strive to reduce it to the bare minimum, there will always be some left. Cardboard is part of it.
And it’s clear that you can quickly become swamped with tonnes of cardboard if you’re not careful. Especially if you order plants online!
Fortunately, all this cardboard can be reused in the garden for several uses: mulching, creating new beds, composting...
This type of material has now become a real staple in the garden... Discover how to use it.
Which cardboard to use ?
As rough as possible! Untreated brown cardboard with as few markings as possible, or none at all. Indeed, inks contain chemical compounds, including heavy metals, which will pollute your soil. Never use white or coloured cardboard for the same reasons. You should also remove from the cardboard anything that is not biodegradable, such as staples, sticky tape...

Using cardboard for mulching
We can’t say it enough: don’t leave your soil bare!
The ideal is therefore to plant densely, use groundcover plants, or, where that isn’t possible (in the vegetable patch, for example), to lay a good mulch on the bare soil. The benefits of mulching are many: retain soil moisture, improve soil structure, prevent soil compaction and leaching, and reduce the proliferation of adventives.
For mulch, you have the choice: straw, RCW (Ramial chipped wood), flax shives, miscanthus chippings, bark... and, you guessed it, CARDBOARD.
The use of cardboard as mulch offers major advantages over any other mulch: cardboard is free and its recycling helps cut waste; cardboard is available all year round for us, unlike some mulches that are more seasonal such as fallen leaves or lawn clippings, for example. Additionally, earthworms seem to revere cardboard, eagerly feeding on it as soon as it’s laid. Cardboard provides a good source of cellulose for them.
The laying of cardboard as mulch is simple:
- Water the bare soil thoroughly;
- Lay the cardboard in a large sheet or in strips (better for faster breakdown) on the bare soil or just around the plants;
- Water everything again more thoroughly than the first time to ensure the cardboard is well moistened.

There you go—it's as simple as that. For the fussy among us (like me), you can hide the rather unsightly cardboard in the first days with a thin layer of branch chippings, straw or similar.
Using cardboard for creating a new bed
Cardboard can also come to your aid in creating a new vegetable bed or a new perennial bed. Tilling is tedious and disturbs the soil’s structure and life. So why not let earthworms and the rest of the soil life do the job of creating a growing site for you? With cardboard, it’s a breeze!
- Mow or trim the vegetation to the edge of the area;
- Water well;
- Place your cardboard flat over the entire surface;
- Water generously to thoroughly dampen the cardboard and place heavy stones or bricks around the edges to stop it from blowing onto a neighbour’s plot;
- You can add a thick layer of fallen leaves (if it’s autumn) or lawn clippings (if it’s spring or late summer) to enrich the bed a little. Personally I’ve done it once without this layer and it still worked.
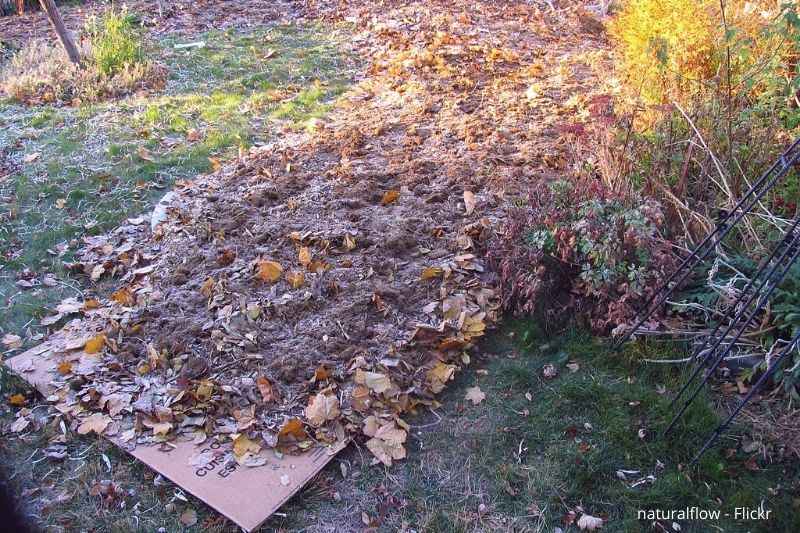
Cardboard in lasagne beds?
And lasagne beds, you ask? I’m obviously talking about lasagne gardening, not the ones on your plate. The technique is simple: on the soil create alternating layers of green waste and brown waste. It’s a bit like growing directly in a compost that’s forming. The aim is to create a quick, cultivable and fertile surface. It’s a great idea if your soil is tricky to cultivate (poor soil, compact soil, too many stones...). Additionally, it allows you to prepare the ground for the next year without losing a growing season. A lasagne bed lasts only one year, but underneath the soil will be perfect for planting or creating a bed, for example (of course it won’t solve any potential stone issues).
Cardboard can therefore be used in lasagne gardening. Already for the base layer, as noted above, but also for the brown waste layers. The cardboard can act as the "brown layer" alternated with the green waste.
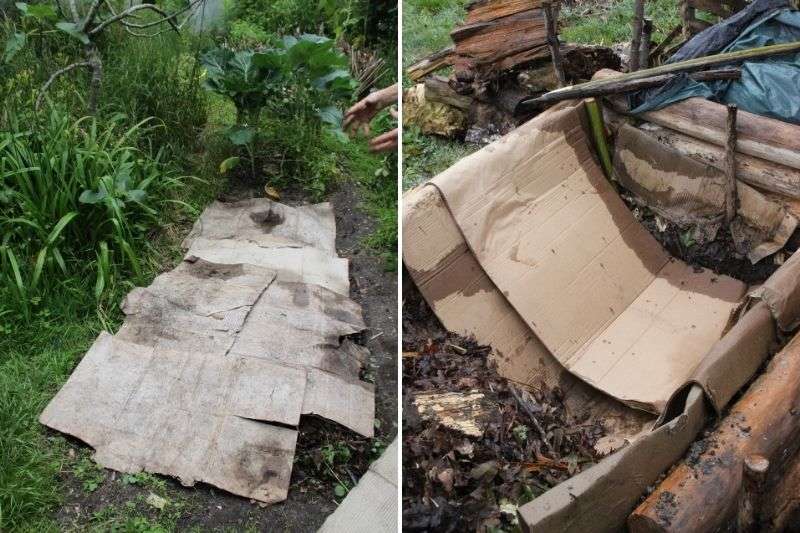
Can cardboard go in the compost?
Yes, indeed! And cardboard is actually quite welcome for balancing the carbon/nitrogen ratio (C:N).
In home gardens we often have many nitrogen-rich items (green waste): lawn clippings, kitchen scraps, weeds not yet seeded... but relatively few brown wastes to compost such as wood, straw or fallen leaves. Yet for compost to transform best it also needs carbon. Cardboard, rich in cellulose, is a brown waste and will be perfect for supplying carbon and thus rebalancing your compost pile.
→ For more on succeeding with compost, see Ingrid’s advice on the subject.
Still more cardboard in stock?
Cardboard can also be used for seedlings that require cool conditions to germinate. Protect your seedlings with cardboard while the young shoots push through the soil. Simply place the cardboard over the seeded soil and check every morning that the germination hasn’t yet occurred. If it has, remove the cardboard promptly.
You can also cut strips of cardboard to support soil blocks for seedlings. This will save you plastic pots for your young vegetable or flowering plants before transplanting. For this, prefer corrugated cardboard which handles moisture less poorly. Toilet paper rolls are also very effective, in addition to already having the desired shape. Obviously, this cardboard use can only be a temporary solution until the plant grows enough to be planted in open ground.
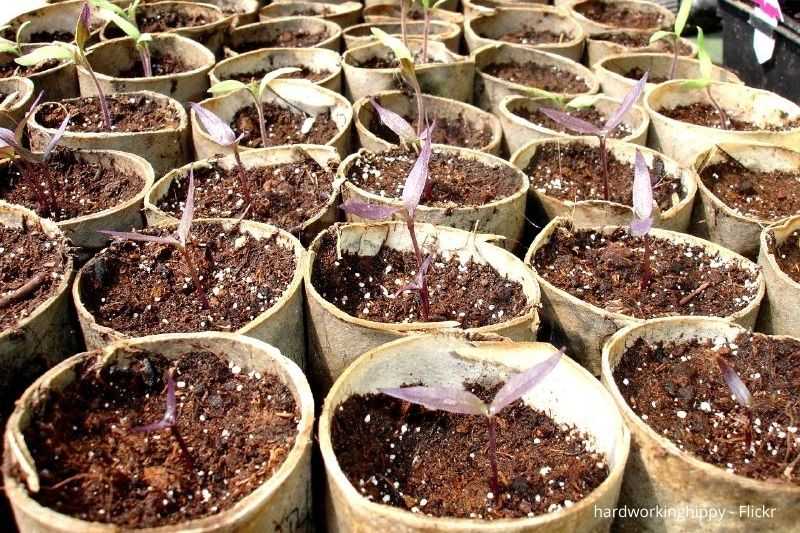
Waste is part of everyday life. While we strive to reduce it to the bare minimum, there will always be some left. Cardboard is part of it. And it’s clear that you can quickly become swamped with tonnes of cardboard if you’re not careful. Especially if you order plants online! Fortunately, all this cardboard can […]
It's winter. It's cold. And by cold, we mean temperatures that sometimes drop below 0°C. Yes, even in the South. This brings us to a strange physical phenomenon: water becomes solid. This is commonly referred to as frost. Surprisingly, winter returns every year, despite humanity's repeated attempts to warm the climate, and just as surprisingly, it catches many gardeners off guard, leading to the loss of some fragile plants left unattended.
So why has your plant suddenly decided to freeze without asking for your permission? We'll explain right away.
Why this happens to you?
Your neighbours never complain about winter. At most, they might grumble a bit when they have to clear snow from a tree or wait for a thaw to plant a tree, but that's about it. Besides, snow in the garden is great!
But for you, winter is synonymous with perpetual anxiety. You scrutinise the sky and your own professional weather station as soon as a cloud appears or one of your acquaintances suffers from their rheumatism. For most gardeners, a little frost is not a problem, but you know it will be much worse! You can sense the drama coming! Ah! What a tough life!
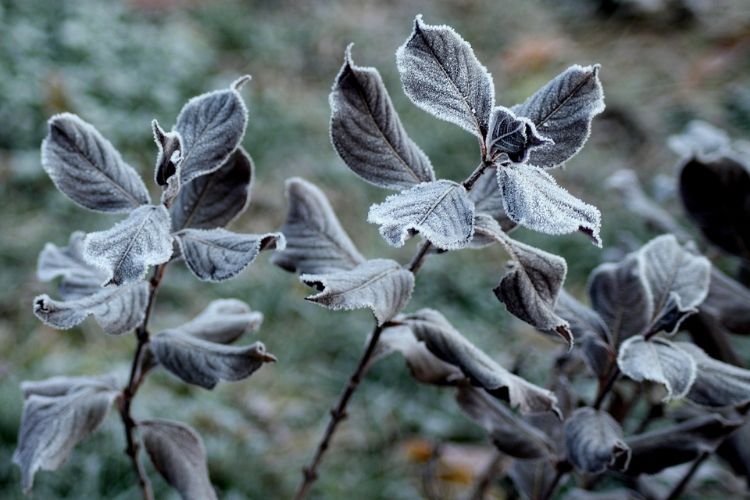
Why this specific plant?
That's true, why this plant in specific? All your other plants usually survive winter and frost perfectly well. And then bam! It's your favourite that takes a hit. The one your uncle from the Caribbean sent you via climate-controlled shipping, which you had to have airlifted into your garden. It cost you a small fortune and was your pride because no one (and for good reason!) had one in the neighbourhood. And now it’s gone overnight without even giving you a heads-up. All the others, planted right next to it, cost you a fraction of that and have survived without any trouble. Plus, you could swear they’re laughing...
Fate is cruel! But what on earth happened?
Why, after all?
Winter is a time for plants to change their rhythm
Deciduous shrubs enter dormancy when they lose their leaves. This is an adaptation to the difficulty of pumping water from the soil, as it has indeed become solid as soon as the temperature drops below freezing. So, to avoid losing too much water through evapotranspiration at the leaf level, what could be more effective than simply letting them fall to the ground? Conifers, with their needles, have found a clever way to reduce the surface area of their leaves, as well as making them thicker and waxy. But what about the other evergreens? They slow their rhythm, yes, but they do not enter dormancy.
Physiological effects during frost periods
Most plants that can grow here are prepared for winter. They reduce their water content (by losing their leaves, for example) and increase their mineral salts and sugar content, which also raises the freezing point of water in their tissues. If it gets even colder, some of the water is expelled from the cells to the intercellular spaces. What remains in the cells will not freeze because there will be an even higher concentration of sugars and mineral salts. If it gets even colder, that’s the end of the anti-frost measures! Water becomes solid within the cells. Solid water takes up more volume than liquid water, and boom! Crash! The cell bursts like a glass bottle would when water freezes inside. This can be seen in various plant injuries during frost: leaves appear scorched, trunks are cracked, ... All of this can lead to the death of your plant.
What can be done about it?
- Choose resistant and suitable plants
If a plant is recognised as hardy down to -15°C, everything should be fine. Native plants from your region should also be prioritised.
- Consider hardiness zones... or not
To help with this, there are what are called hardiness zones. They give you an idea of temperature extremes but are not precise for your garden. It will depend on your soil, exposure, wind, the orientation of your garden, ...
- Look around you
If a type of plant has been growing in your neighbours' gardens for years without issue, it’s likely to thrive in yours too. Plus, it gives you a chance to chat with your neighbour about your favourite topic: gardening.
- Protect fragile plants
If you haven’t taken any of the three previous points into account (like the rest of us!), you’ll need to protect your plants with good organic or mineral mulch (as stones can warm up during the day and release heat at night). You can also wrap your plant in horticultural fleece, hessian, ... or even cardboard if that’s all you have on hand. We cover everything about protecting plants in winter in this article.
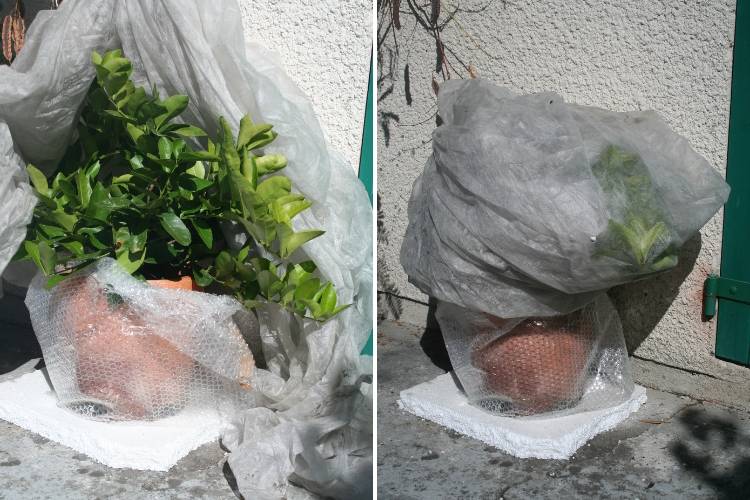
- Avoid standing water
It is crucial to avoid water remaining near the roots. To do this, do not water before a frost period and especially consider placing a drainage layer when planting a fragile plant: some gravel or a bit of sand. Or plant it on a small mound.
- Plant in the right place and at the right time
You know your garden better than anyone. So you know where the coldest spots are and vice versa, the warmest. Identify them and place your tender plants there! Also, avoid planting these precious ones in autumn: they won’t have time to develop a sufficient root system to survive winter without issues. Instead, plant in spring when the risk of frost has passed.
Despite everything, my plant has frozen! What should I do now?
Your plant seems to have frozen despite your precautions and other incantations... First, remove any protection you may have placed to let it breathe a bit. If a thaw occurs (lasting at least two weeks), water it well at the base with lukewarm water. You must avoid dehydration at all costs. And then... wait! Some plants that seem completely lost for good... eventually rise from their ashes like a phoenix as soon as spring arrives. Here’s a short article by Michaël on the subject.
Cold is not a bad thing!
It’s hard to lose a plant, especially a beautiful and rare one. But remember that all your other plants need the cold to bloom, germinate, or produce wood: this is called vernalisation. This cold period is essential for many plants to transition from the vegetative stage to the reproductive stage, thus developing their flowering.
So don’t grumble too much about winter! This cold period varies depending on the species and even varieties, and some need it more than others. That’s why some plants can only grow in the North.
In conclusion
"The right plant in the right place," said Beth Chatto.
And I would even add in the right climate and at the right time. It’s quite amusing to try more exotic things while protecting them well or finding them a microclimate. And it’s very rewarding to see that some thrive for many years. But inevitably, the fateful moment arrives when the temperature is truly too low for them to survive. At least you enjoyed them for a while. That’s what you need to tell yourself...
Also, don’t forget about planting times. Don’t attempt to plant a frost-sensitive plant when frosts are still a concern. The classic mistake of planting dahlias too early, for example...
In conclusion, if you still wish to try some exotics in your garden: consider placing a drainage layer at the bottom of the planting hole and plant your plant in a sheltered spot. And above all... let go. If your plant survives and thrives: great! If it dies: too bad for it! It will make room for a new adoption...
It’s winter. It’s cold. And by cold, we mean temperatures that sometimes drop below 0°C. Yes, even in the South. This brings us to a strange physical phenomenon: water becomes solid. This is commonly referred to as frost. Surprisingly, winter returns every year, despite humanity’s repeated attempts to warm the climate, and just as surprisingly, […]
“ Should trees always be staked ?” Now, that’s a good question! For ages, the answer was quite clear: You plant a tree. You stake it. End of story. However, recent research suggests that trees may not always need it. Worse still! Some even argue that unstaked trees may actually establish better than their staked counterparts.
The reasons are numerous, but the first ones fall on the gardener themselves...
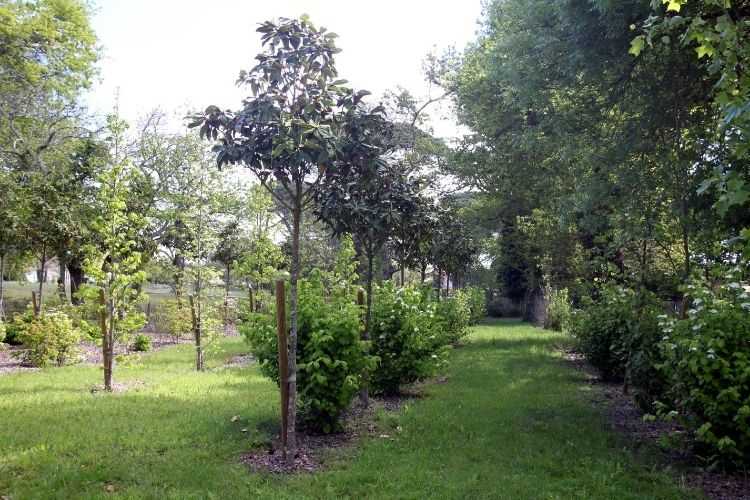
Be cautious when staking your trees!
You shouldn’t stake just any way, nor with any material! Here are the main mistakes to avoid:
- driving the stake in like a brute through the root ball or even into the roots: when you decide to stake a young tree, avoid injuring the roots. Make sure to place the stake well outside the root ball! The easiest way is to place it before planting the tree.
- using ties that can injure the bark of the young tree : only use natural materials if possible or “ soft ” materials for the bark! There are systems designed for this purpose, but rubber from old inner tubes is an excellent solution. Absolutely avoid wire or other rigid materials and don’t tighten too much! The tree should be supported but not strangled, so don’t hesitate to move and loosen the ties as it grows.
- forgetting to remove the stake: I have personally removed dozens of old stakes from trees and shrubs in my garden that had been forgotten there for decades (and they were rusty metal bars tied with plastic string...). Never forget to remove your stake no later than a year after installation! If you wait longer, you risk injuring the tree's roots.
Staking is not always welcome
Recent studies have shown that staking a tree too firmly shortly after planting can sometimes be detrimental. Indeed, young trees need to move a bit with the wind. This allows them to create a very strong root system with roots that will anchor deeper into the soil.
Moreover, the tree will develop a thicker and more resilient trunk against various external threats. It will also produce more branches from a young age. Another proof that staking is not obligatory, on the contrary.
To avoid staking, simply plant well! That is, properly set the root ball or roots at the bottom of the hole you’ve dug and compact the soil afterwards. If you do this, your tree won’t sway too much in the wind, and even if it seems a bit tilted in the first year, it’s very likely to straighten up later.
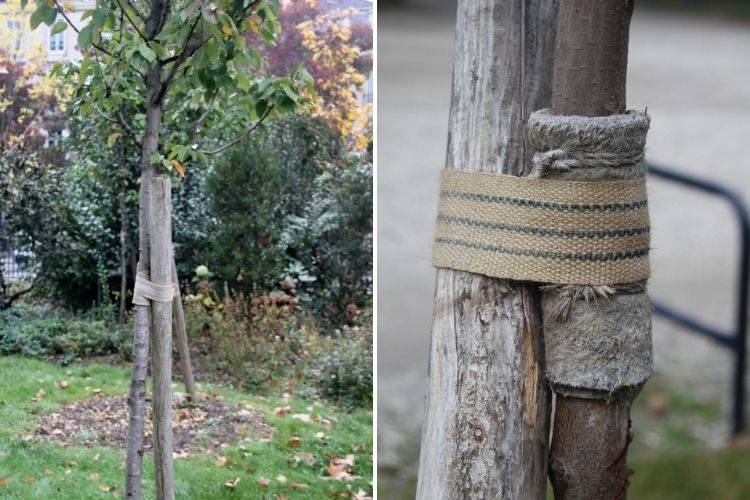
But staking can sometimes be necessary
Let’s not kid ourselves, staking can be necessary in certain circumstances :
- if the ground has a slope worthy of the Beille plateau or the Aubisque pass: good staking will allow the tree to grow straight regardless of the slope.
- if your garden is so swept by the wind that you need to stake the gardener too
- if you are planting a large specimen with a root system reduced compared to its branches, this is particularly the case for trees presented with bare roots. In this situation, your tree, if unstaked, will find itself like a person with a big head and small feet. It will topple at the slightest breeze!
- if the “ top ” is already high on a very (too!) thin trunk : this is a bit of a case-by-case situation, but sometimes you will quickly realise that if you don’t stake your young tree, it will break in two at the first gust (which can be good if you want a coppice). Always check at purchase that your tree is well balanced.
A little word from Oli: if you are patient, frugal, or both like me, you can also adopt very young trees. They are obviously less expensive to buy but that’s not their only quality. Indeed, planting is a traumatic experience for a tree, especially if it has been uprooted from a nursery gauge. If planting is done in its early years, it will have a better chance of recovering. Moreover, a young tree will not have the root ball problem that can be found in container-grown specimens. It will also be less sensitive to the elements and will anchor better in the soil. Lastly, it is also easier to plant and transport a small one-year-old than a large five-year-old specimen. Ultimately, we think we save time by planting already large trees, but young trees planted at the same time will soon catch up with their older siblings in size and spread while being less temperamental in their recovery.
For further reading
Find Oli's tips, or rather his article on how to fail at planting your trees in 5 lessons.
“ Should trees always be staked ?” Now, that’s a good question! For ages, the answer was quite clear: You plant a tree. You stake it. End of story. However, recent research suggests that trees may not always need it. Worse still! Some even argue that unstaked trees may actually establish better than their staked counterparts. The […]
A friend of mine, who is also a well-known gardening columnist (and an excellent gardener, which makes for two significant differences between us), recently told me: “It annoys me, I can’t keep lavender alive…”
This was, I must say, a huge relief for me: I was not alone in carrying this shameful secret: repeatedly failing to keep one of the easiest plants in the garden, lavender.
This prompted me to make a public coming out and share with eager gardeners this specific know-how: how to fail at growing a lavender in 5 lessons!
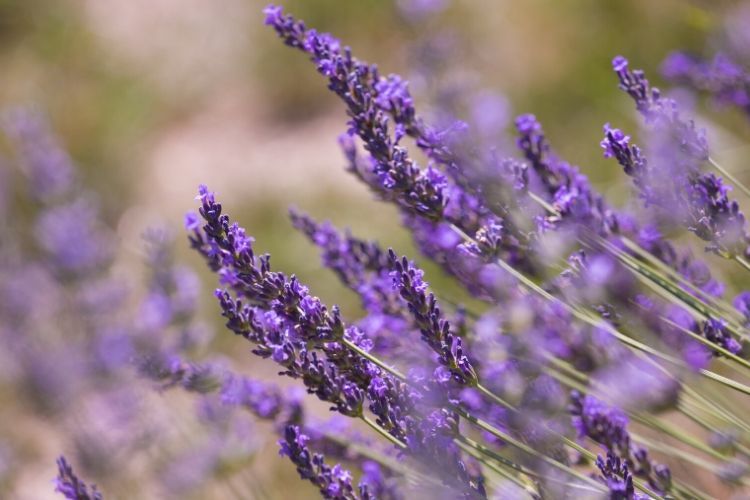
Of course, not everyone is on equal footing: those who, like me, are fortunate enough to live in a cold, rainy climate with heavy soil will find it much easier to successfully fail at growing lavender than those unfortunate enough to live in the sunny climes of Provence.
However, by carefully following these simple and practical tips, accessible to all, I am sure many will also manage to kill their lavenders.
Lesson 1: to kill lavender, smother it!
Lavender comes from the South; it loves southern, stony, well-drained soils. It hates heavy soils that rot its roots in winter, which is why good gardeners prefer to plant in spring rather than autumn.
It can be planted in heavy soil, but requires drainage work: a large planting hole, at least twice the size of the pot, adding gravel or river sand, or, if necessary, turf.
So, to fail at growing your lavender, plant it at the wrong season (between November and February, for example) in heavy clay soil, which you have not lightened or loosened, ideally in a hole that is too small (if necessary, give a few frustrated heel kicks to make it fit);
This is a very reliable method for failing at lavender, which I have practiced extensively in our potato fields up North.
A rather perverse variant of this method is to put your lavenders in the position of gladiators in the circus games: plant lavenders very close together, say 15 cm apart: they will shade each other, and, by fighting, weaken one another, and part (at least) of your plants will end up dying, while the others will blacken, which is quite an effect.
Lesson 2: to fail at lavender, drown it!
Lavender does not appreciate repeated excess watering: it is a Mediterranean climate plant.
To kill lavender, water abundantly, not only after planting (which it likes, like all plants), but also throughout its (short) life: it will disappear by the first winter. To speed up the killing, create a watering basin that will keep the root ball moist during the dreary season, guaranteed success!
Lesson 3: to fail at lavender, put it in the shade
Lavender loves the sun… In the shade, it withers, stretches its branches sadly in search of light, flowers little or not at all, and dies quickly.
By planting in the shade (a true marked shade, it can flower quite well in light shade), you will achieve a result similar to the previous lesson. You can even combine lessons 1, 2, and 3 for a better result.
Lesson 4: to fail at lavender, overfeed it!
Used to poor soils, lavender behaves very poorly in rich environments: it eats too much, grows and grows… And very quickly collapses lamentably, leaving an awful black hole in the centre.
This lesser-known method is particularly recommended for sensitive souls; it allows you to fail at growing lavender (and many other things) in good conscience, through excess care: plant it in rich potting soil, generously amended with compost, supplemented by regular overdoses of fertiliser, preferably chemical: you may not kill it, but you will surely give it a rather monstrous appearance of a Chernobyl plant.
Generally, it is enough to plant poorly to fail. However, for safety, in case your lavender shows resilience, here is a maintenance tip:
Lesson 5: to fail at lavender, prune it regularly in a 'para' style
Like almost all evergreen plants, lavender does not like heavy or short pruning.
Of course, you can safely cut the dry flower spikes once a year (and make lovely fragrant bouquets), or a few overly exuberant young shoots. But do not prune the wood: it never regrows on old wood!

So to fail at lavender, prune it brutally and as short as possible: at the very least, you will make it look considerably ugly and prevent it from flowering properly; at worst, you will kill it. It is worth noting that even in Saint Rémy de Provence, this method works well.
Bonus tip for those who have had the courage to read everything, with a lazy method that I particularly recommend for its simplicity: you can also fail at growing lavender in a pot. Simply plant it in a small pot (say less than 20 cm), and do not water it. Admittedly, lavender does not like excess watering, but it is not a cactus: it needs water, which it seeks through a deep root system. For this reason, it does not settle well in a small pot (and above all, hates being moved).
You can therefore fail at it by simply keeping it in the tiny pot it came in when you bought it, while forgetting to water it!
Finally, to console the clumsy who, even by following these wise tips, still manage to keep a lovely fragrant lavender in the garden: even under good growing conditions, sun, well-drained soil, moderate watering, lavender does not age very well. It rarely lasts more than 10 years, especially in our Northern gardens, and generally becomes quite unattractive after 5 years: you will likely have the opportunity to see it die one day!
Discover everything you need to know about lavender to choose well, succeed in its cultivation, propagate it, or even dry it.
A friend of mine, who is also a well-known gardening columnist (and an excellent gardener, which makes for two significant differences between us), recently told me: “It annoys me, I can’t keep lavender alive…” This was, I must say, a huge relief for me: I was not alone in carrying this shameful secret: repeatedly failing […]
"I pee on the lawn to water the ladybirds..." Do you know the song? Well, it turns out it's making a comeback, and there's increasing talk about using urine in the garden. To be more precise, we're revisiting the idea that peeing in your garden to help plants grow (or just for fun!) was a common practice in the past, especially in rural areas.
But is it really effective? Can human urine replace our usual fertilisers? Is watering with pee a cure-all? Does it not bring diseases? Let's check all this out!
Urine as a fertiliser: a concentrate of nitrogen
Human urine is naturally rich in nitrogen. It can actually be used to correct nitrogen deficiency. To be precise, urine contains urea, which is reduced to ammonia gas NH3 (that's the smell!). This can, depending on temperature and soil biology, be further reduced to ammonium NH4+, which is good; or oxidised to nitrate NO3-, which is less desirable... But both of these chemical compounds can be directly absorbed by plant roots. They are part of what is known as the nitrogen cycle.
Urine also contains phosphorus, potassium, sulphur, magnesium, and various other trace elements.
The composition varies depending on the person's diet: nitrogen content ranges from 3 to 6 g/litre, while phosphorus and potassium average around 1 g/litre.
All this makes urine a balanced and readily absorbable fertiliser for plants.
But, like anything, it must be used correctly!

Urine in the vegetable garden
In well-amended soil (using compost or manure), the use of liquid fertiliser is not really necessary. However, urine can be used diluted at a rate of 100 ml in 1 litre of water, every two weeks during the plant growth phase.
Be careful not to give this "fertiliser" to seedlings or very young plants. They will then produce stems and foliage at the expense of the root system, causing problems later on. These plants will struggle to access water and nutrients and will be less resilient.
Urine in compost
Urine in compost accelerates the decomposition of organic matter.
However, in high doses, urine is toxic to earthworms, compost worms, and other living organisms in the soil. So, be sure to use urine sparingly or dilute it at a rate of 250 ml of urine to one litre of water at a minimum.
Urine in other parts of the garden
Urine is a powerful nitrogen fertiliser. Overdosing in certain areas of the garden will encourage the proliferation of nitrophilous plants: nettles and bindweed at the forefront. In some extreme cases, you could even "burn your plants". So, caution is advised...
If care has been taken to provide fertilisation at planting and to maintain a living and healthy soil, nitrogen fertiliser is rarely needed for ornamental plants: trees, bushes, and even perennials.
In pots or containers, however, it can be a good alternative to regular liquid fertilisers. Again, remember to dilute the urine: 50 to 100 ml of urine per litre of water. And only apply your mixture (or pee...) once every two weeks.

Urine? Yuck?
It's mainly in the West that we have reservations about using human and animal excretions. Urine is frequently used in Africa, Asia, and South America. Numerous agronomic studies are underway to quantify the real impact of this practice: so far, the results are more than encouraging.
Pee, it stinks!
Urine, even diluted, has an unpleasant smell during its decomposition. Storing it for a week will remedy this issue. On a healthy and balanced soil, the decomposition of urine will occur very quickly, which will limit the duration of this unpleasant odour.
Pee, it's not clean!
Urine is naturally sterile in a healthy person. However, avoid using the urine of someone with a bacterial infection in the vegetable garden: note that relatively long storage (at least a month) will eliminate any potential pathogens. Conversely, also avoid using urine from someone on medication, especially antibiotics.
Note: it should also be noted that urine can contribute to excessive salinity in sensitive soils.
Conclusion
If we can get past the repulsion of using our own excretions, urine can prove to be an effective fertiliser. However, keep in mind not to use it pure, not too often, and only when necessary. In short, the usual precautions for a genuine fertiliser! It's also ideal to store urine beforehand to avoid pathogens and significantly reduce the smell.
“I pee on the lawn to water the ladybirds…” Do you know the song? Well, it turns out it’s making a comeback, and there’s increasing talk about using urine in the garden. To be more precise, we’re revisiting the idea that peeing in your garden to help plants grow (or just for fun!) was a […]
Planting trees to combat climate change may seem like a very simple solution. Fortunately, it is!
At a time when more trees are being cut down than planted, every tree you can plant in your garden will prove beneficial in various ways.
One of the causes of climate change is the excessive release of carbon dioxide (CO2), so the most obvious solution that comes to mind is to plant trees, as they absorb this CO2.
Why planting trees?
Plants in general, but trees in particular, have an incredible capacity to absorb CO2. This is simply a result of photosynthesis. The tree absorbs CO2 from the air and transforms it into carbon and oxygen. The oxygen is released into the air for our benefit, while the carbon is stored and gradually released. Forests thus represent the second largest carbon sink after the oceans.
But that's not all; trees are also useful for:
- regulating temperature and humidity: they are true living air conditioners;
- filtering wind and dust, thereby improving air quality;
- fixing certain pollutants such as pesticides or heavy metals;
- improving soil by adding biomass (wood, leaves...) and combating erosion.

Which trees to plant to combat climate change?
1) Native trees first
There are two huge advantages to planting native species:
- they are perfectly adapted to the climate and soil
- they nourish and provide shelter for local wildlife
The list of native trees is long, but here are a few examples:
- For the North: Field Maple, Glutinous Alder, Downy Birch, Common Hornbeam, Male Dogwood, Common Ash, Holly, Trembling Aspen, Field Elm...
- For the South: Strawberry Tree, Montpellier Maple, Corsican Alder, Chestnut, Olive, Holm Oak...
- For the mountains: Hop Hornbeam, Mountain Elm, Mountain Pine...
- For the Coast: Tamarisk, Sea Buckthorn, Bohemian Olive, Maritime Pine, Field Maple...
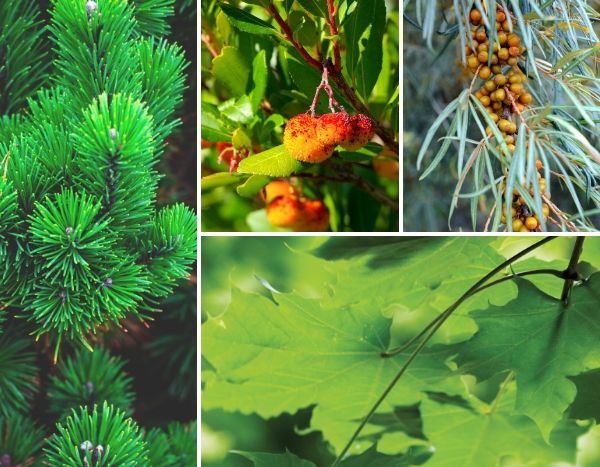
2) Natives, but not only...
Some natives are suffering from climate change while others, more exotic or southern species, seem to be making their way north. For instance, Pines, across all species, are suffering from repeated attacks by Pine Processionary caterpillars. Meanwhile, Common Beech, spruces, and even Pectinate Fir can no longer withstand our hot and dry summers. All these trees have also become less resistant to diseases.
On the other hand, some trees are seeing their original range shift. This is not surprising: it has always been the case! Plants grow where they thrive best. This is why we have issues with certain invasive exotic plants that turn out to be more suited than natives in some natural environments. Or the fact that oak forests are regaining ground over beech forests as they did... only two thousand years ago.
Some examples of trees that have adapted to climate change
- Holm Oak - Quercus ilex: once confined to the Mediterranean climate, it is now moving further north. It now thrives along the Atlantic coast up to Brittany and will continue its progression towards the centre.
- Turkey Oak - Quercus cerris: previously only found in the southeast of the country, it is now moving categorically north, even reaching Belgium...
- Pubescent Oak - Quercus pubescens: a species particularly adapted to drought that has been thriving in recent years.
- Montpellier Maple - Acer monspessulanum: often found in nature alongside Holm Oak, it is following the same trend, progressing up to Vendée.
- Flowering Ash - Fraxinus ornus: a cousin of Common Ash but significantly less sensitive to ash dieback, it is gradually moving away from its native Corsica and Maritime Alps to further north.
- Pride of India - Koelreuteria paniculata: native to China and Korea, this tree proves to be perfectly resistant to drought and urban pollution.
- Maritime Pine - Pinus pinaster: originally found around the Mediterranean and along the coast, it continues its spread westward and northward.
- Black Locust - Robinia pseudoacacia: this exotic tree is gradually becoming the "king of the forest". It withstands heat, drought, and flooding and is adapted to poor soils as it has the ability to fix nitrogen. It is thus gradually taking the place of other tree species.
For your information: the National Forestry Office is currently conducting trials of Bornmuller Fir (Abies bornmuelleriana) in forests, a species more suited to drought than Pectinate Fir. Meanwhile, in Belgium, trials are being conducted in forests with Turkey and Pubescent Oaks and even... Corsican Pines.
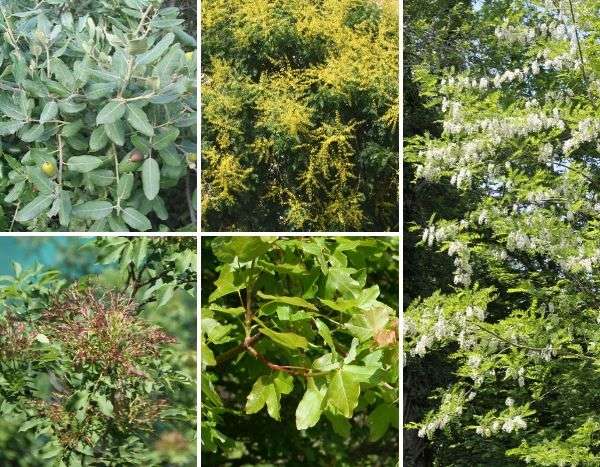
General characteristics of trees resistant to climate change
Trees that exhibit natural resistance to drought and high summer temperatures often share common characteristics:
- Small and numerous leaves: the larger the leaf, the more water evaporates. Small leaves are thus a result of adaptation to drought;
- Waxy and/or fuzzy foliage: if the leaf is thick or equipped with small hairs, it will retain water more effectively;
- Next, it is important to check the tree's region of origin: if it originates from the Scandinavian taiga, it is likely to suffer in summer... Conversely, mediterranean and central European species will be particularly well-suited.
In conclusion
Due to the accelerating climate changes in recent decades, we will need to reassess our approach regarding native species adapted to regions. Some, whose survival requires moisture and distinct seasons, will disappear in favour of less water-demanding species that do not require harsh winters. In any case, planting trees will be beneficial as long as we choose species that can thrive optimally with minimal care. So in conclusion: let’s plant trees!
To learn more
Some researchers express doubts about the effectiveness of tree planting to combat climate change. In reality, it is mainly the notion that CO2 is the sole culprit of climate change that they question, as well as the belief that we will (according to them) need even more agricultural land to feed the population. The ideal would also be to stop deforestation rather than just replanting a few trees here and there. If you wish to learn more and form your own opinion on the matter, read this article (in French): Forests: a solution to the climate crisis?
And if you haven't seen it yet, here are the main results of our survey on climate change and gardening.
Planting trees to combat climate change may seem like a very simple solution. Fortunately, it is! At a time when more trees are being cut down than planted, every tree you can plant in your garden will prove beneficial in various ways. One of the causes of climate change is the excessive release of carbon […]
If there is one plant that is the subject of tons of misconceptions, it is the climbing ivy or Hedera helix. It all seems to have started with Pliny the Elder in the first century AD, who saw this charming climber only as a destroyer of walls and trees, even going so far as to label it a “tree executioner.”
He must have been in a bad mood the day he came up with such nonsense... because, I assure you, ivy, this beautiful native climbing plant, does not deserve this ire, this categorical rejection.
So let’s debunk 5 misconceptions about ivy!
1) Ivy is a parasitic plant that kills trees
The only notion that is not false in this phrase, which we hear or read everywhere, is: “ivy is a plant.”
It is not a parasite, as the tree merely serves as a support. Ivy does not “suck” nutrients from your tree because its climbing roots are only used to cling on. It has its own roots and performs its own photosynthesis. Therefore, it does not need to parasitise anyone to survive.
And ivy does not kill your trees!
When I lead nature walks, as soon as we pass under old picturesque trees, I am often told: “Yes, but sir, my tree died just after being invaded by that ivy pest!”
I then reply: “ivy only used your tree as a support because it was no longer growing in width as it was itself at the end of its life or at least quite old.”
In reality, ivy can live for many years, sometimes several hundred, so it often survives after the death of its support. This is why people think that ivy has killed the tree when, in fact, the tree has simply died of old age and ivy has outlived it.

Ivy protects the trunk from frost, excessive moisture, and even some nibblers like deer. Some compounds produced by ivy even have fungicidal properties, which helps reduce the risk of fungal disease for the tree. Moreover, ivy flowers at a different time than its support: there is therefore no competition for pollination. The leaves of ivy fall and enrich the soil at a different time than the foliage of the supporting tree, which is another benefit for the latter. Ivy will not “take the sun” from the tree either, as it will only grow on the main trunk and some large branches. In short, this is not parasitism but rather mutualism, as both parties benefit.
Did you know? Ivy continues to grow after the death of the tree. While this combines two extremely rich environments for biodiversity: ivy + standing dead wood, it can become a source of danger as ivy will provide a foothold for the wind while the dead wood can break at any moment. It’s up to you to decide whether such an association is worth keeping in the garden or if it should be pruned back.
2) Ivy eats houses
No. Ivy does not damage sound walls. Even on walls in poor condition, all it will do is slightly degrade the joints. But above all, it provides physical protection against moisture and will improve the base of the walls. It offers thermal insulation during winter and summer, which is not insignificant, as it can gain (or lose) two to three degrees for our interiors.
However, two caveats: do not let ivy climb too high to your tiles. They could be displaced by vines passing underneath them. Also, be cautious with earth walls; ivy may take this for “true” earth and allow its roots to grow inside.

3) Ivy attracts spiders
And? Did you know it also attracts a host of insects, particularly the last pollinators of the season, as ivy is one of the last to flower, around October, in nature or the garden? The insects associated with or living off ivy are extremely numerous: wild bees, hymenoptera, hoverflies, flies, rose beetles, and even butterflies. The Clouded Yellow, a butterfly in sharp decline, enjoys hibernating within ivy, and it is not alone. It’s no surprise, then, that spiders are also very present...
Ivy also provides shelter and food for many birds: sparrows, blackbirds, tits, thrushes... The berries are particularly rich in lipids and help frugivorous and omnivorous birds survive in winter. Ivy also serves for the nesting of the Wren, kinglets... and as roosts for some raptors like the Tawny Owl or the Long-eared Owl.
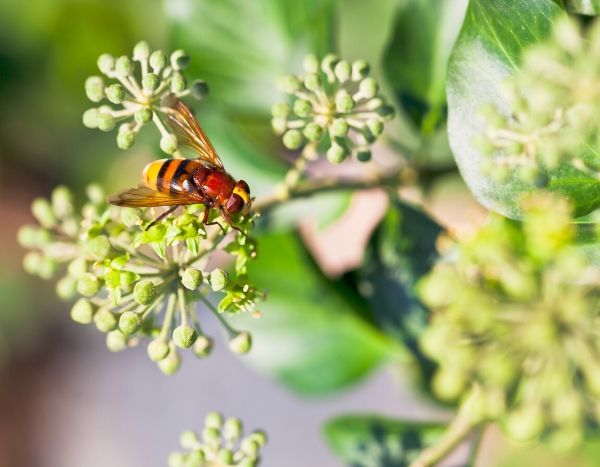
Ivy also nourishes certain mammals such as dormice, martens, the hazel dormouse, and even... provides shelter for some bats.
Removing ivy means eliminating an entire ecosystem!
4) Ivy is sad
No. Or perhaps we have different definitions of sadness... Ivy, as we have seen above, is teeming with life but is also a plant that remains attractive all year round thanks to its evergreen foliage. Ivy is cheerful because there are superbly coloured varieties: variegated with cream, white or yellow or with more or less lobed foliage. It can be used as ground cover, in topiary, to dress up unsightly elements or fencing... Ivy has a thousand and one uses in the garden.
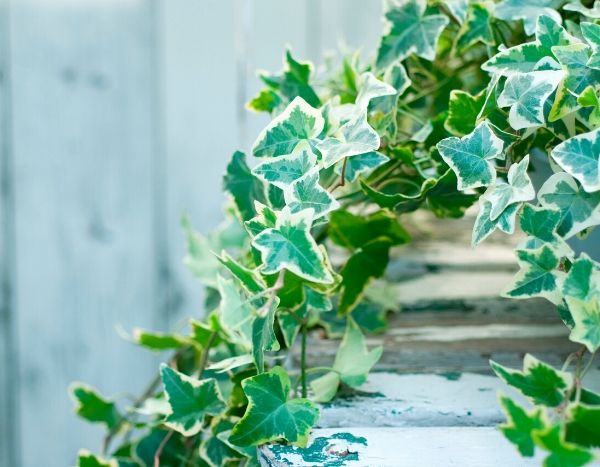
5) Ivy is useless
Come on... In addition to everything we have already discussed, ivy serves many purposes:
- It protects the soil in forests or your garden by creating a cover that maintains moisture and a certain coolness. It thus helps reduce soil erosion and protects soil fauna.
- It is a medicinal plant known since ancient times: antitussive, antispasmodic, purgative, and used in anti-cellulite ointments. However, be careful not to ingest the berries, which are toxic.
- Ivy is capable of purifying the air, particularly by capturing dust or other large particles.
- You can even make laundry detergent from it thanks to the saponins contained in the leaves.
- ...or crowns to adorn the heads of our children.

Conclusion
Therefore, ivy is much more than just a simple climber. It has numerous aesthetic and ecological benefits. It can be planted as ground cover, to dress up unsightly elements, or to brighten up a wall. It proves to be a resilient plant, grows quickly in the shadiest spots, and is very easy to propagate. In short, let your ivy thrive, or better yet, plant some! A symbol of longevity among the Celts, it is certain that ivy will outlive you...
Finally, discover our complete guide on ivy!
If there is one plant that is the subject of tons of misconceptions, it is the climbing ivy or Hedera helix. It all seems to have started with Pliny the Elder in the first century AD, who saw this charming climber only as a destroyer of walls and trees, even going so far as to […]
You may have noticed this summer that, with the nice weather, naturalists have made a bit of a comeback, particularly on social media... And, as every year, a certain category of them has taken a stand against an exotic plant. This year, it’s the Buddleia, known as the “butterfly bush,” that is particularly the subject of their ire. Invasive? Dangerous for butterflies?
The debate is simple, classic, but effective:
“You’re nothing but villains who are killing nature!” (the botanists to the horticulturists)
“That’s not even true!” (the horticulturists to the botanists)
Welcome to the playground! And here I am, right in the middle, trying to calm the troops from both camps.
The debate on the Butterfly bush, in detail
We are hearing, reading, and seeing more and more articles, Facebook posts, or television reports on the subject: “Buddleias kill butterflies because the nectar contains caffeine.” These publications generally share a common trait: they treat information superficially and do not delve into the details, all while, of course, citing no sources...
As it stands, it seems that the nectar of Buddleia flowers contains a substance similar to caffeine that could irresistibly attract butterflies, which may end up exhausting themselves and ultimately dying.
I have taken care to write this sentence in the conditional. Indeed, for nearly twenty years, I have heard everything about this plant. Most of the facts (which I will outline below) are established, while one point remains eternally subject to debate: the infamous toxicity of the flowers that has the effect of “drugging” butterflies.
Interestingly, whenever we talk about this potential toxicity of Buddleia flowers, no one mentions any serious scientific publication. Notice how amusing that is...

Scientifically established facts
- Buddleia davidii, the type species, is an invasive plant, an EEE for Exogenous Invasive Species. It tends to thrive in areas disturbed by humans, as it is a bush that prefers poor, stony, and somewhat disturbed soils (it is native to the arid mountains of China): spoil heaps, railway edges, industrial wasteland, abandoned old car parks… but also in particularly vulnerable natural environments such as the silicicolous lawns of Normandy. This is normal, as it is a pioneer species that “prepares the ground” for other plants to establish later. We have other plants in our native flora that can perform this type of work, but Buddleia is remarkably effective since it has a short lifespan: hence its invasive character. Once other plants grow on the substrate created by Buddleia over time, they will shade it, and Buddleia, primarily a light-loving species, will disappear. Vegetation can then develop to the climax, the ultimate evolution of a natural environment: an oak forest, for example. The only downside is that Buddleia does indeed take the place of a useful native plant for wildlife, particularly for insects that have mostly co-evolved with endemic species. For the record, an exotic plant is always less interesting for feeding the larvae and adults of insects.
Nota bene: if you have the type species at home and are concerned about its invasive nature: prune the bush heavily just before seed formation! The problem will be solved.
- Buddleia contains aucubin and other toxic terpenoids by ingestion in its leaves and stems. This is why nothing and no one consumes the leaves. This is the second argument put forward by naturalists: “If butterflies lay eggs on Buddleia, the caterpillars won’t be able to feed.” In fact, this would be a gross misunderstanding of lepidopterans and especially a denial of millions of years of evolution. A butterfly is genetically programmed to lay eggs only on the plant or family of plants that its offspring need. And nowhere else! However, it is true that if in your garden you only have a closely mown lawn, a hedge of thujas, and… a single Buddleia: well, butterflies won’t be able to lay eggs. So, you will have butterflies the first year on your bush and then… nothing. In a garden with a greater profusion of plants, butterflies will quickly visit the flowers of Buddleia and then go lay eggs on nearby plants depending on the butterfly species: nettle, bramble, grasses, buckthorn, legumes, brassicas, umbellifers…
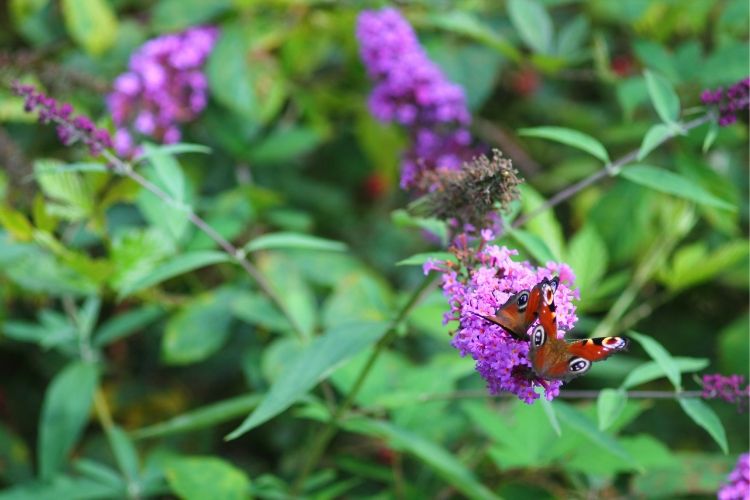
Nota bene: some sources mention that the caterpillar of the Death's-head Hawkmoth and that of the White Butterbur Hawk-moth have adapted to feed on Buddleia leaves in the absence of their true host plants. "Nature always finds a way..."
- The nectar of Buddleia davidii, although produced in quantity, is low in sugar compared to other flowers. It is therefore less nourishing for insects. Note that only lepidopterans with a proboscis can feed on this nectar. Some bumblebees manage to cut the corolla to access some of it. You may also occasionally see a few hoverflies and even one or two wild bees on the flowers, but that is rarer.
- The majority of Buddleia davidii varieties sold commercially are sterile, contrary to what public opinion seems to think. So there’s no need to berate the poor person stacking pallets in your local garden centre for selling Buddleias. Only the type species is invasive, and it is no longer for sale.
- Other species and hybrids of Buddleia pose no problems: B. globosa, B. alternifolia, B. nivea…
What to replace Buddleia with?
If you wish to act on the principle of precaution and avoid planting a “butterfly bush,” then do so! But replace it with native or semi-native plants (Eastern Europe) and leave wild areas in your garden where you will intervene very little. This way, you can truly do your part to try to save what remains of butterflies and avoid falling into general hypocrisy. The classic example being the Sunday moralists who will scold you for having a Chinese plant in your garden but who eat tomatoes in winter, drive a diesel 4X4, and fly four times a year. In short, they are often just big talkers... Let them talk and let’s move forward!
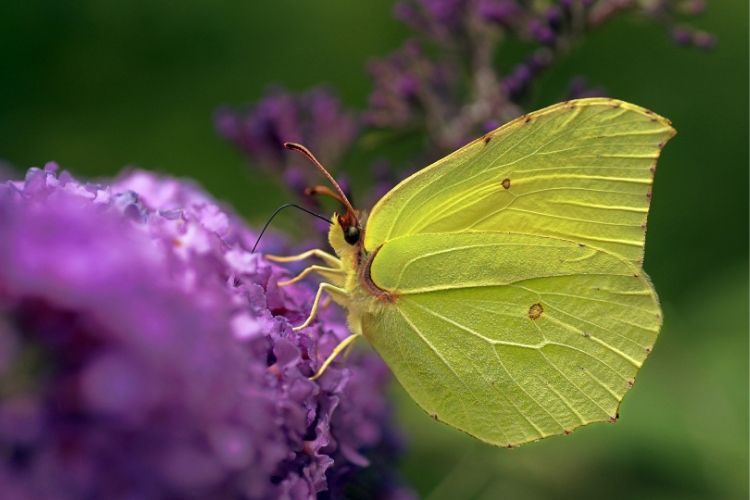
As a conclusion
I do not cast stones at naturalists. Far from it... Their fight is just and necessary. In reality, if they sometimes seem to be acting in bad faith or downright sectarian: it is primarily out of necessity! For decades, no one has listened to them on environmental issues. They have therefore decided to adopt a more easily understandable language for the general public by using simple and precise advice, here in our example: “Do not plant and uproot all Buddleias!” Given what is happening these days, they have no choice but to raise their voices, and too bad if in the process other Buddleias will suffer...
However, it is essential to take the information circulating without a filter on the internet with a grain of salt and to do your own research. Perhaps the nectar is indeed a drug. Perhaps not... This information has been circulating for years, immediately denied by another research team, and then no... or maybe... it depends... In short, we are still only at the speculation stage.
I have personally conducted surveys on diurnal and semi-nocturnal lepidopterans (like the Hummingbird Hawkmoth) for three years at my home. I have observed a significant increase in the number of butterflies as well as greater diversity in species. Yet, I still have a Buddleia. But it is surrounded by several areas of paradise for insects, as I have planted numerous native (or non-native) plants and left some wild areas. So, this bush doesn’t seem so bad after all.
As I write these lines, I see only one Red Admiral on my "butterfly bush" while a wild fennel, a beautiful patch of oregano, an Eryngium planum, and an Hylotelephium spectabile seem to be "the place to be" for lepidopterans at the moment.
I encourage you to also embark on the study of butterflies or insects in general, to draw your own conclusions, and to maintain a critical mind no matter what happens.
You may have noticed this summer that, with the nice weather, naturalists have made a bit of a comeback, particularly on social media… And, as every year, a certain category of them has taken a stand against an exotic plant. This year, it’s the Buddleia, known as the “butterfly bush,” that is particularly the subject […]
Agapanthus are spectacular flowers often found in seaside gardens, particularly along the West Coast and in Brittany. In summer, they display beautiful blue, white, or mauve flowers in umbels that are both graphic and elegant.
As a worry-free perennial, the Agapanthus thrives in full sun in ordinary, well-drained soil that is not too dry in summer. Its lightness and ease of cultivation are real assets for creating a flowering bed or a pot.
Historically, their use in gardens was limited by their lack of hardiness and the small number of varieties... Today, Agapanthus now come in many varieties, and some even show good cold resistance, which presents another challenge: choice!
To help you, here is a selection of 7 reliable Agapanthus that will suit all gardens, regardless of their size, style, or climate.
Agapanthus Navy Blue (Midnight Star): the hardy one
The Agapanthus 'Navy Blue', also known as Agapanthus ‘Midnight Star’, is one of the most popular Agapanthus. This variety ranks at the top for best rating and best seller at Promesse de Fleurs, and you'll soon see why!
Its light umbels bear an intense navy blue. They appear abundantly from July to August. Its light green ribbon-like foliage is deciduous, but this variety is one of the hardiest Agapanthus, with a resistance down to -10°C in well-drained soil.
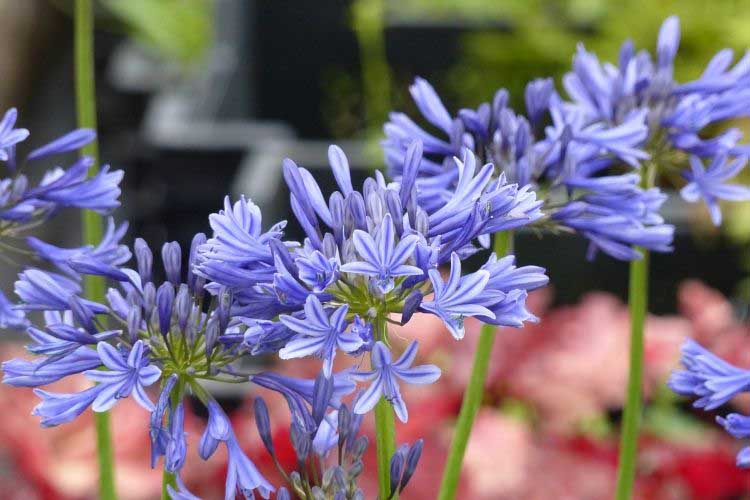
The hardy and popular Agapanthus Navy Blue
Vigorous and medium-sized, reaching 60 cm in height and 40 cm in spread, it adapts well both in pots and as a border plant.
→ To learn more about this variety, check out our article: "Agapanthus 'Navy Blue': a cold-resistant beauty"
Agapanthus Blue Giant: the iconic giant
The Agapanthus Blue Giant is a must-have perennial in Brittany! Often planted, it is valued for its very large dark blue flowers measuring 18 cm in diameter that can reach up to 1.5 meters in height. Its height makes it a remarkable plant for borders and backdrops. It creates significant, elegant vertical lines. You can also enjoy its beautiful large flowers as cut flowers.
Vigorous and robust with fleshy roots, it withstands temperatures down to -12°C.
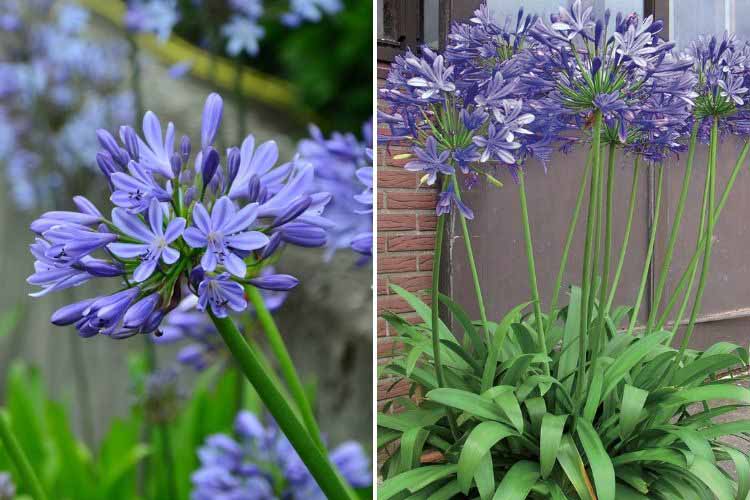
The Agapanthus Blue Giant reaches great heights
Agapanthus Albus: the essential one
Ideal for white gardens, the Agapanthus umbellatus Albus, also known as Agapanthus africanus albus, is distinguished by its white flowering. Its umbels of 15 cm in diameter rise to 1 meter above a ribbon-like semi-evergreen foliage. The umbels consist of snow-white flowers shaped like campanulas. Not very hardy, it tolerates temperatures down to -5°C, limiting its use to mild climates.
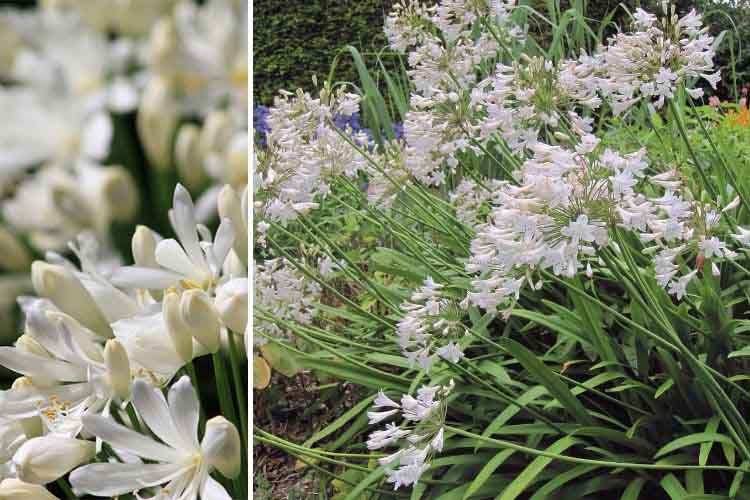
The white-flowered Agapanthus: Agapanthus albus
Agapanthus Royal Velvet: the new star
Original and recent, the Agapanthus Royal Velvet is a new star among Agapanthus due to its intense, trendy colour described as 'ultra violet'. It produces a stunning effect with its unique umbels of 10 to 12 cm in diameter, featuring a deep violet colour streaked with very dark blue-violet. The umbels rise to 80 cm above the ground, clearly above the (deciduous) foliage that forms a lovely clump. The elegance of the Agapanthus Royal Velvet is undeniable!
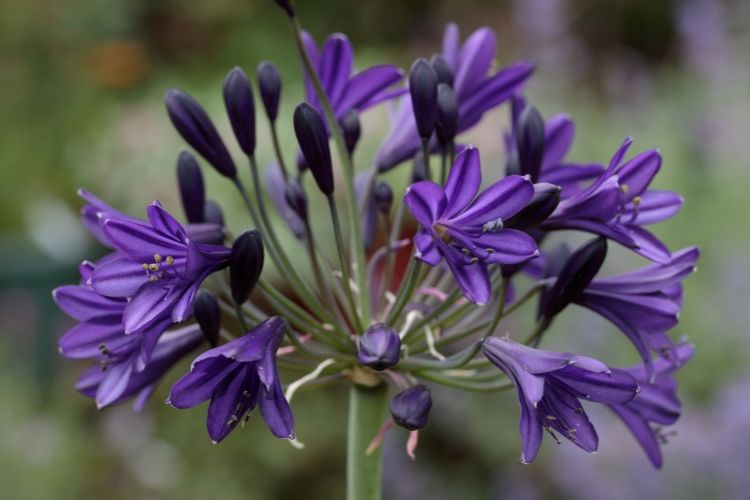
The Agapanthus Royal Velvet, a new variety with ultra violet flowers
Its intensely coloured flowers make it ideal for contemporary gardens as well as for exotic scenes featuring orange flowers like kniphofias, cannas, or hemerocallis.
In addition to its original colour, this variety boasts many advantages with its abundant flowering, robustness, and cold resistance down to -10°C.
Agapanthus Double Diamond: the compact one with double flowers
Recent, the Agapanthus Double Diamond is a variety that combines two qualities: a compact habit and generous flowering. Its main asset lies in its pure white double trumpet-shaped flowers. Grouped in umbels, they measure 10 cm in diameter and appear above a clump of persistent leaves in mild climates. Its compact habit (35 cm high and 30 cm wide) makes it ideal for pots, on terraces or balconies, as well as for borders in areas where winters are not too cold, as it does not tolerate temperatures below -5°C.
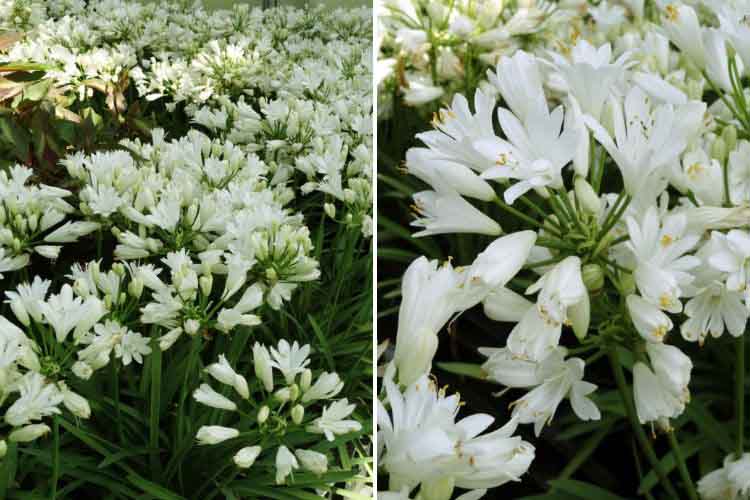 The Agapanthus Double Diamond, a small variety with generous double flowers
Agapanthus Twister: the bicolour
The Agapanthus Twister is an original variety appreciated for its bicoloured flowers. Large, up to 18 cm in diameter, its umbels consist of white flowers with a dark blue base. These two-coloured flowers provide a certain dynamism while blending the softness of the shades, accentuated by the green-grey foliage. Medium-sized, this Agapanthus reaches 60 cm in height and 50 cm in width, making it ideal for the middle of borders, behind ground-cover plants, and it can also be grown in large pots.
Finally, the Agapanthus Twister can be planted in many climates as it is one of the hardiest Agapanthus, tolerating temperatures down to -12°C.
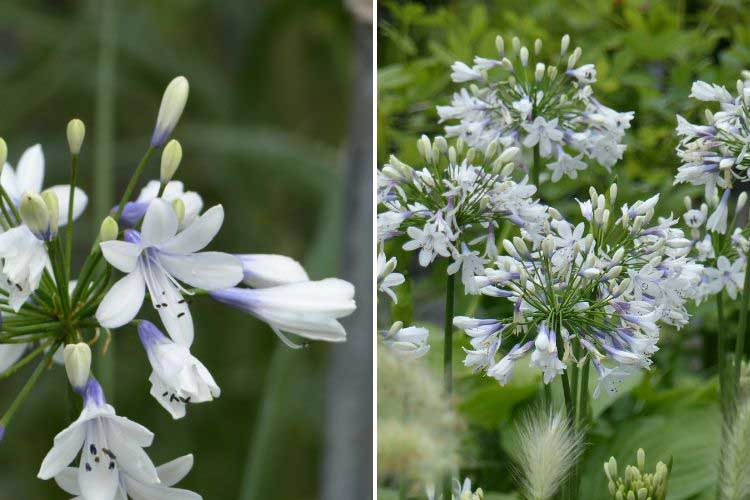
The Agapanthus Twister: bicoloured flowers, white and blue
Agapanthus Pitchoune Blue: the perfect cute pot plant
The Agapanthus Pitchoune Blue lives up to its name. All cute and small, this compact variety measures only 50 cm in height and 50 cm in width. Dwarf, it is perfect for border planting but also for pot cultivation, allowing it to be brought indoors for protection in winter, as it is not very hardy and only tolerates -5°C.
Although small, the Pitchoune Blue variety stands out for its abundant flowering. It pleasantly blooms in an overseas blue above persistent ribbon-like foliage. In the garden, it can be associated with or replaced by its "little sister" with white flowers, Pitchoune White, which offers the same qualities.
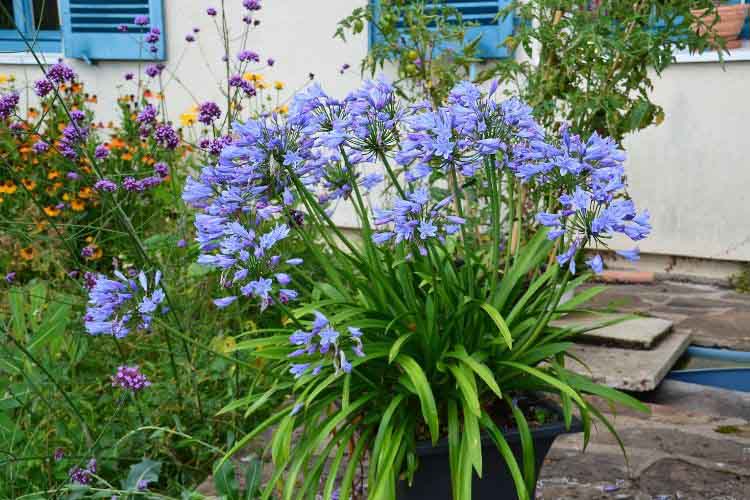
The Agapanthus Pitchoune Blue, a reliable choice, ideal for pots
Do you have other varieties to recommend? Feel free to share their names with us in the comments!
Agapanthus are spectacular flowers often found in seaside gardens, particularly along the West Coast and in Brittany. In summer, they display beautiful blue, white, or mauve flowers in umbels that are both graphic and elegant. As a worry-free perennial, the Agapanthus thrives in full sun in ordinary, well-drained soil that is not too dry in […]
Thistles, as a whole, are often associated with the field thistle (Cirsium arvense), a species more feared than appreciated. Consequently, they are relatively rarely planted in gardens. However, ornamental thistles are low-maintenance, easy to grow, and, above all, they are unmatched for adding interest to a somewhat flat flowerbed, even into winter thanks to the striking structure of their inflorescences that last for many months.
Here are our favourite "thistles" along with some ideas for pairing them.
Echinops ritro, Globe Thistle or Azure Globe
Hardy and unassuming like a camel, this perennial thistle is distinguished by its blue flowering, which is remarkable from a distance. It features green foliage with silvery highlights, spiny, from which small globe-shaped flowers emerge from July to September.
- Growing conditions: in full sun in any well-drained soil, even poor or dry - hardiness: -20 °C
Echinops are easy to pair, particularly in summer beds where perennials and grasses mingle. They are also perfect for creating a lovely blue colour scheme, here with Echinops ritro, Perovskia Lacey Blue, Catananche caerulea, and Agastache Blue Boa.
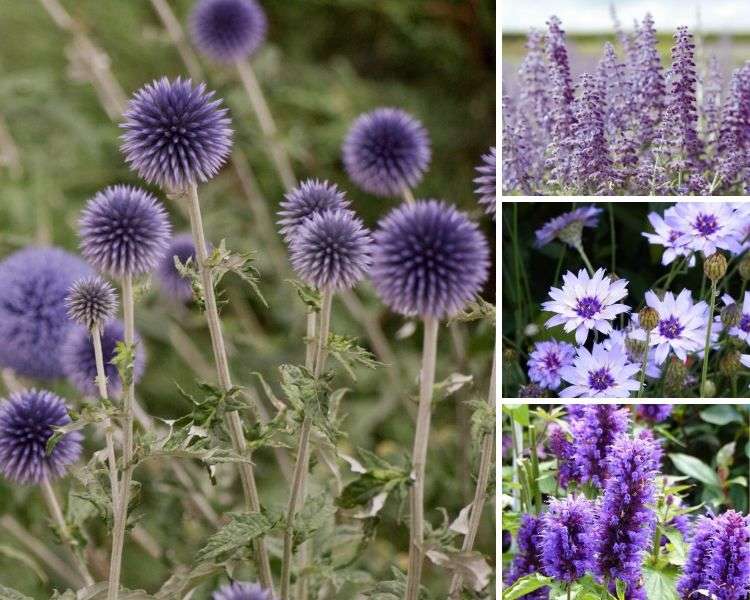
Onopordum acanthium, Cotton thistle
Monumental, the Onopordum acanthium (or nervosum) is a biennial plant that produces large purple-pink flowers reaching up to 2 metres high in July. They are perched on a hairy stem, which is adorned with greyish foliage armed with formidable thorns. Its growth is simply astonishing as it requires very little.
- Growing conditions: in full sun in any soil, even dry and calcareous - hardiness: -15 °C
More than just a companion, Onopordum acanthium is a standout. With its tall stature and graphic silhouette, it easily steals the show from surrounding plants. Nevertheless, to highlight it, feel free to pair it with Salvia verticillata Purple Rain, Achillea millefolium Lilac Beauty, and Elymus magellanicus.
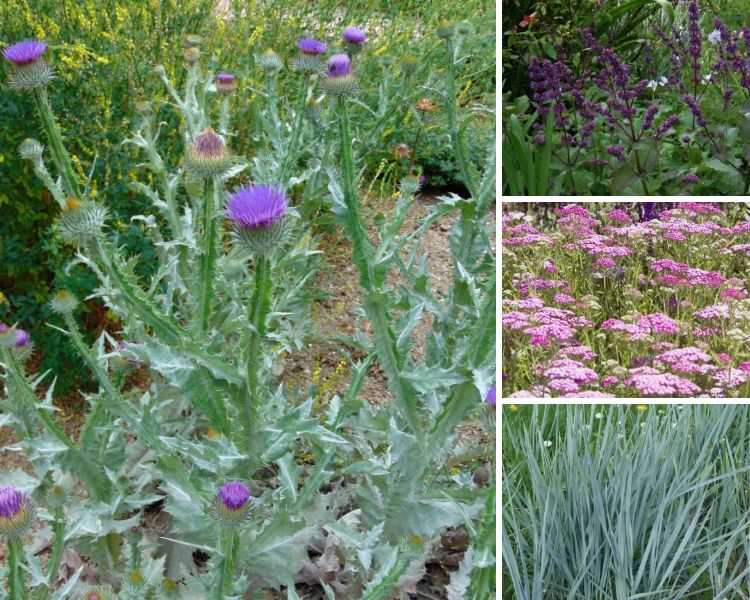
Eryngium yuccifolium, Yucca-leaved eryngium
Simply charming, this American eryngo is distinguished by its somewhat waxy, long leaves with sharp tips, as well as by its flowering. Carried on branched stems, its flowers appear in July, they are numerous, spherical, and a lovely greyish white. In a flowerbed, it is an excellent graphic plant that quickly forms a clump 1.5 metres high and 60 centimetres wide, ideal for adding a touch of white to summer beds.
- Growing conditions: in full sun in well-drained soil - hardiness: -15 °C
The yucca-leaved eryngo is the perfect plant to enliven a somewhat "flat" flowerbed. The shape of its flowers contrasts beautifully with vertically-oriented plants like agastaches, salvias, liatris, or other American perennials like echinaceas, heleniums, or the lovely Canadian Burnet. Here it is paired with Sanguisorba Red Thunder, Echinacea Hot Summer, and Liatris spicata.
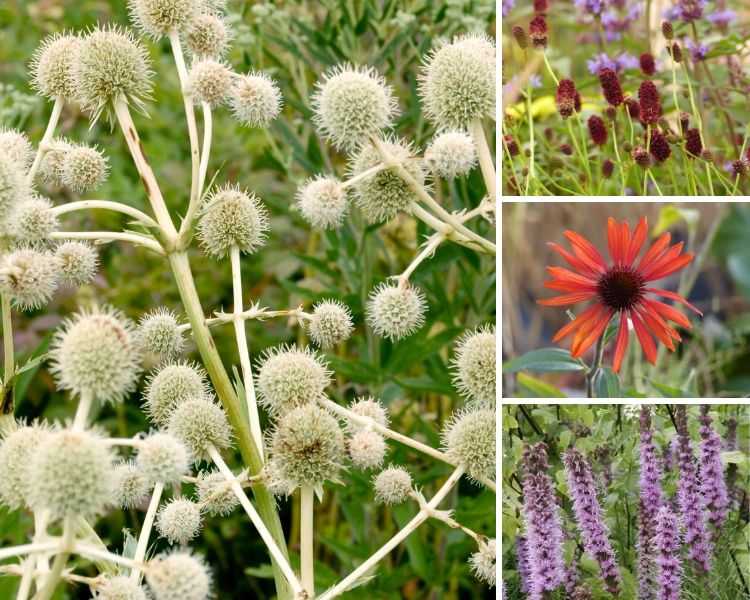
Cirsium rivulare Atropurpureum, River thistle
This thistle, perfect for heavy and moist soils, is appealing due to its purple-red flowering that begins in June. Its flowers, about 3 cm in diameter, are borne on tall branched stems that can reach a height of one metre. Graphic yet somewhat wild, this river thistle is a blessing for waterlogged soils and also for pollinating insects as its flowers are melliferous.
- Growing conditions: in full sun or partial shade in fairly rich, cool to moist soil - hardiness: -15 °C
Versatile, this thistle suits all styles of gardens: modern, English, or natural. It pairs well with Astrances, Japanese Anemones, Astilbes, Veronica, and with all grasses suited to cool or moist soils like Carex, Deschampsias, and Molinies. You can also combine it with Filipendula ulmaria, Lythrum salicaria Robert, and Carex elata Aurea.
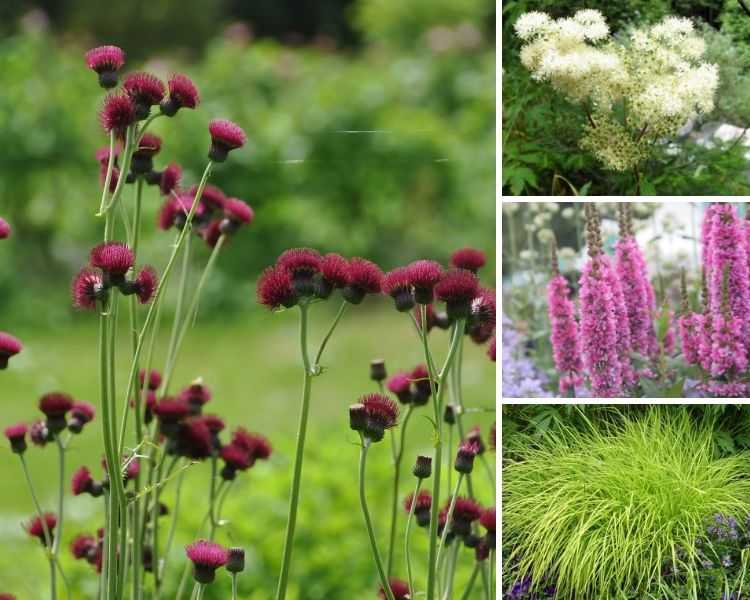
Eryngium Jos Eijking®, Blue flower eryngium
The Eryngium Jos Eijking® is a magnificent blue thistle that shines with its cobalt blue hue but also with the graphic nature of its conical inflorescences crowned with finely cut bracts. Its average height (70 cm tall and 30 cm wide) is more than compensated by its colour, which ensures an extraordinary presence that will undoubtedly attract all eyes in the garden.
- Growing conditions: in full sun in well-drained soil, even dry - hardiness: -15 °C
Stunning in a flowerbed where all shades of blue are represented, this eryngo will shine even brighter if you add a touch of bright yellow (with Crocosmia Buttercup, for example).
For a calmer and more restful atmosphere, opt for white with Gaura lindheimerii, blue with Perovskia Blue Spire, and elevate it all with a note of Achillea Red Velvet.
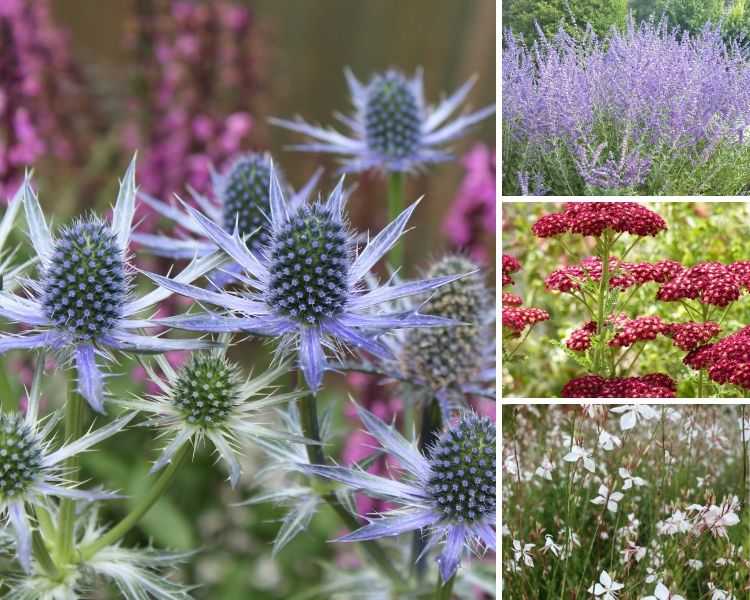
Berkheya purpurea, Purple African thistle
Large daisy-like mauve flowers with a purple centre perched on threatening spiny stems… here is the Berkheya purpurea! Curious, this perennial native to South Africa is quite hardy and particularly interesting in well-draining soil, though not too dry. We love it for its originality but especially for its 10 cm diameter flowers and its silvery-grey, downy foliage.
- Growing conditions: in full sun in well-drained soil but not too dry - hardiness: -10 °C
Perfect for a gravel garden, Berkheya pairs well with many perennials, but why not combine it with agapanthus (also native to South Africa) like Agapanthus Enigma, Monarda fistulosa Menthifolia, and to echo its dark heart, Pennisetum alopecuroides Black Beauty.
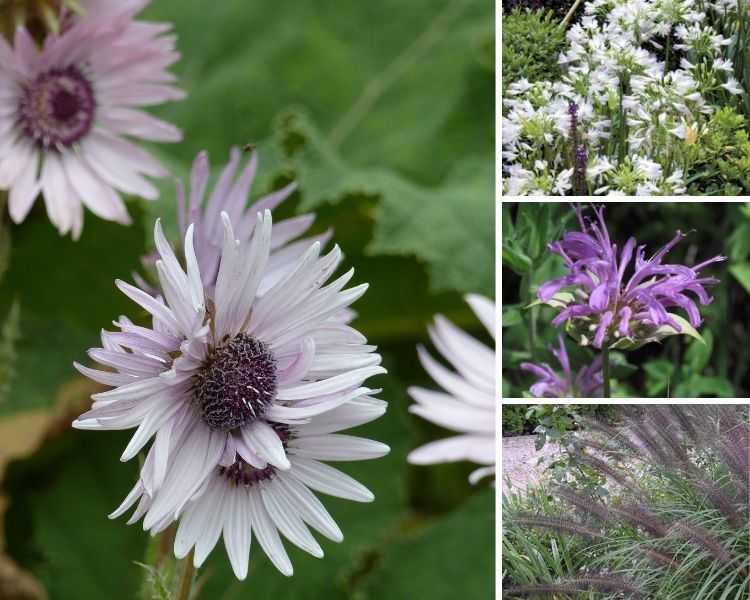
What about you? Do you have any thistles in the garden? What are your favourite varieties? Let us know in the comments!
Thistles, as a whole, are often associated with the field thistle (Cirsium arvense), a species more feared than appreciated. Consequently, they are relatively rarely planted in gardens. However, ornamental thistles are low-maintenance, easy to grow, and, above all, they are unmatched for adding interest to a somewhat flat flowerbed, even into winter thanks to the […]
Who hasn't heard of coffee grounds and their use for garden plants?
This simple, free product, accessible to all, is one of the most popular tips on the internet… that wonderful world where, every couple of days, a new revolutionary practice or a grandmother's secret (that will yield a five-kilo courgette in just seventeen minutes or exterminate all slugs within a three-kilometre radius) pops up. All of this is quickly relayed by the entire internet community with the catchphrase "everything on the internet is true!" and the few rare individuals with a critical and scientific mindset are swiftly silenced by the spectre of conspiracy theories.
So let's dare to ask the uncomfortable question: is coffee grounds in the garden fact or fiction?
After all, its benefits in the garden have been discussed for quite some time, and it would be strange if it turned out that all of this was just nonsense...

Coffee grounds and their many uses in the garden
Coffee grounds: a good fertiliser, rich in nitrogen, phosphate... and everything else...
This is the first thing that comes up when discussing the benefits of coffee grounds in the garden: their nitrogen content.
Coffee grounds indeed contain between 2 and 3% nitrogen, which isn't too bad, but this nitrogen is not directly assimilable by plants. Coffee grounds must be composted to release their nitrogen.
The potassium (0.6%) and magnesium (0.3%) levels are not negligible, as well as phosphorus (0.05%) and copper (0.03%). These various elements are, on the other hand, immediately assimilable by plants and in amounts that can prevent deficiency risks.
However, the levels of manganese, zinc, calcium, and iron are far too low to be significant.
Also note that coffee grounds contain a good amount of organic matter but a Carbon/Nitrogen ratio of 24/1. This means there isn't enough nitrogen to allow for the decomposition of carbon. In practice, applying coffee grounds directly to the soil will result in nitrogen being drawn from the soil to initiate mineralisation. This nitrogen will therefore no longer be available to plants: they will be deficient, which is known as nitrogen hunger. The decomposition of this organic matter will also occur very slowly.
In summary, coffee grounds are rich in several elements necessary for plant growth, but not more, and often less, than another amendment like well-matured compost, for example. They should also be used sparingly to avoid nitrogen hunger.
Coffee grounds: an ally in the fight against "pests"?
The caffeine that persists in coffee grounds does indeed have a repellent, even biocidal effect on pest insects but also on other beneficial arthropods in the garden, especially earthworms.
It is quite an effective repellent against ants, and thus, by extension, can help prevent an aphid invasion later on. However, placing coffee grounds at the base of plants infested with aphids will be of no use, as they do not descend to the ground.
Molluscs, including slugs and snails, are not directly affected by coffee grounds. They may be physically disturbed by dry conditions if you surround your delicate plants with a "physical" barrier of coffee grounds. Like ash, this will not work in wet conditions.
In short, the effectiveness of coffee grounds in combating pests is weak and can be risky. An excessive application can have disastrous consequences for the fauna in your garden, as well as in the compost heap. So, caution is advised...

Coffee grounds: a solution against fungal diseases?
No scientific publication has been able to separate fact from fiction regarding this claim. For now, the results from field trials are inconclusive. But if this is indeed the case, one can assume that coffee grounds "will make no difference" between fungal contaminants and the beneficial soil flora. Once again, caution is warranted.
Coffee grounds: a boon for acid-loving plants?
Coffee grounds have a pH of around 6-6.5. One might assume that once on the soil, it will acidify for the benefit of our so-called "heather soil" plants.
In reality, like any organic amendment, there will be a slight acidification during decomposition and mineralisation. But the pH will rise again to approach neutrality.
So, a "drop in the ocean," coffee grounds will not acidify the soil.
Coffee grounds: a growth inhibitor?
Research is ongoing to determine whether a derivative of coffee grounds could one day serve as a non-selective herbicide (yes, again...). For indeed, coffee grounds can significantly slow down plant growth, even kill certain plants such as solanaceous plants like tomatoes, aubergines, and even potatoes.
For now, researchers have not been able to demonstrate which compound might have this inhibitory power but have already concluded that it is not caffeine.
Coffee grounds: a compost accelerator?
As mentioned earlier, in high doses, coffee grounds, or rather the caffeine it still contains, can kill worms, particularly compost worms that are so useful.
What happens is the opposite of what we hoped. We thought we were helping the composting worms by "boosting" them a bit, and instead, they die. It's all about dosage... If you really want to activate or accelerate compost, it's better to use an addition of comfrey leaves, nettles, or ferns, or even a bit of well-matured compost. This will be safer...
In conclusion
Some benefits of coffee grounds can be highlighted: a nutrient supply, a slight repellent effect, but they are unfortunately accompanied by far too many drawbacks to be used thoughtlessly. Like all amendments, in the end.
Coffee grounds are not a miracle product but just... coffee grounds. So don't expect to see your garden transform overnight into a plant paradise just because you've sprinkled coffee grounds everywhere. No, that’s nature's job and... the gardener's.
Who hasn’t heard of coffee grounds and their use for garden plants? This simple, free product, accessible to all, is one of the most popular tips on the internet… that wonderful world where, every couple of days, a new revolutionary practice or a grandmother’s secret (that will yield a five-kilo courgette in just seventeen minutes […]
Today, I am angry! Angry but also weary because, along the roadsides, in parks, and even in gardens, it’s always the same horror film that starts again: “Chain saw massacre of trees…”
Despite the awareness campaigns by arborists, we are coppicing, pruning too severely, cutting back too short, topping, mutilating... sometimes even tearing out entire parts with a large machine... Any old how and at any time!

I could, at a pinch, forgive my neighbours who are certainly not informed. However, I find it much harder when it comes to certain professionals who are supposed to practice a trade for which they have been trained.
Why does severe pruning harm trees?
These mutilations, let’s not be afraid of the words, weaken or even kill trees by causing rot in the central wood and making them vulnerable to fungal and parasitic attacks.
The structure of the tree itself is compromised, and the production of plant hormones is "disrupted," producing new shoots in all directions. Embolisms form, stopping the circulation of sap in certain areas.
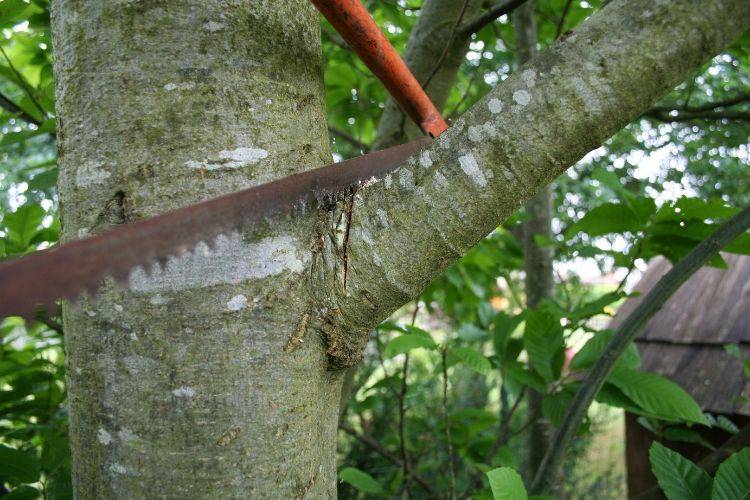
Please note: this type of pruning is also detrimental to wildlife as the tree can no longer provide shelter and cover for a good season, or even longer if the tree does not recover. Especially if the pruning occurs during the nesting period of birds: which is now prohibited by a European directive! However, in the case of pollarded trees, the tree stumps of our countryside (willows and other species), it’s actually the opposite that happens. Indeed, the tree thus (mis)treated will gradually hollow out to provide shelter for various animals (Little Owl, tits, small mammals, bats, ...), food for wood-boring insects and fungi and lichens. It can even provide a substrate for the proliferation of some plants. A true mini-ecosystem!
Should we prune trees?
"When and how should I prune?" This is the eternal question posed by many gardeners when planting a tree.
But isn’t the better question: "Should I prune?"
Without falling into anthropomorphism, a tree is a living being, and cutting off pieces of it clearly does not do it any good. Ultimately, it depends on the piece... A twig here and there: all is well. Cutting off a branch the diameter of a pipeline or removing all its branches: hello damage, as this opens the door to chaotic development and various fungal diseases.
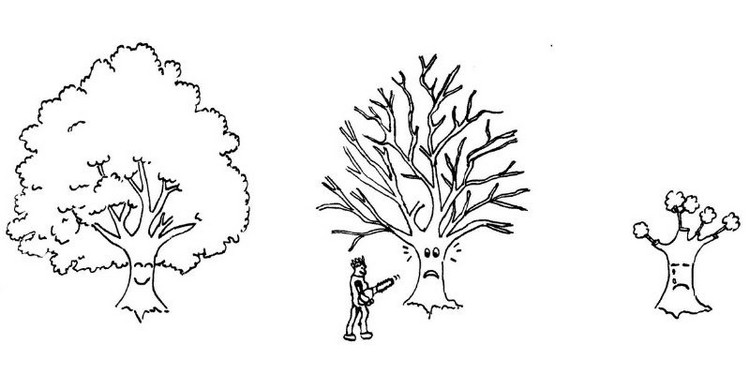
So, the answer to the question is yes... and no. A tree does not need you to live. It has been taking care of its little affairs long before Homo sapiens became this invasive and harmful species.
But...
Pruning, a helping hand for the tree
However, pruning, when done with respect for the tree and at the right time, does indeed offer significant advantages:
- Sanitary first: removing dead wood and damaged branches, lightening the canopy, ... The tree will present fewer openings to potential diseases and will be more aerated. Removing dead wood also provides a safety aspect. If the tree borders a busy road or hangs over a school, for example, it is advisable to avoid unexpected branch falls.
- Aesthetic: balancing the canopy, removing the lowest branches, ... In their younger years, trees sometimes have a "chaotic" growth (at least in our minds!), and pruning can help guide this growth to give it a more "tree-like appearance" quickly.
- Volumetric: reducing the volume and spread that a tree can take on once well established in its life. One must always consider the adult size of a plant when planting it. Moreover, there are increasingly more dwarf varieties that will prevent the need to drastically cut back a beautiful tree, ultimately turning it into a sort of giant bonsai.
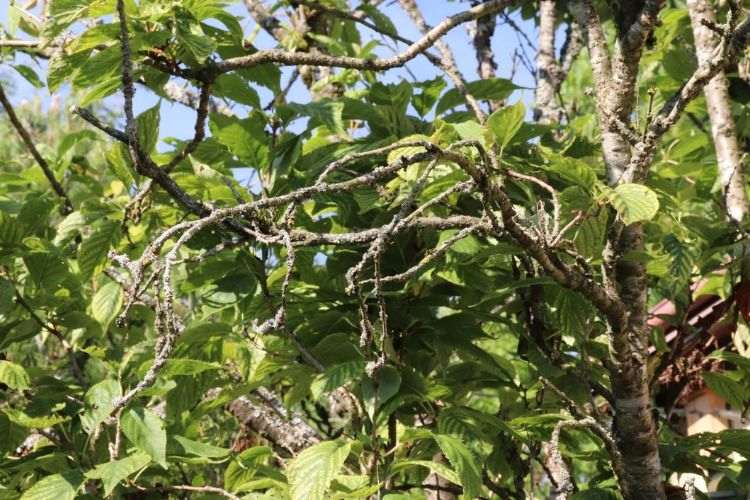
Why not trying transparent pruning?
Princess Greta Sturdza understood all this well when she embarked on the idea of transparent pruning in her "garden" at Vasterival.
This gentle pruning allows, in addition to removing dead or diseased parts, to balance and lighten the canopy, which brings undeniable aesthetic appeal but above all provides light and rainwater to the plants below. Furthermore, this transparent pruning allows both the visitor's gaze to pass through the garden and the wind, thus reducing accidents due to storms.
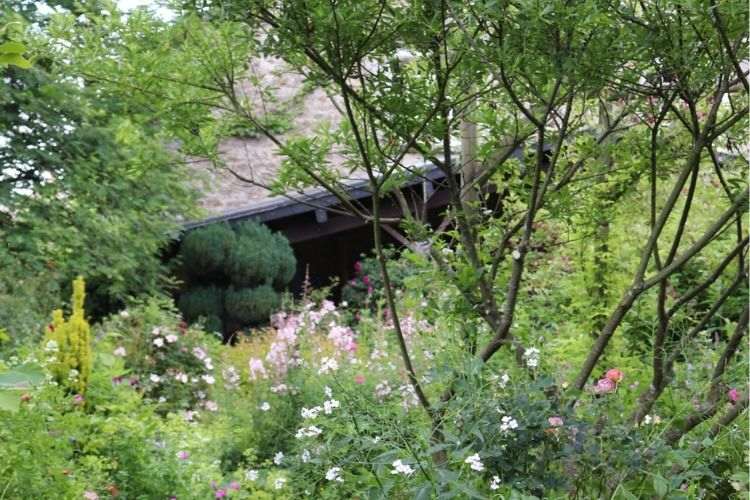
If this type of pruning interests you, we recommend visiting the results at the Vasterival garden in Normandy and reading the French book by Dominique Cousin: "Transparent Pruning" published by Ulmer.
The best pruner is the wind...
(Anonymous author)
In conclusion...
You will have understood, pruning trees is sometimes necessary, of course, but it requires understanding how a tree grows and what suits it best so that it can survive and thrive for many years.
Let’s avoid as much as possible trauma to our dear trees by cutting only rarely, always wisely and with good tools. And let’s also be calm and thoughtful in action: "When in doubt, abstain or... come back another day". That branch may not have been so problematic after all...
Finally, if you have doubts, consult a professional. A good one! Indeed, times are changing (slowly…) and so are people (a bit). More and more tree surgeons practice gentle pruning and think about the best way to keep trees in good health while only intervening when absolutely necessary. Don’t hesitate to use their services!
Today, I am angry! Angry but also weary because, along the roadsides, in parks, and even in gardens, it’s always the same horror film that starts again: “Chain saw massacre of trees…” Despite the awareness campaigns by arborists, we are coppicing, pruning too severely, cutting back too short, topping, mutilating… sometimes even tearing out entire […]