Roses have always been the undisputed stars of gardens, symbolising both love and beauty. However, for these queens of the garden to bloom their petals splendidly, planting requires special care. One of the most common and effective methods is planting bare root roses, a technique that promises vigorous growth and abundant flowering. In this article, we will detail the crucial steps to successfully plant your bare root rose supplied in a pot of substrate, from soaking methods to the secrets of perfect watering. Follow our guide to transform your garden into a haven of resplendent roses!
Bare root rose or potted? It’s all Greek to me
" Don't you order your roses bare root? - Well, yes. Look! - Oh no, these are potted. - Yes, but they are still bare root... just potted. - Oh. Well, if I were you, I would have bought bare root plants in pots. - Oh, very funny! That's clever...."
Bare root roses delivered with a pot of substrate surrounding them represent an excellent option for all gardeners. This proposal combines the advantages of the two most commonly used plant delivery types: bare root and containerised.
When a rose (or another plant) is delivered bare root, it means it is shipped without soil around the roots. This process has several advantages, including reduced transport costs and better recovery of the plant once planted. However, it requires that the plant be planted quickly after receipt to minimise stress and the risk of root desiccation.
The addition of a pot of potting soil around the roots during transport offers a clever compromise. This pot hydrates the roots during transit, thereby reducing transport-related stress and increasing the chances of successful recovery. It also allows gardeners to gain a little time (but don’t take too long!) before needing to plant their new rose.

When to order? When to plant?
Bare root roses are generally available for purchase between November and March, which coincides with their dormancy period. This helps to minimise stress on the plant and increases the chances of successful recovery once planted. The best time to plant these roses is also during their dormancy, when the plant is less likely to suffer from thermal shock or water stress.
How to plant a bare root rose bush?
First, unpack the pot by removing the plastic that holds it in place. When you do this, you may take some substrate on your feet or even in your boots: this is perfectly normal (it happens to me every time too!) and in any case, you don’t really need it anymore. However, you can keep it to bring to the planting if your soil is very heavy.
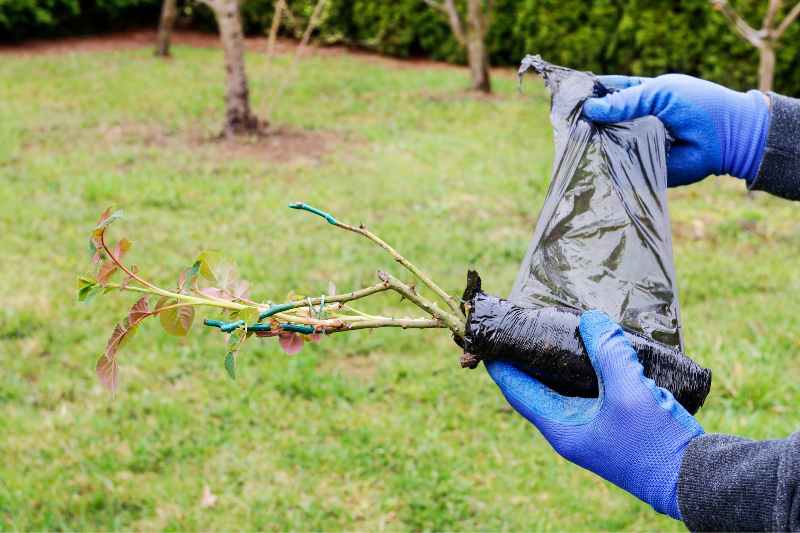
- Choosing the location: Select a well-sunny spot with well-drained soil. Roses prefer at least six hours of direct sunlight each day.
- Inspecting the roots: First, carefully inspect the roots of your rose. Remove any damaged or rotten parts with sharp, disinfected pruning shears. Healthy roots are essential for good recovery of the plant.
- Hydration and soaking: Soak the roots of the rose in a bucket of water for a few hours to hydrate them. You can also proceed with soaking the roots. This operation involves soaking the roots in a mixture of soil, preferably clay, compost or manure, and water, all forming a thick mud. This step promotes recovery and root growth by improving contact between the roots and the soil.
- Preparing the planting hole: Dig a hole large enough to accommodate the spreading roots of the plant, generally 50 cm deep and 60 cm wide is sufficient.

- Soil amendment: Mix the removed soil with well-decomposed compost to improve the soil, providing essential nutrients to the plant.
- Placing the rose: Position your rose in the middle of the hole, ensuring the roots are well spread out. The grafting point, identifiable as a swelling at the base of the stem, should be level with the soil or slightly above (see picture below).

- Backfilling and tamping: Fill the hole with the enriched soil and compost mixture, lightly tamping down by hand to eliminate air pockets.
- Watering: Water thoroughly immediately after planting to establish good contact between the roots and the soil.
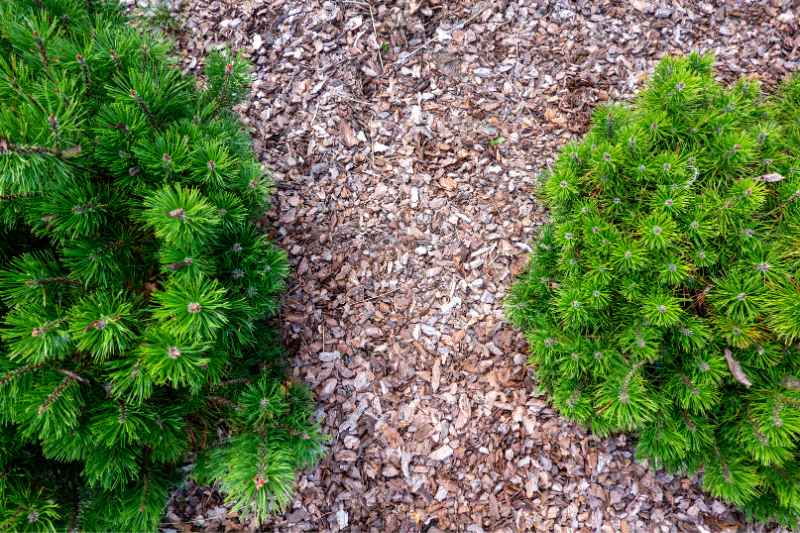
- Mulching: Apply a layer of mulch such as straw or wood chips to retain moisture and limit weed growth.
- Post-planting care: Keep the soil moist but not waterlogged during the first few weeks, and consider applying a rose-specific fertiliser when the first signs of growth appear.
Roses have always been the undisputed stars of gardens, symbolising both love and beauty. However, for these queens of the garden to bloom their petals splendidly, planting requires special care. One of the most common and effective methods is planting bare root roses, a technique that promises vigorous growth and abundant flowering. In this article, […]
Ah, gardening! This sweet art of patience, precision, and skill. But wait a minute, who said everyone wanted a garden worthy of a decor magazine? If you've always dreamed of transforming your green space into a wild jungle or an arid desert, then you're in the right place. Yes, you read that right, we're going to teach you how to fail at planting shrubs!
From poor species selection to random watering, you'll discover how to ensure your shrubs won't survive beyond their first season, and perhaps not even beyond the first week! So, without further ado, here's your ultimate guide to failing at shrub planting in 5 unforgettable lessons.

Lesson 1: plant anything!
You might think that any shrub will do, but think again! If you really want to fail at your planting, you need to choose the least suitable species or varieties for your garden. Moderately hardy exotic species (or not at all, for that matter!) are often ill-suited to the local climate, ensuring a resounding failure.
But soil is important too! Choose shrubs that hate your type of soil. If your soil is acidic, go for shrubs that prefer alkaline soil, and vice versa. The result? Shrubs struggling to survive and ultimately perishing in no time.
To ensure you plant without success, try our Plantfit app.
If you really want your garden to resemble an uncontrollable jungle, opt for fast-growing shrubs. Not only will they smother other plants, but they will quickly become unmanageable. A double failure! In the same vein, choose species that will grow far too large for your small garden.
Finally, the last tip for truly failing at your choice of shrubs is simple: don't ask anyone for advice. Ignore nursery staff, gardening advice articles, and even that uncle who always had a green thumb. After all, failure is a solitary path.
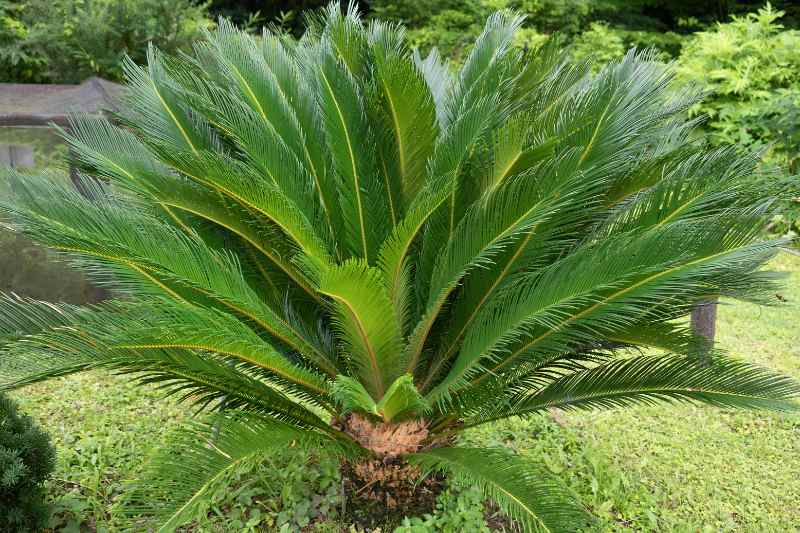
Lesson 2: Plant anytime!
Who needs to wait for spring or autumn to plant shrubs? Not you! Gather your courage and go out and plant in the middle of winter. The frozen ground will add an extra challenge to your shrubs' growth, which is perfect for guaranteed failure. But if the freezing cold doesn't appeal to you, why not choose the extreme opposite? Plant your shrubs in the height of summer, under a blazing sun. High temperatures and lack of water will ensure your plants suffer from water stress, leading them straight to disaster.
Is a storm forecast for tomorrow? Perfect, it's the ideal time to plant! Excess water combined with poor soil preparation (see Lesson 3) will turn your garden into a swamp.
Finally, why plan when you can do everything at the last minute? Buy your shrubs on the same day and plant them without a second thought. Or better yet, wait weeks before finally planting your bare-root shrubs carelessly stored at the back of a garage. Lack of preparation is always a great recipe for disaster.
Autumn or spring? To choose the best time, you can refer to these two advice sheets: What to plant in spring? & What to plant in autumn? as well as The best planting times.

Lesson 3: plant any old way!
If you've followed the first two lessons, you already know that haste is your best friend. So, don't waste time preparing the soil. Dig a hole in a hurry, toss in your shrub and hope for the worst!
Forget about soil drainage! Poor drainage guarantees your shrubs will have "wet feet", especially in winter, which is excellent for encouraging diseases and root rot.
Also ignore the soil pH: acidic, alkaline, neutral... all that is for gardeners who want to succeed. If you disregard your soil's pH, you'll have every chance of choosing totally unsuitable shrubs, which is perfect for a memorable failure.
Chemistry classes may be a distant memory. To learn more about the subject, read: Soil pH: what is it?
Your soil is poor, compact, low in humus...? Don't try to fix the situation by adding organic matter, manure, compost, or dried blood... Your shrubs will struggle to obtain the nutrients they need, making them weak and sick. Well done!
Take a quick look at Soil fertility: rich or poor, how to tell?
Have you managed to choose the wrong shrubs, ignore the planting calendar, and neglect soil preparation? Bravo! But don't rest on your laurels, as there are still ways to sabotage your gardening project. One of the most effective is to plant the roots upside down. Yes, you read that right! Take your shrub and plant it headfirst into the soil. Guaranteed results. (Note: don't laugh, we've had this exact case with a customer who had bare-root roses...).
To add an extra layer of failure, use the wrong tools to plant your shrubs. A small spoon or a beach shovel will do just fine. The more unsuitable, the better!
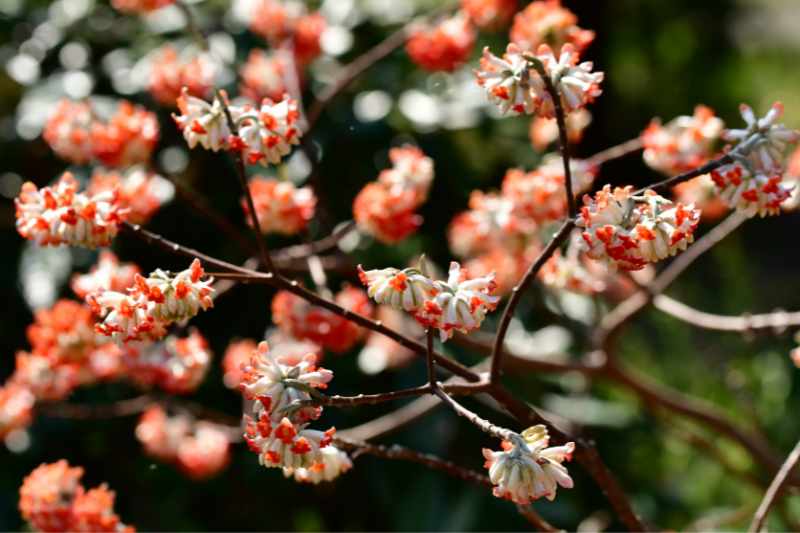
Lesson 4: forget about watering!
You've already done a great job sabotaging the previous steps of planting your shrubs. But why stop there? Watering is another golden opportunity to guarantee the failure of your gardening project.
One day, turn your garden into a swamp, and the next, let it become an arid desert. Your shrubs won't know what to expect and will suffer from water stress. Or simply forget to water your young shrubs for several days, even weeks. When you remember, it will probably be too late, and you can add this failure to your list of gardening mishaps.
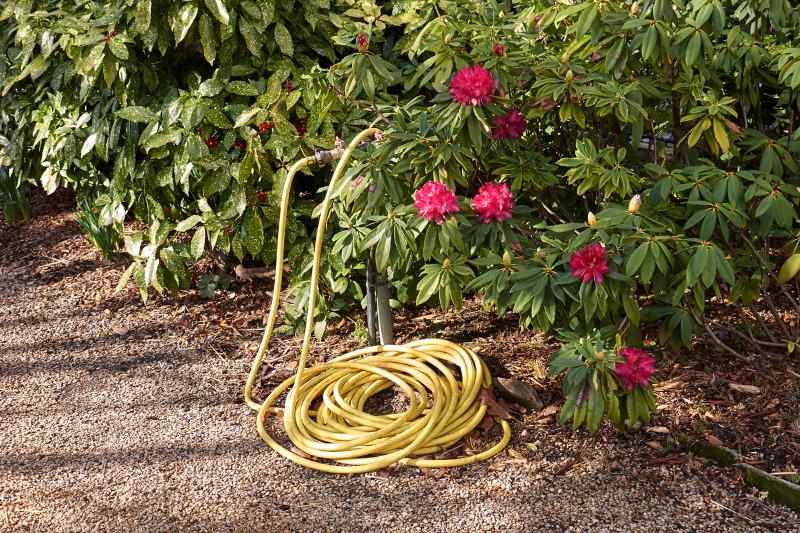
Oh yes, and forget about the watering can or a suitable irrigation system; a high-pressure hose is much more fun!
Watering isn't that simple. Jean-Christophe tells you everything about the art of watering in his article: Watering the garden: How to do it?
Lesson 5: ignore maintenance!
Congratulations, you've almost succeeded in completely failing at planting your shrubs! But don't celebrate too soon. There's one last step to seal the fate of your garden: thoroughly ignore the maintenance of your plants. Even if most shrubs, if well chosen, will grow without much care, never tending to them, pruning them, pampering them, or even looking at them will always add a little extra to the overall failure of your garden. After all, maintenance is for the weak, and you are a hardcore gardener.
Lastly, if someone asks you why your shrubs aren't growing properly (what business is it of theirs!), deny all responsibility. Stay in total denial! Blame the weather, the birds, the nursery staff who sold you the plants, or even the moon. After all, it's not your fault if nothing grows in your garden...
Ah, gardening! This sweet art of patience, precision, and skill. But wait a minute, who said everyone wanted a garden worthy of a decor magazine? If you’ve always dreamed of transforming your green space into a wild jungle or an arid desert, then you’re in the right place. Yes, you read that right, we’re going […]
A friend of mine, who is also a well-known gardening columnist (and an excellent gardener, which makes for two significant differences between us), recently told me: “It annoys me, I can’t keep lavender alive…”
This was, I must say, a huge relief for me: I was not alone in carrying this shameful secret: repeatedly failing to keep one of the easiest plants in the garden, lavender.
This prompted me to make a public coming out and share with eager gardeners this specific know-how: how to fail at growing a lavender in 5 lessons!

Of course, not everyone is on equal footing: those who, like me, are fortunate enough to live in a cold, rainy climate with heavy soil will find it much easier to successfully fail at growing lavender than those unfortunate enough to live in the sunny climes of Provence.
However, by carefully following these simple and practical tips, accessible to all, I am sure many will also manage to kill their lavenders.
Lesson 1: to kill lavender, smother it!
Lavender comes from the South; it loves southern, stony, well-drained soils. It hates heavy soils that rot its roots in winter, which is why good gardeners prefer to plant in spring rather than autumn.
It can be planted in heavy soil, but requires drainage work: a large planting hole, at least twice the size of the pot, adding gravel or river sand, or, if necessary, turf.
So, to fail at growing your lavender, plant it at the wrong season (between November and February, for example) in heavy clay soil, which you have not lightened or loosened, ideally in a hole that is too small (if necessary, give a few frustrated heel kicks to make it fit);
This is a very reliable method for failing at lavender, which I have practiced extensively in our potato fields up North.
A rather perverse variant of this method is to put your lavenders in the position of gladiators in the circus games: plant lavenders very close together, say 15 cm apart: they will shade each other, and, by fighting, weaken one another, and part (at least) of your plants will end up dying, while the others will blacken, which is quite an effect.
Lesson 2: to fail at lavender, drown it!
Lavender does not appreciate repeated excess watering: it is a Mediterranean climate plant.
To kill lavender, water abundantly, not only after planting (which it likes, like all plants), but also throughout its (short) life: it will disappear by the first winter. To speed up the killing, create a watering basin that will keep the root ball moist during the dreary season, guaranteed success!
Lesson 3: to fail at lavender, put it in the shade
Lavender loves the sun… In the shade, it withers, stretches its branches sadly in search of light, flowers little or not at all, and dies quickly.
By planting in the shade (a true marked shade, it can flower quite well in light shade), you will achieve a result similar to the previous lesson. You can even combine lessons 1, 2, and 3 for a better result.
Lesson 4: to fail at lavender, overfeed it!
Used to poor soils, lavender behaves very poorly in rich environments: it eats too much, grows and grows… And very quickly collapses lamentably, leaving an awful black hole in the centre.
This lesser-known method is particularly recommended for sensitive souls; it allows you to fail at growing lavender (and many other things) in good conscience, through excess care: plant it in rich potting soil, generously amended with compost, supplemented by regular overdoses of fertiliser, preferably chemical: you may not kill it, but you will surely give it a rather monstrous appearance of a Chernobyl plant.
Generally, it is enough to plant poorly to fail. However, for safety, in case your lavender shows resilience, here is a maintenance tip:
Lesson 5: to fail at lavender, prune it regularly in a 'para' style
Like almost all evergreen plants, lavender does not like heavy or short pruning.
Of course, you can safely cut the dry flower spikes once a year (and make lovely fragrant bouquets), or a few overly exuberant young shoots. But do not prune the wood: it never regrows on old wood!
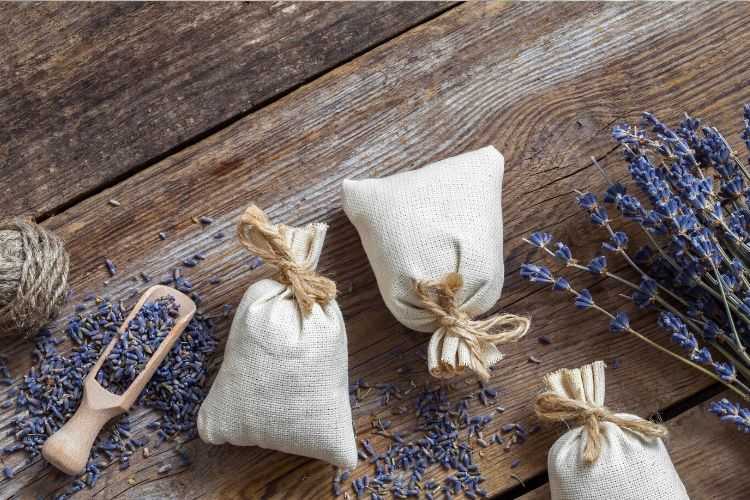
So to fail at lavender, prune it brutally and as short as possible: at the very least, you will make it look considerably ugly and prevent it from flowering properly; at worst, you will kill it. It is worth noting that even in Saint Rémy de Provence, this method works well.
Bonus tip for those who have had the courage to read everything, with a lazy method that I particularly recommend for its simplicity: you can also fail at growing lavender in a pot. Simply plant it in a small pot (say less than 20 cm), and do not water it. Admittedly, lavender does not like excess watering, but it is not a cactus: it needs water, which it seeks through a deep root system. For this reason, it does not settle well in a small pot (and above all, hates being moved).
You can therefore fail at it by simply keeping it in the tiny pot it came in when you bought it, while forgetting to water it!
Finally, to console the clumsy who, even by following these wise tips, still manage to keep a lovely fragrant lavender in the garden: even under good growing conditions, sun, well-drained soil, moderate watering, lavender does not age very well. It rarely lasts more than 10 years, especially in our Northern gardens, and generally becomes quite unattractive after 5 years: you will likely have the opportunity to see it die one day!
Discover everything you need to know about lavender to choose well, succeed in its cultivation, propagate it, or even dry it.
A friend of mine, who is also a well-known gardening columnist (and an excellent gardener, which makes for two significant differences between us), recently told me: “It annoys me, I can’t keep lavender alive…” This was, I must say, a huge relief for me: I was not alone in carrying this shameful secret: repeatedly failing […]
You may have noticed that last spring, articles became scarcer on the blog... To be honest, we experienced what we modestly call "a period of rapid growth", which means it was hot, very hot indeed! To tell you the truth, it felt like all the gardeners in France and beyond had decided to frantically place orders. Let’s just say that everyone was on deck, and even the boss was preparing the parcels. As a domino effect, those who were, like me, a bit "hidden" behind their advice sheets found themselves responding to emails from worried, even desperate gardeners facing their dying plants. This sometimes challenging experience was rich in lessons, as I can confidently say I now know how our clients manage to kill their plants in their gardens!
Here’s how they go about it!
1) They use acidic soil, pure, preferably
Using acidic or heather soil, we agree, starts from a good intention: to provide an appropriate substrate for acidophilous plants (like Japanese Maples, rhododendrons, hydrangeas...), which need a soil with an acidic tendency (pH between 4 and 6.5) to thrive. It’s also a logical approach because in the term "heather soil plants," there is "heather soil." Finally, if the local garden centre sells it, it must be good to use! Well, believe it or not, it’s not, because heather soil is a substrate that seems to have been invented to kill plants.
Indeed, heather soil, which contains a significant amount of blonde peat, is certainly acidic but it is also very low in nutrients. Moreover, when it is soaked it often retains too much moisture, and when it is dry, it is nearly impossible to rehydrate; water just runs off it and does not penetrate the heart of the plant. As a result, it is impossible to properly water a plant in pure heather soil. And worst of all, the plant that manages to grow will just struggle and eventually die due to a lack of substantial nutrients!
2) They water every day, a little... or every day, a lot... or not at all.
80% of replanting issues are due to overwatering or underwatering.
The problem is that an overwatered plant shows roughly the same signs as a plant that is not watered enough: wilting leaves that dry out and eventually fall off. Faced with these symptoms, the first reflex of inexperienced gardeners is to water again, more often and more abundantly... until death ensues, or nearly. Those who do not water generally do not speak up: they often realise their neglect when it is really too late and no rescue measures are feasible. In truth, I think they feel a bit ashamed.
Our advice for proper watering is simple: to know if your plant needs watering, touch the soil! If the soil is damp and your finger comes out muddy, it has too much water, so stop watering. If, on the contrary, your finger comes out dry and without soil, water it; it is too dry! The ideal is to keep the soil always fresh and loose, where your finger comes out slightly damp with a bit of soil stuck to it. And the hotter and drier it is, the more you should not water, but check the moisture at the base of the plant. Also consider your plants' needs: a lavender plant does not need constantly moist soil, while butterbur, planted in regular soil, does.

3) They install frost-sensitive plants... where it freezes, hard and often.
The notion of hardiness sometimes leads to very personal interpretations, bordering on the fanciful. For many gardeners, a hardy plant is a robust plant (a bit like our grandparents' furniture... so far, so good) capable of withstanding Siberian cold, everywhere in France (that’s where things go awry). Indeed, there are several degrees of hardiness, and a plant will not react the same way in all gardens... as its age, exposure, soil type, and drainage also matter.
It frequently happens that optimistic gardeners living in harsh climates like Alsace, the Vosges, or Aveyron realise their exotic garden dreams with a plethora of callistemons, Musa basjoo, or Gunnera... Generally, they call us in spring to report the failure of their plant. And, of course, we can do nothing!
To avoid this type of inconvenience, take the time to read the information contained in the plant sheets: hardiness is clearly indicated! And to learn all about hardy plants and the concept of hardiness, feel free to consult our complete guide.
4) In pots and containers, they use garden soil and rely on the sky for watering.
Sometimes it works. Often, it does not.
Growing plants in pots may seem simpler. In reality, it is not that easy. Not only do you need suitable containers, but you also need, above all, a quality substrate.
What could be better than garden soil? Indeed, when it is rich and light, it works. When it is heavy, a bit suffocating, or stony and very draining, it’s a whole different story. In pots, plants must make do with little: a reduced volume of soil and the water that you are willing to give them through watering. Moreover, their root system is inevitably a bit constrained. These plants are therefore more sensitive to potential nutrient and water shortages. To have beautiful potted plants, the quality of the substrate is crucial! Instead of digging who knows where to beautify your balcony or terrace, invest in quality, nutrient-rich compost that retains water well. If possible, choose from professional quality ranges (like Klasmann), and use it pure, without trying to make improbable mixtures like: Aunt Brigitte's garden soil + the sand from the nearby construction site + the old geranium compost from the neighbour below.
Regarding watering, do not rely on rainwater. Even if it floods your garden, it is unlikely to be sufficient to meet the essential needs of your potted plants. Why? Because, often, the leaves form a barrier that prevents rainwater from penetrating the soil, and then, because pots, unlike garden soil, do not retain moisture for long. Potted plants must therefore be watered, without excess, but as soon as they need it (see above) and especially, all year round, even in winter, after a severe frost or if the weather is dry.
5) They plant quickly (and poorly), in concrete-like soil or, conversely, overly worked and fertilised soil.
We trust our clients, but, as we know our plants well, some failures leave us puzzled. To get to the bottom of it, we ask for a photo of the dying plant, in situ. Let’s just say that we have a collection of images that could open a genuine little museum of gardening horrors: perennials planted in compact soil, visibly as hard as concrete, understorey plants in stony soil, shrubs planted in the lawn with just a hole the size of the pot dug...
Conversely, some go to great lengths and fertilise with wheelbarrows of manure, sometimes fresh. The road to hell is paved with good intentions.
Let’s remind ourselves once and for all: apart from a few very greedy vegetables like squashes, plants do not need such inputs. And when a plant likes rich soils, we are talking about humus-rich soil... rich in humus that will be the result of the slow decomposition of balanced compost, good leaf mulch, or green waste... but, under no circumstances, brutal fertilisations or those too rich in nitrogen that, on the contrary, weaken them by making them grow too quickly or, at worst, burn their roots.
Plants, to thrive, need a welcoming environment: soil, more or less rich (but never too much) and at least well loosened. You need to dig a comfortable hole, wide enough for it to spread its roots. Remember, in this regard, to gently untangle the root hairs before planting. This simple gesture will allow the rootlets to make contact with their new soil. Also, be mindful of competition: if we advise planting in weeded soil, it’s not just to make you sweat; it’s to allow your little newcomers to gather strength before having to make their place in the sometimes hostile environment of the garden!
6) They plant rhododendrons in calcareous soil, agaves in wet soil...
Who knows why, but multi-recidivist plant killers all have one thing in common: they dream of what they cannot grow at home, like hydrangeas in calcareous soil, Gunneras, or a shrimp willow in dry soil, agaves in wet soil. The problem is that they take action and plant anyway (sometimes adding heather soil, see point 1...). Inevitably, at best, the plant struggles fighting against chlorosis or root rot, at worst, it dies. It’s usually at this point that they call customer service for a replacement (yes, I assure you!).
Errare humanum est, perseverare diabolicum.
If a type of plant does not suit your soil or climate, stop insisting and adopt "The right plant in the right place" as your mantra!
As with hardiness, the information regarding the type of soil required to grow the plants is included in the descriptions of our plants. Read them, take them into account, or take some time to consult a reference book like "All the plants, for all desires and all situations" by Didier Willery.
7) They fall for a perennial or a shrub without knowing exactly where to place it
A slight variation on the previous point, this mistake is often made by experienced gardeners whose garden is already bursting at the seams... because they too often fall for... a new, charming variety, a rare species, or a crush during a plant fair. Three clicks and 48 hours later, these same gardeners are wandering the garden, the new addition in hand, looking for a little spot. It’s usually after 20 minutes of wandering that they find a few square centimetres to squeeze it in. Along the way, they will have forgotten its requirements and, despite their experience, they will have planted a shade plant in full sun (or vice versa). The plant may not necessarily die, but its foliage may look sad or it may not flower... which will undoubtedly earn us a little remark!
Moral: not planting a plant in the right place is not just the domain of beginners. Experienced gardeners can do it just as well...
8) They plant on the day of delivery, even in heatwaves or severe cold... or they wait, a long time
Our plants are delivered all year round, in pots or containers. Weather conditions mean they sometimes arrive at an inopportune time: severe cold, intense heat, or waterlogged soil... Some even plant anyway, pulling out the ice pick and headlamp (it gets dark early in winter). Let’s just say that this compromises their establishment.
We also sell plants in vegetative rest (we explain why in this article), with no visible signs of life or just a few small leaves. I won’t dwell on those who angrily throw them in the compost (they are rare... and I believe they are among those cases where we can do nothing) but will focus on anxious gardeners who, even when conditions are ideal, are afraid to plant such small "things" in the garden and decide to let them "harden off." Once again, letting plants grow comes from a good intention. The problem is twofold: the pots in which the plants are sold quickly become too small, nutrients deplete rapidly, and, above all, potted plants need almost daily watering! Result: the plants die. My advice: do not necessarily plant as soon as you receive them, but plant as soon as possible!
Please, we no longer want to hear "I know it’s hardy, but I’m going to wait until after the Ice Saints to put it in the garden" or "I’m ordering now, I know it’s not the right time, so I’ll keep it in a pot and plant in October"... or promise us to: 1) repot the plant in a much larger pot, 2) use good compost, 3) ensure regular watering whenever necessary until planting in the ground.
Finally, as a side note, know that no, keeping plants in a garage during your holidays, even with the light on, is not possible!
9) They prune, without knowing why or how, but they prune!
For some, it’s an obsession: pruning is a must. It doesn’t matter when, why, or how; nothing must stick out, so they chop away. If the shrub is of the friendly type (hornbeam, boxwood, Lonicera nitida...), things generally go well. Where pruning becomes problematic is:
- when they prune down to the ground shrubs that cannot tolerate it (like Japanese maples, daphnes, forsythias...),
- when they prune at the wrong time: at the end of winter for spring-flowering shrubs or at the end of spring for summer or autumn-flowering shrubs.
To be completely honest, poor pruning or excessive pruning rarely kills a plant, but this massacre with shears will deprive you of blooms and cause the shrub to lose the harmony of its natural shape, which is somewhat similar!
Remember: pruning a shrub is not always necessary. If you don’t know how to prune, do nothing without informing yourself!

10) They worry
"Don’t worry, it just got a bit hot, give it some water" "Yes, it will grow, I assure you" "No, white spots are not a serious disease", "It’s just a pest, there are many this year."
No, you are not in a paediatrician's office, but at the customer service of Promesse de Fleurs. Like young parents, gardeners develop all sorts of anxieties. They are particularly afraid of diseases.
However, many "diseases" like powdery mildew on a young Aster or Monarda plant, a bit of Marsonia on rose leaves are like a cold in kindergarten: normal and benign. There’s no need to rush to the sprayer; treating in full sun, for example, will do more harm than good. Remember, plants are like children: they need to be raised in good conditions to grow well; they need love... but let them live their lives; nothing is worse than being overindulged or overly sheltered!
You may have noticed that last spring, articles became scarcer on the blog… To be honest, we experienced what we modestly call “a period of rapid growth”, which means it was hot, very hot indeed! To tell you the truth, it felt like all the gardeners in France and beyond had decided to frantically place […]
Planting spring bulbs is an autumn "routine" that I diligently carry out every year. It's not my favourite task in the garden, but I know that my diligence will be richly rewarded with the first beautiful days full of colour.
While the ideal time to plant spring bulbs has already begun a few weeks ago, I tend to wait until November to get started... Firstly, because I enjoy, in good years, the public holidays, but mainly because at this time, once the less presentable perennials have been cut back (I practice selective seedheads), I can see more clearly. Finally, if I cut the wifi if I'm lucky, I can easily find a child at home half-dead from boredom during the holidays, who can lend me a hand.
So today, let's see everything you need to know, or almost; to plant bulbs well.
Tip #1: For easy bulb planting: choose the right tool
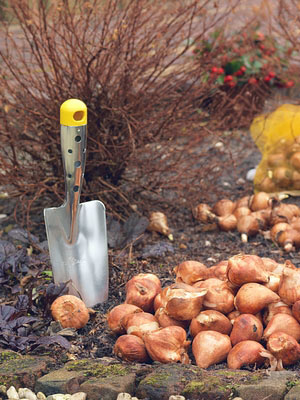
For a long time, I struggled using the first bulb planter that came to hand. You know, that so-called "automatic" thing whose plastic handle usually breaks after the third hole, especially if you're gardening in somewhat firm soil?
Then one day, after seeing this selection, I added a proper bulb planter to my Christmas list that could tackle my 200 holes without breaking... or breaking my back: a long-handled planter with a footrest. And that's when everything changed.
If you're planting less intensively, at the very least, opt for a sturdy tool that is made from a single piece. A good classic planter, used for perennials, can do the job just fine. It will always be better than a flimsy tool!
Tip #2: For abundant flowering: plant at the right time
The very end of summer and autumn (from September to November) is the best time to plant spring bulbs. For early flowering bulbs, like snowdrops and Crocus, the principle is simple: the earlier you plant, the greater your chances of seeing their flowers appear early the first year.
Late spring and early summer bulbs like Camassias or Alliums can also be planted in late winter, but if planted in autumn, they will have more time to settle in and will bloom much better.
For those with a busy planting schedule in autumn or who take advantage of end-of-season promotions, know that it is entirely possible to extend the planting period for bulbs until early winter, especially if you live in a mild climate.
Admittedly, the flowering will be less spectacular the first year, but it works! For all the details, I invite you to check our advice sheet: "Late Planting of Spring Bulbs"
Tip #3: For a real impact, don't skimp on quantity
The beauty of spring bulbs, besides warming our hearts by announcing the approaching end of winter, is their ability to enhance the interest of a summer bed. They are also very useful for flowering effortlessly and without maintenance in natural spaces like meadows and orchards. But for it to be effective, the visual impact must be strong enough.
For small bulbs, there is only one solution: plant in numbers and in masses. This applies to crocus, muscari, but especially to snowdrops, which are never as charming as when they stand closely together like a group of little penguins on the ice!
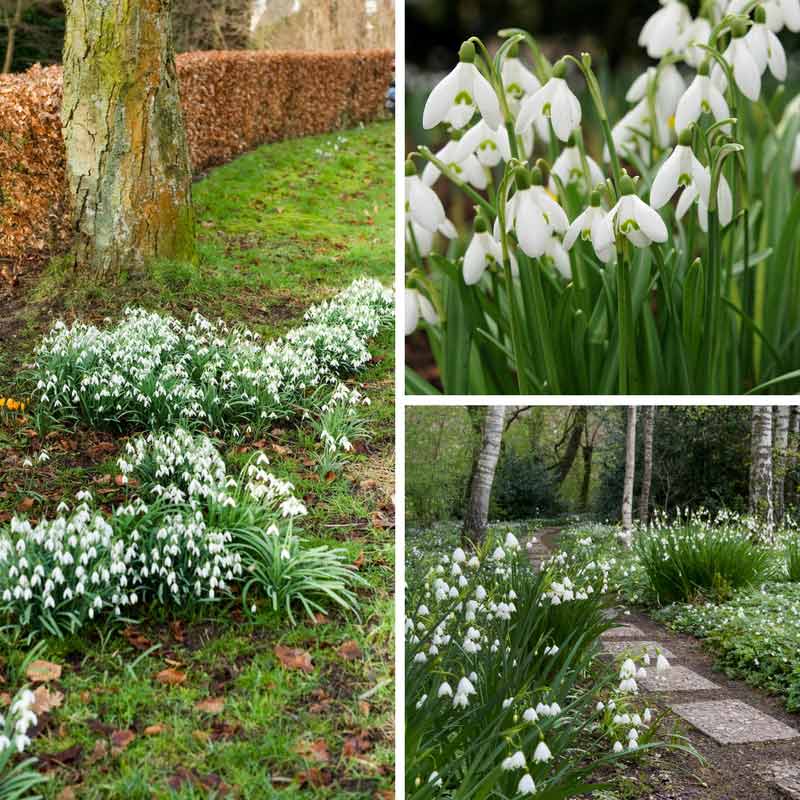
To know how many bulbs to plant, refer to the recommended planting distances in each of our plant sheets. The numbers may seem a bit crazy, but they correspond to what is necessary to achieve a real effect. This figure is expressed in the number of bulbs per square metre, but you are, of course, not obliged to plant a square metre of snowdrops! As you can probably see from the image above, a "patch" of 30 cm² (or 60 bulbs) already offers a very nice visual impact.
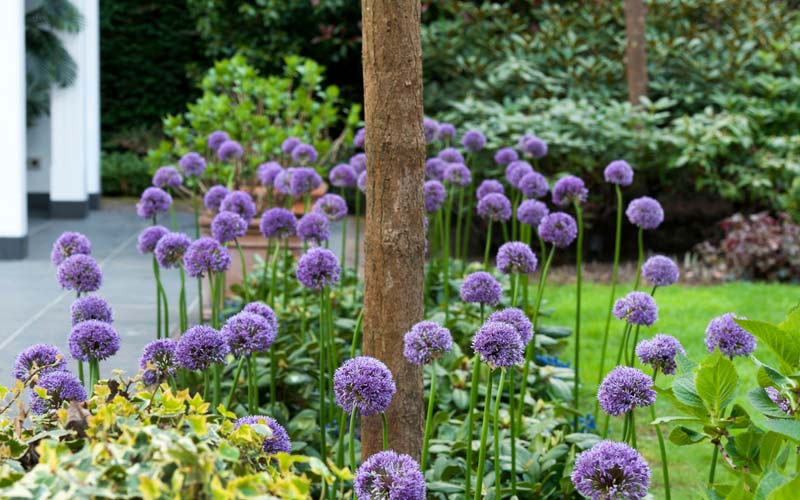
Larger bulbs like giant-flowered alliums and Imperial Fritillaries can be planted less densely, as they are remarkable from a distance and often benefit from being accompanied by other plants. If you are planting in an existing bed, these planting distances are less important, but do ensure to create wide patches by planting your bulbs closely together, among the already established plants.
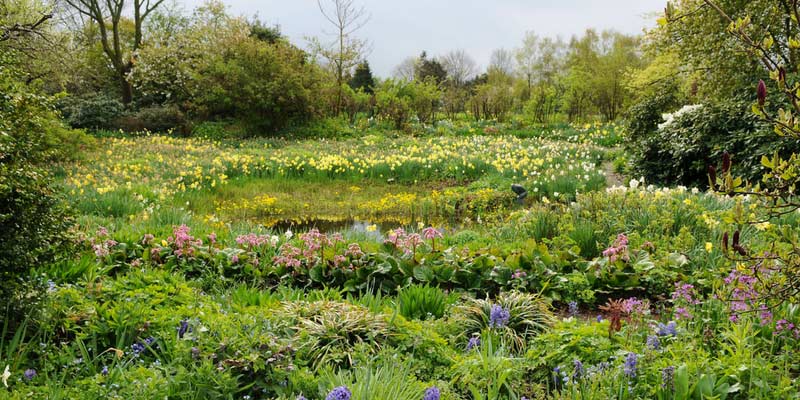
If you are planting in a lawn, the ideal is to opt for bulbs that naturalise easily like botanical daffodils, squills, botanical tulips, and guinea fowl fritillaries... Here too, you can plant a bit less densely because year after year, they will multiply and produce a mass effect at little cost. Remember Pierre's motto: Small bulbs, big effects!
Tip #4: For faster planting: choose the right method
Bulbs, whether planted in groups of 20 or 200, are not planted quite the same way if you want to save time. If you are planting within an already established bed, you will be forced to use a planter and plant individually. However, if you want to create a border specifically for these plants, we recommend a method that involves removing the grass over a wide area rather than planting individually:
In this video, you will see that the grass is put back in place. This is not a requirement: you can also mulch with fallen leaves or pruning chips.
Tip #5: To prevent rot, ensure good drainage and avoid over-fertilising
We can never repeat it enough, and even if some appreciate moist soils, bulbous plants dread waterlogged soils, which inevitably leads to their rot. It is therefore essential, in very wet soil that retains water, to improve drainage. To do this, it's very simple: place a layer of gravel or sand, about two centimetres thick, at the bottom of the planting bed or hole.
Also note that soil that has been fertilised too recently, excessively, or with compost or manure that is not well-matured can also promote the rot of your bulbs. If your soil is poor, you can add fertiliser, but it should:
- be suitable (use a special bulb fertiliser; a fertiliser too rich in nitrogen would encourage foliage growth at the expense of flowers),
- be moderate as bulbous plants are not "greedy".
Tip #6: Plant a bulb in the right direction, at the right depth, is better...
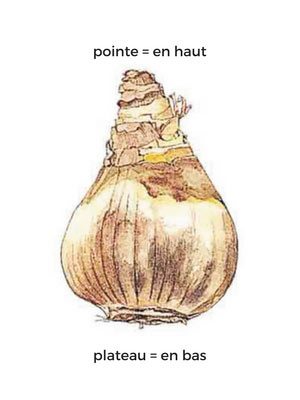
Planting a bulb upside down is a classic mistake of beginner gardeners. Nothing dramatic, as in most cases, the bulb is a contortionist and will eventually turn itself around. This is what is known as geotropism... but, if possible, it's better to spare it this effort! To know which way to plant your bulbs, observe them: the point should be facing upwards and the plateau, from which the roots will emerge, downwards. Logical 🙂
Regarding the planting depth of bulbs, it is often said that the planting depth corresponds to three times the diameter of the bulb... but also that bulbs should be planted at a depth equal to twice their height. And of course, there are exceptions that confirm these rules.
Rather than measuring your bulbs and getting out your calculators, check the indications at the end of each plant sheet... or keep the packets until planting time: it's noted on them!
Tip #7: Beware of voles!
Every spring, we receive a few calls from customers who assure us that their tulip bulbs have not flowered. And in most cases, when we ask them to check the condition of the bulbs, they cannot find them. And when they do, they appear partially gnawed. The culprits? Voles!
If you too have to deal with rodents, don't take any risks: choose bulbs that are generally not attacked or implement the necessary protective measures! To find out how to do this, discover Virginie's tips: "How to Protect Bulbs from Rodents".
And you, do you know how to plant bulbs? What is the trend where you are? Perhaps you have tips to make this task a little less tedious... Don't hesitate to share them in the comments!
Planting spring bulbs is an autumn “routine” that I diligently carry out every year. It’s not my favourite task in the garden, but I know that my diligence will be richly rewarded with the first beautiful days full of colour. While the ideal time to plant spring bulbs has already begun a few weeks ago, […]
Tulips are, among the spring flowering bulbs, the easiest to succeed with: well-sized, standardized bulbs that are almost always homogeneous in quality; they are the easy bulbs par excellence; and yet, it is just as easy, with a little attention, to fail at planting them.
Follow our meticulously established guide, based on the author's extensive first-hand experience with various failures, and also, let’s thank them in passing, the help of many inventive clients who, by phone or email, have vigorously explained their little secrets leading to failure.
Lesson number 1: to fail with your tulips, plant them in late spring or summer
Living in Flanders, I regularly spend weekends (cultural) in Amsterdam, and I have always been amazed to see, in May-June, a plethora of tulip bulbs for sale at the Amsterdam flower market… For a long time, I wondered what that could yield. So I eventually tried planting Dutch tulips in late spring, among other local crops.
The result was quite pitiful: a third of the bulbs did not start, the rest bloomed roughly at the same time as my dahlias, and most of my bulbs did not survive the following winter.
Grandma and popular wisdom say: "tulips should be planted in autumn, preferably in September or October."

Tulips should be planted in autumn!
Series of tests conducted at the nursery nuance this result: tulip bulbs establish better if planted in autumn; results are respectable for winter planting, but become frankly random from March-April onwards.
So, to fail with your tulips, plant them whenever you think of it, in April-May when they are blooming at your neighbour's and it makes you green with envy. The result will be, at best, mediocre.
Proposed variant for distracted and lazy gardeners: buy them in autumn, forget them in the garage for a year and plant them the following autumn, guaranteed failure at 95%! We often advise clients who call us in January after finding a packet of bulbs wickedly hidden by the cleaner at the back of the shed to plant immediately: flowering will be slightly delayed, but quite acceptable.
Lesson number 2: to fail with your tulips, sort your bulbs very ri-gou-rous-ly (and throw them all away)… or don’t sort them at all!
While the first lesson was suited to lazy, procrastinating Latin gardeners like me, the second is aimed at neat freaks, preferably with a background from across the Rhine.
Cultivated tulip bulbs are mechanically harvested by machines with sorts of harrows. It’s not extraordinarily poetic, but effective (and it’s what allows you not to pay ten euros per bulb).

Mechanical harvesting of tulip bulbs
In the process, many bulbs lose their little protective copper-coloured skin (of no importance), and some end up slightly scraped, sometimes superficially nicked, without any detrimental consequence on the bulb's recovery.
On the other hand, mould is a very serious enemy of the tulip bulb: during autumn, bulbs, especially if stored in humid conditions, tend to develop a layer of mould. If this damage is superficial, a quick wipe will remove it, and recovery will be perfect. However, if this mould reaches the inside of the bulb (signal: the mould doesn’t come off with a quick wipe), particularly at the root plate, the bulb has no chance of recovery. Worse: the mould may spread to other nearby tulip bulbs. This is why we manually sort all our tulip bulbs during packaging; also the reason why it is advised to plant tulips in September or October: bulbs are, at that time, practically free from mould attacks.
So, to fail with your tulips, throw away all the bulbs for non-compliance before planting… Or conversely, leave a packet of bulbs lying around in a humid place, and, with a bit of luck, the bulbs will mould within a few weeks.
Lesson number 3: to fail with your tulips, plant them in an unsuitable place: deep shade, marsh, extremely heavy soil, or rocky areas where nothing grows
The tulip, true to its Ottoman origins, loves sun and fairly well-drained soils, which do not retain too much water, but are relatively rich, to allow the bulb to replenish its reserves after flowering.
It blooms on the reserves accumulated by the bulb, even if the growing conditions are poor, so it is difficult to fail the first year. However, if the conditions are sufficiently bad, the bulb will not be able to properly replenish its reserves after flowering: thus, by the second year, the flowers will be weak or absent.
If the bulb is planted in complete shade (less than two hours of sun per day), the flowers will be weak.
If the bulb is planted in very heavy and wet soil, some bulbs may rot from the first year, the rest in subsequent years.
If the tulip is planted in excessively dry soil in spring, the tulips will be stunted, with early yellowing of the foliage, and will not return.
Note: there’s no need to try to fail your tulips by planting them in very acidic or calcareous soil: tulip bulbs tolerate all pH levels, you will not fail them with this classic method.
For technical enthusiasts, it is interesting to note that not all tulips have the same resistance to difficult conditions.
The botanical tulips (small tulips that maintain a distant relationship with their natural ancestors) are ultra-tough. They last for many years even in shaded heavy soil. They naturalise as soon as conditions are suitable. Very difficult to fail, a challenge!
The old horticultural tulips (e.g.: Lily-flowering, Triumph) are quite sturdy. They last about 3 years in poor growing conditions, 7 to 10 years in good growing conditions. Difficult to fail.
The double tulips (peony-flowered tulips) are generally fragile, lasting 2 to 5 years depending on growing conditions. Quite easy to fail.
In summary, to fail your tulip plantings:
- If you live in the northern half of France: plant recent double-flowered varieties in heavy, wet soil in a very shaded position. And if the winter is dry, water abundantly to ensure failure.
- If you live in the south: plant the same varieties in poor, stony soil, without any watering, and cross your fingers for a very dry spring, a guarantee of failure.
Lesson number 4: to fail with your tulips, plant them upside down, or too deep, or not deep enough
Tulips have a top (the small point) and a bottom (the flat area from which the roots will emerge); if planted upside down, point down and roots up, they will struggle to emerge…. To be honest, I must admit, I have never actually tried this method. But I know it works, having dealt with a furious client about the poor quality of our bulbs. He had carefully planted his bulbs upside down…
Variants of failure:
- Maniac version: planting your bulbs too deep (result: stunted tulips… or even no tulips at all). This is a classic method that requires effort; you need to dig deep, about thirty centimetres, but it is worth it: you end up with rather ridiculous-looking tulips.
- Lazy version: planting your bulbs too shallow (bulb almost at the surface), a method that is very economical in time and effort, which is why I like it so much. However, it is more random; sometimes tulips settle in well despite everything, who knows why.
To properly plant your tulips, here’s what a good gardener would write:
- Make a hole 4 times the diameter of the bulb (about 20 cm)
- Fill a quarter of the hole (the height of one bulb) with loose soil, or even potting soil or soil mixed with coarse river sand if you have heavy soil. This effectively extends the number of years of flowering.
- Place the bulb, point up, at the bottom of the hole (about 15 cm)
Cover with soil. If you haven’t made a mistake in these complicated calculations, the bulb should be covered with twice its height of soil (a good 10 cm).
So, to fail with your tulip plantings, plant them upside down, far too deep, at least 20 cm deep, or too shallow, less than 5 cm, in uncompacted soil.
Lesson number 5: how to fail the re-flowering of tulips: early digging or mowing, famine or death by thirst
Nature is poorly made: tulips in the garden need a little attention just when you stop taking care of them, after flowering, when these sublime beauties fade and turn into unsightly stems and leaves that are more or less yellowish.
The post-flowering period, generally April-May or May-June, is when tulip bulbs replenish their reserves to be able to bloom again the following year: they need their foliage, a bit of water (especially if they are planted in pots), and appreciate some fertiliser. You can safely cut the flower stems, but a good gardener does not cut the foliage before it has completely yellowed. On the contrary, they will stimulate it, with a bit of fertiliser, and water in case of spring drought. The said good gardener also plants, in front of or among their tulips, spring-flowering perennials, like brunneras for example, which help to mask the unsightly foliage of tulips after flowering, without having to cut it prematurely.
So, you guessed it, to prevent your tulips from re-flowering properly, you need to thwart this regeneration. The simplest way is to mow immediately after flowering over your tulip bed: the bulbs will not re-flower, or very little. And if you repeat the mowing after flowering the second year, you will eliminate the last survivors.
Note: it was traditional among old gardeners to dig up tulip bulbs at the end of spring to replant them in early autumn. This custom has fallen out of favour, as it does not significantly improve their lifespan. In theory, digging and storing in trays reduces the risk of fungal disease (like fusarium); in practice, there is generally more risk related to poor storage conditions (excessive humidity, presence of rodents, etc.) than to leaving them in the ground in a properly drained garden. In short: leaving your bulbs in the ground will not significantly increase your chances of failing them.
In summary, to prevent tulips from re-flowering in the second year, mow your beds immediately after planting.
* * *
As a special bonus to reward readers who have had the patience to skim through all these many lines:
Bonus gift: how to create an ugly tulip bed?
You can succeed in growing tulips, and still easily end up with a very ugly result. It’s very easy; here are some little tricks from a specialist to help you:
- Mix a lot of non-complementary colours
It is often said that a beautiful bed plays on two colours, a maximum of 3. If you mix bulbs of 4 or 5 non-complementary colours, you will generally achieve a garish result that will remind you of your grandmother's plant mail-order catalogues (no, we won’t name names!).
- Plant several varieties side by side without mixing them
You randomly acquire the magnificent collection of tulips "Carnival of Venice" from Promesse de fleurs (our best seller for 30 years), and instead of mixing the 5 matching varieties of this collection for a harmonious result, plant each variety separately. Even better: instead of planting naturally, that is to say, a bit irregularly, make nice straight planting lines, just like in the vegetable garden. The result will be… strange!
- Plant insufficiently dense
Experienced gardeners plant tulips quite densely for a nice group effect. Without necessarily planting in large numbers, a nice effect can be achieved with 10 bulbs planted in a "potato" shape over 20 cm2, or even with 5 bulbs grouped in "clumps" in the same large planting hole, with a spacing of about ten cm between bulbs.
You read on promessedefleurs.com that you can plant a hundred tulip bulbs per m2, at least 50, and your mother-in-law boasts with her beds of 150 tulips per m2. But since you’re not easily fooled, and you know the generally dishonest mercantile spirit of Promesse de fleurs and your mother-in-law's reckless spending when it comes to anything other than your birthday gift, you scoff and plant your bulbs economically, 10 bulbs per m2; it sounds good, and it makes… one bulb every 40 cm.
Bravo!
The result will be bizarrely ugly: you will have the vision of a small forest of stems (tulip stems are always unsightly). And if you combine this with the previous advice, I promise you that neighbours and passers-by will stop in front of your garden to contemplate your bed.
I promise you this, as I still vividly remember, despite the time that has passed, a sort of gathering of giggling neighbours one day in front of the magnificent first flowering of my very first tulip bed.

Tulips are, among the spring flowering bulbs, the easiest to succeed with: well-sized, standardized bulbs that are almost always homogeneous in quality; they are the easy bulbs par excellence; and yet, it is just as easy, with a little attention, to fail at planting them. Follow our meticulously established guide, based on the author’s extensive […]
Whether you are a beginner or experienced gardener, you cannot have failed to hear about the famous "Saints de Glace". When will they occur? Should you follow folk sayings and wait for them to pass before starting your vegetable garden and putting out planters? What should you fear during this period? We tell you everything!
You can also find this article in our podcast about the Saints de Glace :
What are the Saints de Glace?
The "Saints de Glace" refer to a period in May traditionally associated with the lune rousse, which occurs after Easter. In practice, it is a few rather tricky days in the garden during which late frosts can occur.
When are they? Dates of the Saints de Glace
There is no need to look for when the Saints de Glace will occur this year! They fall on the same dates every year: 11, 12 and 13 May. These three dates correspond respectively, in the old calendar, to Saint Mamert, Saint Pancrace and Saint Servais. In the cooler regions, one more companion is added: Saint Urbain, celebrated on 25 May.

Can you plant before the Saints de Glace or should you wait?
Of course, it is possible to plant all frost-resistant plants before this period: trees, shrubs and hardy perennials.
However, avoid planting frost-tender annual flowers (petunias, impatiens...) and all tender vegetables such as tomatoes, aubergines, courgettes and peppers. Another factor to take into account is, of course, the region where your garden is located. Risks of late frost are much lower in Nice than in Strasbourg, where you'll need to wait until the end of May to be completely out of the danger zone.
That said, in practice, statistically the risk of frost does not seem that high.
So, if you've been gardening in a T-shirt for 10 days and are eager to start your vegetable garden, nothing prevents you from planting a few tomato plants. Keep an eye on the weather forecast, but also on the sky because cloudless nights are conducive to frost. Make sure you have something to protect your seedlings and plants from the cold… just in case… and everything should be fine!
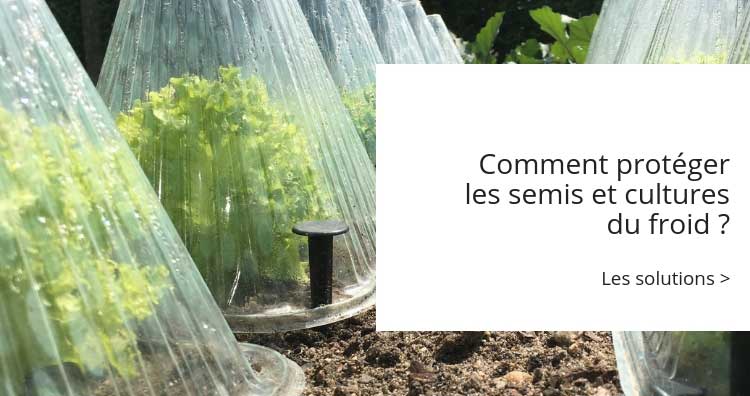
However, if you're the anxious, not-very-adventurous or absent-minded gardener: be patient! After all, everything in its own time… vegetables planted later, but into well-warmed soil, at the end of May or start of June will quickly catch up with those planted much earlier.
Whether you are a beginner or experienced gardener, you cannot have failed to hear about the famous “Saints de Glace”. When will they occur? Should you follow folk sayings and wait for them to pass before starting your vegetable garden and putting out planters? What should you fear during this period? We tell you everything! […]
The mulching fabric or planting tarp has become, in just a few years, a staple in landscaping. Whether in public spaces or private gardens, it is rare for the soil not to be covered by it. Why? To help plants grow faster, with no maintenance, no weeding, and no watering.
What a great plan! But does the tarp really deliver on its promises? Should we use it? I won’t beat around the bush and, at the risk of upsetting all those whose gardens are equipped with it: the answer is no, and I’ll explain why.
Does mulching fabric promote plant growth?
When planting on a tarp, one generally observes good plant growth during the first two or three years. However, things gradually deteriorate afterwards. Indeed, the soil needs to be regularly amended to maintain its fertility. In a forest, this is a natural process that is child’s play: leaves fall from the trees, decompose, and create humus.
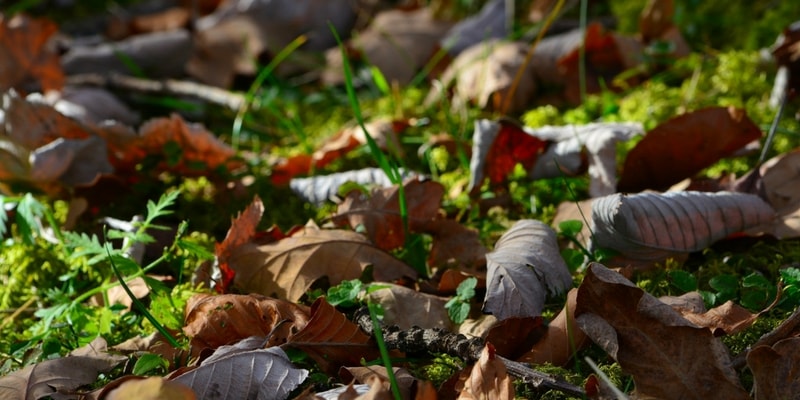 Forest soil maintains its own fertility: a process to replicate at the base of hedges
On soil covered with a tarp, this process is blocked as the fabric acts as a barrier to decomposing elements. This results in soil depletion, which ultimately leads to a lack of nutrients for the plants. In the medium to long term, the soil loses its vitality, and under strict conditions, trees and bushes become weakened. Some may fall ill... and die prematurely.
Regarding watering, yes, the tarp retains moisture, but not more than organic mulching... and possibly less, as rainwater tends to run off and infiltrates more slowly, depriving the soil of the benefits of a good downpour.
Is mulching fabric effective against "weeds"?
I experience this every day. In my street, two flower beds were planted at the same time: mine and the one belonging to the council. I mulched with pruning chippings, while they laid down a tarp.
In the first year, I had a bit of work, sure (they laughed...). But for the past two years, I hardly intervene, while the council’s green space team spends at least an hour a month on theirs (and now, I’m the one laughing!). Why? Simply because in my bed, weeding is easy: I just have to pull out the intruders by their roots. Meanwhile, my friends from the council struggle to extract those that infiltrate every little crevice.
Finally, observing what happens on the mulching fabric over the long term, one notices that quickly, the leaves that fall end up decomposing on the surface, forming a substrate ready to welcome any seed: while weeds may struggle to grow under the tarp, they easily find a way through and thrive on top of it!
The proof is in these images, mundane yet very telling:
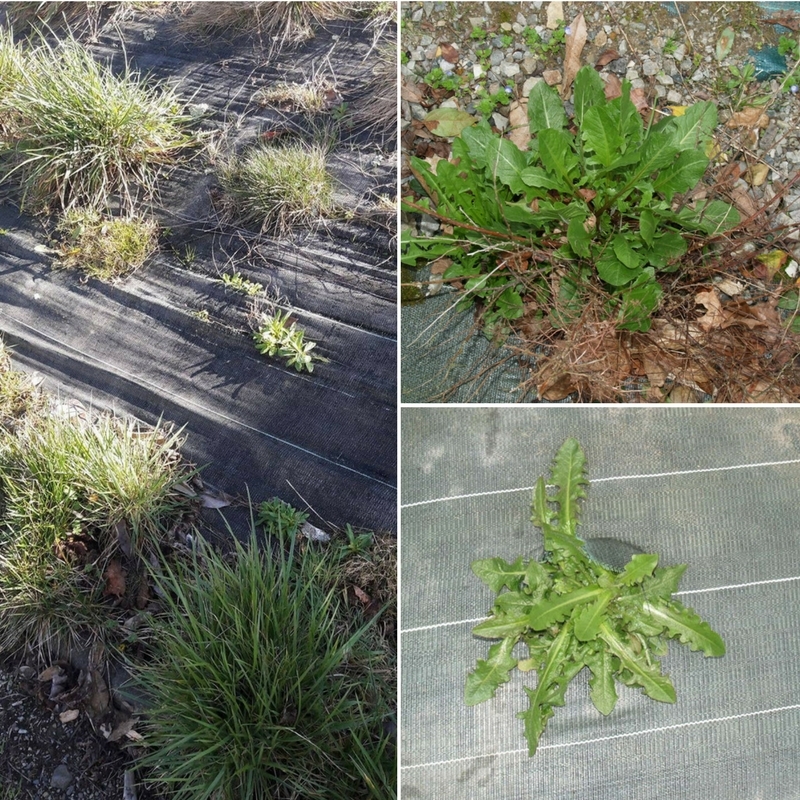 An unappealing aspect / substrate forming on the surface / a dead bush has left a gaping hole quickly occupied by an opportunistic dandelion!
On the implementation and aesthetics of planting tarps
Having experienced the installation of tarps, done properly, during a training course with a landscaper (the longest two weeks of my life), I can tell you: it’s particularly difficult. Despite my limited sewing skills, adapting it to the shape of the bed and ensuring the entire surface is covered is far from enjoyable. The worst part is certainly having to plant through it: you have to make a cross-shaped opening with a cutter, but it mustn’t be too large... You slide the root ball in, and it is impossible to check that the plant is in contact with the soil and at the right level!
Finally, for economic reasons, mulching fabrics are rarely covered with decorative mulch. And inevitably, it looks ugly... especially when it frays!
How to do without planting fabric?
When you have little time to devote to your garden and are not a big fan of weeding, what can you do? It’s quite simple: first, don’t skip the preparation: weed and carefully loosen the planting area by extracting as many roots as possible (you have the right to curse the couch grass!). Add a bit of compost, plant, water, and then mulch generously with a thick layer of organic mulch (commercial types like Fibralgo, bark for ericaceous plants, chippings, straw…). It will decompose slowly, fertilising the soil. After a year, renew the mulch if necessary, and once the plants are well established, you can, if you wish:
- plant groundcovers: they will form a lovely carpet at the base of trees or bushes,
- if it’s a trimmed hedge or perennials, leave the residues in place to maintain soil coverage,
- let spontaneous flora grow... In a natural garden, this is perfectly acceptable!
Thus, you won’t have more maintenance than if you had laid a tarp, and your plants will thrive.
Is biodegradable tarp a good alternative?
Mulching a very large area or a long hedge requires moving a large volume of mulch. If you’re not a fan of wheelbarrows, biodegradable mulching fabric is a good alternative. It is more expensive, but offers the advantage of being more aesthetically pleasing, more environmentally friendly, and above all, it decomposes naturally! Made from coconut fibre or jute, it allows for good plant growth. It is also, in combination with suitable perennial plants and groundcover bushes, a good solution for greening difficult areas like slopes.
In conclusion, know that if you have tarp in your garden, it’s never too late to do the right thing: don’t hesitate to remove it and install a nourishing mulch instead... your plants will thank you!
The mulching fabric or planting tarp has become, in just a few years, a staple in landscaping. Whether in public spaces or private gardens, it is rare for the soil not to be covered by it. Why? To help plants grow faster, with no maintenance, no weeding, and no watering. What a great plan! But […]
Temperatures are cooling, light is turning golden and veiled by first autumn mists; in the distance, star-shaped flowers of autumn asters shine across beds, blooming in large clumps where summer flowers have faded. The genus Aster includes several hundred species and varieties, the range is such that choosing can often be difficult. Discover our short guide to help you choose, combine and grow them successfully.
1) Choosing: natural or sophisticated, a question of taste and style!
-
For naturalistic, wild scenes: Aster cordifolius and Aster ericoides
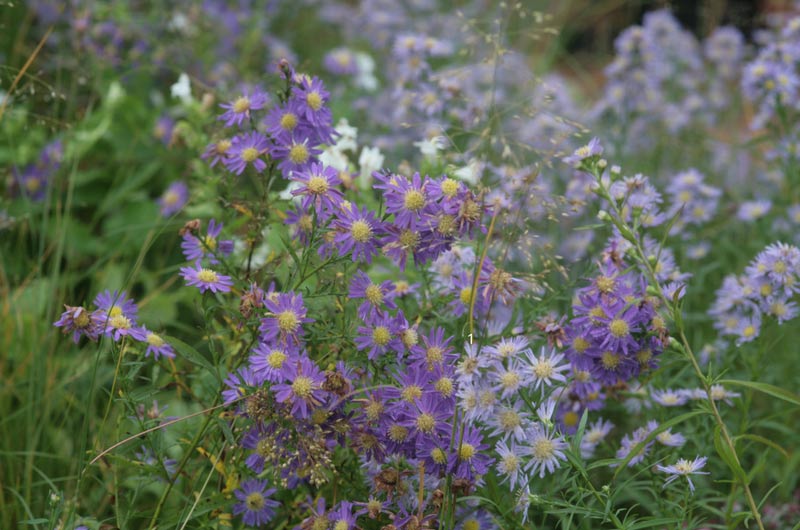
Aster cordifolius and Aster ericoides are meadow perennials par excellence: they withstand wind without collapsing, their foliage remains free from powdery mildew and their light but sturdy branching bears clouds of small flowers in mid-autumn. They form a shrub 80 cm to 1 m high to which large grasses such as Miscanthus or Pennisetum are traditionally paired.
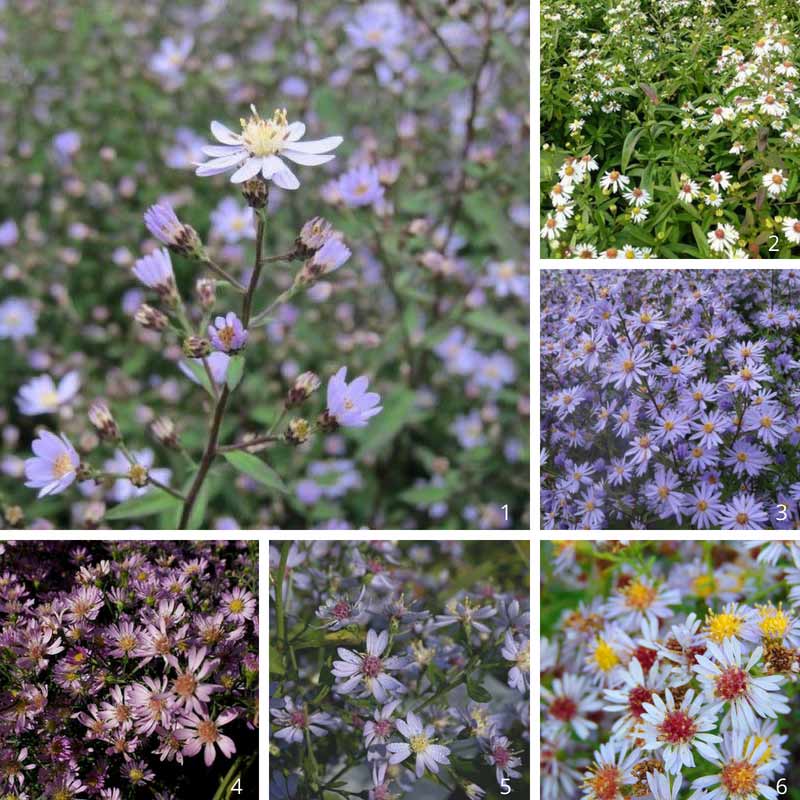
1) Aster cordifolius Blutenregen 2)Aster ericoides Herbstmyrte 3) Aster cordifolius Blue Heaven 4) Aster ericoides Blue Wonder 5) Aster cordifolius Ideal 6) Aster ericoides Lovely
-
For mixed borders: Aster novi-belgii and Aster novae-angliae
The most exuberant and colourful asters belong to the novi-belgii and novae-angliae groups, which form large, colourful clumps in mid-autumn. On average, their height ranges from 70 cm to 1.2 m, making them excellent candidates for the back of borders, but unfortunately vulnerable to wind. It is not uncommon to see them flop like cereal crops after heavy rain. Prevent this by inserting branched canes at least 50 cm tall into clumps in August. Later hidden by flower heads, this discreet framework will support the clumps more flexibly than traditional bamboo. You can also pinch them in May to keep them more compact and well-branched.

from top to bottom and from left to right: Aster novae angliae-Andenken an Paul Gerber - Aster novi-belgii Marie Ballard - Aster novae-angliae Violetta - Aster novi-belgii Weisses Wonder - Aster novae-angliae Alma Potschke - Aster novi-belgii Schone von Dietlikon - Aster novi-belgii Porzellan - Aster novi-belgi Karminkupel - Aster novi-belgii Fellowship
-
For neat, well-behaved borders: Aster dumosus
There are enough dwarf aster varieties that you need not look elsewhere to fill autumn borders. The best for compactness and abundant flowering are Aster dumosus. They do not exceed 40 cm in height (20 cm for the most compact) and their growth habit is relatively restrained. Plant them in borders or at the foot of shrubs and space them 20–25 cm apart at planting.
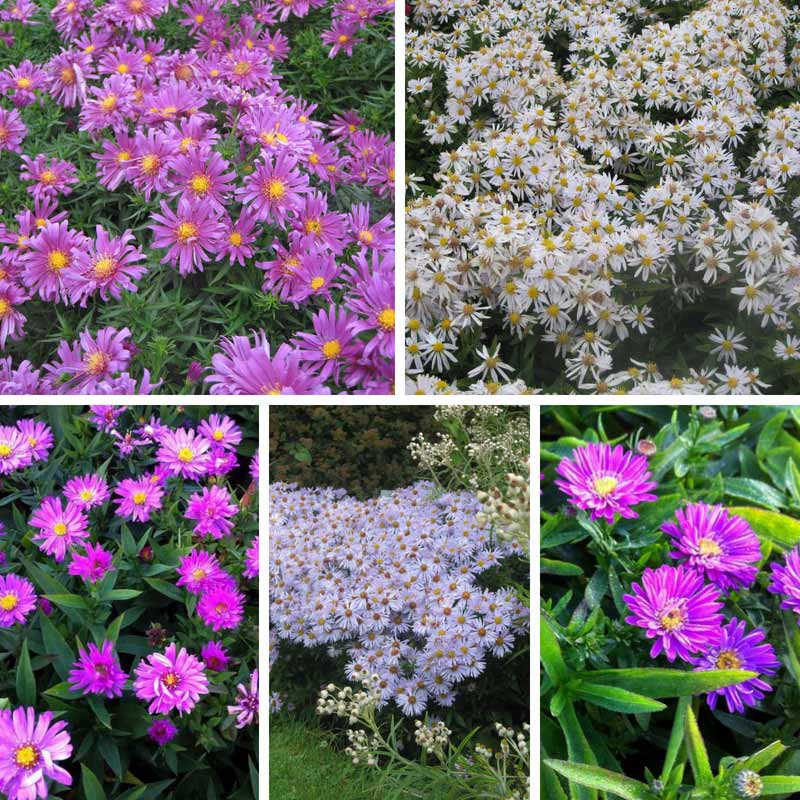
From top to bottom and from left to right: Aster dumosus Tonga, Kristina, Rosenwichtel, Silberblaukissen and Starlight
2) Combining asters: rules for good neighbourliness
Asters are perennials that are easy to combine, but while some are known to take over borders and overwhelm less vigorous companions, others are so large they collapse at the merest gust of wind.
-
Group the most vigorous together
Very vigorous varieties (Aster novi-belgii, novae-angliae and ageratoides) can occupy several square metres in a few years and smother surrounding plants. Grow them either in large, monochrome drifts where they can self-manage, or with small, colourful shrubs such as dogwoods (Cornus alba 'Siberian Pearls', Cornus alba 'Sibirica'...) or Physocarpus ('Lady in Red', 'Diable d'Or').
Aster novi-belgii in a mix
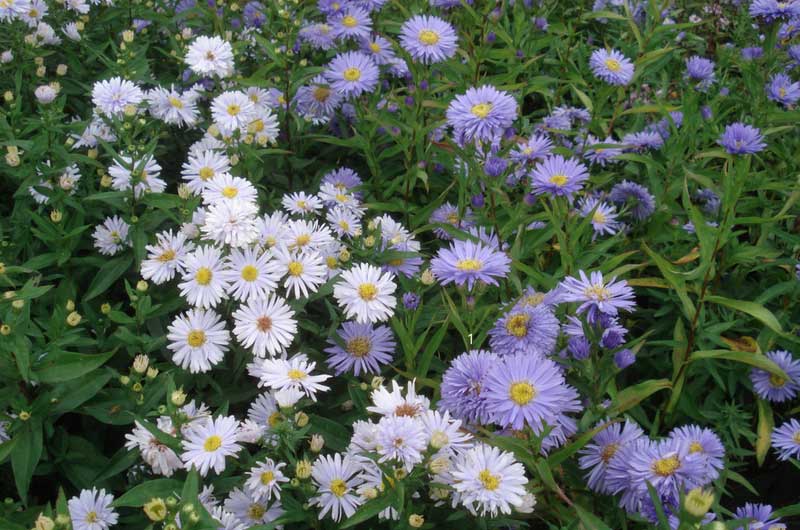
Lovely, soft pairing between the delicate, translucent flowers of Aster Porcelain and the large double mauve flowers of Aster Marie Ballard.
-
Charming duos with wild-looking perennials
Asters love the company of Japanese anemones, which naturally weave their roots into the clumps and mingle with the large, slightly stiff asters. Aster ericoides and Aster cordifolius also pair well with sedums, whose flowering they extend. They combine nicely with large structural perennials such as agastache, artemisias, persicarias or Cimicifuga. Finally, a happy autumn marriage is with grasses: mix a few Panicum, Miscanthus or Pennisetum into your aster clumps for a very sophisticated meadow effect.
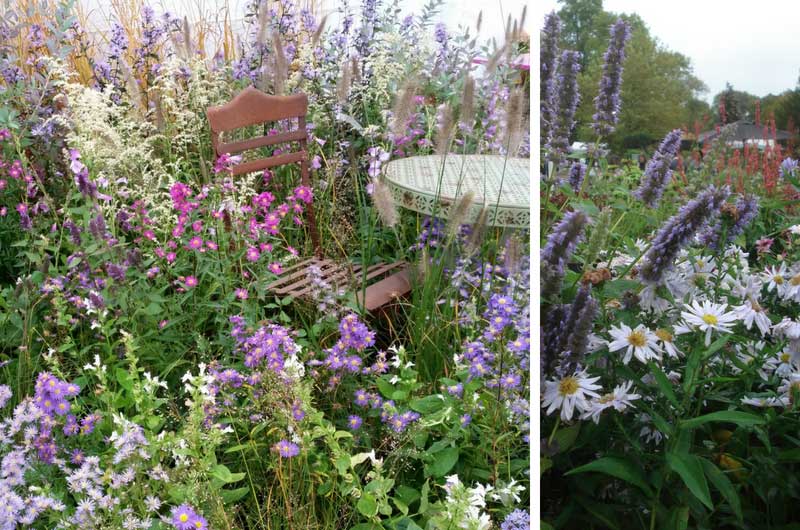
Asters mixed with artemisias and pennisetums - Pairing between agastache 'Blue Fortune' and Aster-novi-belgii 'Porcelaine'
3) How to succeed with asters? Sun and light soil
Large Aster novi-belgii and Aster novae-angliae prefer full sun. Good garden soil is all they need to be happy. They do not mind compact, clay soils provided the soil stays cool in summer. As they send out suckers relentlessly, they eventually become bare in the centre: it is then necessary to divide clumps every three years or so, in spring or in autumn after flowering.

Other asters prefer a light, cool but never waterlogged soil. All, however, like open, airy positions; avoid planting them in borders enclosed by trees or walls, where risk of powdery mildew will be greater, asters need air to flower abundantly and to keep foliage healthy. As you have probably understood, asters are easy perennials, very hardy and undemanding; like phlox or persicarias, they are indispensable perennials for late-season colour in the garden.
And you, what are your favourite varieties, your best combinations, your tips and tricks for keeping asters healthy all season long?
For more information, discover our complete guide to Asters
Temperatures are cooling, light is turning golden and veiled by first autumn mists; in the distance, star-shaped flowers of autumn asters shine across beds, blooming in large clumps where summer flowers have faded. The genus Aster includes several hundred species and varieties, the range is such that choosing can often be difficult. Discover our short […]
A green corner in a small space? It's possible! There are many combinations to create a beautiful balcony full of flowers, but results don't always live up to expectations... Several points must be observed, as in the garden, to be fully satisfied with your creation: exposure, available space, etc. Personally, I gave in to a little whim: a clematis on my windowsill.
How to choose the right clematis?
First, think carefully about the size it will reach when mature: preferably choose a small-growing variety. This is the case, for example, of clematis 'Baby Star', which does not exceed 1.5 metres in height and is therefore ideal in a pot on a balcony. The larger the plant, the larger the pot required to accommodate it. On the promesse de fleurs website, a selection of clematis for pot growing is offered... but the choice is vast and, to decide, you need to play with colours and foliage. For example, clematis 'Early Sensation' is well suited to pot culture and has the advantage of evergreen foliage. Others have a very long flowering period, others are scented...
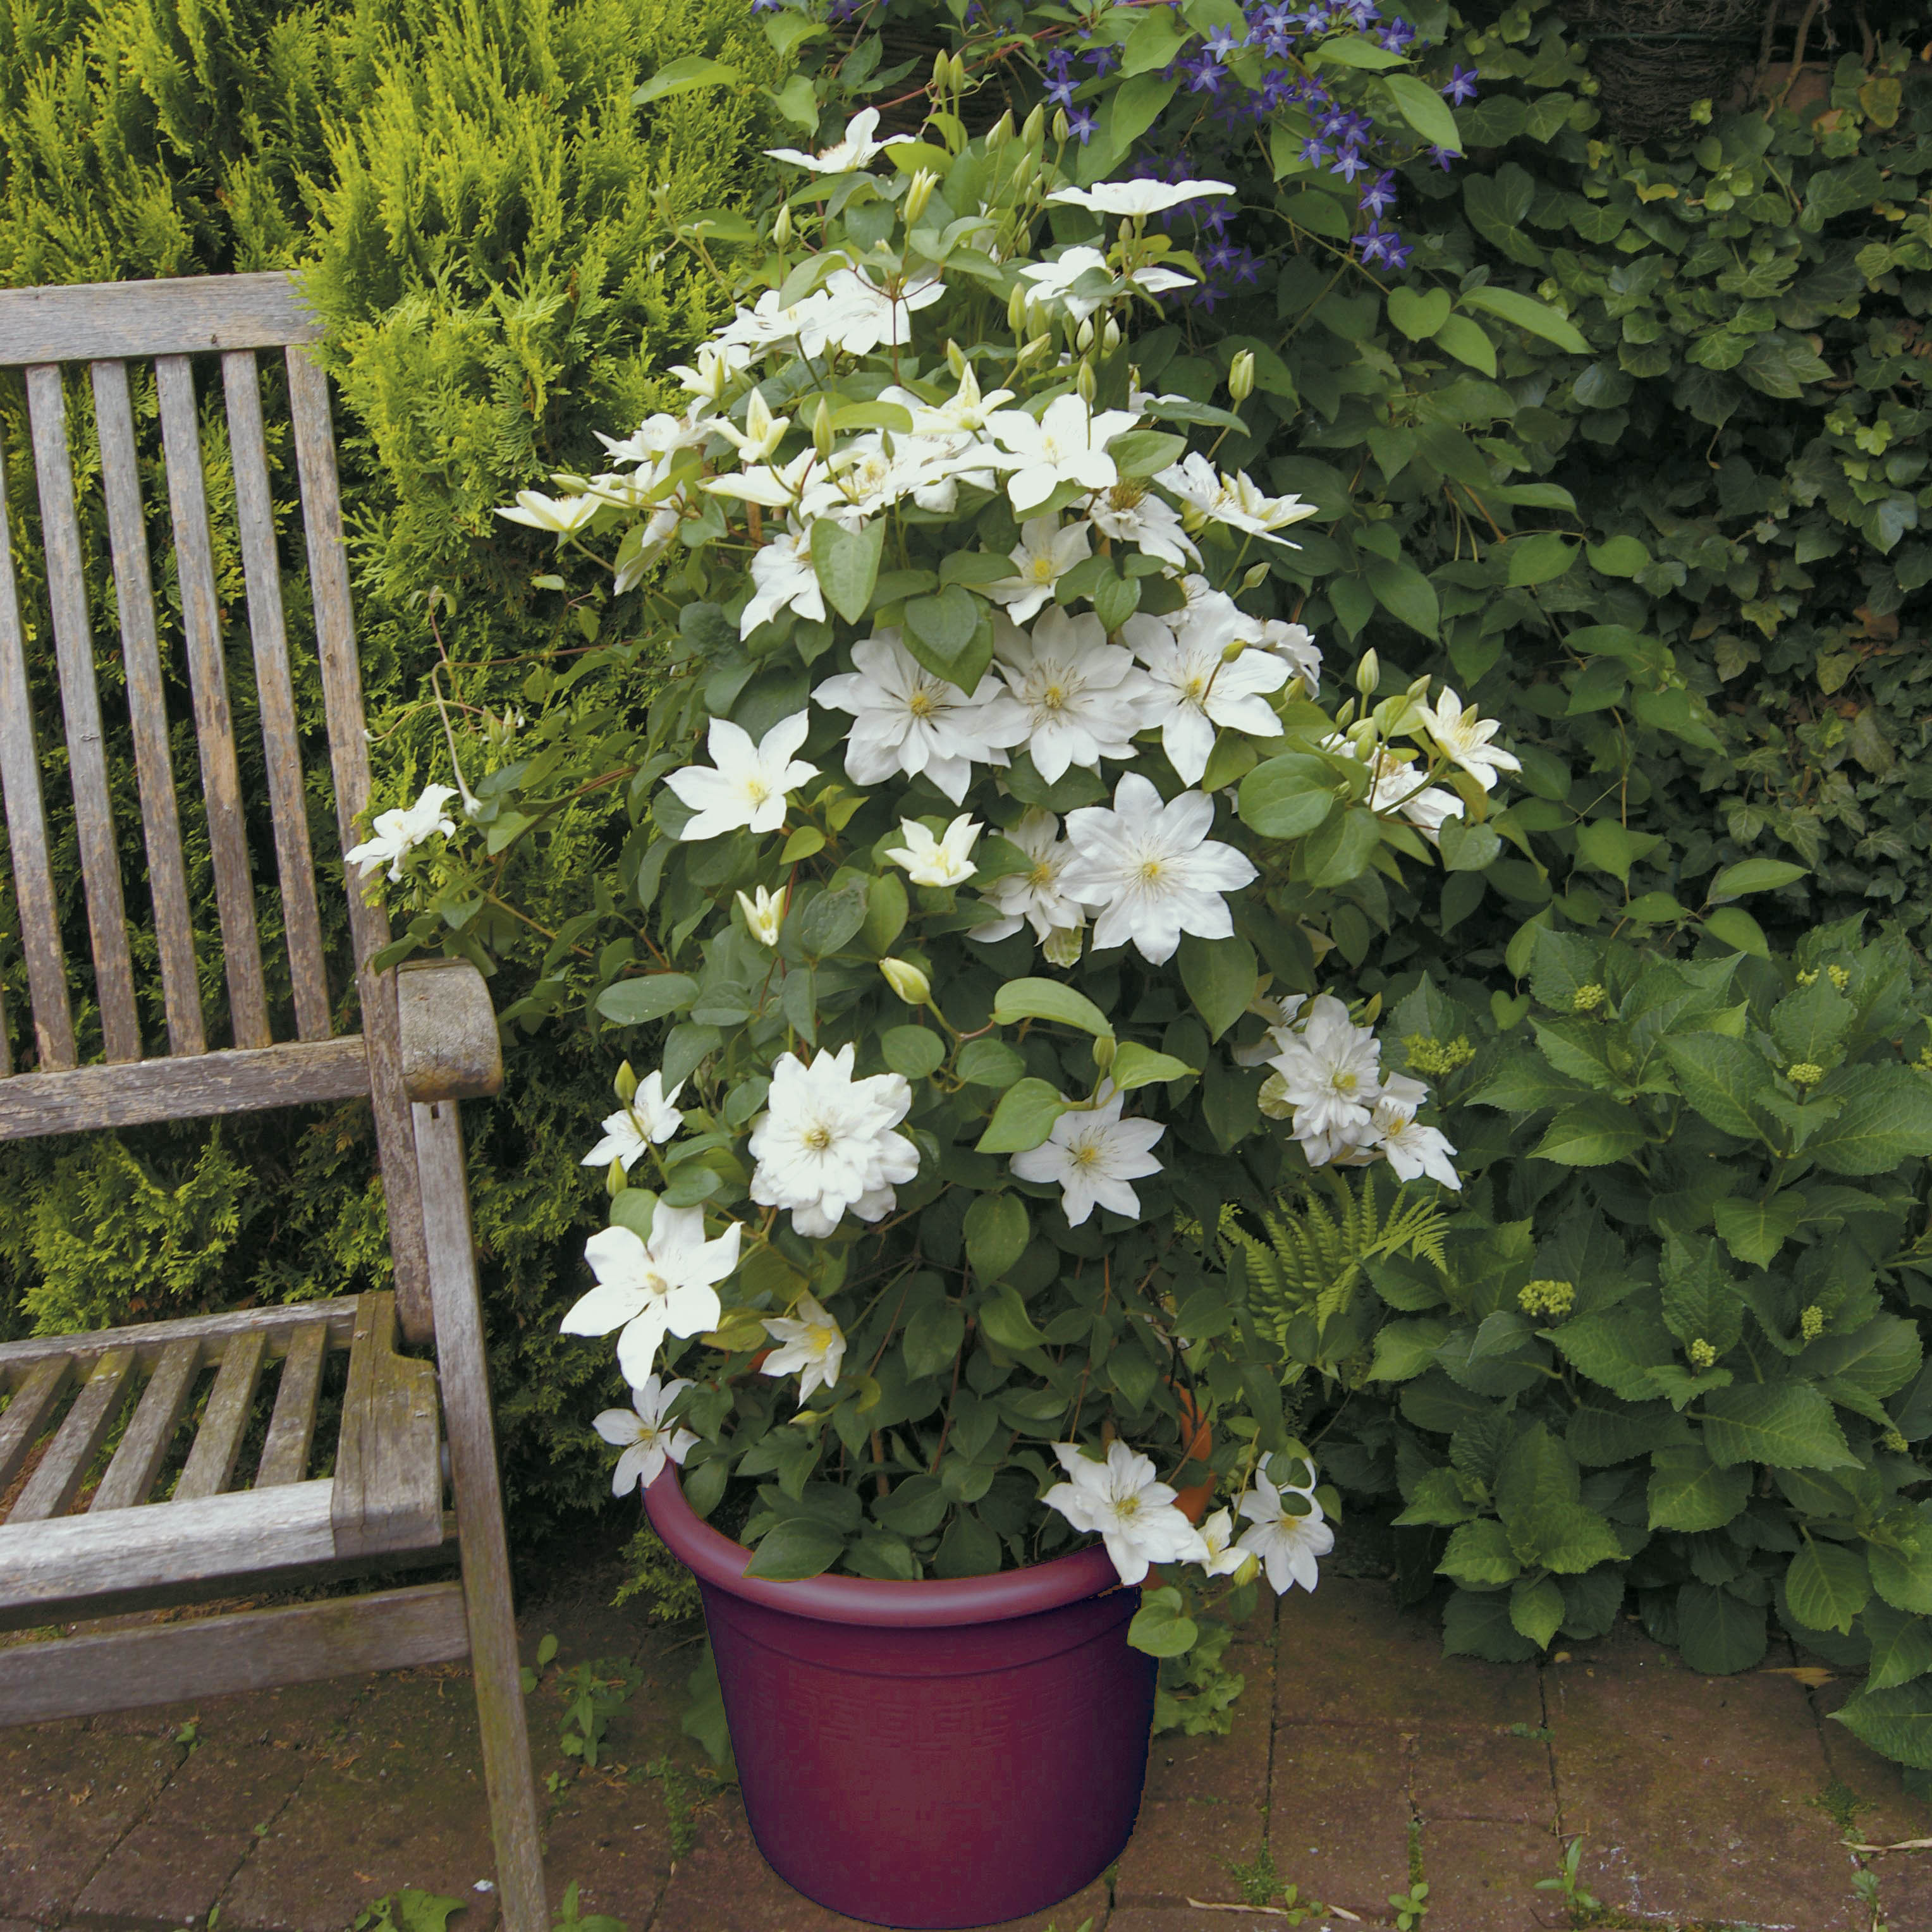
When planting, make sure to provide good drainage at the bottom of the pot; clematis do not like stagnant water... prefer a fertile soil, even enriched with compost. Next, provide a support for your climber: for example a wooden trellis or a bamboo obelisk. If you have the room, let it run along the branches of a shrub planted nearby... Personally, I simply installed stainless steel wires attached to hooks: the clematis' tendrils had no problem finding something to cling to!
Then, it's like in the garden: keep roots cool in the shade and the top in the sun! Most often, sun is the key to a good display of flowers, provided watering is regular. Clematis also like their roots to be cool: we all know the old trick of placing a tile to protect the base, but better is to try plant associations that will provide this role. For example, bushy, undemanding perennials can coexist with the clematis in the pot and provide the necessary shading. My top choice? hardy geraniums, of course! Easy to grow and very floriferous, they are the ideal companions for a potted climber.
I tried: clematis and geranium combinations
- In shade: clematis 'Sweet Summer Love' placed against a shadier window flowered quite well! Its medium size is suitable for pot culture and, the icing on the cake, its flowers exude a sweet fragrance... I paired it with the well-known hardy geranium 'Orion', tireless. The combination is very pretty, even in shade! I even added a small fuchsia, and the three seem to coexist without too much trouble. However, I think the pot (less than 30 cm in diameter) will need to be changed next year.

- In sun: clematis 'Dancing Dorien' has taken place in a zinc pot, with another hardy geranium, 'Dragon Heart', which has delighted me for a month now, without interruption. Flowering slowed in mid-June (I missed one or two waterings...) before restarting with renewed vigour. It pairs wonderfully with the double white flowers of 'Dancing Dorien', which has just begun to flower.
The result? Two flower-filled windowsills that I hope will last all summer...
A green corner in a small space? It’s possible! There are many combinations to create a beautiful balcony full of flowers, but results don’t always live up to expectations… Several points must be observed, as in the garden, to be fully satisfied with your creation: exposure, available space, etc. Personally, I gave in to a […]
Meconopsis betonicifolia is the Latin name of the famous Himalayan blue poppy. Considered by many as the gardener's Grail, its cultivation is certainly delicate but remains within reach of all. To succeed in growing it, you must meet 2 conditions in your garden: a suitable location and soil.
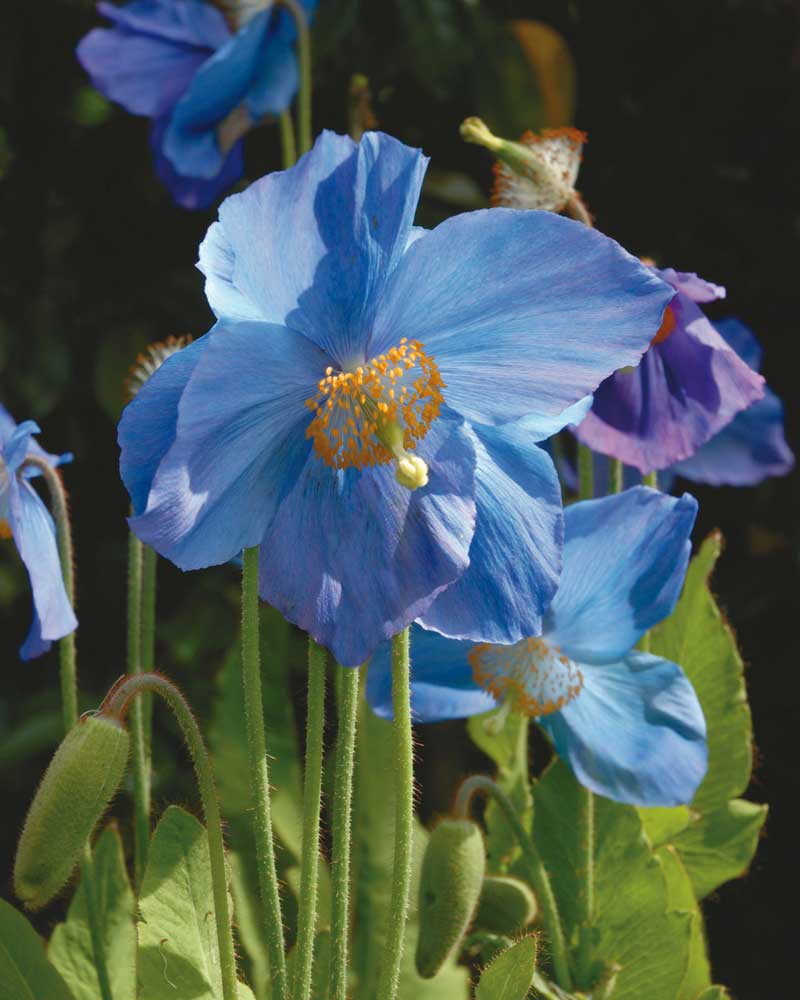
Meconopsis betonicifolia, the famous Himalayan blue poppy
The Himalayan blue poppy appears in a multitude of forms and colours; some are perennial, others annual, others still semelparous (they grow for one or several years before flowering once and dying immediately afterwards). Among the dozens of species and hybrids in this genus, the best known is Meconopsis betonicifolia, and to a lesser extent Meconopsis grandis, with their sublime sky-blue flowers adorned with a cluster of golden stamens. Native to the Himalaya (from Nepal to China), this montane perennial grows at edge of damp woodland, on humus-rich banks alongside primroses and ferns in a moist, cool atmosphere throughout the growing season.
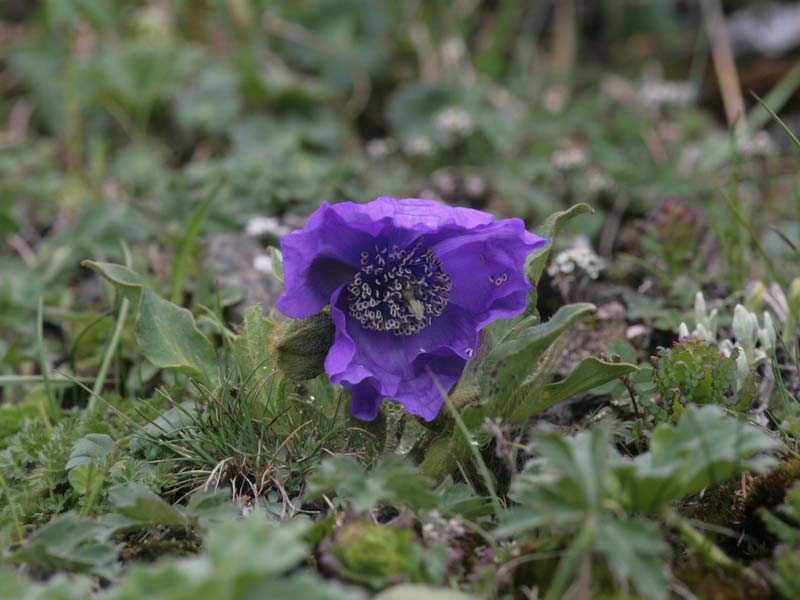
Meconopsis lancifolia, Balang Shan, Sichuan, in situ
Although growing Meconopsis is delicate, it is not impossible, and it is important to respect 2 key points that are decisive for success and for getting flowers over several years. But before addressing these 2 points, here is a short test to find out whether this plant is right for you — answer yes or no:
- Hostas, Asian primroses and hydrangeas grow very poorly in my garden.
- In summer my soil is dry, cracks and I spend every evening watering.
- By contrast, in winter my garden is regularly flooded.
- When it is not the soil that is dry, it is the wind that desiccates the plants.
If you answer "yes" to all these statements, Meconopsis will not be at their best in your garden and will not survive the summer; if "no", succeeding with cultivation of this mythical plant is well within your reach!
1- Planting location will determine about 80% of success with the Himalayan blue poppy. It should be bright, in partial shade and sheltered from the wind. Avoid direct sun during the hottest hours of the day and favour a cool situation. One of the keys to successful cultivation is humidity. The higher the summer humidity, the better the chance Meconopsis have of living a long time. No wind, not too much sun and plenty of ambient moisture in summer guarantee success. In my garden they are protected by large, ancient trees and surrounded by evergreen shrubs (Trochodendron, Rhododendron, Osmanthus...). They are planted facing west near a pond that provides the essential summer humidity.
2- Soil quality is crucial. It should be light, acidic and cool — that is, little or no clay, 0% lime and plenty of leaf mould and humus. Soil should be diggable by hand without a spade yet retain enough density to keep cool in summer. If you do not have such soil you can improve it at planting by adding: potting compost, turf, compost, sand and vermiculite. In my heavy, rich and wet soil, the mix that works best for Himalayan blue poppies is: 50% leaf mould, 20% turf (brown preferably), 20% topsoil and 10% sand. Adjust proportions as needed according to soil type. Planting hole should be 4–5 times the volume of the pot; no need to dig a 1 m³ pit, but ideally a hole 35–40 cm wide and 20–25 cm deep is sufficient.
If all these conditions are met, Meconopsis will grow and flower every year in your garden. Bear in mind their lifespan is short: they live on average 3–4 years in our gardens but when conditions are optimal they self-seed and over time form beautiful colonies, like these Meconopsis grandis in my garden...
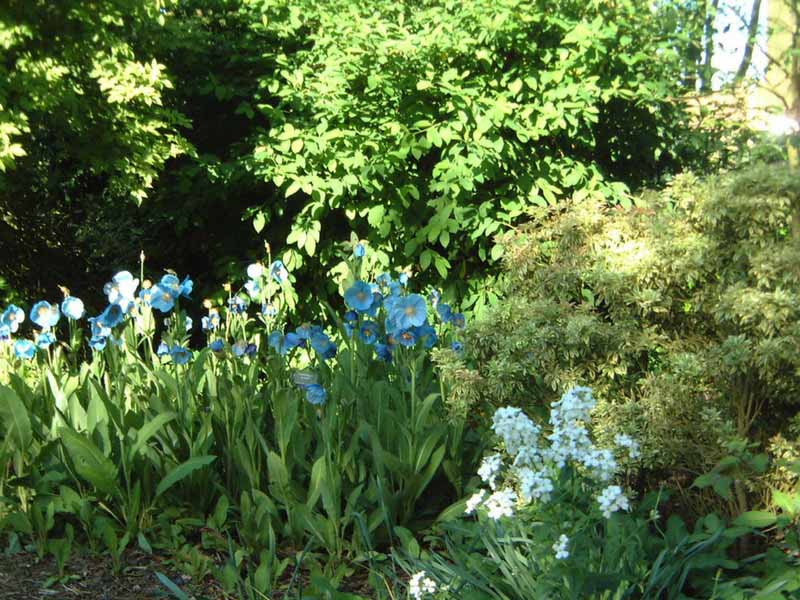
Meconopsis grandis in my garden
Meconopsis betonicifolia is the Latin name of the famous Himalayan blue poppy. Considered by many as the gardener’s Grail, its cultivation is certainly delicate but remains within reach of all. To succeed in growing it, you must meet 2 conditions in your garden: a suitable location and soil. The Himalayan blue poppy appears in a […]
There we go, it has started again; I've become impatient. You know how it is, I suppose, you fellow flower enthusiasts? At Promesse de fleurs, we sell bulbs by the dozens, by the hundreds... Enough to make you dream. I find myself thinking about the arrival of the beautiful 'Angélique' and the delicate 'Dark Eyes'. Because, of course, like many gardeners, I am a tad eager. The flowers, the colours, and the scents... I’m being told that it’s not quite the right time: for the lovely dresses of the tulips and the little faces of the muscaris, we’ll have to wait a few more weeks. But, in addition to being impatient, I am a bit stubborn. And I have a craving for flowers, what can I say….
Little manual for the impatient gardener:
Surround yourself with beautiful objects that are just waiting for a second life:
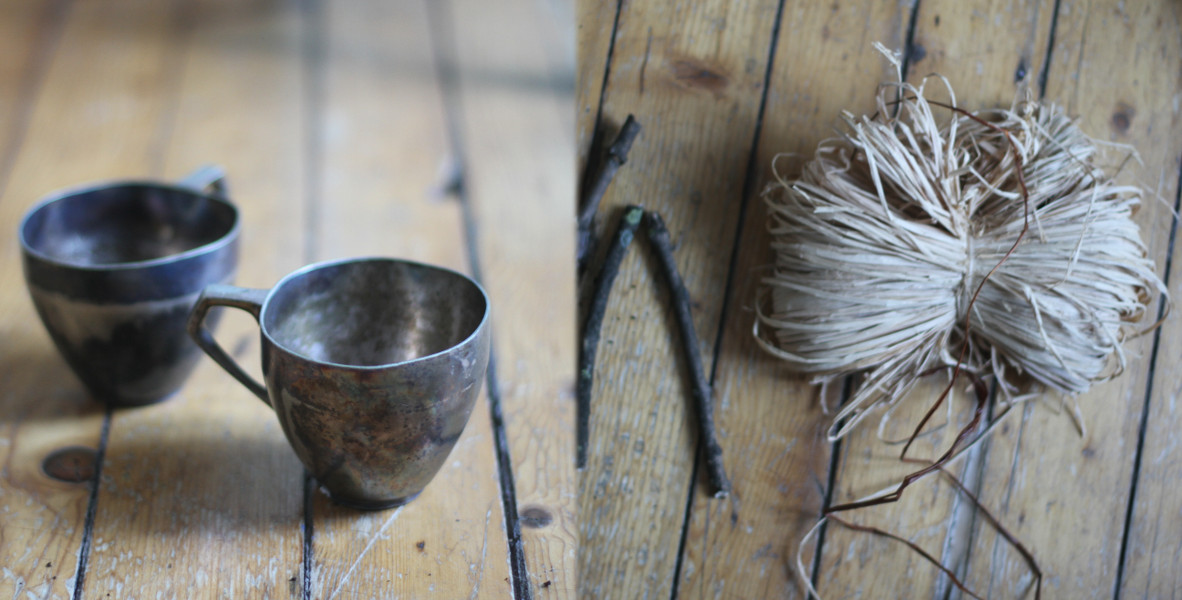 Reclaimed bronze cups, twine, wood
Some bulbs have already undergone forcing (here daffodils and muscaris), we add a few sprigs of vegetation collected from nature:
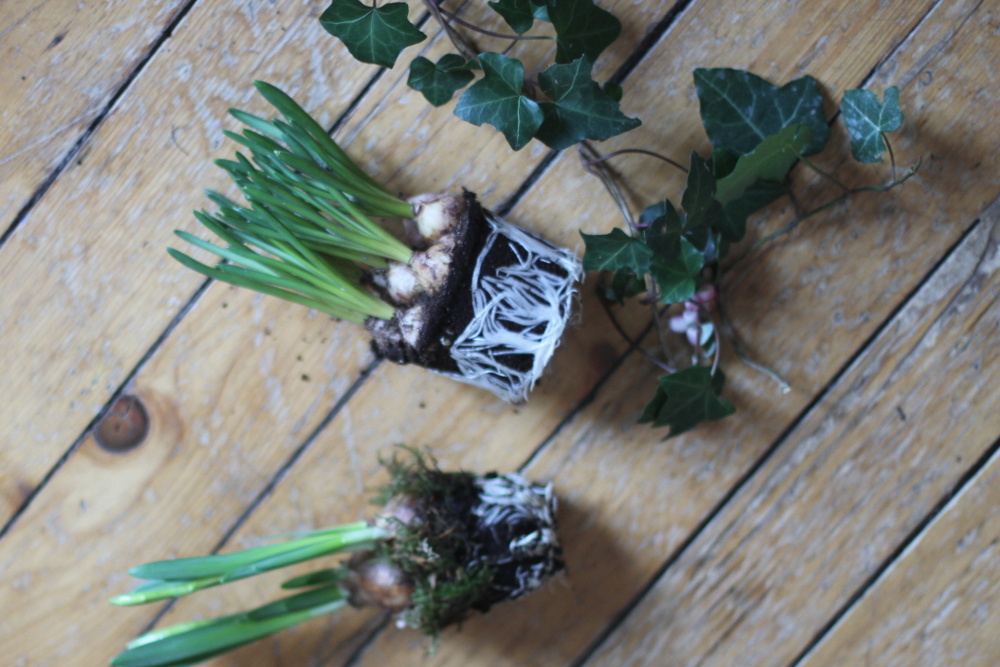 Various forced bulbs and green accessories
We place the bulbs in the "pots", filling with soil if necessary. Then we surround them with ivy and raffia, we fiddle, tie knots, and readjust. We decorate according to inspiration, here with a branch of symphorine in pink:
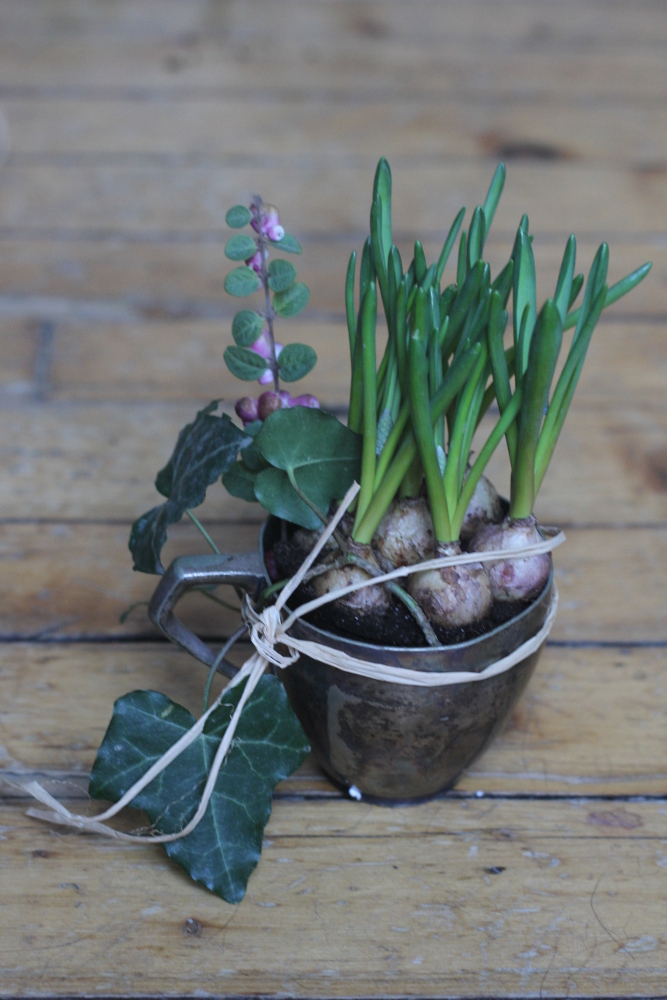 Decorative pot of muscaris
Then we wait for the flowering!
There we go, it has started again; I’ve become impatient. You know how it is, I suppose, you fellow flower enthusiasts? At Promesse de fleurs, we sell bulbs by the dozens, by the hundreds… Enough to make you dream. I find myself thinking about the arrival of the beautiful ‘Angélique’ and the delicate ‘Dark Eyes’. […]
Camellia sasanqua, pronounced "Ka-mel-ee-ah sah-sahn-kwah", is currently showcasing its late flowering... and enchanting fragrance in gardens. Also known as autumn camellia, it blooms continuously until December. However, to enjoy its long flowering and sweet scent right up to the gates of winter, here are 3 key points to know:
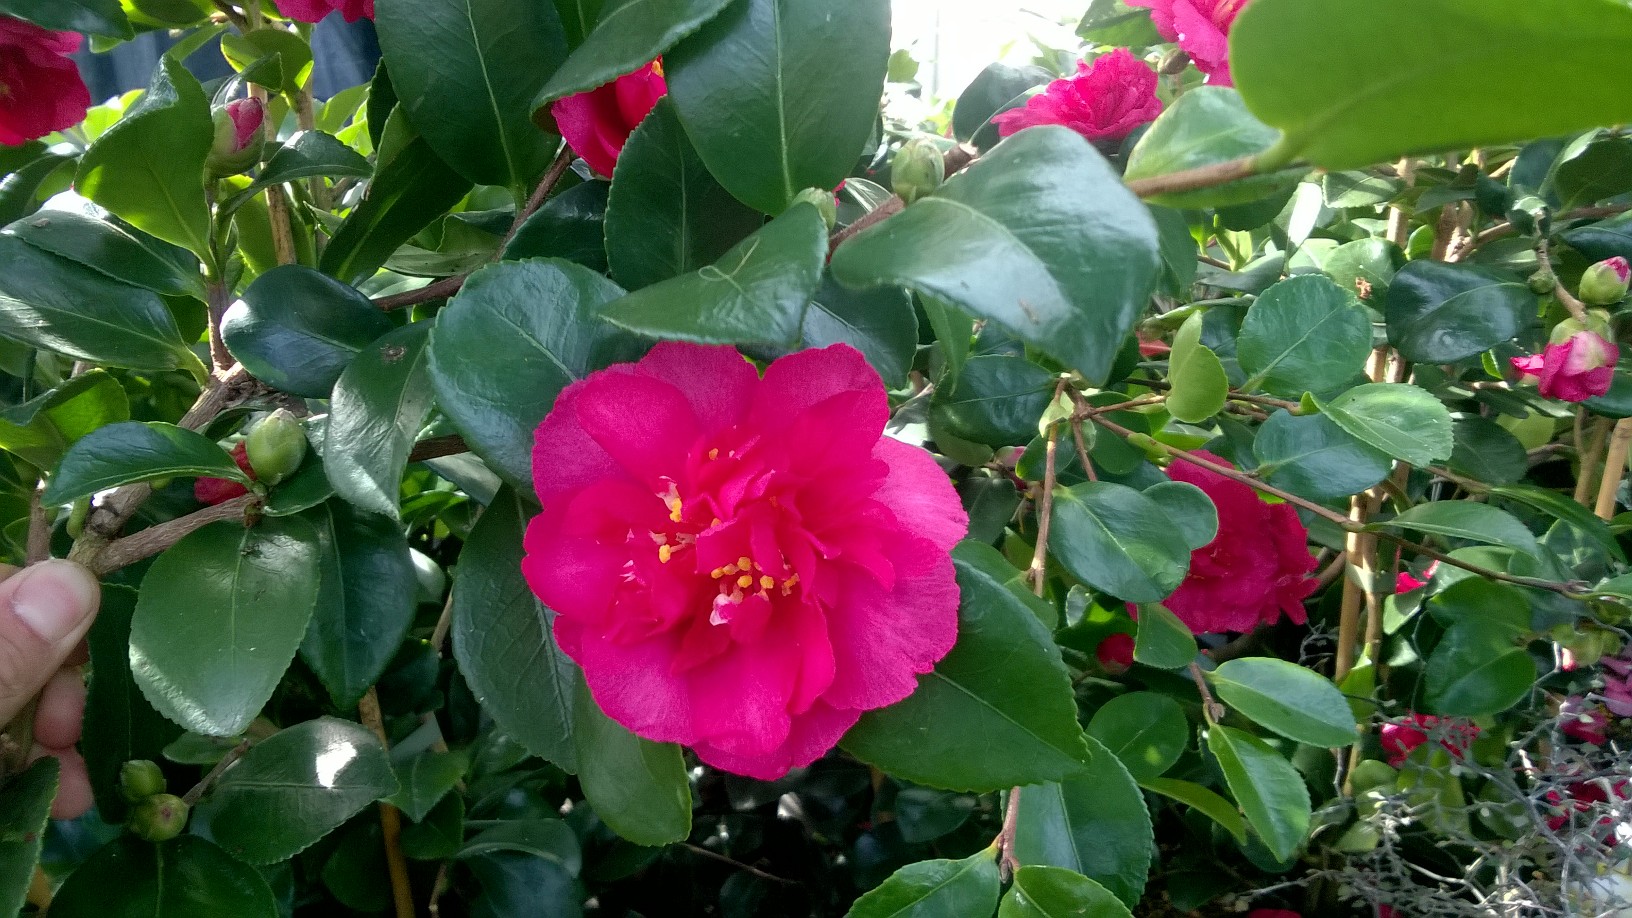
- For which region?
The autumn-flowering camellia performs better in a mild and temperate climate than in colder regions where its hardiness can sometimes be challenged, and its flowering destroyed by early frost. Its average hardiness ranges between -10°C and -15°C for short periods. Traditionally, autumn camellias are cultivated in Brittany, Normandy, and along the entire Atlantic coast. Elsewhere, cultivation is quite possible but requires a sheltered position protected from cold winds.
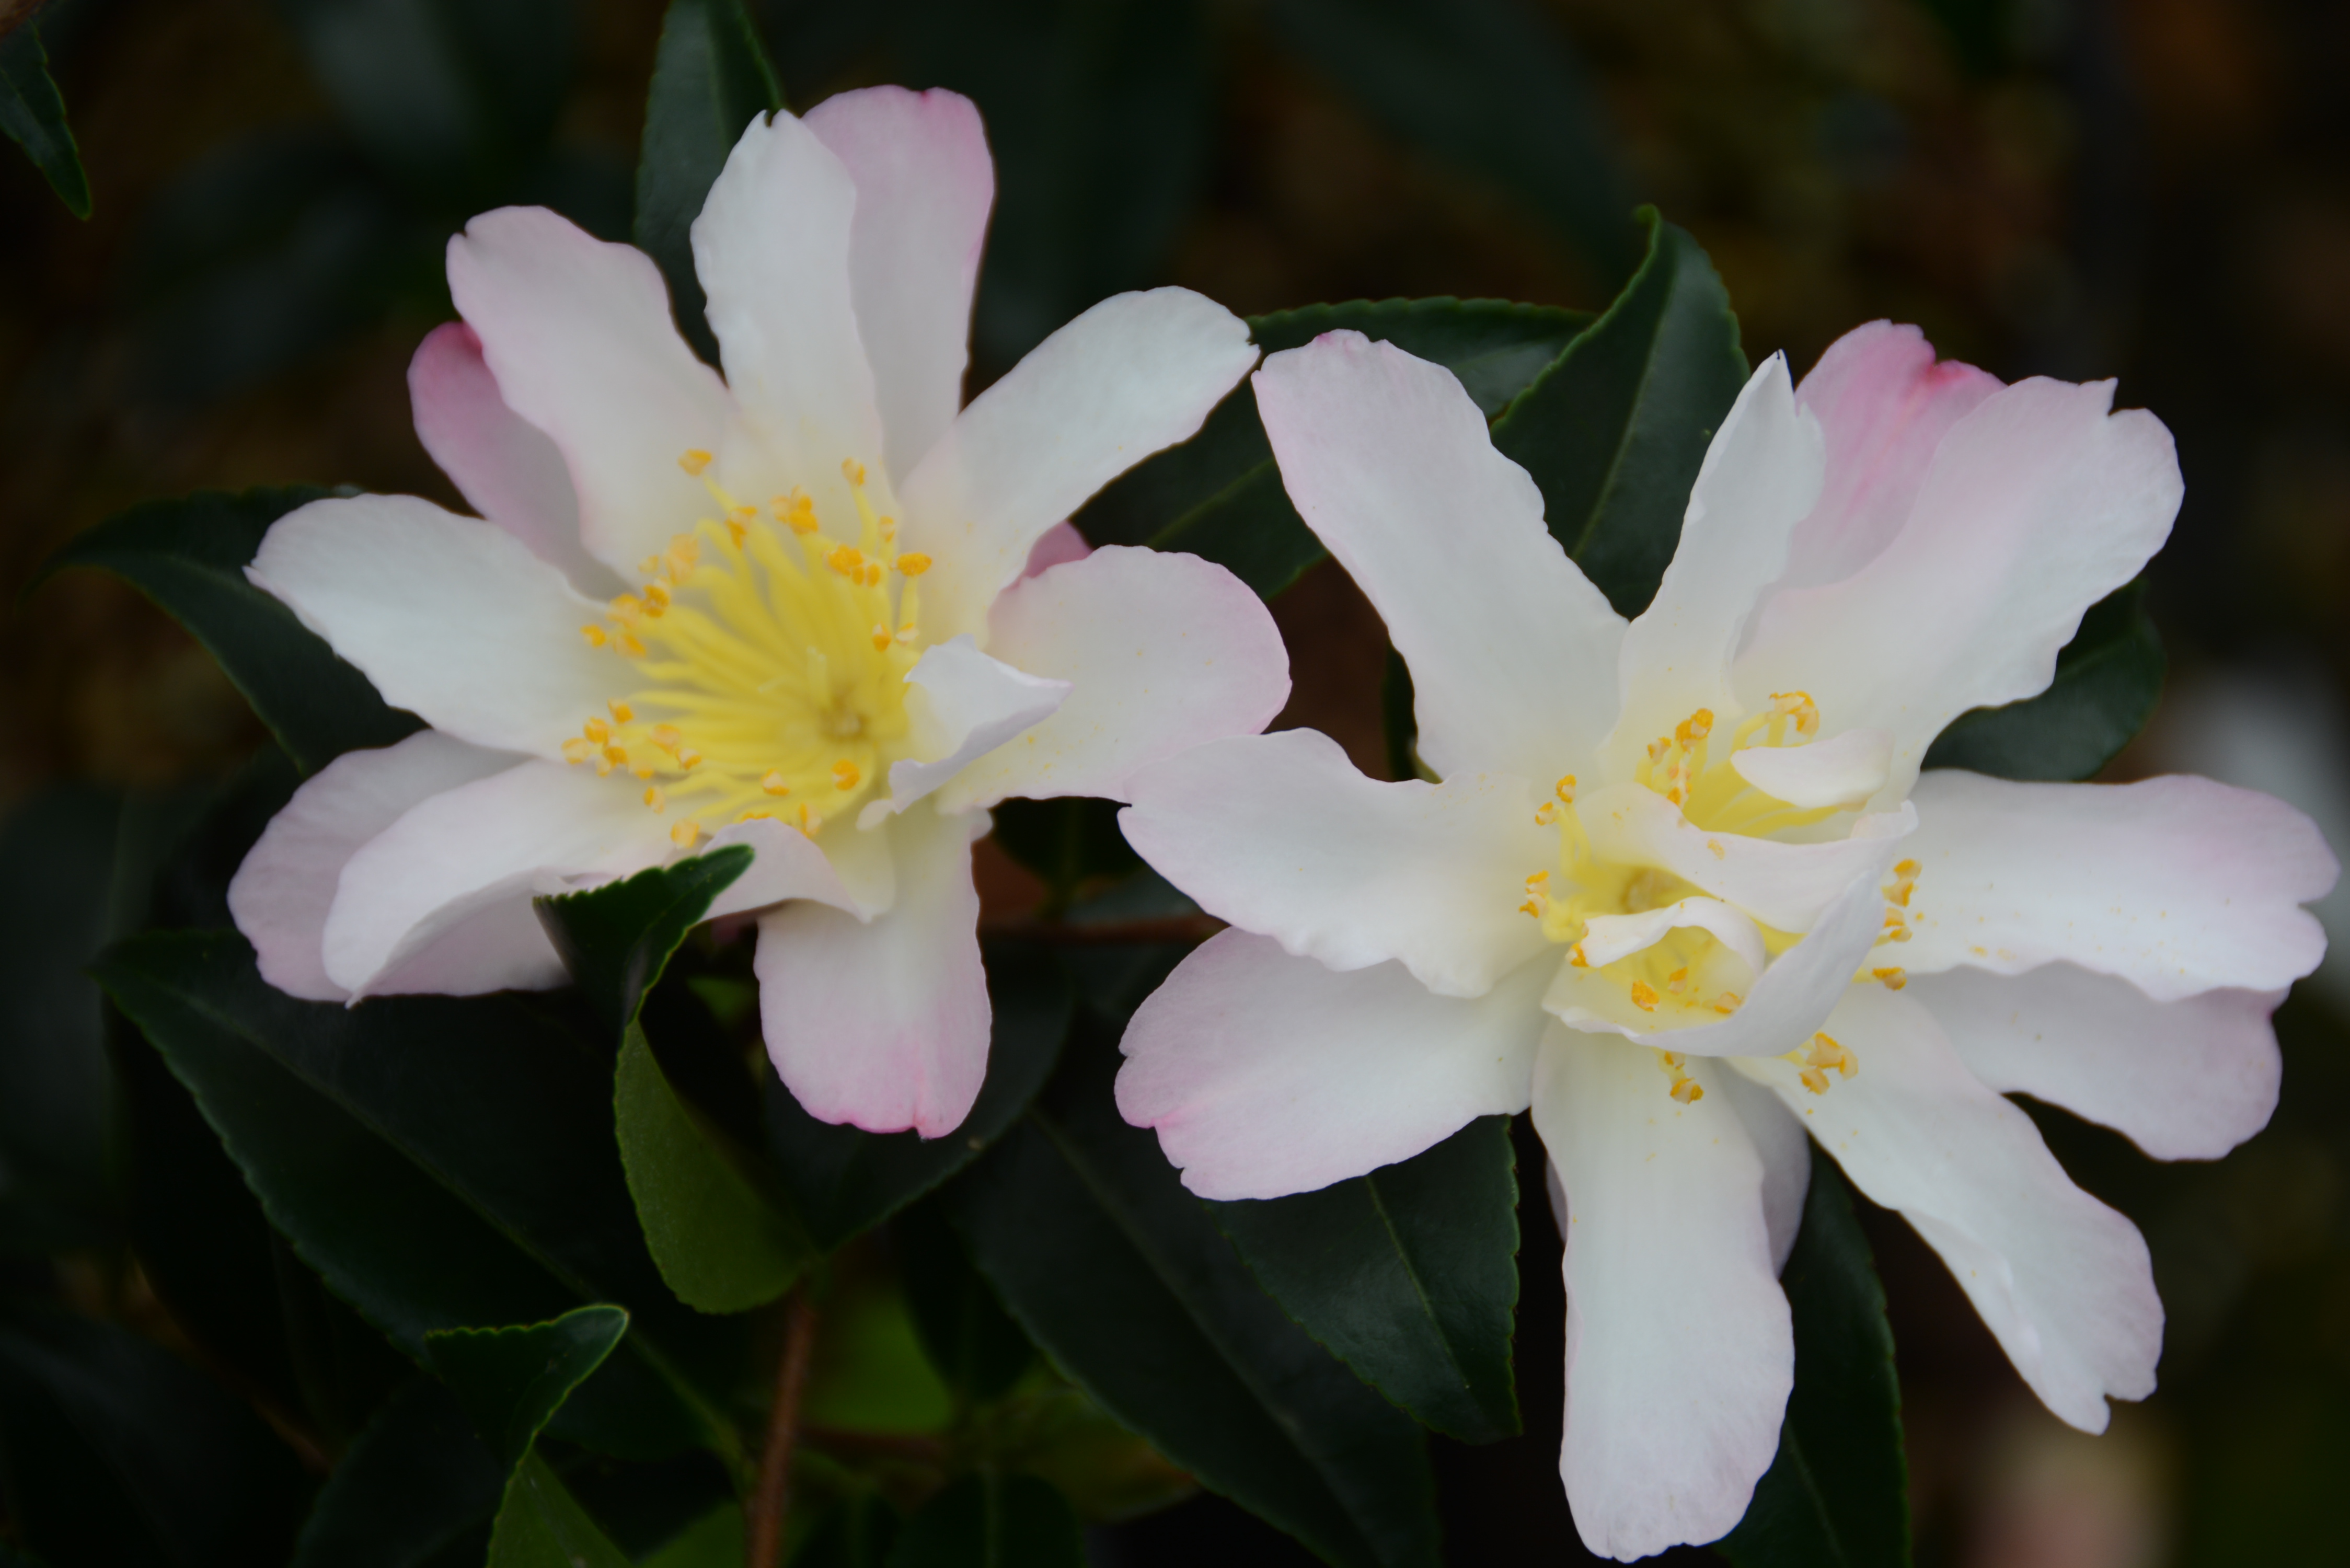
- For which soil?
Like many so-called "heath" plants, Camellia sasanqua thrives in any good acidic and light soil. It requires a soil that is both rich and well-draining, never waterlogged in winter. Its thick, leathery foliage allows it to withstand short periods of drought; however, if it does not lack water in summer, its flower buds will form quickly, resulting in a more abundant flowering.
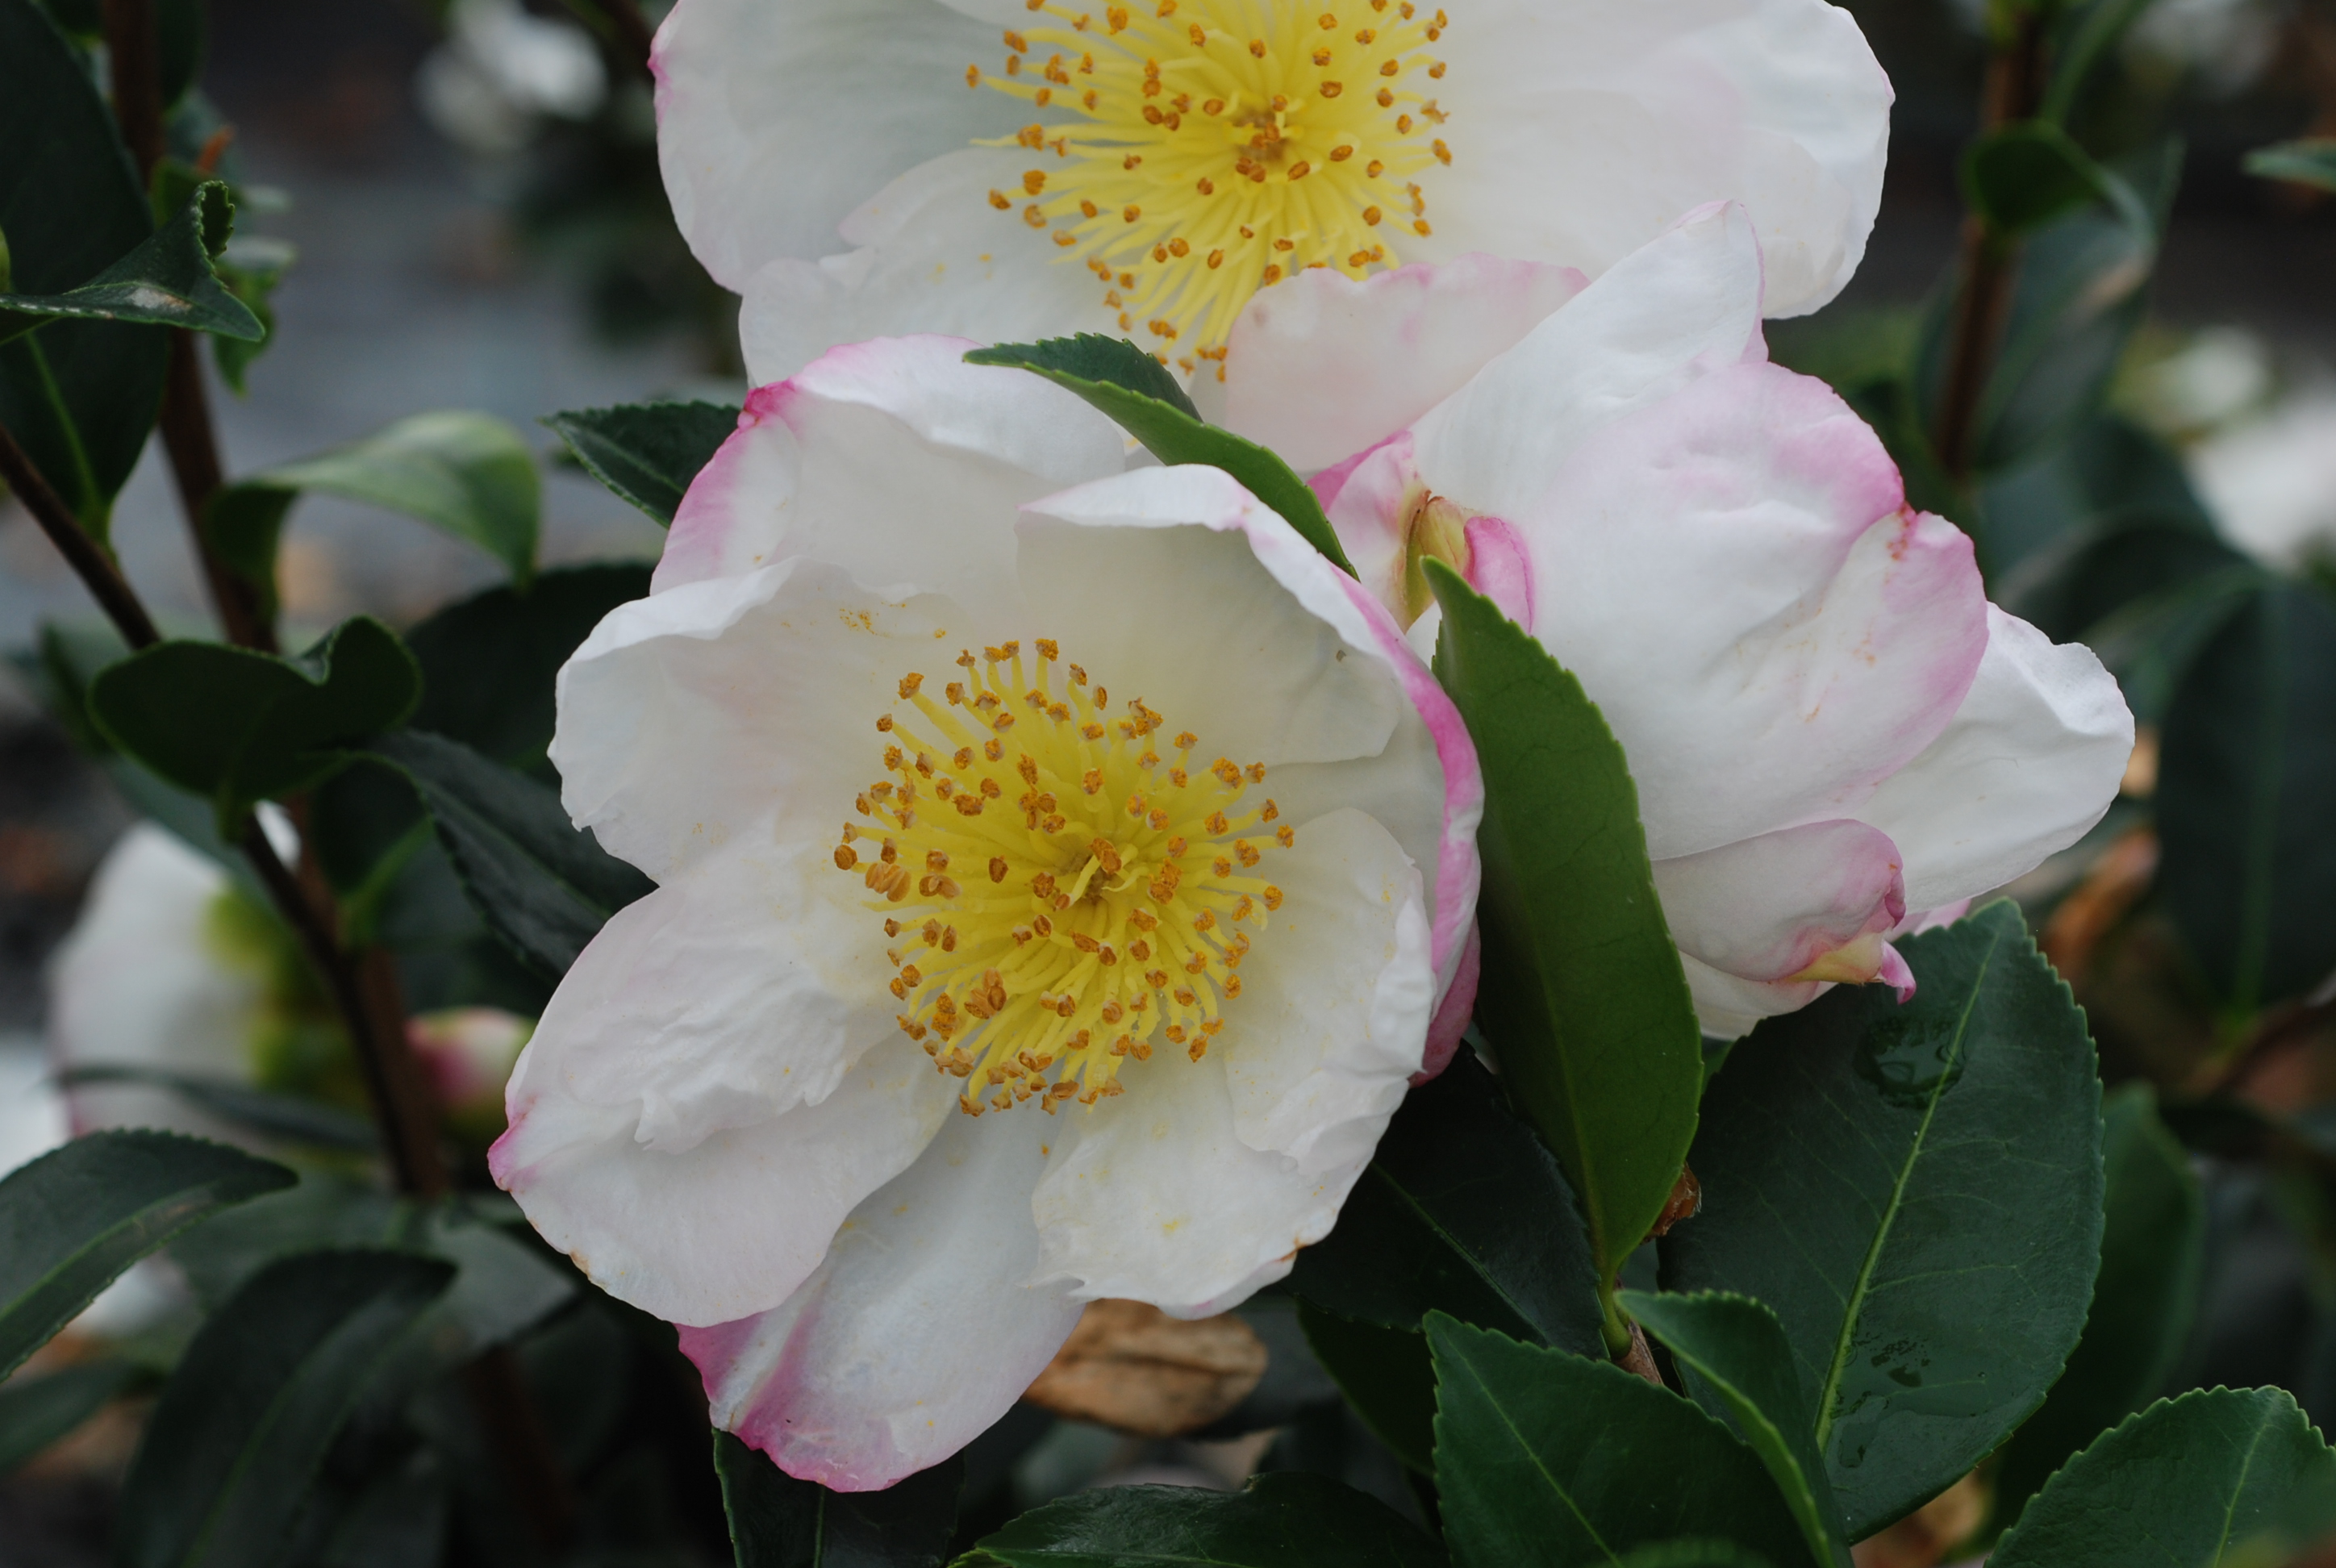
For which exposure?
- Exposure is the cornerstone of successful cultivation. Camellias prefer protected spots, particularly from cold and prevailing winds. They also enjoy a partially shaded, bright, and warm exposure. Heat is essential for abundant flowering; the longer the heat lasts, the longer and more fragrant the flowering will be.
For those who lack the soil or climate to plant an autumn camellia, know that this slow-growing shrub grows very easily in pots; it would be a shame to miss out on such beautiful autumn blooms!
Camellia sasanqua, pronounced “Ka-mel-ee-ah sah-sahn-kwah”, is currently showcasing its late flowering… and enchanting fragrance in gardens. Also known as autumn camellia, it blooms continuously until December. However, to enjoy its long flowering and sweet scent right up to the gates of winter, here are 3 key points to know: The autumn-flowering camellia performs better in […]
Every year we search for the rare bulb that is hard to find, highly sought after, and will surprise you. Among the new offerings in our spring catalogue this year, we have uncovered some gems for you.
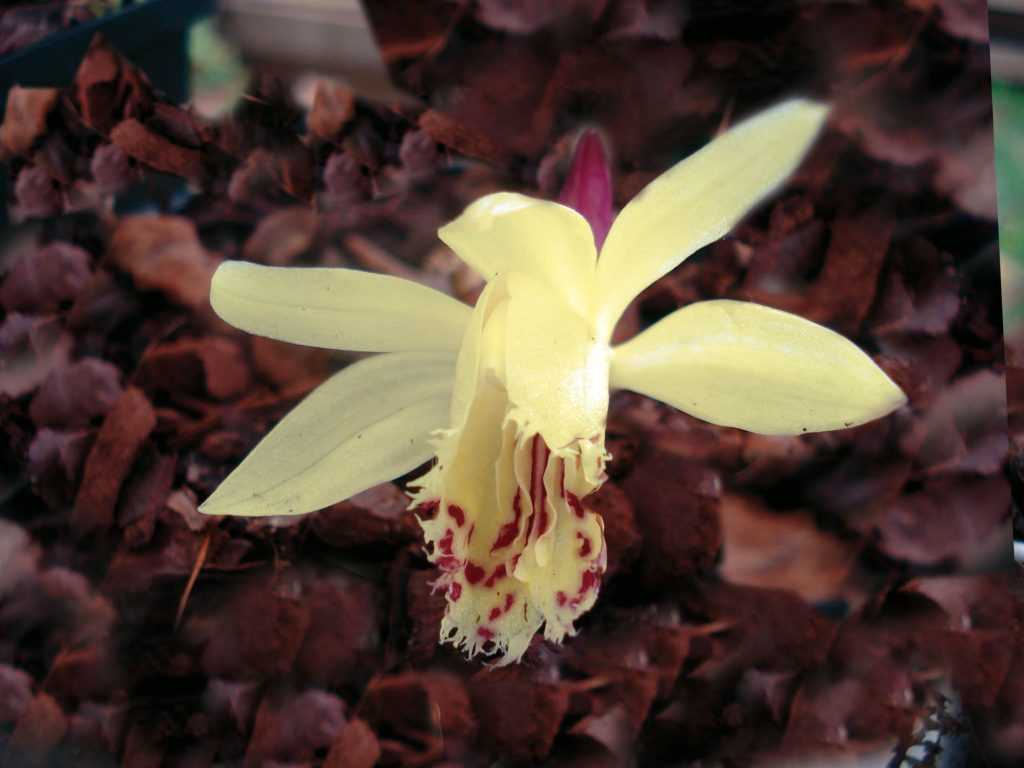 Pleione forrestii: The lemon-yellow flowers of this terrestrial orchid reveal a subtle spicy fragrance. Hardy down to -5°C, it can be grown in a pot or in a shady rockery, protected.
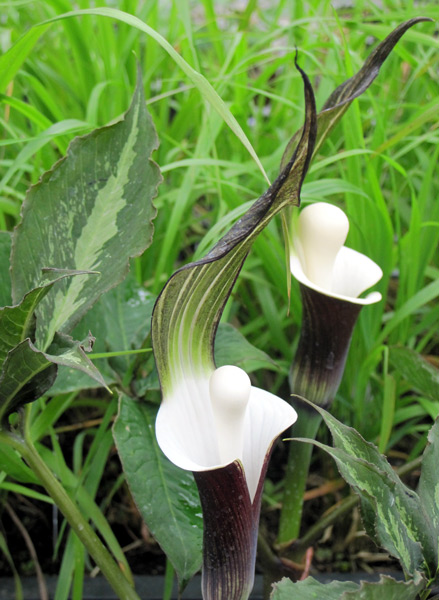 Arisaema sikokianum: This is the earliest species of the genus and undoubtedly one of the most graceful.
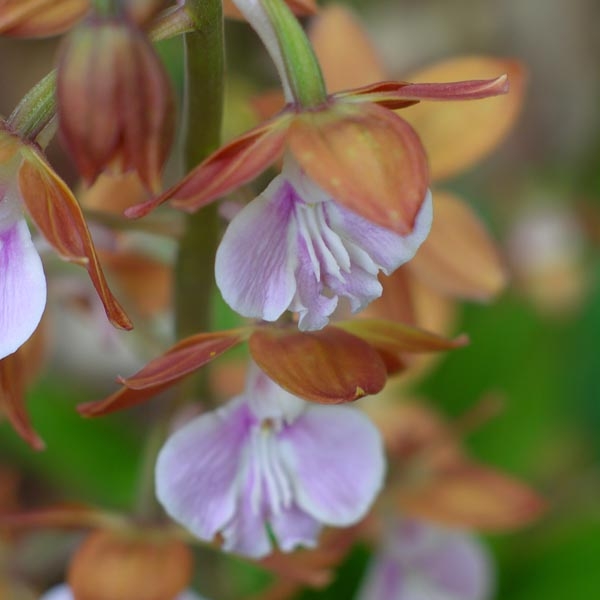 Calanthe discolor: Native to the Japanese mountains, this terrestrial orchid with evergreen foliage is quite hardy in our woodlands. It is hardy down to -12°C.
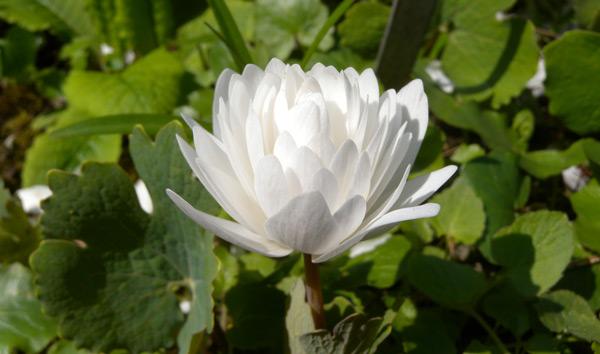 Sanguinaria canadensis Flore Pleno: This small perennial groundcover reveals magnificent double flowers of immaculate white. Its stump suckers in rich, cool, and light soils.
A rare plant is not always synonymous with "uncultivable plant"; rare bulbs are not necessarily the hardest to grow, they are rare due to their shape, cross-breeding, colour, fragrance... But all possess a touch of originality. They do not like excess: not too much shade, sun, wind, water, or dryness.
The ideal conditions for growing them long-term involve having light, cool soil rich in humus with a neutral or acidic tendency. They should ideally be planted in a shady rockery or in a bed facing north or west, against the wall of the house, with the soil amended with compost.
Rest assured, if you do not have these conditions, rare bulbs adapt very well to pot cultivation; in fact, the more tender varieties will be exclusively planted in pots. Just be careful not to overwater them during dormancy, as they do not tolerate excess water. A tip: when planting, place your bulb on a bed of 5cm of gravel or sand to ensure good drainage and promote longevity.
Every year we search for the rare bulb that is hard to find, highly sought after, and will surprise you. Among the new offerings in our spring catalogue this year, we have uncovered some gems for you. Pleione forrestii: The lemon-yellow flowers of this terrestrial orchid reveal a subtle spicy fragrance. Hardy down to -5°C, […]
The unusual warmth we have been experiencing for the past few weeks has direct consequences on vegetation; while some plants are flowering earlier, others are still in bloom, as is currently the case with the Camellia sasanqua 'Yume'.
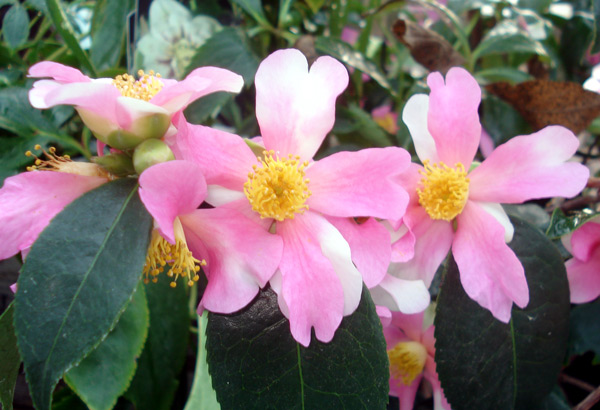
Camellia sasanqua Yume
For a shrub named autumn camellia, Camellia sasanqua 'Yume' can be quite surprising. Its flowering typically spans from October to December, but with this ongoing warmth, the flowers are holding on and blooming for an extra month.
This variety also rewards us with a pleasant fragrance, typical of Camellia sasanqua, and to enjoy the pun, what does the camellia smell like? The scent is a subtle blend of jasmine and lily, a true delight for the nose.
Camellias are fairly hardy evergreen shrubs. However, while they can withstand the cold, their flowers may sometimes abort, either due to lack of moisture or cold winds. To fully enjoy them in winter, here are some planting tips:
1- Exposure is not just important; it is crucial. The camellia is a woodland shrub, so it tolerates shade but copes less well with wind. It is essential to find a spot for it under large trees, at the edge of woodlands, or against a wall, sheltered from cold, drying winds.
2- The soil is also very important; it should be cool, meaning not drying out in summer but not waterlogged in winter. It must be rich in humus, slightly acidic or neutral, and fairly light; camellias do not like heavy soils, and no, camellias do not tolerate chalk!
If you are a fan of camellias and other ericaceous plants, there is a radical solution for growing these plants in chalky soil: dig a planting pit of at least 1m³ and replace the soil with a mix of potting soil, pumice, and heather soil. The shrubs can grow, and their roots will colonise the pit until they are strong enough to withstand the chalk. This method has proven effective in many gardens, particularly at Vasterival in Upper Normandy, a garden with chalky subsoil, renowned for its extensive collection of ericaceous shrubs.
The unusual warmth we have been experiencing for the past few weeks has direct consequences on vegetation; while some plants are flowering earlier, others are still in bloom, as is currently the case with the Camellia sasanqua ‘Yume’. For a shrub named autumn camellia, Camellia sasanqua ‘Yume’ can be quite surprising. Its flowering typically spans […]
Perennial plants are generally known for being hardy (which makes sense, as they are perennial...), and if you purchase them from a reputable nursery, their establishment is almost guaranteed.
Therefore, it’s not particularly easy to fail at planting perennials. But rest assured, with a few appropriate actions, any reasonably skilled gardener can still almost certainly mess up their plantings.
Here is our reasoned guide, consisting of 6 lessons: follow it step by step, and you won’t be disappointed!
Lesson 1: Plant perennials at the wrong time.
It’s very easy to plant at the wrong time: just listen to your instinct and plant… when you feel like being outside, usually when the weather is nice in the garden: from June to September in the northern half, and over a slightly wider range in the south. The heat will weaken the young plants already stressed from moving from their cosy nursery.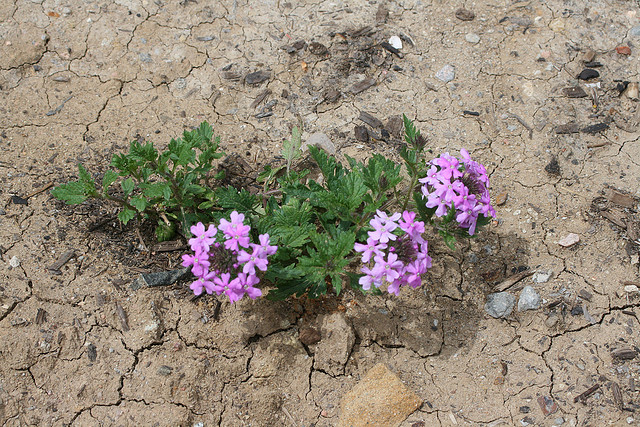
Experienced gardeners, those who annoy us by succeeding at everything, plant hardy perennials from late September to November and from February to April. The more delicate ones, like Mediterranean varieties, are planted from March to early May: this way, they settle in gently, in cooler conditions, without thermal or water shock, making it almost impossible to fail.
During this time, as there is no visible vegetation, they perform the odd act of gently scratching the surface of the soil to check for a solid root stump beneath the surface and remove the clump from its pot to ensure it is well-rooted.
One alternative is to plant in mid-winter, from late December to mid-February. This method is much less reliable for failure: most perennials will survive, quietly dormant. However, if you choose a period of hard frost and somewhat fragile varieties, you still have a fair chance of successfully killing your plants if you’ve taken care not to mulch them.
Note: this winter planting method is rarely used, as it requires leaving the warmth of the fire to face the cold wind, and it demands certain tools to break through the frozen soil in the cold regions of the east, north, or mountainous areas: a pickaxe or jackhammer for occasional gardeners.
And if by chance you forget to follow this first lesson, you can still redeem yourself by neglecting to mark the planting spot: most perennials are non-persistent, making them invisible until late February or March; you will thus have the opportunity to give a good spade to the stump while turning over your flowerbed.
Summary of Lesson 1: to properly fail with perennials, plant them between late spring and early autumn.
Lesson 2: Plant perennials when they are in bloom (preferably forced).
Nature does things well: it’s just when they are in bloom that we want to plant perennials; and it’s just the time when it’s not good to plant them. This is therefore a very intuitive way to fail at planting: putting all their energy into blooming, these beauties tend to, like a proper fashion model, neglect their nourishment and live off their reserves. Weakened, they will struggle to settle in the garden.
If you make the wise choice to plant beautiful forced flowers from a heated greenhouse, such as those you find from March or April in many garden centres or shops, you significantly increase your chances of failure. Indeed, raised in cotton at 28°C, the plants will face thermal shock at the time of planting, which, if late frosts occur, are likely to be fatal. How can you recognise forced flowers, you may ask? It’s simple: they are not (at all) in bloom in the neighbouring gardens, and they are (a bit) too beautiful to be quite real.
Old experienced gardeners, remember, those who succeed at everything, have the annoying habit of planting empty clay pots (with dormant roots beneath the surface), purchased from good nurseries, and, as irritating as it is, it works.
But, we say this to console you, even they sometimes crack in front of those adorable bodybuilder plants from the local garden centre...
Takeaway from Lesson 2: to fail every time or almost, plant forced perennials that are in full bloom.
Lesson 3: Plant anywhere
A rose would look so lovely to brighten up that dark corner that never sees the sun… or a beautiful hosta in the dry rockery, it would create such a beautiful contrast with the cacti in the garden of the house in Saint Raphaël… Well done! Since roses love the sun and hostas prefer very cool soil, they will surely die.
Planting anywhere is the most effective method for failure: with rare exceptions, perennials have a defined biotope in terms of sunlight and soil type.
Follow your instinct, and don’t read the growing instructions provided on the label or care guide: exposure and soil type. Plant a heather soil plant in chalky soil, and it will disappear after having lamentably yellowed for a few months. Plant a fresh soil perennial (fresh soil is a well-drained, dark woodland soil that doesn’t dry out too much even in summer) in pure clay or in the gravel of a vineyard soil, and you’ll have roughly the same effect.
And if you want to prolong the plant’s agony, which can be a pleasant exercise in sadism with a clear conscience, add a small handful of suitable substrate, such as potting soil, to your unsuitable soil: the plant, delighted to find itself in familiar terrain, will start a lovely establishment… before hitting the hostile environment after a few days or weeks.
If you install a shade perennial in full sun, it will wait for the first heatwaves to die. And if you plant a sun perennial in the shade, there’s a risk it may not die. However, you will almost certainly prevent it from flowering properly.
If you are unfortunate enough to lack the instinct to fail (this can happen with long gardening practice), choose only varieties you don’t see thriving in the surrounding gardens. Opt for varieties admired during your travels in Morocco or Sweden, and plant them respectively in cool shade and dry sun….
Don’t laugh, we try every spring to dissuade Mediterranean customers from planting delicate Himalayan blue poppies they admired in the peat gardens of Scotland...
Remember this Lesson 3: the best approach is to buy randomly, based on the beauty of forced flowers, and forget about plants suited to the climate, soil type, and sunlight of the place where you will plant them.
Lesson 4: Do not respect planting distances
In general, plants are delivered with a maturity spread indication: for example, ←→ at 40 cm
This means that the spread of the plant, in time, will be about 40 cm, and therefore, to achieve a dense mass, they should be planted about 20 cm apart.
To properly fail, do not respect the distances recommended by your nursery. Pack the clumps tightly against each other; this will create a very nice effect at planting… and will ultimately kill a good portion of your plants that will be too busy fighting each other to have time to grow. Indirect effect: your partner or other heir may have a fit when calculating the price per square metre of your flowerbed... But, I admit, this can be a pleasant side effect at times.
You can also, to save money, space the plantings excessively. This will look ugly, but in itself won’t kill your perennials, which will be comfortable. So, note this tip: just let the adventive plants grow, as the knowledgeable folks say: in simple terms, the weeds. They will feel right at home in a terrain that suits them perfectly and will quickly smother the intruders in a form of nationalism tinged with xenophobia, especially the first spring. Once your perennial is established, it will become part of the landscape and be respected by the local flora. Those of us with Italian ancestors know what we’re talking about…
Don’t forget Lesson 4: to fail with your perennials, plant very densely or, for those on a budget, let the weeds smother your well-spaced young plants.
Lesson 5: Don’t bother with planting
The advantage with perennials is that pots are generally small; so it’s just a matter of making a small hole, which isn’t too tiring. And then, if you really underestimated, just push a bit to fit the clump in. And there you go, never mind if it sticks out a bit!
Experienced gardeners, we need not introduce them, claim that you should make a hole three times the width of the pot and twice its height, and even a bit more for varieties with large or tap roots, so that the plant can push its young roots into soft soil. For the same reason, they damage the plant intentionally by gently undoing the root ball (the roots that on some varieties wrap around the edges and bottom of the pot, leaving the top of the clump flush with the soil or covered by a few millimetres of soil).
An alternative for those who are unfortunate enough not to have a garden to fail in: plant a plant with a strong root development in a small pot. How to recognise them? Generally, they are the tallest at maturity.
Summary of Lesson 5: make a very small planting hole and push hard if the clump doesn’t fit.
Lesson 6: Neglect watering
We really like this method, as it is spontaneous: you just have to do nothing to apply it. We have practiced it a lot, and still use it occasionally, even if the rather rainy nature of our Flanders complicates it a bit.
Let’s explain: a plant without water dies. For a cactus, this can take several years. But for most varieties in our regions, it’s enough to forget the pot before planting for a week in the sun to cause serious damage or to neglect watering in the weeks following planting, especially if it’s hot.
So don’t do like the old gardeners, who after removing the clump from the pot, soak it for a few minutes in water, and then pour a few good litres of water on the freshly planted plant even when the soil is moist.
Note, this method has a near 100% success rate at the time of planting, as all perennials, even those for dry soil, need water at planting. However, the method becomes very uncertain afterwards: once the plant is well-rooted, after 3 to 6 months, it will be difficult to make it die of thirst (unless you planted it in the wrong place, see Lesson 3): once its root system is developed, it will resist your negligence by seeking its water deeper.
An interesting variant for very watered areas is drowning: except for water’s edge plants, equipped for a big bath, perennials do not like having roots permanently submerged in completely soaked soil. This is particularly true for well-drained soil plants (soil that doesn’t retain water, where there’s never a puddle even after a heavy storm, often stony, sandy, or very light), which will die suffocated under very regular and substantial watering in heavy soil. This is a technique that requires more effort, as you need to think about watering very often and a lot to really drown a plant, which is hardly practicable in a Mediterranean climate. However, it works like the icing on the cake if you have properly followed Lessons 3 and 5 in a rainy region, heavy soil, by ensuring to plant in a hollow to create a small pool.
Lesson 6 is simple: forget watering… or drown your plant.
In conclusion
If you reasonably apply at least half of these tips, especially those regarding planting and watering, you should succeed in making the majority of your plantings disappear within a few months.
And a note for the pessimistic minds who will shrug at these “obvious” anti-tips: are they really sure they have always planted the right plant in the right place at a reasonably favourable time, with appropriate watering? Let them come forward; we’ll hire them. Immediately!
Perennial plants are generally known for being hardy (which makes sense, as they are perennial…), and if you purchase them from a reputable nursery, their establishment is almost guaranteed. Therefore, it’s not particularly easy to fail at planting perennials. But rest assured, with a few appropriate actions, any reasonably skilled gardener can still almost certainly […]
In my opinion, evening and morning are the best times to admire the flowers in the garden. The colours are softer, less overwhelmed by sunlight, and the contrasts are more pronounced. This is even more evident with white flowerings; when the flowers are exposed to full light, it's wise to have a good pair of sunglasses to fully enjoy the blooms without straining your eyes.
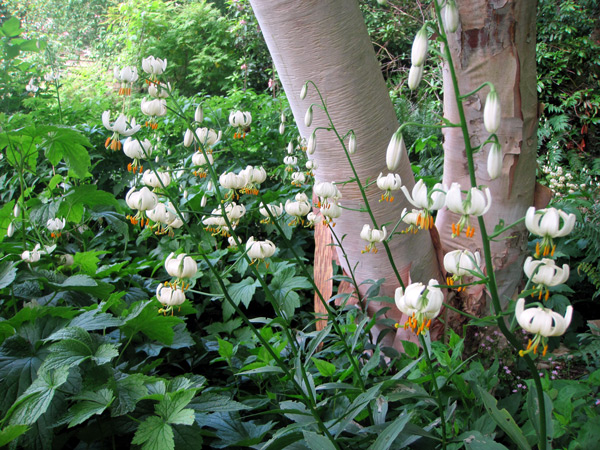
Flowers of the Lilium martagon Album
White should be used sparingly, and when creating an entirely white garden, the exposure must be thoughtfully considered. The most beautiful white gardens are those that are partially shaded or even completely shaded, as white does not jump out at you; it is soft, and one can better discern the nuances. At the moment, there is a plant I particularly love, which is the white form of the martagon lily (Lilium martagon 'Album'). Bulbous plants have the great advantage of being able to spring up, almost overnight, from a bed and quickly add a touch of colour. This lily blooms early but, more importantly, it flowers during the lull period, that is, when the spring flowerings are finishing and the summer ones are just beginning. It allows for a gentle transition from spring to summer.
In this partially shaded white garden, the Manchurian birch (Betula costata) structures the bed, and the flowerings are arranged around it. The bulbous plants with white flowers (Narcissus, Trillium, Cardiocrinum, and lilies) punctuate the bed and enliven it, supported by a large number of perennials: hostas, anemones, astilbes, primroses, strobilanthes, etc., which have a stronger presence.
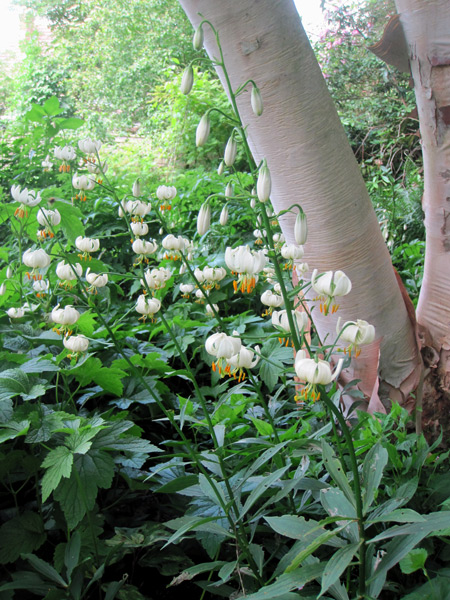
Cultivating martagon lilies is simple; they thrive in sun or partial shade and prefer soil rich in humus, cool, and light. One must be cautious of one thing: the lily beetle, which tends to puncture the leaves, as can be seen.
In my opinion, evening and morning are the best times to admire the flowers in the garden. The colours are softer, less overwhelmed by sunlight, and the contrasts are more pronounced. This is even more evident with white flowerings; when the flowers are exposed to full light, it’s wise to have a good pair of […]
Very popular in the United States, hostas struggle to gain a foothold in our gardens. Indeed, these plants are known for attracting slugs and are therefore often overlooked in favour of more robust plants. However, when it comes to robust plants, hostas are among the best for heavy soil. They are extremely cold-resistant and thrive in the darkest areas of the garden. So yes, the hosta is a thirsty plant, yes, the hosta is a greedy one, but no, the hosta is not necessarily devoured by slugs if the right conditions are provided. Here is our practical guide to failing with your hostas in 4 lessons:
Lesson 1: Plant hostas in dry conditions, and they will dry out.
It is common knowledge that hostas love shade, but it must be cool and even moist, not at the foot of trees where the bare soil cracks in summer. If nothing grows in the dark and dry part of your garden, hostas will do no better!
A possible variant of failure: plant your hostas in a very well-drained pot, and forget about it for a few weeks without watering in the garden... Guaranteed results! Hostas thrive in pots... in a rich, not overly drained mix, and with regular watering even during rainy periods. Indeed, the drying out of a potted plant is much, much faster than in the ground, and plants in cool soil require regular watering from spring to autumn.
For lazy and procrastinating gardeners, here’s another simple and elegant variant to kill your hostas: delay planting the lovely young plants you just acquired by leaving them in the garden for a few days, in the sun and without watering... They will simply dry out!
→ To fail with your hostas, plant them under trees or in pots, without ever watering them.
Lesson 2: Drain, drain to dry them out... They will dry out.
It is sometimes recommended to plant hostas in a heather soil bed, which is light and filtering. Indeed, heather soil can be an excellent medium for hydrangeas, rhododendrons, and camellias, but often it contains more peat than actual compost from decomposed heather, and when it dries out, this so-called "heather soil" is very difficult to rehydrate; water glides over it and does not penetrate.
→ To fail with your hostas, plant them in so-called heather soil or, even better, in poor and well-draining soil.
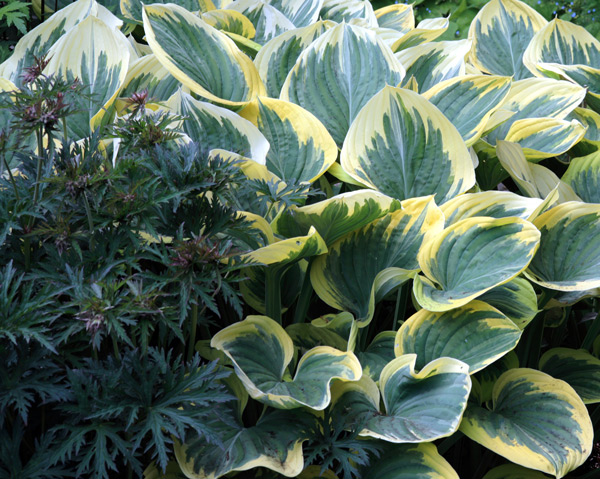
The foliage of the hosta here is used in contrast with that of Geranium pratense Midnight Reiter
Lesson 3: Open a slug bar
Plant a single hosta in the middle of a lawn or a bed, and you are announcing the imminent opening of a slug and snail bar. Yes, slugs love hosta leaves, and consequently, all garden gastropods will head straight for it, especially if it is small and frail. If a plant is isolated, if it is young, and if amphibians, birds, and hedgehogs are absent from the garden, then yes, your hostas will be devoured. You will see the leaves shrink, become holey, and if the slug population is sufficiently abundant, disappear completely, leaving only a resilient stub of stem.
→ To fail, plant a young isolated hosta in the middle of a large bare bed in a garden devoid of natural fauna or organic slug deterrents like ferramol.
→ Check out our article:"9 Slug-resistant Hostas"
Lesson 4: Throw away a healthy hosta that you think is dead!
Every autumn, we receive dozens of calls from customers who have just received their ordered hostas and remark, with varying degrees of annoyance, that they are not entirely satisfied to receive a dead hosta... And every early spring, we get calls from customers a bit surprised to find an empty pot instead of the friendly hosta that was supposed to be delivered to them. It also happens that our customers are dismayed to see their hosta, planted in autumn, not re-emerge.
So, we remind them that the hosta is perennial (which lives for many years and forms a large clump) but it is not evergreen. Its autumn foliage gradually dries out, taking on a greyish hue and hanging limply before disappearing... only to reappear late in spring, in April or even May... And we too have, during a spring clean-up, accidentally split a poor hosta snugly asleep under a few centimetres of soil.
If you have any doubts, a simple gesture at purchase, which applies to almost all deciduous perennials: remove the root ball from its pot and check the root condition. Hostas have large, fleshy white roots. Their presence allows you to quickly check the health of the lovely sleeper. In the garden, if you have doubts in spring, you can gently dig to find the hard stump or the beginning of the stem. But again, hostas are not afraid of the cold but have a heavy sleep: give them time to wake up!
→ To fail with your hostas, do not mark their location in the garden in autumn, and brutally kill it with a spade... Or angrily throw away the "empty" pot containing the plant asleep under a few centimetres of soil.
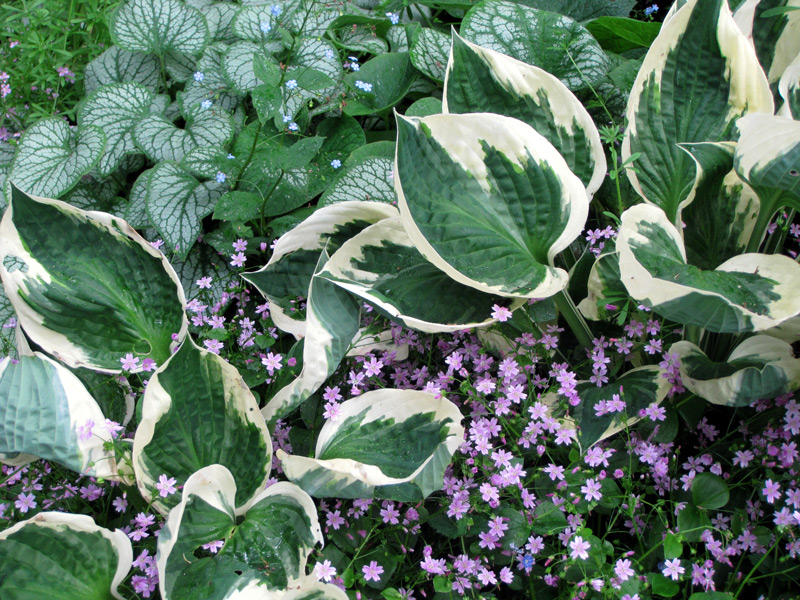 In heavy soil, its structuring foliage allows for beautiful arrangements; it can be used in a mix of harmonious shades, here Hosta Patriot is associated with Montia sibirica and Brunnera Jack Frost.
Bonus tip for readers who have followed us this far: how not to make a hosta flower?
Some hostas, particularly the grandiflora variety, produce beautiful large fragrant flowers. If and only if they receive a bit of sun: in complete shade, even dense, your hostas will grow and offer you beautiful leaves. But, if they do not have one or two hours of sun per day, they will not flower.
→ To prevent a hosta from flowering, plant it in complete, dense shade.
If despite my words, you are tempted to grow hostas and neither your soil nor your climate is suitable, grow them in pots while monitoring watering. This is how I test them; some new varieties are very attractive but grow slowly or are real slug magnets. To avoid losing them, I grow them in the shade on my terrace so I can observe them closely, and when I tire of a variety, I plant it in the garden. Since the stump is mature, slugs may eat a few leaves but do not completely strip the plant of its foliage!
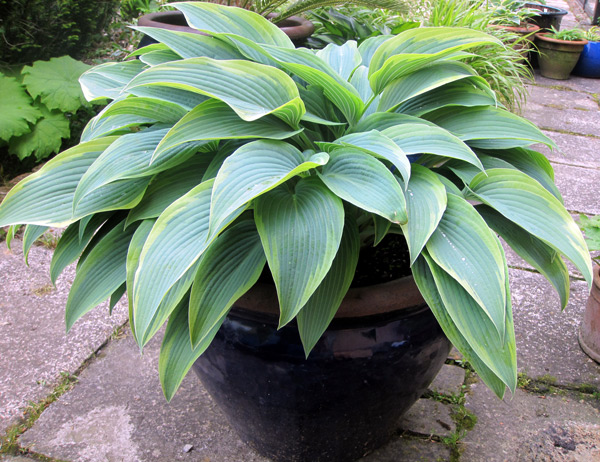
Very popular in the United States, hostas struggle to gain a foothold in our gardens. Indeed, these plants are known for attracting slugs and are therefore often overlooked in favour of more robust plants. However, when it comes to robust plants, hostas are among the best for heavy soil. They are extremely cold-resistant and thrive […]
It's being talked about more and more; it's THE star of simple and natural gardens for some time now. But what exactly is Alcalthaea?
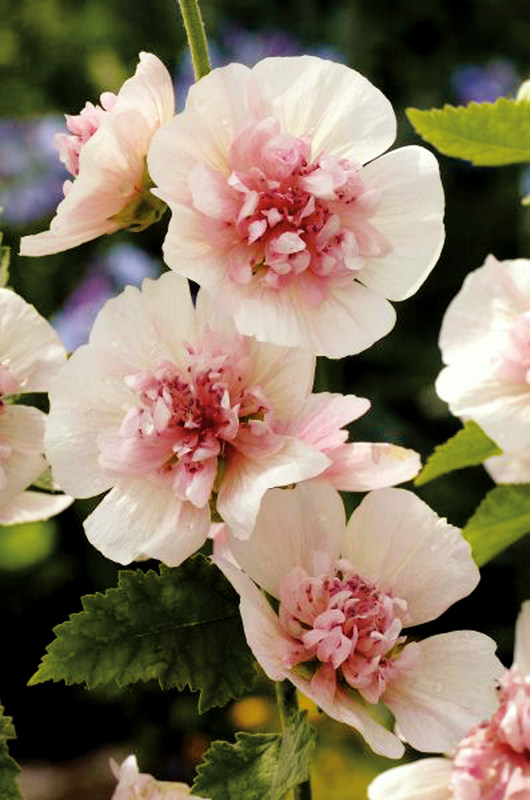 Flowering for a good part of the summer, this malvaceous plant is undoubtedly one of the best hybrids at the moment. Here is Alcalthaea 'Freedom' with its beautiful pale pink semi-double flowers and a frilled, light garnet centre.
Why such a strange name for a lavatera?
This plant from the malvaceae family, with its full name (x) Alcalthaea suffrutescens, is actually the result of an inter-generic cross between tree mallow (Althea) and hollyhock (Alcea), which gives Althaea x Alcea, named (x) Alcalthaea.
When observing the varieties closely, one can clearly distinguish the foliage, the bushy and ramified habit of Althea, and the vibrant colours of the hollyhock without the latter's drawbacks, namely rust-stained leaves. Currently, only three varieties are offered: 'Freedom' with pale pink flowers fading to light garnet, 'Parkrondell' with pink-mauve flowers with grey reflections, and 'Parkallee', my current favourite, with a rather indefinable colour, a mix of light apricot, fawn, and cream yellow with a crumpled bouquet of stamens and petals at the centre.
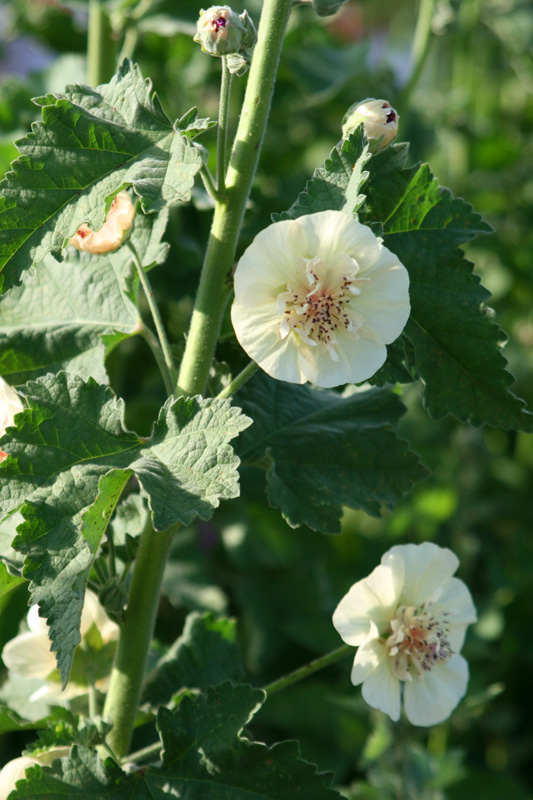 Superb double cream apricot flowering of Alcalthaea Parkallee.
Where to plant and for what use?
Like all malvaceous plants, Alcalthaea thrive in sunlight and light soils; they adapt very well to calcareous and poor lands and tolerate drought quite well... in the north! They resist many conditions: wind, frost, and a relative summer drought; in short, they grow everywhere except in shade, in heavy and wet soil.
These plants are very easy to use; they are less structuring than a hollyhock and take up significantly less space than a lavatera. Therefore, they can be used in a romantic garden with lychnis coronaria or yunnanensis, campanula 'Kent Bell', umbellifers, or simply with roses, or like me, in a grass garden with a natural style. I have been using them for a few years with grasses, and I have a real crush on Alcalthaea simply paired with Allium christophii or 'Globemaster' and pennisetum alopecuroides, which can also be replaced by Stipa tenuissima or Stipa barbata in mass. It's very simple, but it works well and for a long time.
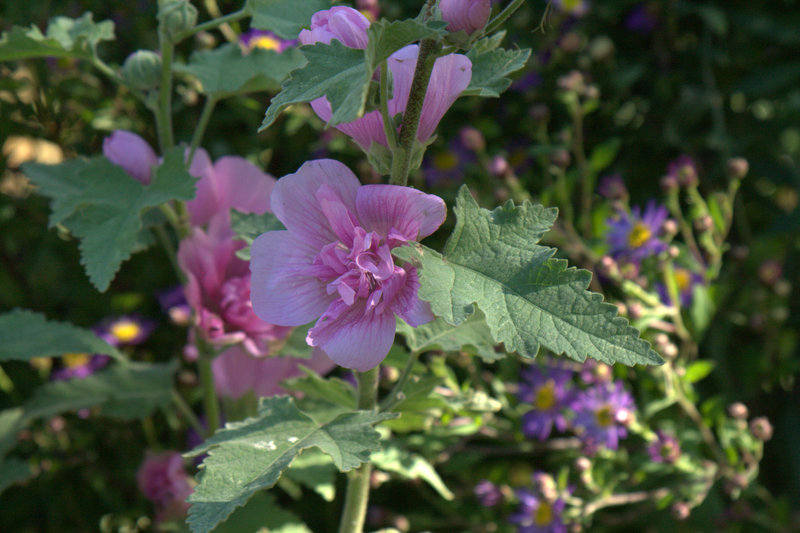
If, like me, you have heavy clay soil, add a good third of sand and gravel at planting, and place the stump on a mound or slope. One last tip: after 2-3 years, Alcalthaea tend to have an upright habit; pinch them in May-June for a more compact, floriferous plant that will suffer less from summer drought in the south.
It’s being talked about more and more; it’s THE star of simple and natural gardens for some time now. But what exactly is Alcalthaea? Flowering for a good part of the summer, this malvaceous plant is undoubtedly one of the best hybrids at the moment. Here is Alcalthaea ‘Freedom’ with its beautiful pale pink semi-double […]
Unlike regular hedges, which are often monotonous and monochrome, the flowering hedge enlivens the garden and changes colour throughout the seasons and flowering periods. It combines shrubs that can flower in spring, summer, autumn, or even winter. So farewell to dull, impenetrable thuja hedges, and long live the flowering hedge, free, rustic, synonymous with biodiversity, charm, and easy maintenance!
Why choosing a free and flowering hedge?
Firstly, because this type of hedge offers a variety of decorative advantages throughout the seasons, making it interesting to fully integrate into garden design, with effects from both deciduous and evergreen foliage, as well as flowering and fruiting.
Secondly, because the shrubs planted here are less exposed to diseases or pests due to their diversity. If one plant is sick, the neighbours are unlikely to be affected, unlike uniform hedges.
Through its diversity, the mixed hedge helps attract a variety of beneficial wildlife, including birds that come to seek shelter and food, as well as beneficial insects, pollinators, or pest predators.
Finally, because it is not static. You can intervene through pruning to control a species that is a bit too vigorous, decide to replace another that may not thrive or lacks vitality...
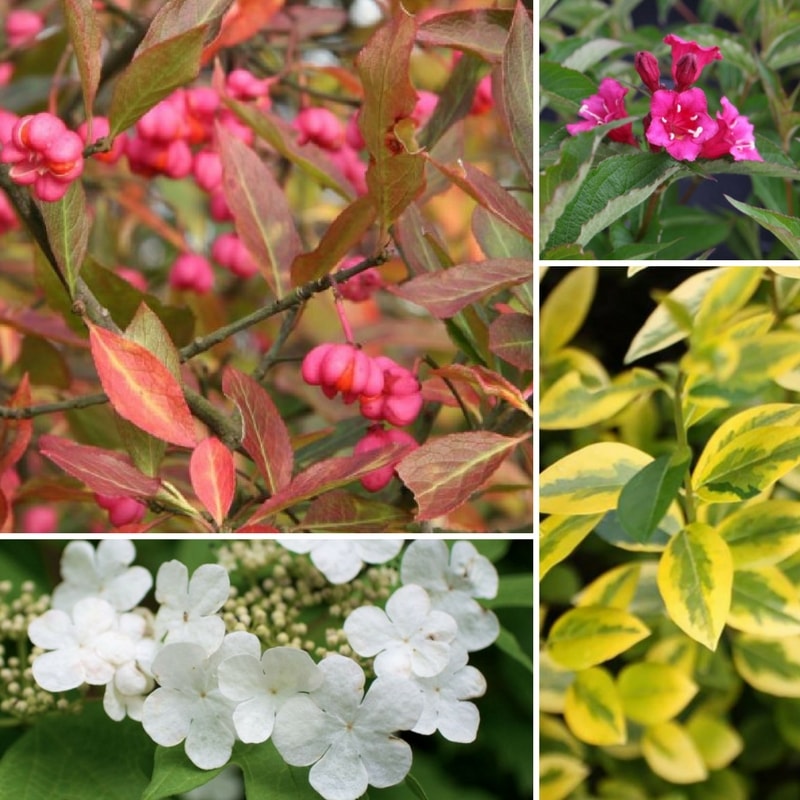 Euonymus europaeus, Weigelia Bristol Ruby, Ligustrum ovalifolium aureum and Viburnum opulus
What to plant to create a beautiful hedge?
A golden rule: only choose robust plants that are suited to the growing conditions of your garden, both in terms of climate and soil. The hedge is not the place to try to acclimatise a rhododendron in chalky soil or a shrub at the edge of hardiness that risks freezing irreparably after the second winter.
Also, consider observing the local wild flora and the hedges of neighbouring gardens: this is an excellent indicator of what will thrive in your area.
Of course, choose according to your tastes and seek a decorative effect that changes with the seasons. To ensure the hedge remains attractive in winter, do not overlook evergreen foliage (a ratio of 1/3 evergreens to 2/3 deciduous is ideal) and also consider Hornbeam (Carpinus betulus), which retains most of its dry leaves throughout winter.
Which species and varieties to plant?
To choose your shrubs for a flowering hedge, consider your climate as well as the exposure and size of your garden...
- In southern France: pittosporum, strawberry tree, choisya, oleander, pomegranate, bay laurel, buddleia, myrtle, laurustinus… select plants for their drought resistance and, of course, their ornamental qualities.
- In northern France: rough rose, barberry, kolkwitzia, spindle, forsythia, mock orange, Japanese quince, hornbeam, pyracantha, palm laurel, cherry laurel, holly, laurustinus, eleagnus, hazel, privet, spiraea, weigela…
- In shade: this may be the case in an urban garden overshadowed by neighbouring buildings, or when large trees cast shade. Remember: barberry, pyracantha, mahonia, aucuba, Japanese cornel, snowberry, sea buckthorn, palm laurel, laurustinus, privet.
- In a small garden: combine the useful with the pleasant and plant a flowering hedge (in a single row, of course) as a shrub bed, choosing your favourite shrubs, simply planted along the property line. To break the alignment effect, lean other plantings here and there against the hedge.
How to associate shrubs in a hedge?
On a short length of hedge, you can place the shrubs as you wish, avoiding as much as possible the regular repetition of a sequence.
On a longer stretch to plant, it is often simpler for both purchasing the plants and planting to design a “sequence” to repeat. Imagine a sequence of at least 5 different shrubs, in an odd number for a more harmonious effect, and when planting, do not hesitate to interchange certain species to break the repetition effect and always favour more freedom!
When and how to plant a flowering hedge, what planting distances?
Regarding the planting period, it all depends on the conditioning: for container-grown subjects, it is possible almost all year round if you take care with watering. Deciduous trees and shrubs with bare roots should be planted between the end of October and the end of March.
Useful resources
- Discover our wide range of shrubs and kits for flowering hedges
- To learn all about the different shrub conditioning options: "Hedge shrubs: bare roots, clumps, pots... What to choose?"
- For how to plant your hedge: "How to plant a hedge"
Goodbye to the dull, impenetrable thuja hedges that require regular pruning and end up deteriorating… Long live the mixed hedge, free, flowering, and rustic, synonymous with biodiversity, charm, and easy maintenance!