


Propagation by cuttings can be practised in many ways, from stem cuttings, leaf cuttings, root cuttings or even bulb-scale cuttings. Among stem cuttings there is a specific method, the heel cutting, particularly useful in autumn as it gives a good success rate. We explain it in detail so this technique holds no secrets and so you can obtain new plants easily and for free!
What is a heel cutting?
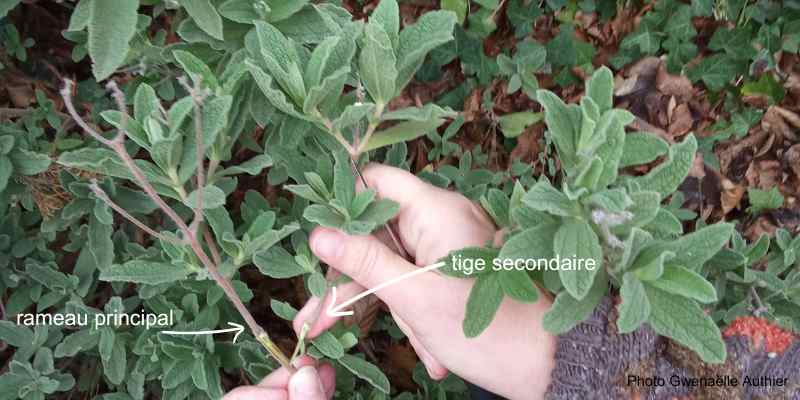
Unlike many cuttings obtained from a terminal stem, a heel cutting is taken from a lateral shoot (a secondary stem). But that is not all. The term "heel" is part of its DNA: a piece of the parent branch is kept at the base of the stem. The shoot detached from a main branch carries a small fragment of stem (like a tongue), this small piece from the parent branch measuring roughly 1 cm. The cutting then has a T‑shaped base.
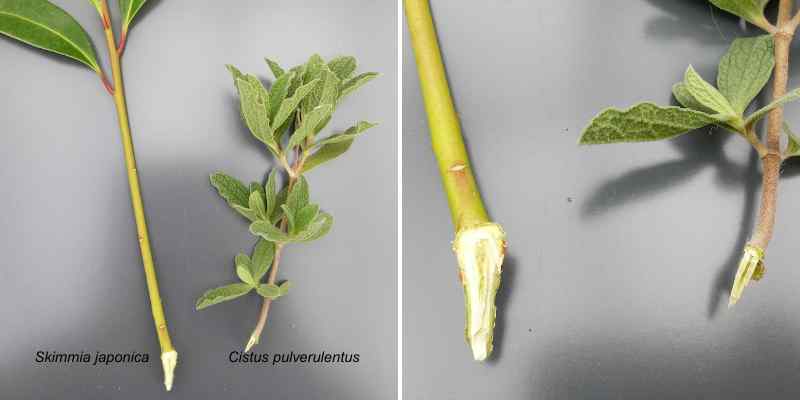
N.B.: the term crossette cutting is used when the woody piece taken from the main stem is larger (between 1 and 3 cm), and is cut with pruning shear.
This type of cutting is carried out only on shrubs, often evergreen, and on semi-woody plants (partly lignified, i.e. beginning to turn into harder wood).
Heel cuttings are often said to increase success rate. The swelling caused by tearing the bark helps retain meristems (meristematic cells), abundant in this zone, which favours root formation. This type of propagation is always done in autumn, between September and October, or even November when conditions are mild, plants being less prone to dehydration because of lower temperatures.
Which plants are suitable for a heel cutting?
Heel cuttings are used for plants that are difficult to root with standard cuttings.
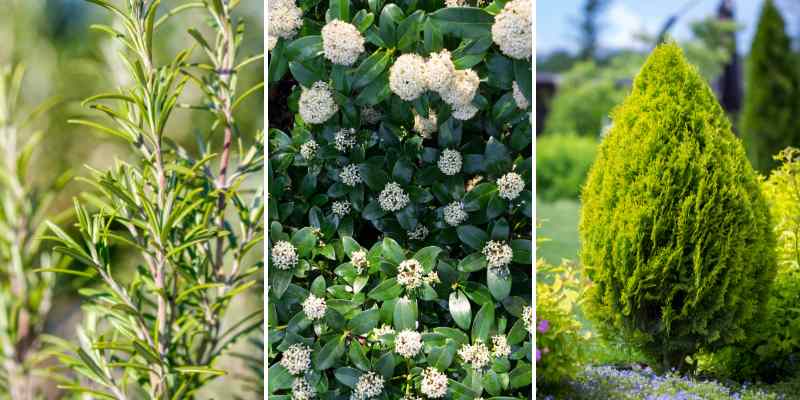
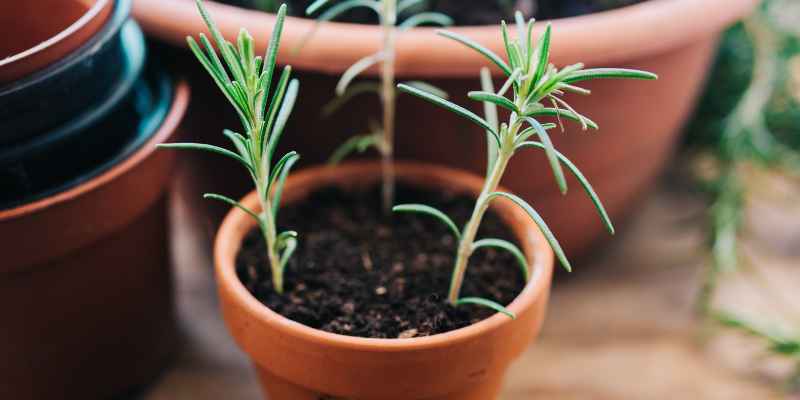
They are especially suitable for evergreen shrubs and conifers such as thuja, some woody aromatic herbs, particularly thyme and rosemary. Among the shrubs concerned: Skimmia, cotoneaster, escallonia, gaultheria and euonymus, but also grapevine (Vitis), sumac, prunus species, Cotinus, Weigela, wisteria and clematis, olive, etc.
Heel cuttings also suit roses and small fruit bushes and shrubs that tend to produce woody growth (Perovskia, lavender, common sage and many lamiaceae, etc.).
How to take a heel cutting
One secret to success (as with all cuttings) is to pot the cutting immediately, at least within a few hours.
Equipment
- one or more terracotta pots depending on number of stems taken,
- a sharp knife disinfected with 70% alcohol (optional),
- a spray bottle,
- seed and cutting compost or a mix of half horticultural compost (or good sieved garden soil) and half sand,
- a pencil or small stick,
- a cloche or a plastic bottle with the base removed or a plastic bag and three small wooden stakes to create a humid cover.
Technique
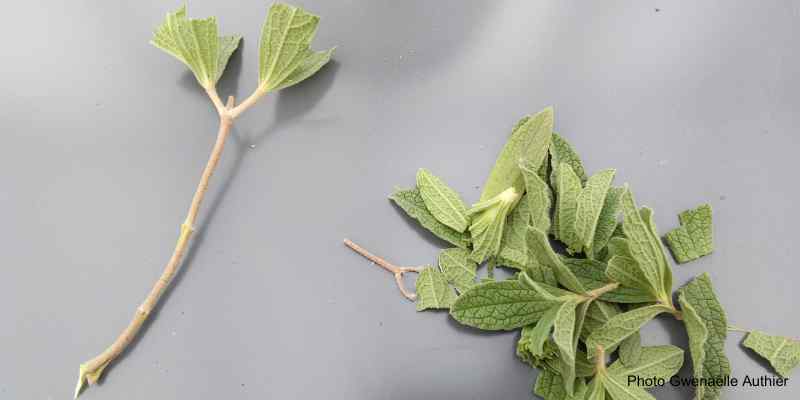
- Take lignified shoots: select healthy, well-formed lateral shoots. Do not choose shoots bearing flowers or fruit. Using a knife, detach a lateral shoot 15–20 cm long so as to keep the heel from the parent stem. You can also do this by hand, gently pulling shoots that are supple enough to retain this small "heel" or tongue;
- Trim the cutting: remove leaves from lower half of stem, leaving only two leaves at the top, cutting them in half if broad. This reduces evaporation and prevents the cutting from drying out;
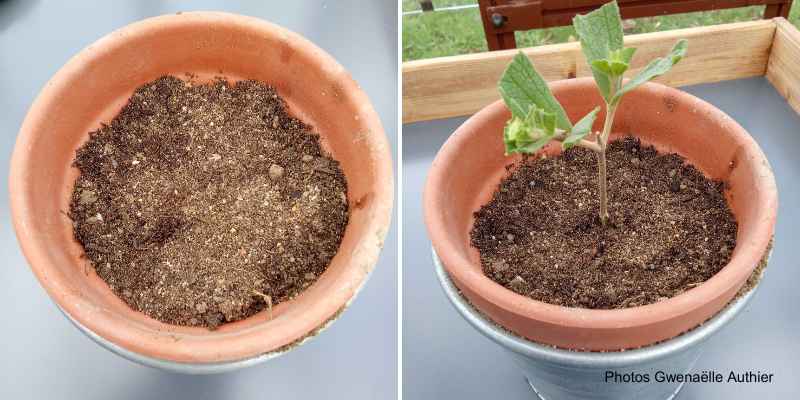
- Prepare pot(s): fill with seed compost up to 2 cm from rim, then firm substrate with hands;
- Moisten compost with spray bottle (ideally using rainwater);
- Make a hole in substrate with pencil about 4–5 cm deep for your cuttings; you can make three holes in a sufficiently large pot;
- Insert stem so that one third of its length is in the hole, ensuring nodes where leaves were removed are buried in substrate (roots will form from these). Then firm substrate around stem so it makes good contact with compost;
- Keep covered (optional but strongly recommended): place a cloche or a plastic bag over cutting, held up with three small wooden stakes (stem and remaining leaves must not touch plastic). Covering maintains ideal humidity for rooting;
- Keep compost slightly moist, avoid overwatering (compost must never be waterlogged). Renew air by lifting plastic or cloche for half an hour every 3–4 days;
- Place cutting in bright position out of direct sun; label pots or note cutting date in gardening notebook;
- Leave pot covered for 3–4 weeks;
- When leaves begin to appear, bingo! cutting has taken, indicating roots are forming.
- During winter, keep young plants in a cold greenhouse, cold frame or bright unheated room (conservatory or winter garden), always protected from frost but not in direct sun. Reduce watering frequency.
- In spring, pot on into a larger pot; plant out permanently in garden in autumn or following spring according to root development of shrub.
Further reading
Principle is always the same, but we have written several tutorials for plants that respond well to heel cuttings. Feel free to consult them:
- How to take holly cuttings?
- How to take Kolkwitzia cuttings?
- How to propagate Westringia (Australian rosemary)?
- When and how to take rosemary cuttings?
- How to propagate thyme?
- How to take cuttings from conifers?
- How to take a successful rockrose cutting?


Comments