


Monsteras (Monstera Delicisiosa being the most famous) are among the most popular houseplants for their spectacular foliage and vigorous growth. Over time they can become quite large and need pruning. It’s the ideal opportunity to propagate Monstera using propagation by cuttings. Easy to do, propagation by cuttings of Monstera produces healthy new plants while keeping the parent plant under control. In this tutorial find our tips on how to take a Monstera cutting at home.
When to propagate Monstera?
Propagation by cuttings of Monstera can be attempted at any time of year, but spring and early summer remain the ideal seasons. During this period the plant enters active growth, which encourages production of new Monstera roots and rapid development of young leaves.
In autumn or winter it is still possible to propagate a Monstera, but rooting will be slower.
How to take a Monstera cutting?
Propagation by cuttings of Monstera (deliciosa and other varieties) is easy to succeed if a few basic rules are followed:
- Choose a vigorous stem with at least one clearly visible node (area where leaves originate) and an aerial root (often a small beige bud). This is where the cutting will root.
- Prepare the cutting by cleanly cutting the stem with a disinfected pruning shear.
- Remove damaged leaves and keep one or two healthy leaves at the top of the stem.

Propagation by cuttings of Monstera in water
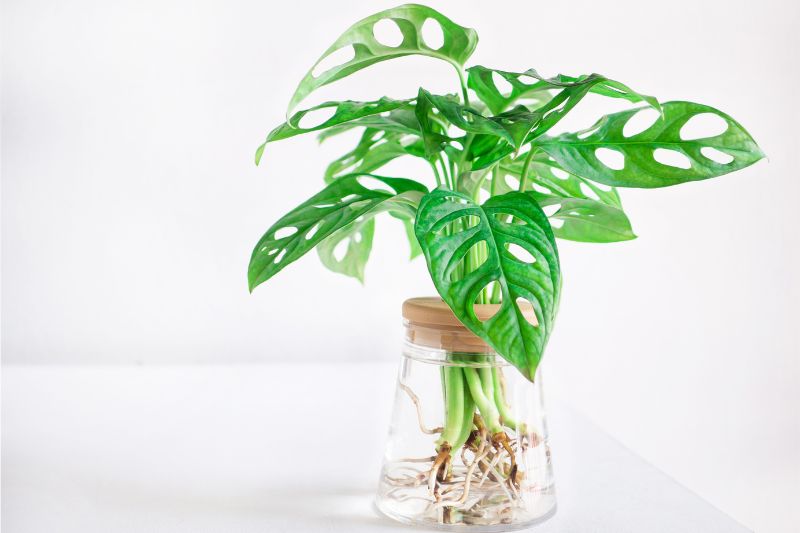
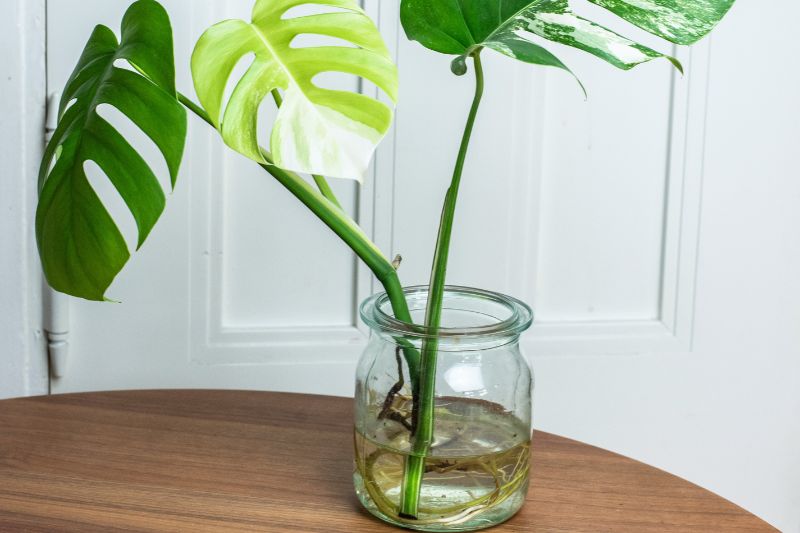
Propagation by cuttings of Monstera in water is easy to do and generally gives very good results quickly.
1- Fill a vase or jar with water at room temperature. Preferably use rainwater.
2- Place your Monstera stems in the vase, taking care to submerge the base of the stem with the small root buds, but without drowning the leaves.
3- Change the water regularly, every 5 to 7 days to keep the environment healthy and oxygenated, thus avoiding rot.
4- After 2 to 6 weeks, roots appear and lengthen. Wait until they reach about 10 centimetres to ensure a good take when potting up.
5- Pot up the Monstera cutting into a pot with potting compost for houseplants, lightened with a handful of perlite or pumice.
Tip for a good take: always choose a pot with drainage holes and place a layer of clay pebbles at the bottom to help evacuate excess water.
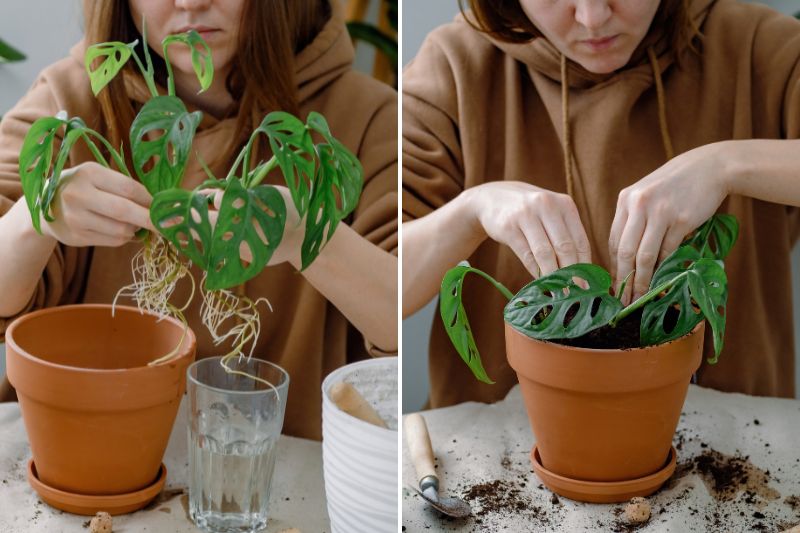
Propagate Monstera directly in soil
You can also try to propagate Monstera directly in soil. Note however that your chances of success are slightly lower than propagation by cuttings in water.
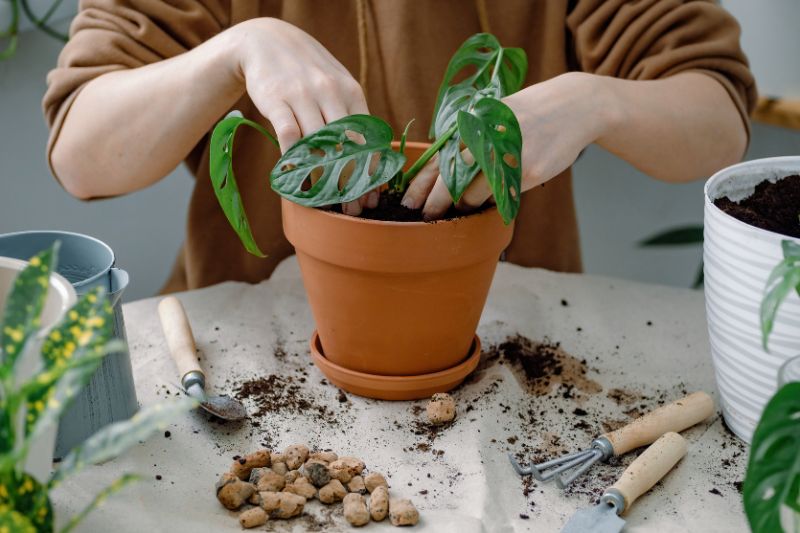
1- Choose a pot with drainage holes and place a layer of clay pebbles at the bottom.
2- Fill it with a mix of 3/4 potting compost for houseplants or for cuttings and 1/4 perlite or pumice.
3- Make a small hole 4–5 cm deep and plant the cutting, firmly inserting the node and root buds into the compost.
4- Firm the compost lightly around the stem and water to moisten the substrate without waterlogging it.
5- Facultative : to encourage rooting you can create a humid microclimate by covering the pot with a cloche, a clear plastic bag or half a bottle. This will increase chances of success.
Every 2–3 days, remove the plastic or bottle for 20–30 minutes to renew the air.
You can remove the cloche permanently after 4–5 weeks.

6- Place the pot in a bright spot, out of direct sun, to stimulate growth of Monstera roots.
7- After a few weeks the Monstera cutting will produce new roots. As soon as you see young, healthy green leaves appearing, it is a sign your propagation by cuttings of Monstera has succeeded.
After propagation by cuttings of Monstera
- After potting, place the Monstera cutting in a bright spot without direct sun, behind an east- or west-facing window.
- Keep the substrate slightly moist, but never waterlogged.
- Occasionally mist the foliage with rainwater or demineralised water to maintain good ambient humidity.
- You can lightly fertilise after a few weeks to support growth of your Monstera cutting.


Comments