


Spring soil preparation: the essential gardening tasks
Our tips to help your garden come through winter smoothly
Contents
Spring is a time of renewal and rebirth for everyone, including your garden. After winter and its string of storms and frosts, the soil warms gently, wakes up and comes back to life. And it needs to be nourished and aerated to welcome new plantings. That’s why it’s time to prepare the soil, to ensure vigorous growth, better disease resistance, optimal flowering or abundant harvests.
Let’s explore together the key steps to prepare the soil in your ornamental garden or kitchen garden as the growing season returns.

Clean and weed the soil to clear the area
Before addressing the first steps to take this spring in the garden, perhaps it is worth noting that there is no need to rush. In short, wait until the soil is completely drained, i.e. the excess water has drained away. Likewise, avoid working on soil that is still frozen. And above all, be patient until it has warmed sufficiently. Depending on the region and the current weather conditions, you may start preparing your soil during March, or even early April.
When conditions are right, put on your gloves, and the soil work can begin. And before sowing or planting anything, it’s essential to clear the area. Indeed, winter may have left behind decomposed fallen leaves, broken branches or even tough adventive weeds. First, you will need to:
- Remove the decomposing leaves, which, potentially, may harbour diseases or parasitic pests. If they look healthy, they go to the compost bin; otherwise, take them to the recycling centre.
- Also remove undecomposed mulch residues and add them to the compost heap
- In the vegetable garden, it is time to mow and/or chop down the green manures (vetch, broad bean, clover, rye) sown in autumn
- Remove the weeds that have braved the winter cold, by hand for the more superficial ones, with a hoe or a fork if the soil is more compact. You must ensure to pull out the running roots, without breaking them, of the bindweed and couch grass. If your soil is really infested with weeds, you can weed by occultation using a tarpaulin.
Further reading : Weeding… naturally
Aerate and loosen soil to preserve soil life
A quick aside before discussing soil cultivation. Remember that soil is alive, that is, a whole microfauna teems in the top 30 centimetres. Earthworms, tiny invertebrates, bacteria, fungi… All these living organisms are beneficial to soil health, they tunnel, feed on organic matter, excrete, in short, they feed and aerate the soil day in, day out. And it is therefore essential to preserve this underground life, invisible though it may be, but highly effective.
Now, to work! After winter, the soil is often compacted due to weather and recurring frosts. It is therefore necessary to loosen it and aerate to promote the penetration of water and nutrients, allow microorganisms to multiply and help the roots penetrate deeply into the soil to draw what the plants need. In short, to ensure your plants grow optimally.
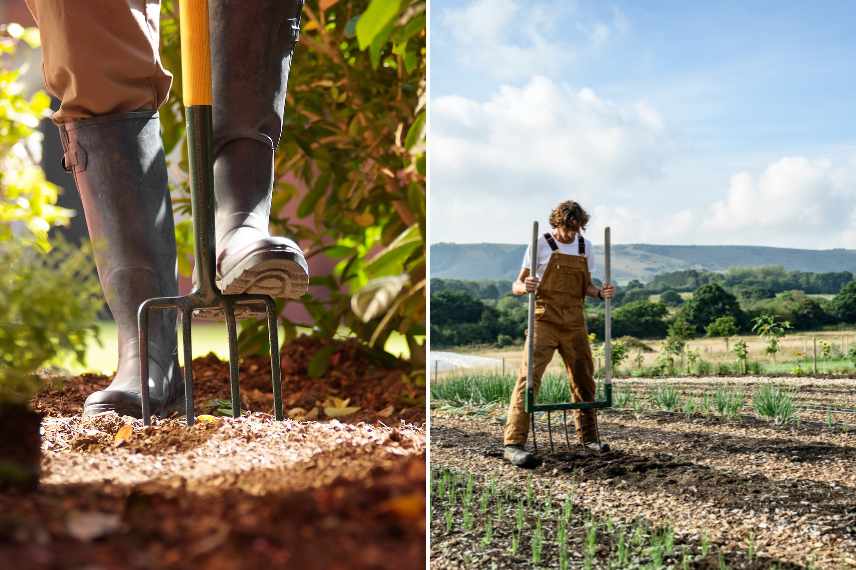
Second step: loosening the soil while preserving microorganisms
What tools to loosen the soil?
En matière de travail du sol, il y a deux écoles : ceux qui prônent l’usage de la bêche pour retourner la terre, et ceux qui ne jurent que par la biofork or broadfork. Pour mettre tout le monde d’accord, la fourche à bêcher est idéale pour aérer les terres lourdes et compactes et casser les mottes, et the biofork perfect for lighter soils. But the choice is yours.
You will also need a garden fork or claw and a rake.
How to proceed?
- Work when the soil is slightly moist (not too dry, nor waterlogged)
- Loosen the soil with the biofork or digging fork to a depth of 10 to 15 cm, avoiding turning it over too much to preserve microorganisms
- Work backwards to avoid over-trampling the loosened soil
- Run the garden fork over to break up the clods, and remove stones and adventives
- Finish with a light rake to level the surface.
Further reading :
Enrich and fertilise to grow better
After winter, the soil has lost some of its nutrients. To restore its vigour, it is essential to amend it with organic matter. This input of organic matter will not only nourish the soil, but also improve its texture. These amendments will therefore enrich the soil’s composition and structure, but also improve its capacity to retain water and allow plants to establish well.
Among the most common amendments, the compost is essential. Indeed, it is both an amendment and a fertiliser that inoculates the soil with microorganisms, lightens heavy soils, gives body to light soils, and provides the nutrients for plant growth.
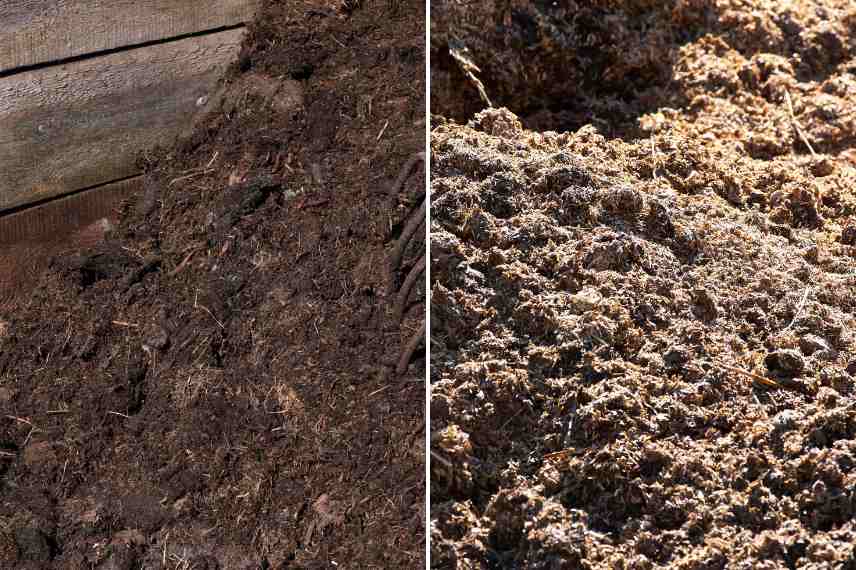
Step three: amend the soil with compost or manure to enrich it
We can also apply well-rotted manure which is ideal for poor soils. Leaf mould is also a valuable amendment.
Whether you opt for this or that amendment, don’t bury it too deeply. Simply spread it in a thin layer over the soil and lightly incorporate it with the garden fork. The soil’s living organisms will take over.
Further reading :
Protect to enable better planting and maintenance
Your garden soil has been loosened and amended, ready for sowing or planting. But the prep work is not yet finished. In the garden or the vegetable plot, it is recommended not to leave the soil bare. As in nature, the soil should be mulched to reduce germination and the long-term establishment of weeds. But mulching is also useful for reducing water evaporation and thus keeping the soil cooler, preventing erosion and crust formation, and finally insulating the soil from heat or cold. Not to mention that a mulch nourishes the soil and the microorganisms as it decomposes into humus.
So, mulch the soil generously at the base of hedges, shrubs and trees, in borders and beds, in the vegetable plot…
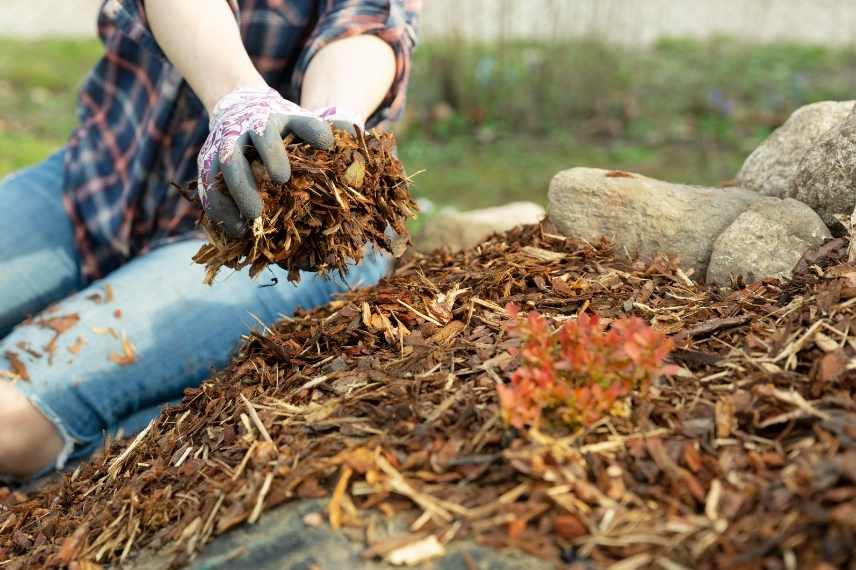
Step four: mulch to prevent the soil from being bare
Some quick mulching tips:
- Wait until the soil has warmed up properly before mulching
- Vary commercially available organic mulches ( bark chips and pine needles for acidic soils, pine needles, hemp chips, flax or miscanthus, buckwheat hulls or cocoa hulls…) and homemade mulches (straw, dried lawn clippings, shredded branches (RCW)…). By contrast, mineral mulches are best saved for succulent plants, rockery plants or alpines
- Check the organic mulch fairly regularly as it decomposes at varying rates.
Further reading:
- Subscribe!
- Contents

Comments