


Complete guide to growing and caring for Calathea
Tips and tricks
Contents
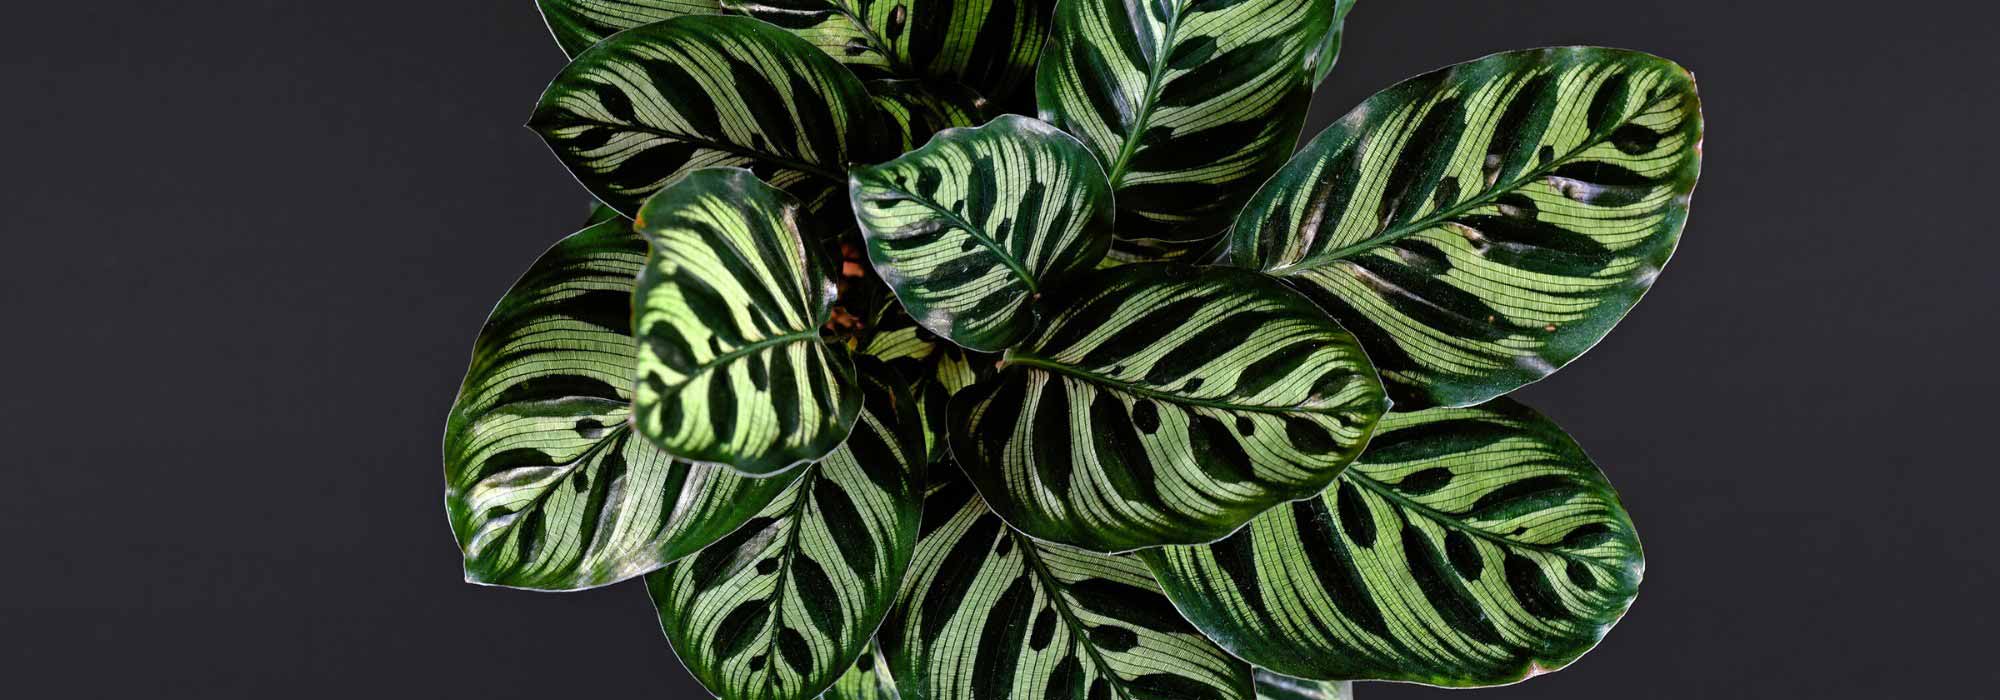
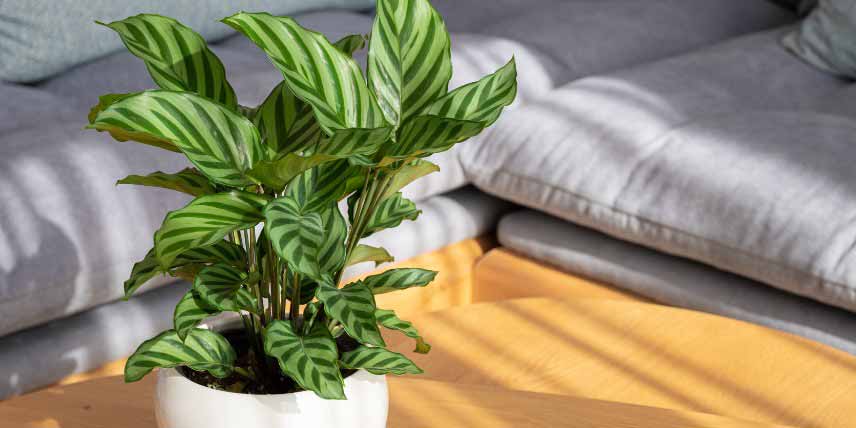
Originating from the tropical forests of South America, the Calathea, also known as the ‘peacock plant’, fascinates with its foliage marked by striking patterns and its ability to move its leaves to follow the sun. Its broad colourful leaves, sometimes striate, spotted or striped, make it a particularly sought-after indoor plant for its ornamental value. The many varieties of this exotic plant offer a breathtaking range of shapes and colours, from Calathea orbifolia with its large round leaves to Calathea ornata with its elegant pink veins. Discover our tips for growing and caring for this tropical beauty that will transform your home into a veritable Garden of Eden!

The most beautiful varieties of peacock plants
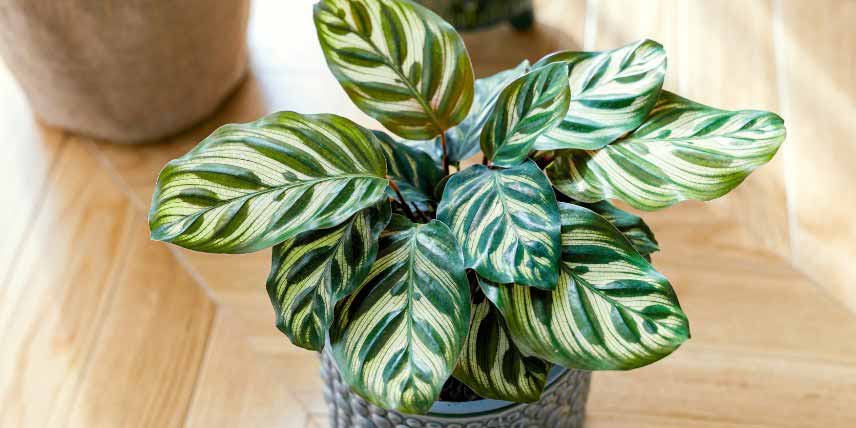
The Makoyana with delicate patterns
The Calathea makoyana stands out for its oval leaves measuring 15 cm with translucent markings, evoking the delicacy of a natural stained-glass window. The dark green veins on a pale green background create a fascinating pattern that reflects in purple on the undersides of the leaves. This houseplant grows to 60 cm in height in a bright location but not in direct sunlight. A high humidity level and regular watering with non-calcareous water promote its optimal growth. Mist its foliage and place it on a bed of damp clay pebbles to recreate the tropical atmosphere it loves. A stable temperature between 18 and 22°C will allow it to fully display its magnificent patterns.
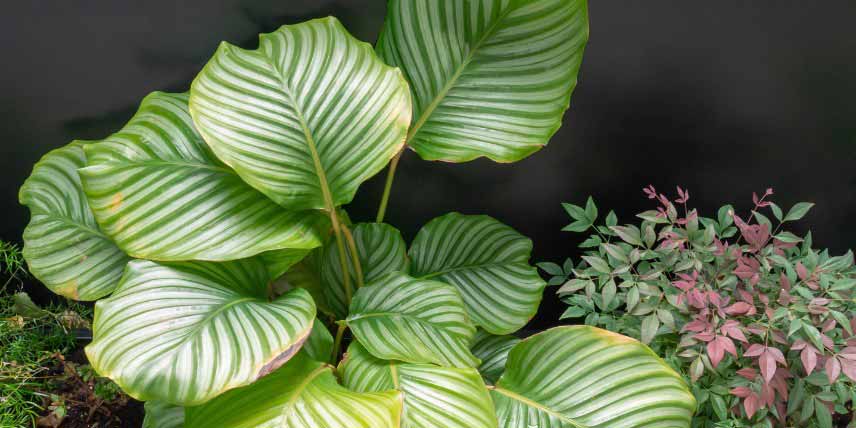
Orbifolia and its broad leaves
True star of social media, Orbifolia impresses with its rounded leaves that can reach 30 cm in diameter, adorned with silver stripes on an emerald green background. This generous variety quickly grows into a lush clump of 60 cm to 1 m in diameter in a pot. New growth emerges in a spiral, gradually unfurling its leaves like sheets of parchment. Regular cleaning of the leaves with a damp cloth revives the brightness of their veins and helps prevent parasitic pests. Placed in a bright spot with no direct sun, this tropical beauty adds a spectacular touch of exotic flair to your home.
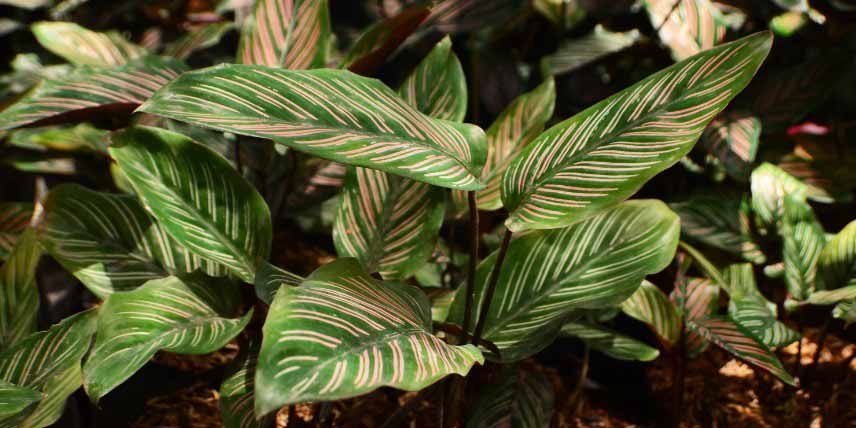
Ornata and its pink veins
With its pale pink stripes that look hand-painted on a deep green background, Ornata creates a striking visual display in our homes. These delicate veins, like brushstrokes, contrast beautifully with the purple undersides of the leaves. The plant develops a compact habit of 60 cm, ideal for small spaces. A constant humidity level and partial shade enhance the intensity of its pink markings. The young leaves, still curled up, reveal a more pronounced pink hue before gradually unveiling their elegant striations, offering a changing display as they grow.
Read also
Misting indoor plantsWhere should you place your indoor Calathea?
The ideal light for healthy foliage
Controlled light is the key to vibrant foliage and harmonious growth. Place your plant in a bright but shaded spot, ideally behind a light sheer curtain that will filter direct sun rays. Rooms facing north or east offer perfect exposure, while a south-facing window will require a protective screen. Leaves will indicate whether the location is right: fading foliage signals too much light, while stems that stretch betray insufficient light. Observe the natural movement of the leaves as they reach for the light to adjust their position.
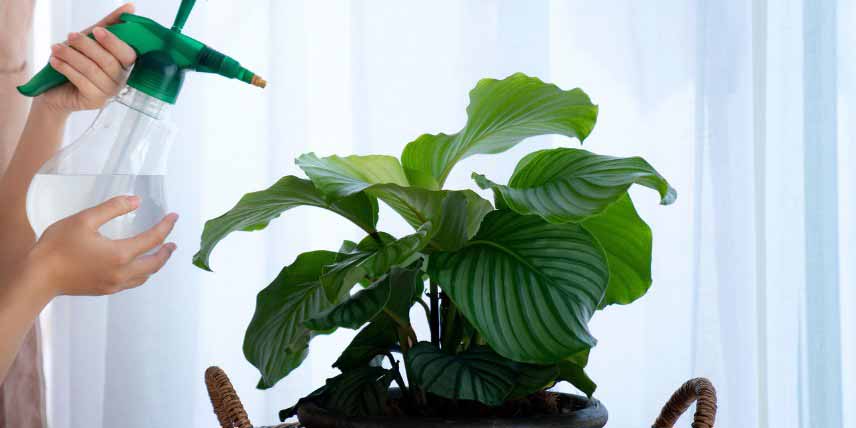
The humidity level to maintain
Recreating the humid atmosphere of tropical undergrowth is essential for your Calathea. Humidity levels between 60% and 80% promote foliage growth and prevent the tips from drying out. The bathroom becomes an ideal haven, combining warmth and natural humidity. To maintain this tropical bubble elsewhere in the house, opt for a humidifier or place your plant on a bed of damp clay pebbles. Daily misting with non-calcareous water strengthens this ambience while preserving the sheen of the leaf veins. Beware drafts that quickly dry the air and weaken your companion plant.
The optimal temperature
Temperature fluctuations present a critical factor for the health of your tropical plant. Steady warmth between 18 and 22°C promotes harmonious development, while temperatures below 15°C can quickly damage its foliage. In its natural habitat, beneath the canopy of the Amazon rainforest, your Calathea benefits from stable, protective warmth. Keep your companion plant away from dry-heat sources such as radiators, and away from poorly insulated windows in winter. A thermometer placed nearby will help monitor fluctuations and maintain this tropical ambiance, essential for the lush growth of its magnificent leaves.
The art of watering and repotting
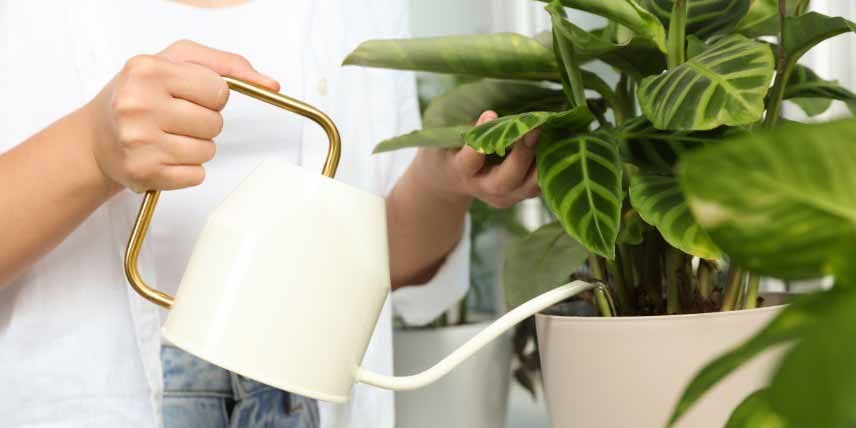
How to tell if your plant needs watering?
Very characteristic visual signs alert you when your Calathea needs water. The leaves curl gently in on themselves, like parchment leaves, and their margins begin to brown slightly. Another telling clue: the potting mix visibly pulls away from the sides of the pot. Push your finger into the soil to about 3 cm deep – if it is dry at that depth, your plant needs watering.
Thirst is also evident in a less vigorous growth habit: the stems lose some of their turgor and the leaves droop gently. Regular checks of the moisture in the potting mix, particularly during spring growth, will help you anticipate these distress signals.
Choosing the right potting mix
The success of growing Calathea relies on a perfectly balanced substrate, blending water retention and optimal drainage. A mix based on potting soil for green plants enriched with a quarter of Heather soil provides the acidity required for root development. The addition of perlite or coconut fibre naturally aerates the substrate while maintaining constant humidity. The soft, light structure of this mix allows roots to develop harmoniously, guaranteeing vigorous foliage growth. To maintain the nutrient content of the substrate, refreshing the surface potting mix in spring stimulates the vitality of your tropical plant.
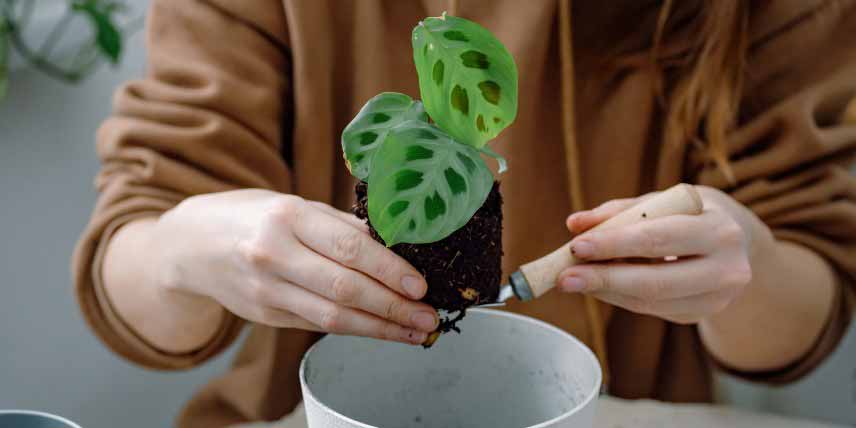
Steps for successful repotting
The right time to repot your tropical companion is in spring, when new growth begins to emerge. Prepare a slightly larger pot, with drainage holes, and lay a generous layer of clay balls at the bottom of the pot to promote water drainage.
Gently loosen the root ball by tilting it to the side, then inspect the roots. Remove any that are brown or damaged, and aerate the root mass gently. Position the plant in the centre of the new container, keeping the collar at the level of the previous one, then gradually fill with fresh substrate, lightly firming.
Moderate but regular watering during the first few weeks will help your Calathea settle into its new environment. Maintain humidity and gentle light exposure to accompany this transition period.
→ For more information, see our tutorial: “How to repot a Calathea without stress?“.
Preventing and treating common Calathea problems
Causes of yellowing leaves
Yellowing leaves indicate an imbalance in daily care for your tropical plant. Overexposure to direct sunlight weakens the central vein and causes visible stress on the leaves. The water quality also plays a crucial role: too hard, it leaves mineral deposits that disrupt the health of your companion plant. Red spider mites, sometimes difficult to spot, also cause characteristic yellowing, particularly during hot and dry periods. An ill-judged fertiliser application can also upset the nutrition of your Calathea zebrina or other sensitive species. In warm rooms, monitor soil moisture closely, as a waterlogged substrate quickly causes irreversible yellowing of the leaves.
Solutions for dry leaves
Crispy brown edges on your Calathea indicate an atmosphere that is too dry for this tropical beauty. Daily misting of the leaves with demineralised water at room temperature restores the necessary humidity. Place your plant on a bed of clay balls kept moist to create a cocoon of coolness around it. Using a humidifier near your companion plant effectively prevents the leaf tips from drying out.
A tray of pebbles kept under the pot naturally raises local humidity. For leaves already affected, a clean pruning at the base of the dry areas, with disinfected scissors, allows your Calathea to redirect its energy toward new healthy shoots.
Managing overwatering
A waterlogged substrate quickly jeopardises the health of your Calathea. To rescue a waterlogged plant, gently remove it from its pot and inspect its roots: healthy parts are white and firm, while affected areas brown and become soft. Remove damaged roots with clean scissors, then allow the root ball to dry for a few hours in the air. Repot into fresh, well-aerated potting mix, adding 30% perlite to improve drainage. A terracotta pot, more porous than a plastic container, will promote the natural evaporation of excess moisture and will help prevent future overwatering.
→ For more information, read our article: “Calathea: Diseases, common problems and parasites“.
Calathea propagation and propagation by cuttings
Dividing clumps
Your Calathea offers a wonderful opportunity for propagation when its clump becomes lush and bushy. Spring, the moment when the sap starts to rise, is ideal for carrying out this delicate operation. Prepare your sterilised tools and carefully remove the plant from its pot to preserve the roots.
Once the clump is freed, identify the natural points of separation between the tufts. With gentle but assured movements, divide the rootstock into sections, each containing several leafy shoots and a healthy root system. Each new division will quickly find its place in an appropriately sized pot, filled with the same potting mix as the parent plant.
→ For more information, see our tutorial: “How to easily propagate a Calathea?“.
Post-division care
The success of the division hinges on the first weeks of attentive care. The establishment of a stable and protected environment promotes the recovery of the new divisions. Place your young plants away from direct sunlight, in a warm and humid atmosphere between 20 and 22°C. A daily misting of the foliage maintains the humidity required for their development. The first shoots usually appear after three to four weeks, signalling the success of the operation. A half-strength application of fertiliser for green plants stimulates the formation of new roots without risking burning the delicate tissues.
To learn more about Calathea
Also read our complete guide to Calathea: varieties, growing and care.

- Subscribe!
- Contents

Comments