


Red Crystal Finger Lime with red pearls - Microcitrus australasica
Red Crystal Finger Lime with red pearls - Microcitrus australasica
Red Crystal Finger Lime with red pearls - Microcitrus australasica
Red Crystal Finger Lime with red pearls - Microcitrus australasica
Microcitrus australasica Red Crystal
Australian finger lime, Caviar lime
A very significant development since its reception a few months ago. I will have to prune it as it is no longer at all harmonious. It had a very beautiful flowering and now there are about ten lemons. I am delighted and surprised, I did not expect such early fruiting.
Joelle Anne, 30/12/2021
Special offer!
Receive a €20 voucher for any order over €90 (excluding delivery costs, credit notes, and plastic-free options)!
1- Add your favorite plants to your cart.
2- Once you have reached €90, confirm your order (you can even choose the delivery date!).
3- As soon as your order is shipped, you will receive an email containing your voucher code, valid for 3 months (90 days).
Your voucher is unique and can only be used once, for any order with a minimum value of €20, excluding delivery costs.
Can be combined with other current offers, non-divisible and non-refundable.
Why not try an alternative variety in stock?
View all →
Available in 1 sizes

Available in 3 sizes

Available in 3 sizes

Available in 3 sizes

Available in 1 sizes

Available in 2 sizes

Available in 2 sizes

Available in 1 sizes

Available in 1 sizes

Available in 1 sizes
This plant carries a 12 months recovery warranty
More information
We guarantee the quality of our plants for a full growing cycle, and will replace at our expense any plant that fails to recover under normal climatic and planting conditions.

Description
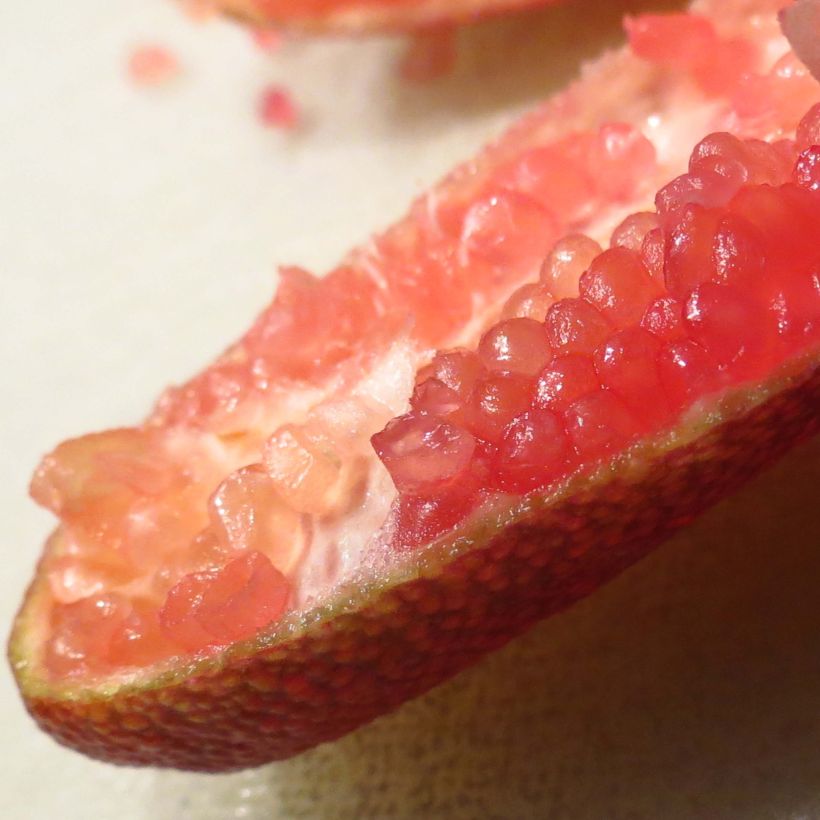
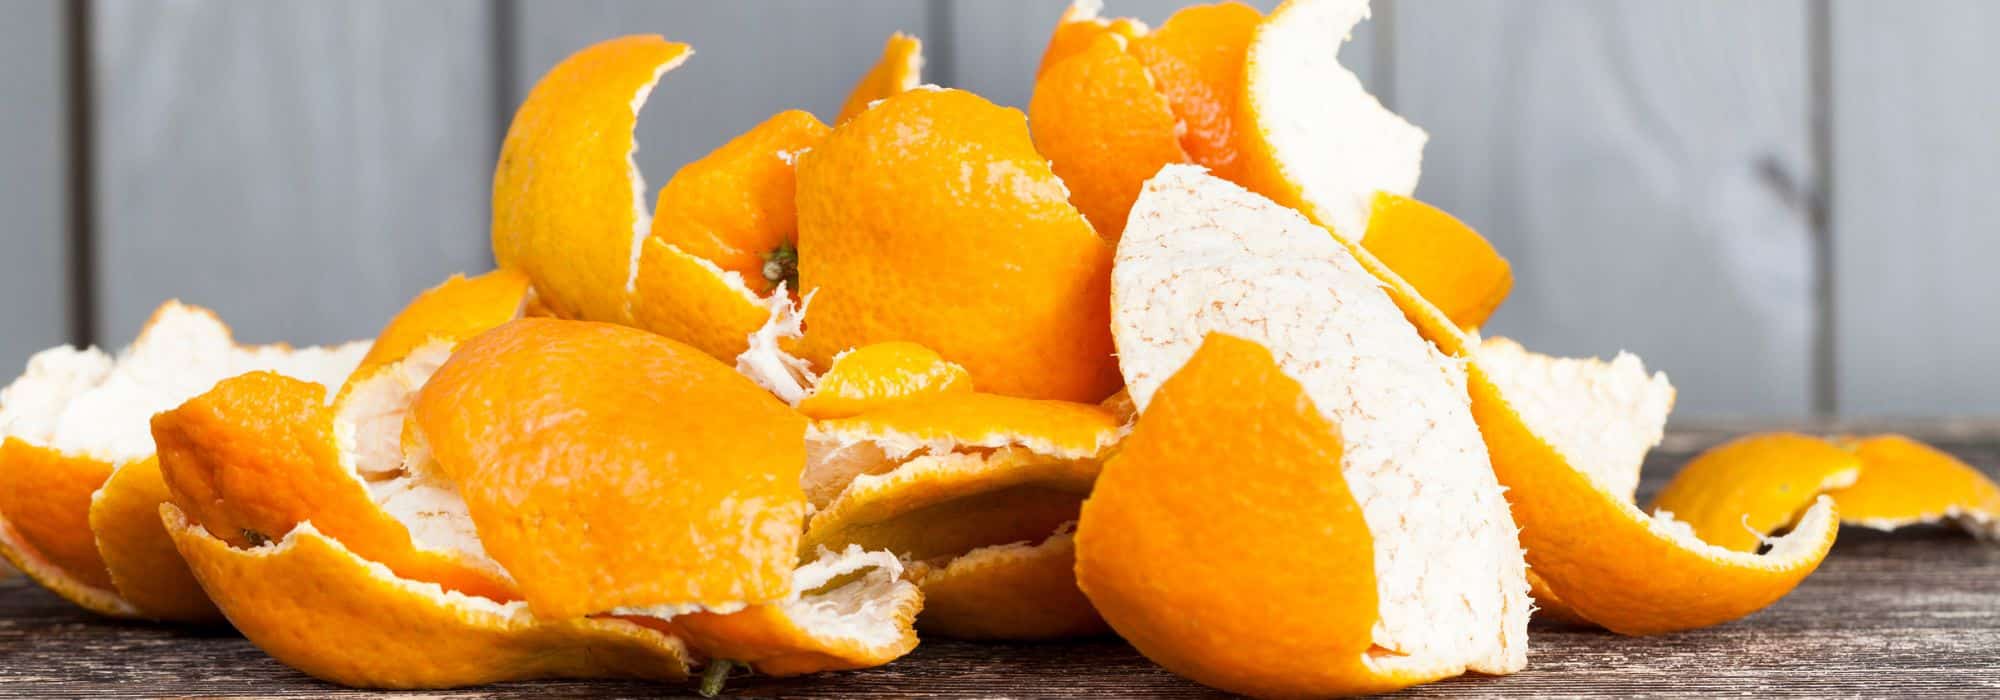
The Caviar Lime, Microcitrus or Citrus australasica in Latin, also exists in a red-seeded version that will surprise both on the plate and in the mouth. Rare and sought after, this trendy citrus fruit is coveted by the Chefs of the best restaurants in the world, yet it is still relatively unknown to amateur gardeners, despite its playful appearance and its compact growth, well suited to container cultivation. This small Australian lemon tree produces small white or pink flowers, fragrant, followed by elongated fruits that range in color from red to purple when ripe. Under their fragrant skin lies the 'caviar', small translucent beads that reveal delicious tangy and aromatic flavours. This chic and unusual citrus fruit can be grown in a large container and stored in a greenhouse during winter, or planted directly in the ground in warm regions that are spared from severe frost.
The Citrus or Microcitrus australasica is also known as the 'finger lime' or 'Australian finger lime' due to the appearance of the size of its fruits, which can also resemble pickles. It is a small thorny bush from the Rutaceae family, with a rather upright bushy habit. It is native to eastern Australia, a mild and very humid region. In the wild, it grows in plains, in the undergrowth of humid forests. The natural variability of this species has allowed for the selection of different varieties with different colors, which are available for cultivation, some of which have been named and registered.
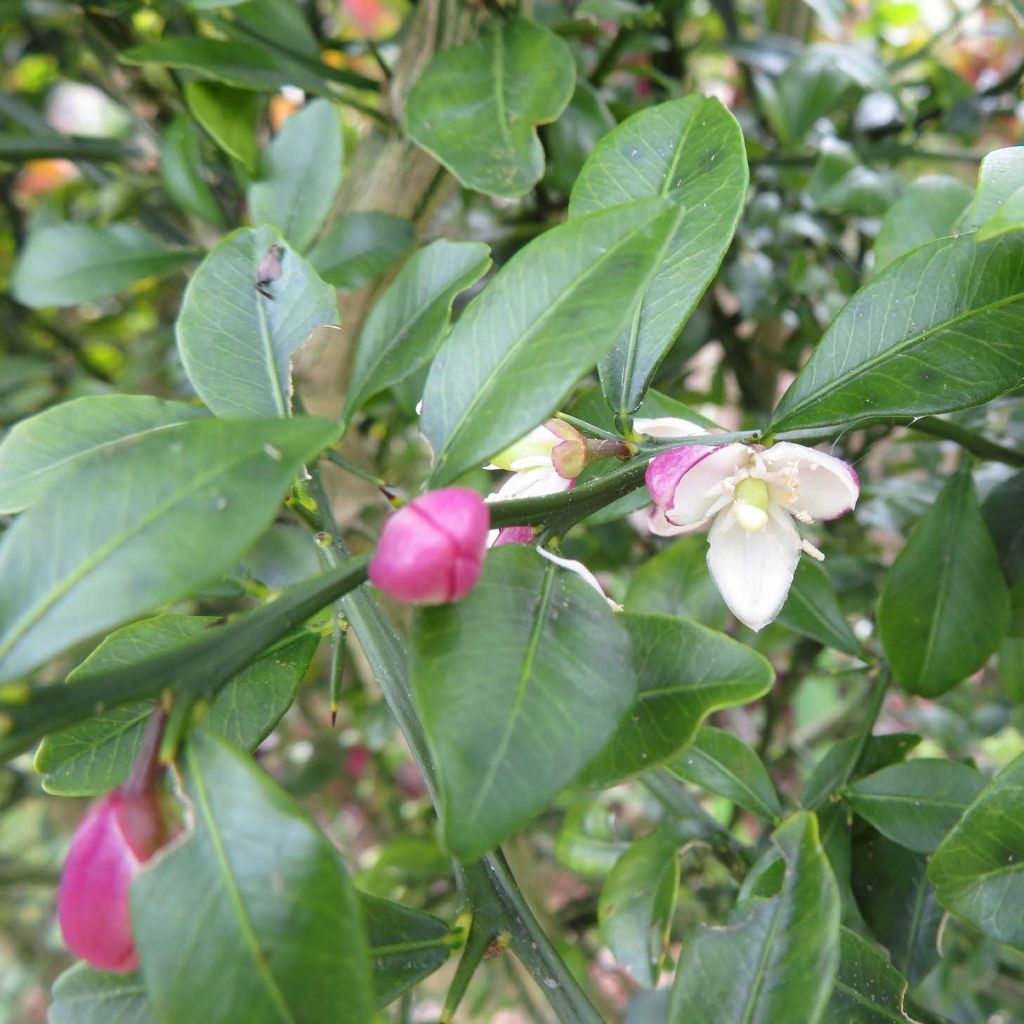
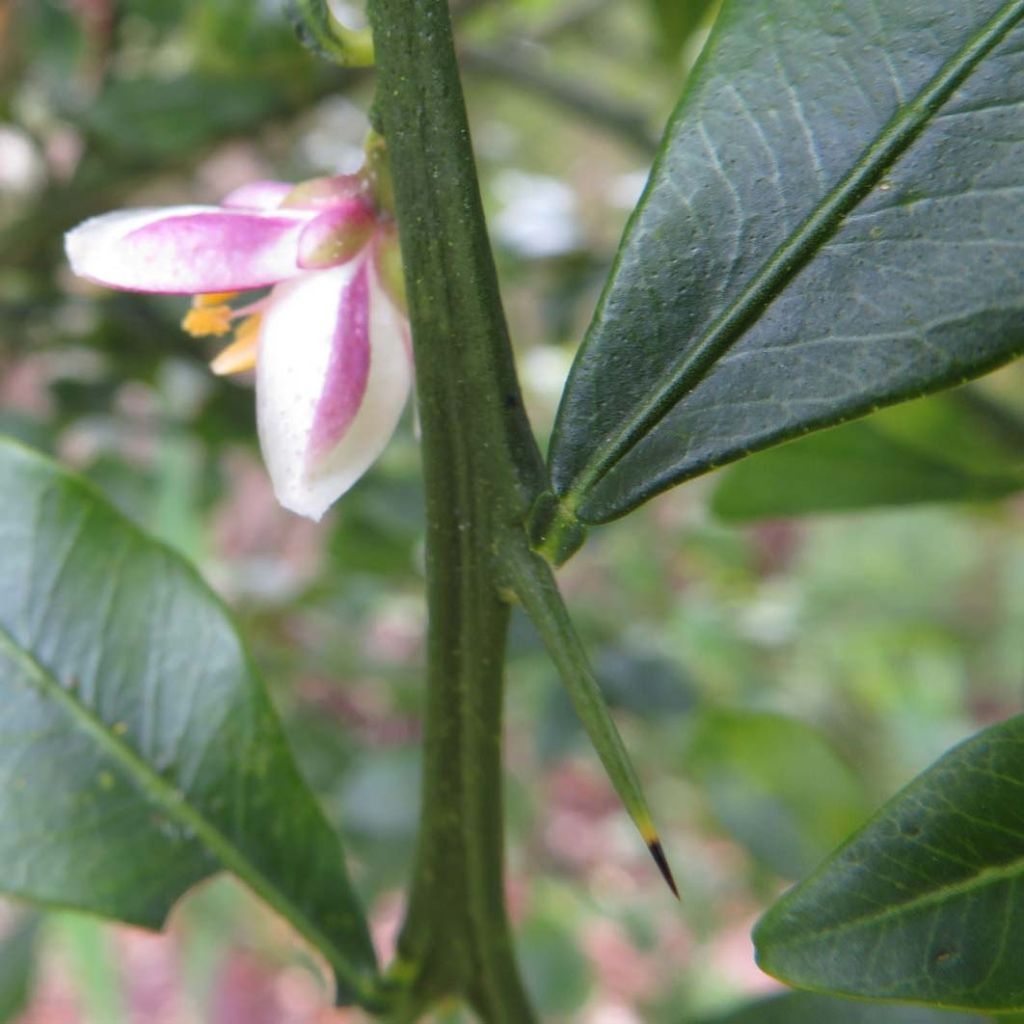
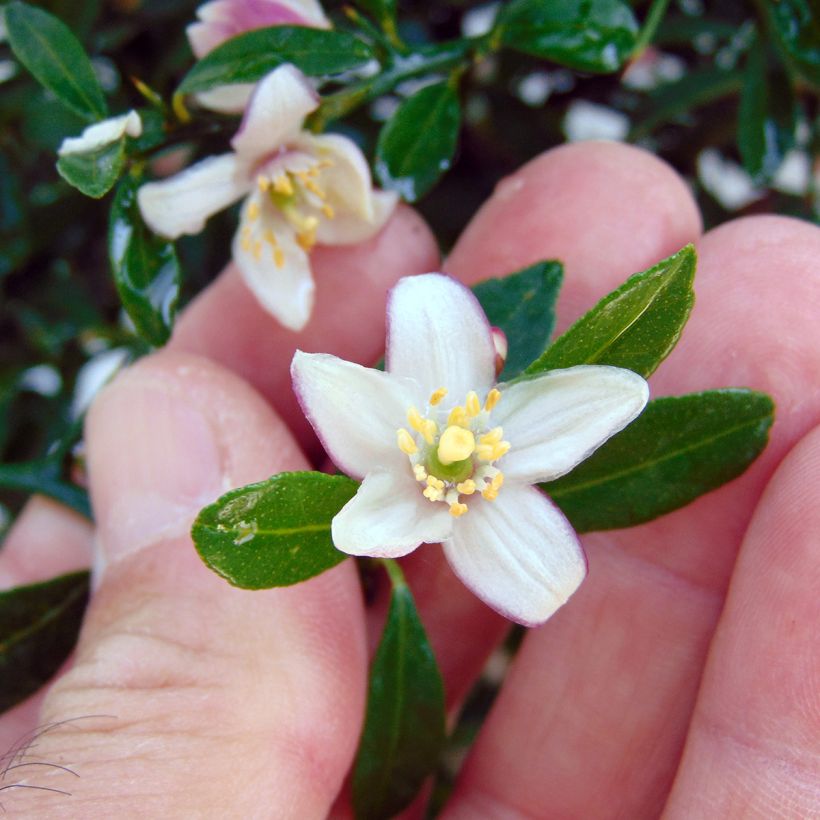
This small tree reaches a height of 3 meters and spreads over approximately 2 meters (7 feet) in the ground, but will remain more compact when grown in a pot. Not very hardy, it can be planted in the ground in a narrow coastal strip of the Mediterranean. Elsewhere, it will be grown in a pot and stored at the onset of the first frosts. Cultivated for its leaves and fruits, the Caviar Lime blooms in March-April. It produces pink buds that open into small white to pink flowers, with a sweet and gourmet neroli fragrance, characteristic of Citrus. This citrus fruit takes time to reach maturity, and the fruiting process is rather slow. The flowers give way to cylindrical, finger-shaped fruits, measuring 4 to 8 cm (2 to 3in) long. The skin of the mature fruits can display various shades, ranging from green to almost black, including red, purple, and brown. They contain small juicy and crunchy vesicles that naturally separate from each other like caviar. The fruits are harvested from October to December. They enhance both savory and sweet dishes. The evergreen and aromatic leaves of this citrus measure 1cm (0in) to 6cm (2in) in length and 3mm (0in) to 25mm (1in) in width. They have a very delicate aromatic flavour, used as a spice.
The Red-Seeded Caviar Lime is cultivated frost-free in a slightly acidic, consistently moist soil, and in a humid atmosphere, requirements that are easier to meet in a large pot. Cultivation in the ground is almost a specialist matter for this species, which is frost-sensitive at -3°C (26.6°F). The fruit of the Caviar Lime is a refined and sought-after delicacy, which can reach several hundred euros per kilogram. Like truffles, it should therefore be used sparingly to decorate a plate or flavor a dish. This citrus-condiment adds a pleasant tangy and aromatic note to seafood such as oysters or almonds, for example. It pairs well with the flavor of scallops or thinly sliced salmon fillets prepared as carpaccio. Also incorporate some crunchy beads into fruit salads or cocktails.
Like all Citrus, the Microcitrus contains in its leaves, flowers, and fruits pouches of essential oil that are often visible to the naked eye, from which essential oil with anti-inflammatory and anti-rheumatic properties, as well as sedative properties, can be extracted through distillation (flowers and leaves) or pressing (zest), allowing it to fight against stress and insomnia. The fragrance of the essential oil is described as fresh, citrusy, tangy, with green notes.
Most citrus fruits thrive in the ground in Mediterranean coastal regions where they find the necessary warmth throughout the year. However, in order to bear fruit well, they must not lack water or nutrients. Not very hardy, the Caviar Lime begins to suffer from cold temperatures as low as -3°C (26.6°F). It is a self-fertile bush, which means that a single individual is sufficient for complete pollination and fruiting.
Red Crystal Finger Lime with red pearls - Microcitrus australasica in pictures
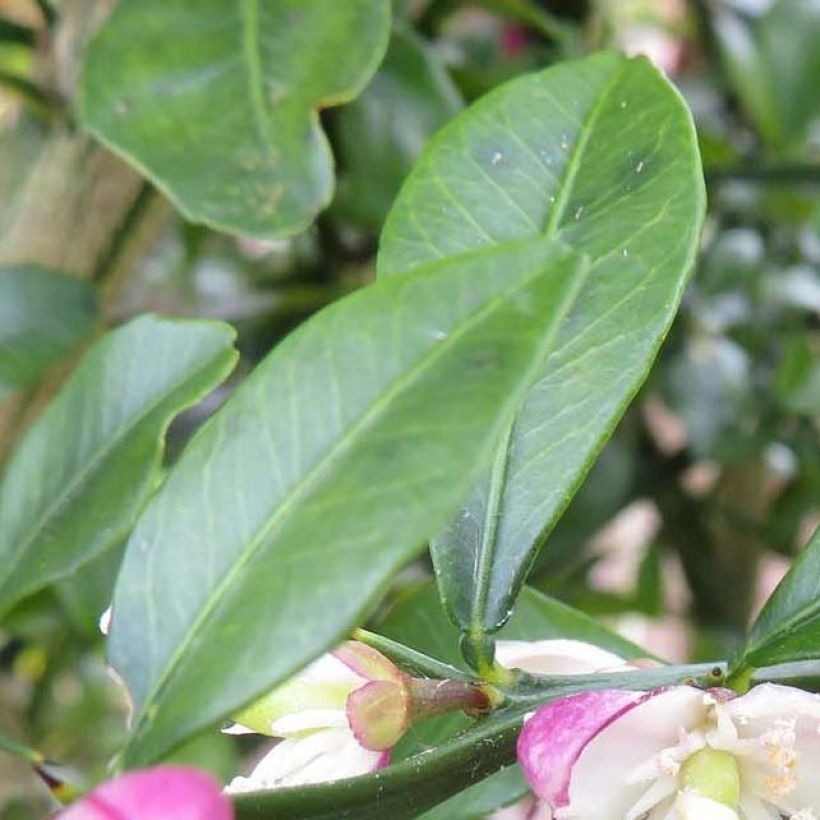
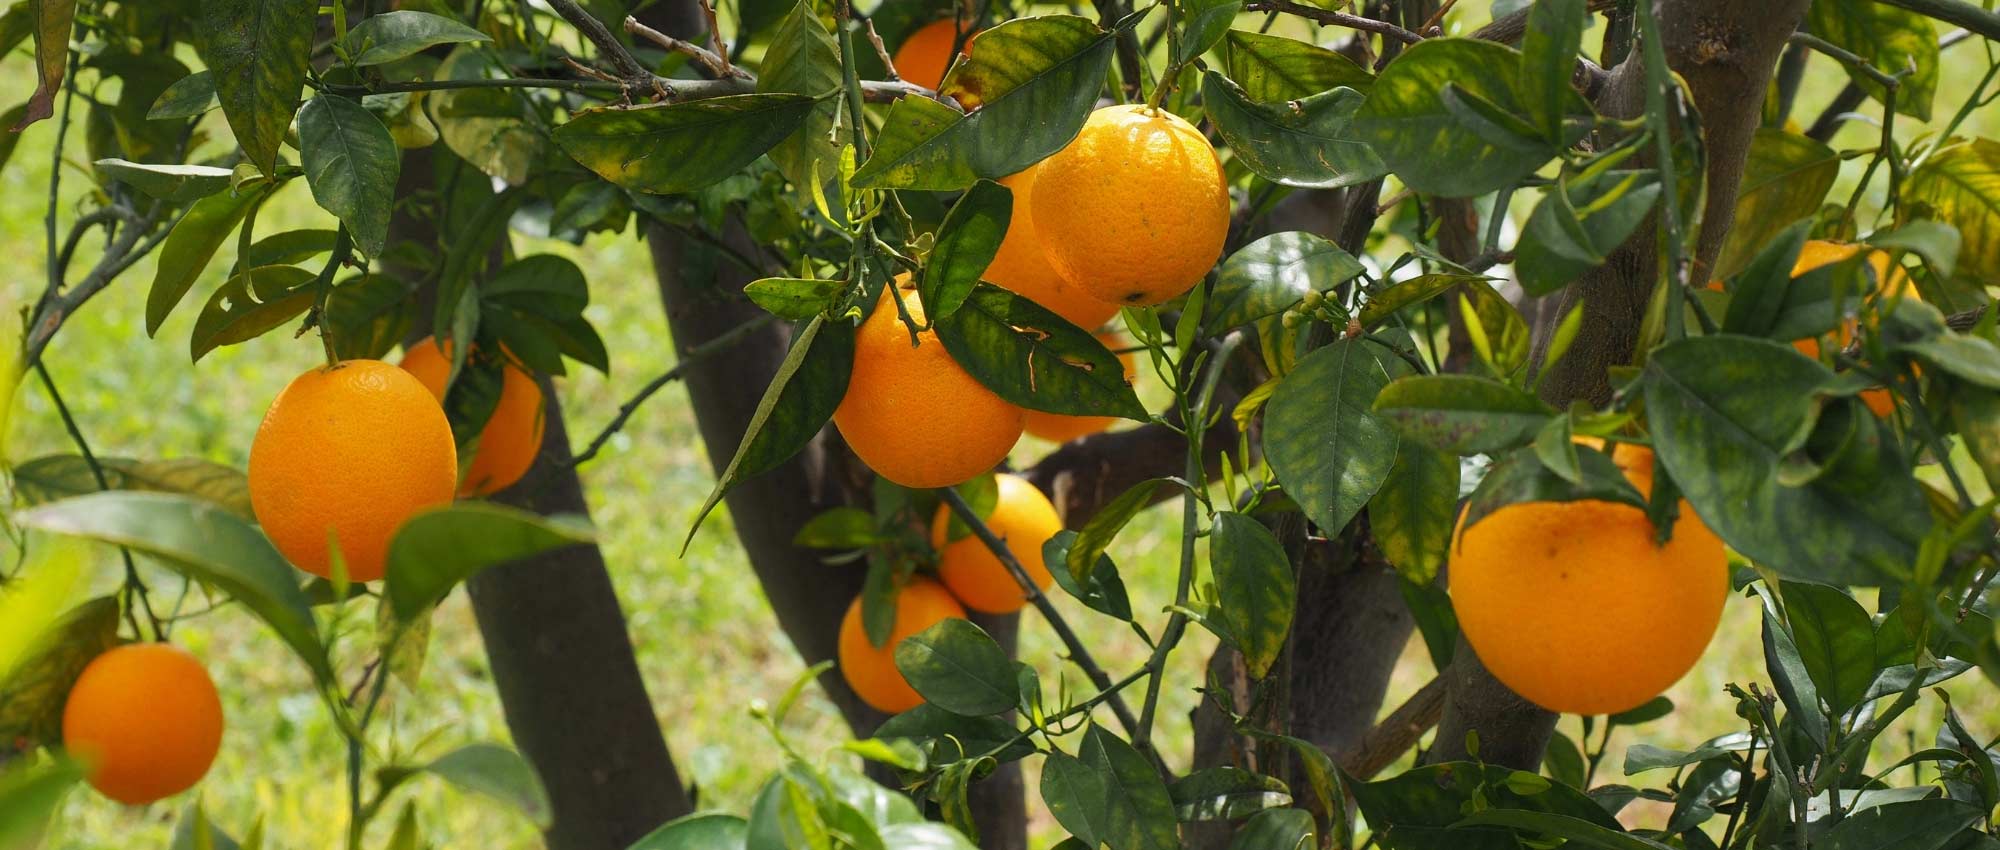
Plant habit
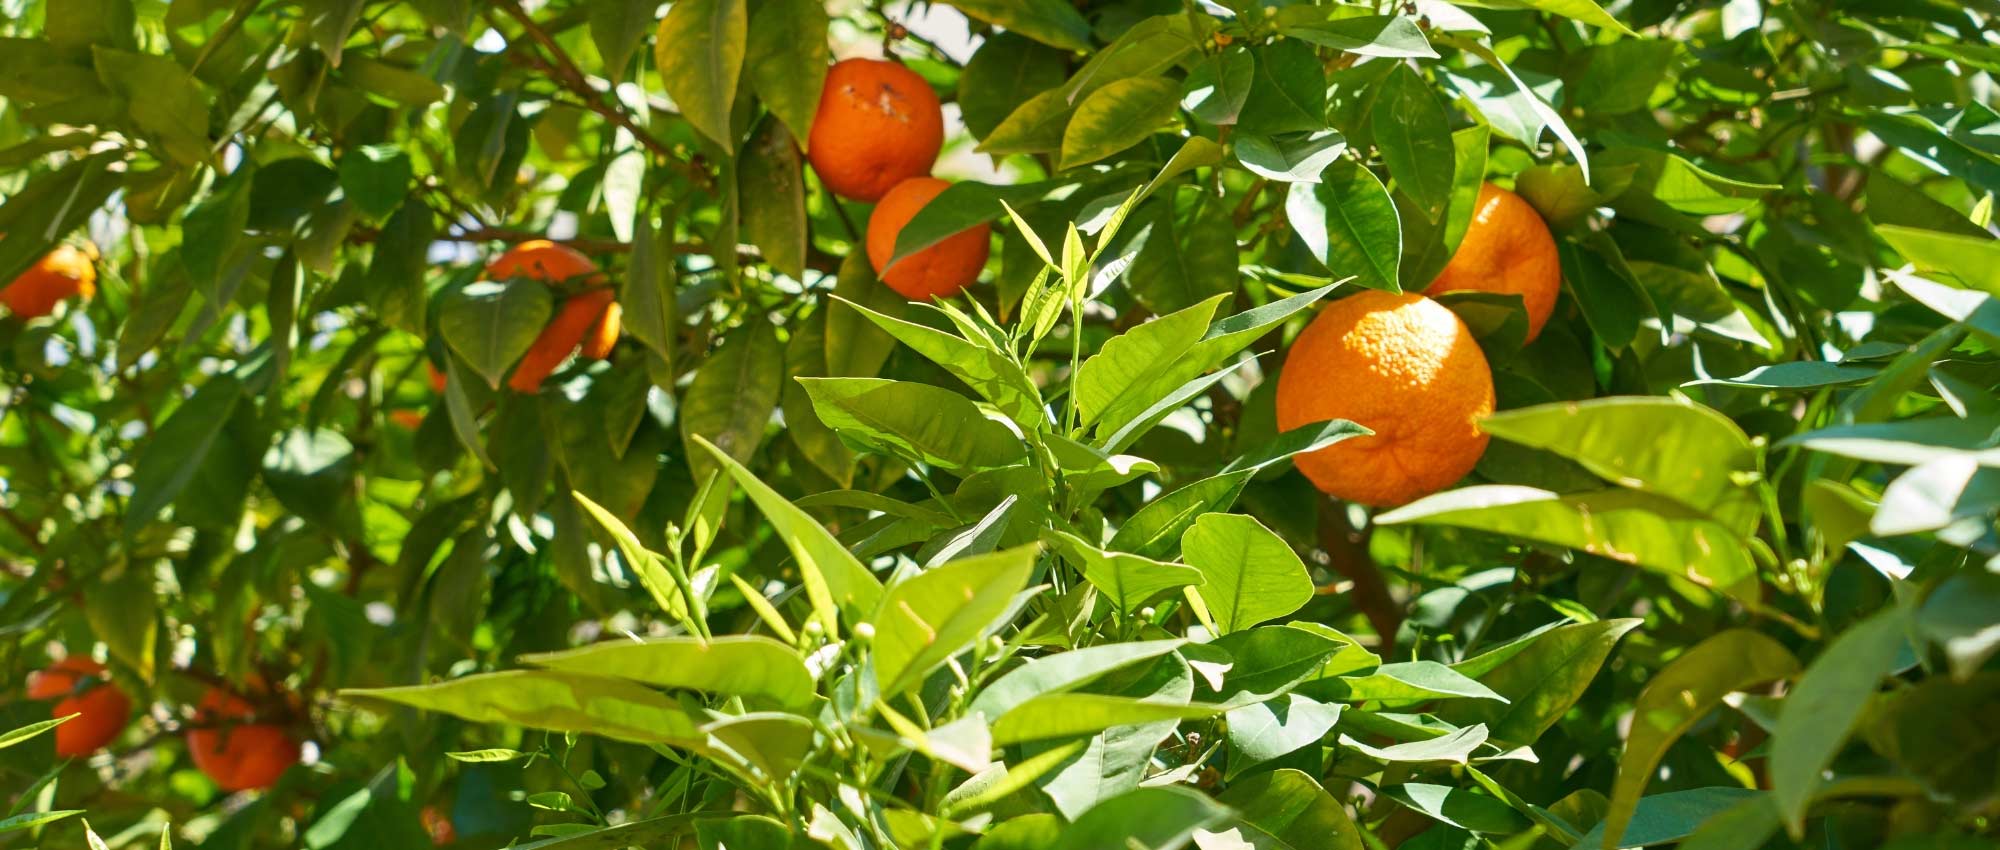
Fruit
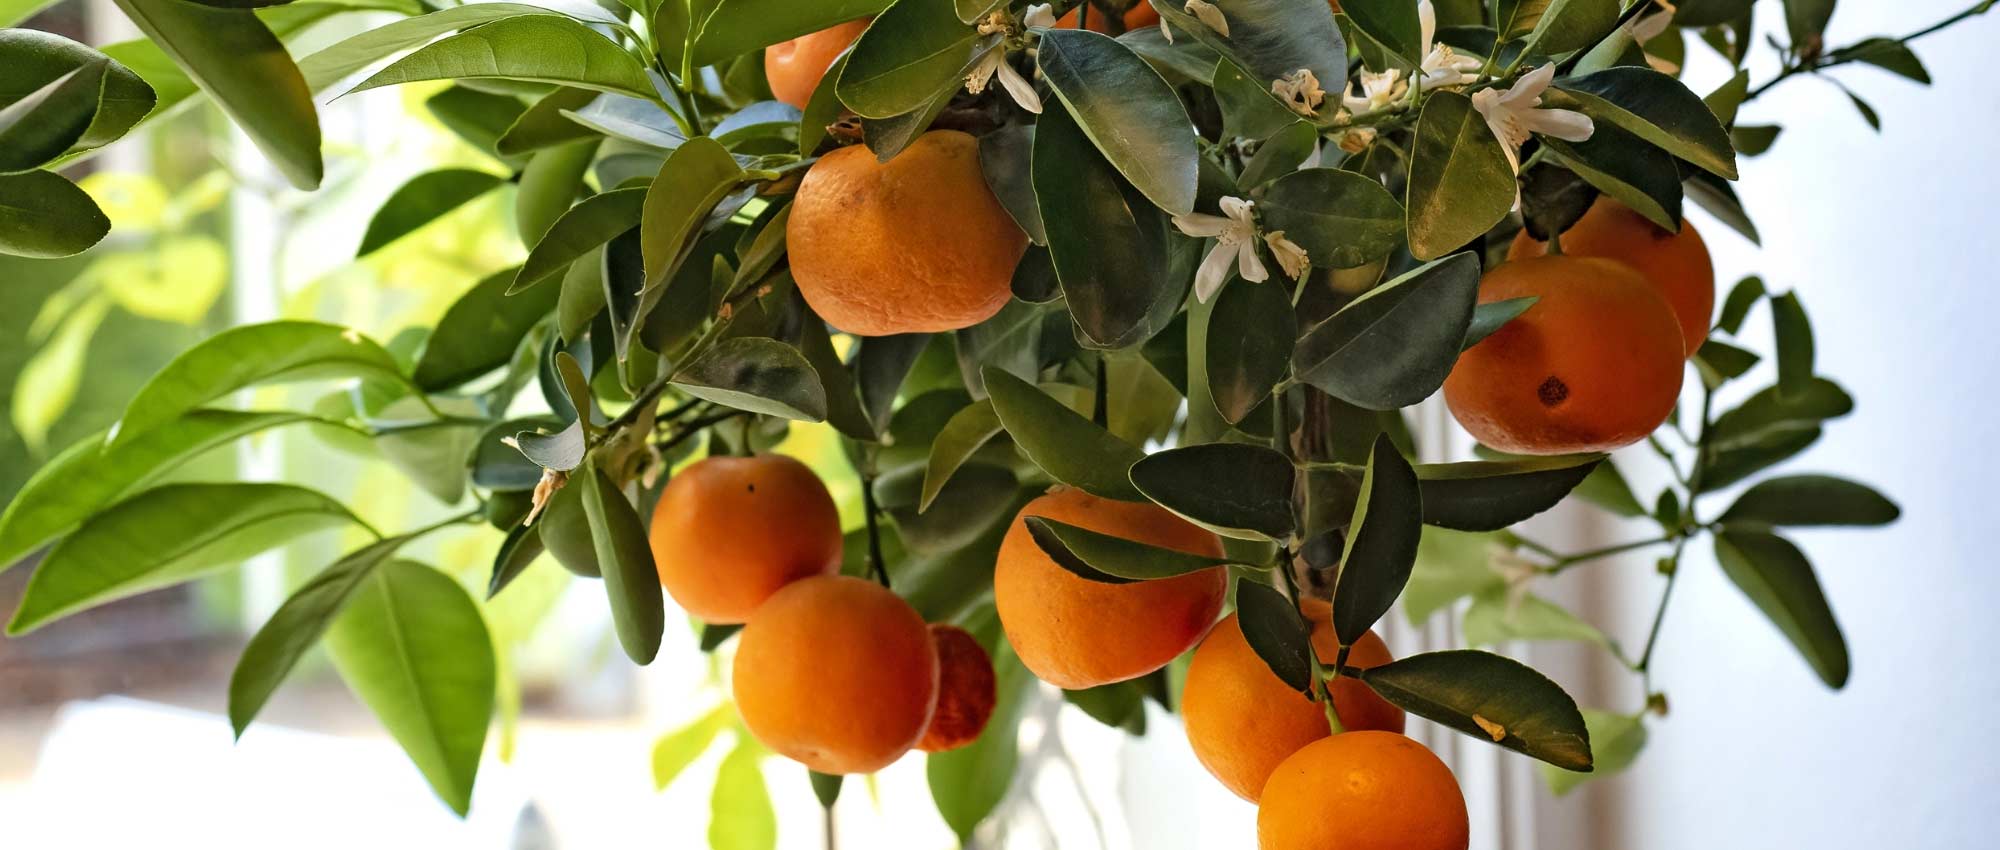
Flowering
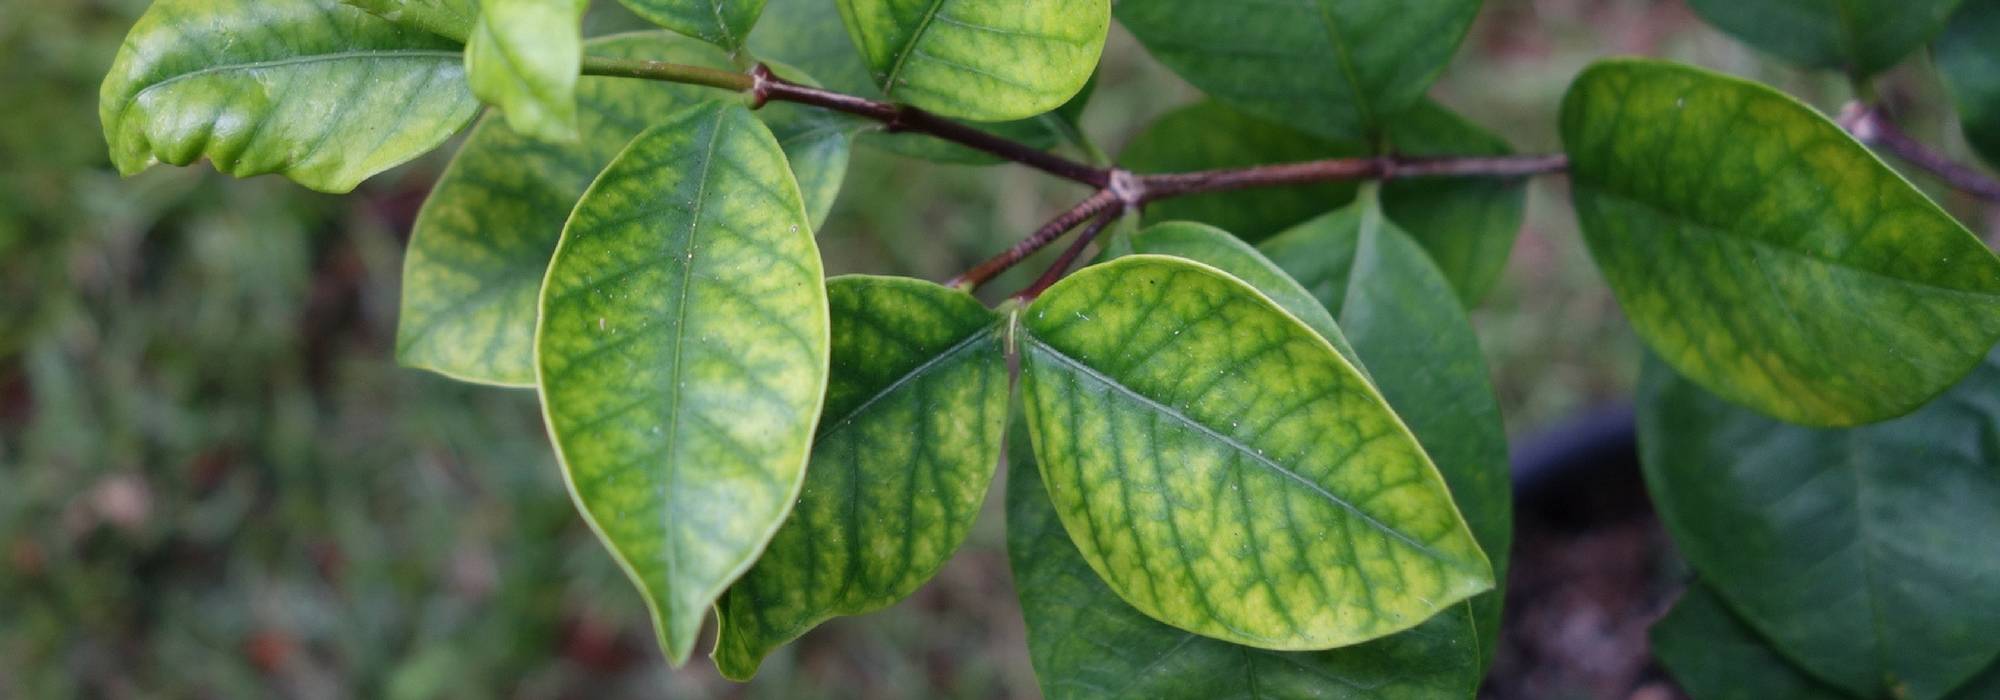
Foliage
Botanical data
Microcitrus
australasica
Red Crystal
Rutaceae
Australian finger lime, Caviar lime
Australia
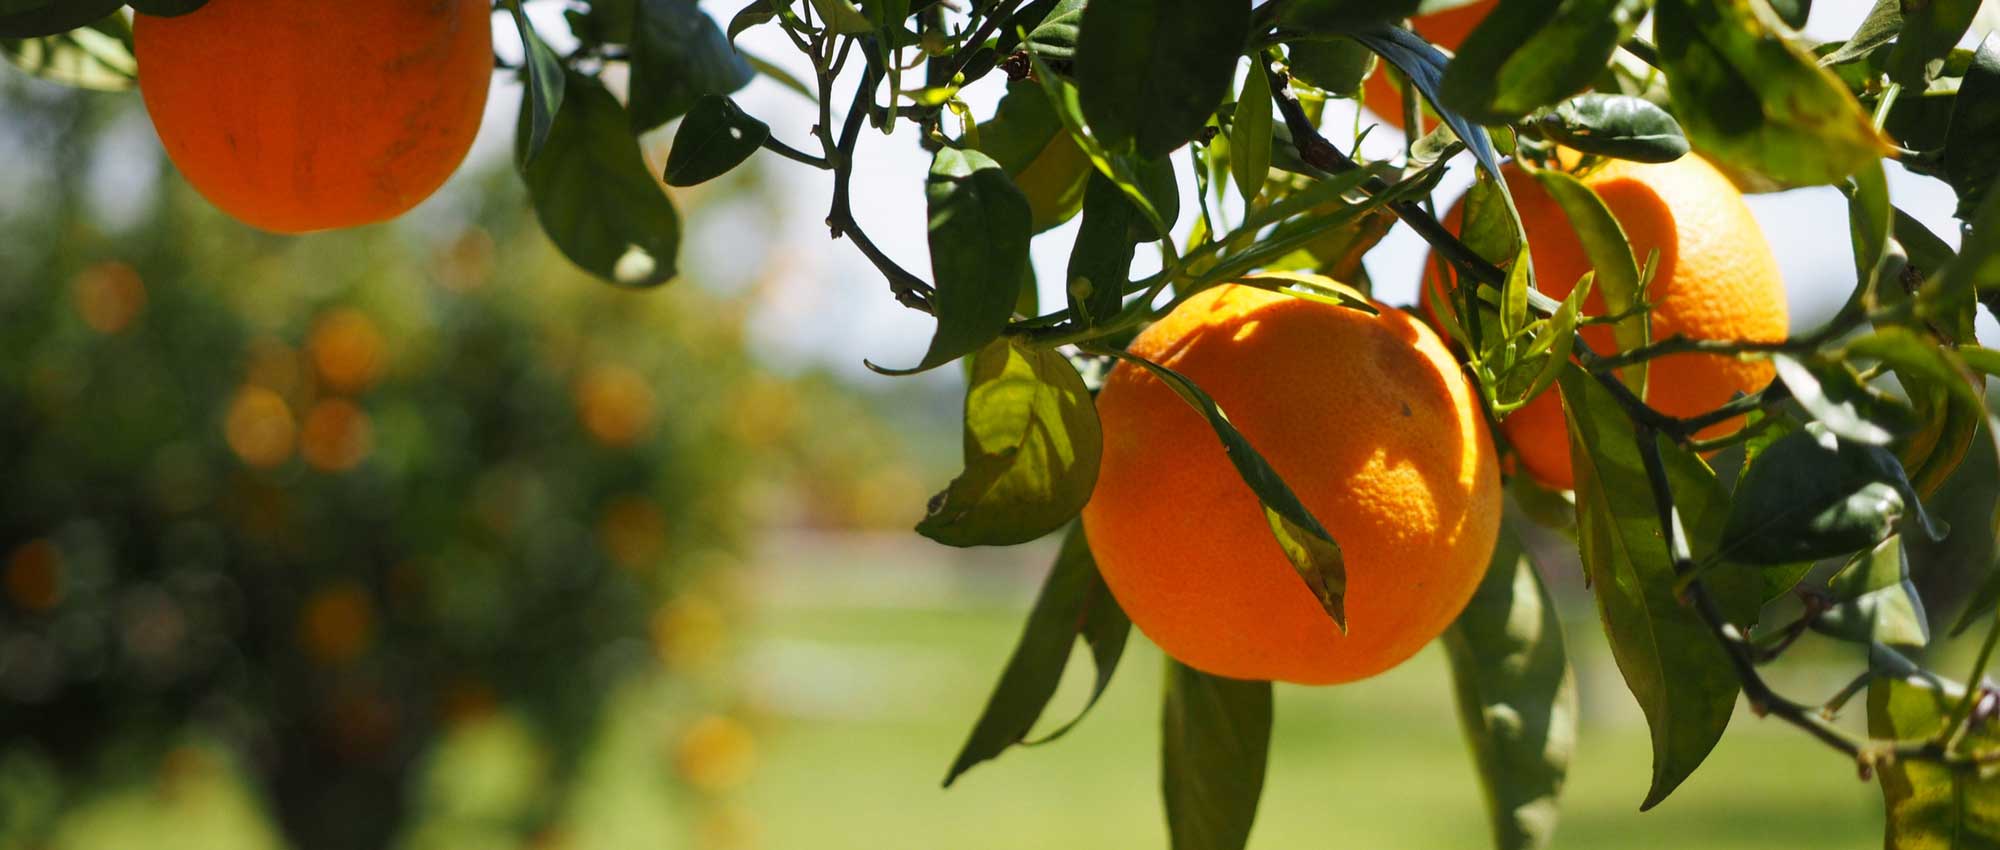
Other Citrus trees
View all →
Available in 0 sizes
Available in 2 sizes

Available in 3 sizes

Available in 1 sizes

Available in 3 sizes

Available in 3 sizes

Available in 1 sizes

Available in 3 sizes

Available in 2 sizes

Available in 3 sizes
Planting and care
Planting in the ground: the caviar lime appreciates damp, neutral to slightly acidic and non-calcareous but fertile soils. It is only reasonable to plant it in the ground if you live on a highly protected Mediterranean or Atlantic coastline, where temperatures do not drop below -4°C (24.8°F). The best time to plant is in early spring, in March and April. Be careful not to bury the collar. Citrus trees are naturally greedy and require water to bear fruit: in any case, consider amending with well-decomposed compost or "special citrus" fertilizer. Choose a sunny but not scorching location for your bush, sheltered from the wind to prevent leaf drying and premature fruit drop. Place it in a location protected from sea spray.
Planting in a pot: in all other regions, the Microcitrus will be planted in a pot that can be kept in a greenhouse or a minimally heated conservatory, with an atmosphere that is not too dry, but frost-free at all times. It will appreciate being outdoors in summer. Planting in a pot or repotting takes place in late summer. Choose a pot slightly larger than the root system, as citrus trees do not like to feel cramped. Moisten the soil well. To improve drainage, line the bottom of the pot with clay pebbles. Loosen the root ball and mix two-thirds garden soil (if possible, non-calcareous) with one-third 'special citrus' potting soil. Water generously. Prefer pots made of breathable materials or terracotta.
Citrus trees need a lot of water to thrive. Your caviar lemon should be watered daily with lightly or non-calcareous water, and the soil should remain consistently moist. Similarly, make sure to regularly provide the necessary fertilizer: every 6 months for slow-release granular fertilizer or every 3 waterings for liquid fertilizer.
Beware of attacks from the Australian scale insect (Icerya purchasi), which has taken up residence in our mild climate regions through imported plants from Australia.
Planting period
Intended location
Care
Planting & care advice
-
-
-
-
-
-
-

-
-
, onOrder confirmed
Reply from on Promesse de fleurs
Similar products

Available in 2 sizes

Available in 1 sizes

Available in 1 sizes

Available in 3 sizes

Available in 1 sizes

Available in 2 sizes

Available in 1 sizes

Available in 2 sizes

Available in 1 sizes

Available in 1 sizes
Haven't found what you were looking for?
Hardiness is the lowest winter temperature a plant can endure without suffering serious damage or even dying. However, hardiness is affected by location (a sheltered area, such as a patio), protection (winter cover) and soil type (hardiness is improved by well-drained soil).

Photo Sharing Terms & Conditions
In order to encourage gardeners to interact and share their experiences, Promesse de fleurs offers various media enabling content to be uploaded onto its Site - in particular via the ‘Photo sharing’ module.
The User agrees to refrain from:
- Posting any content that is illegal, prejudicial, insulting, racist, inciteful to hatred, revisionist, contrary to public decency, that infringes on privacy or on the privacy rights of third parties, in particular the publicity rights of persons and goods, intellectual property rights, or the right to privacy.
- Submitting content on behalf of a third party;
- Impersonate the identity of a third party and/or publish any personal information about a third party;
In general, the User undertakes to refrain from any unethical behaviour.
All Content (in particular text, comments, files, images, photos, videos, creative works, etc.), which may be subject to property or intellectual property rights, image or other private rights, shall remain the property of the User, subject to the limited rights granted by the terms of the licence granted by Promesse de fleurs as stated below. Users are at liberty to publish or not to publish such Content on the Site, notably via the ‘Photo Sharing’ facility, and accept that this Content shall be made public and freely accessible, notably on the Internet.
Users further acknowledge, undertake to have ,and guarantee that they hold all necessary rights and permissions to publish such material on the Site, in particular with regard to the legislation in force pertaining to any privacy, property, intellectual property, image, or contractual rights, or rights of any other nature. By publishing such Content on the Site, Users acknowledge accepting full liability as publishers of the Content within the meaning of the law, and grant Promesse de fleurs, free of charge, an inclusive, worldwide licence for the said Content for the entire duration of its publication, including all reproduction, representation, up/downloading, displaying, performing, transmission, and storage rights.
Users also grant permission for their name to be linked to the Content and accept that this link may not always be made available.
By engaging in posting material, Users consent to their Content becoming automatically accessible on the Internet, in particular on other sites and/or blogs and/or web pages of the Promesse de fleurs site, including in particular social pages and the Promesse de fleurs catalogue.
Users may secure the removal of entrusted content free of charge by issuing a simple request via our contact form.
The flowering period indicated on our website applies to countries and regions located in USDA zone 8 (France, the United Kingdom, Ireland, the Netherlands, etc.)
It will vary according to where you live:
- In zones 9 to 10 (Italy, Spain, Greece, etc.), flowering will occur about 2 to 4 weeks earlier.
- In zones 6 to 7 (Germany, Poland, Slovenia, and lower mountainous regions), flowering will be delayed by 2 to 3 weeks.
- In zone 5 (Central Europe, Scandinavia), blooming will be delayed by 3 to 5 weeks.
In temperate climates, pruning of spring-flowering shrubs (forsythia, spireas, etc.) should be done just after flowering.
Pruning of summer-flowering shrubs (Indian Lilac, Perovskia, etc.) can be done in winter or spring.
In cold regions as well as with frost-sensitive plants, avoid pruning too early when severe frosts may still occur.
The planting period indicated on our website applies to countries and regions located in USDA zone 8 (France, United Kingdom, Ireland, Netherlands).
It will vary according to where you live:
- In Mediterranean zones (Marseille, Madrid, Milan, etc.), autumn and winter are the best planting periods.
- In continental zones (Strasbourg, Munich, Vienna, etc.), delay planting by 2 to 3 weeks in spring and bring it forward by 2 to 4 weeks in autumn.
- In mountainous regions (the Alps, Pyrenees, Carpathians, etc.), it is best to plant in late spring (May-June) or late summer (August-September).
The harvesting period indicated on our website applies to countries and regions in USDA zone 8 (France, England, Ireland, the Netherlands).
In colder areas (Scandinavia, Poland, Austria...) fruit and vegetable harvests are likely to be delayed by 3-4 weeks.
In warmer areas (Italy, Spain, Greece, etc.), harvesting will probably take place earlier, depending on weather conditions.
The sowing periods indicated on our website apply to countries and regions within USDA Zone 8 (France, UK, Ireland, Netherlands).
In colder areas (Scandinavia, Poland, Austria...), delay any outdoor sowing by 3-4 weeks, or sow under glass.
In warmer climes (Italy, Spain, Greece, etc.), bring outdoor sowing forward by a few weeks.