


The art of pumpkins for Halloween: choosing, decorating and preserving
Our tips for the perfect Halloween decor!
Contents
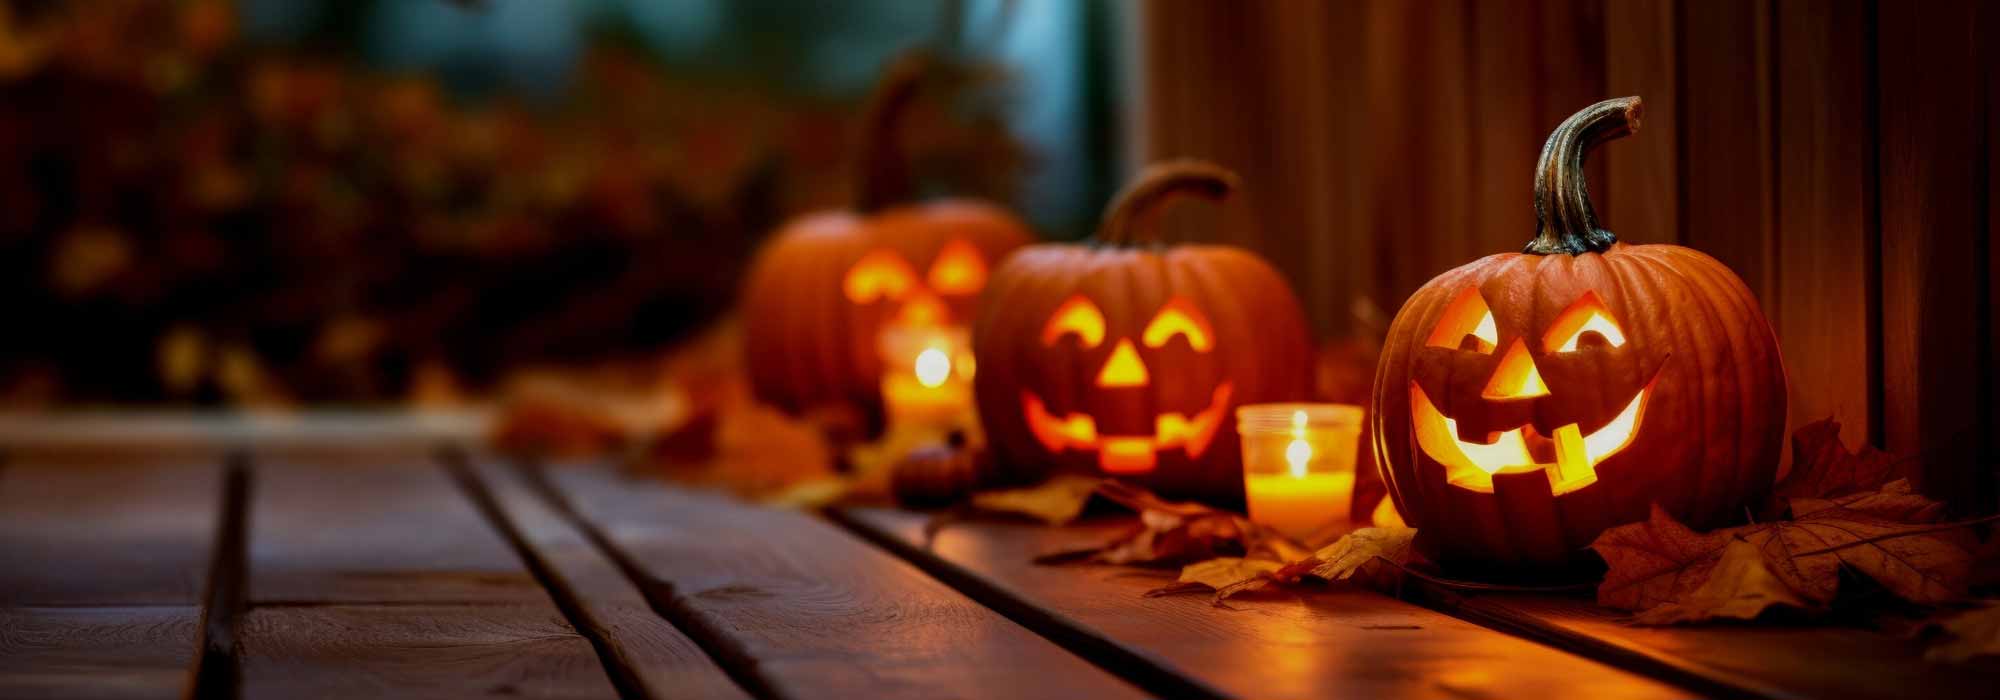
Carved, scary, grimacing, welcoming or masked, no Halloween party without pumpkins!The indispensable squash, with its beautiful bright orange skin, can be hollowed out into a threatening face, but you can also paint it, stick on decals, add glitter or turn it into a vase. This gourd adapts to every creative idea. For a more natural display or to complete the setting, also consider using mini-pumpkins in a variety of shapes and colours. Choosing the right pumpkin variety is essential to make your Halloween party a success! Discover our selection of pumpkins perfect for Halloween, our decoration ideas and tips to keep a lovely autumn atmosphere for as long as possible.

What are the best pumpkin varieties for Halloween?
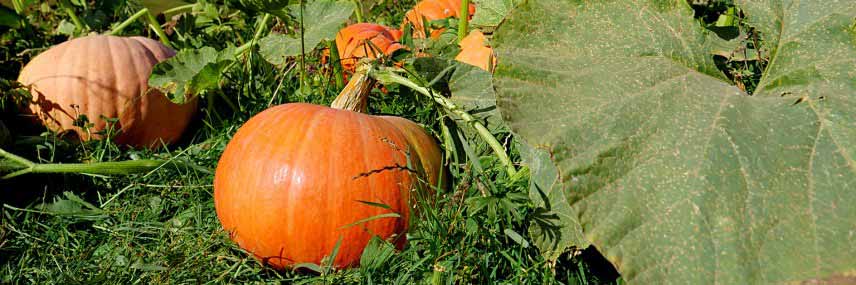
If you grow pumpkins in your vegetable garden, you’ll be able to create many lanterns and other more or less terrifying decorative items! But at first glance you might wonder: is it really that easy to have fun with a fruit you have to carve, hollow out and shape? Orange, green, yellow or even blue, smooth, ribbed or warty, with tender skin… Choosing the right variety of pumpkin (nice and round and large enough to be hollowed out) is a crucial step to make your Halloween decoration a success.
Certain squashes are traditionally used to make the famous Halloween lanterns, the “Jack O’Lantern”, those pumpkins hollowed out and carved to create openings (a mouth, teeth and eyes) which usually form a face with a smiling or frightening grimace, all lit by a candle placed in the belly of the fruit. In fact, many squashes lend themselves to creating illuminated decorations. White varieties prove particularly refined under lighting effects. You should favour (especially if you are not very handy!) cucurbits with large, regular fruits, and whose flesh is easy to hollow out, such as:
- The classic ‘Jack O’Lantern’ pumpkin which produces large, slightly ribbed orange pumpkins 18 to 20 cm in diameter, about 25 cm tall and weighing up to 8 kg.
- The ‘Jack Be Little’ squash which yields smaller fruits (5 to 8 cm in diameter, around 300 g on average) and strongly ribbed, perfect for making mini lanterns.
- The ‘Baby Boo’ squash is the white version of ‘Jack Be Little’! This mini squash, very ribbed, measures no more than 5 to 8 cm in diameter and allows you to make very decorative mini lanterns for a table set for guests, for example.
- The ‘Spooktacular’ squash, a cute little pumpkin 12 to 15 cm in diameter (1 to 2 kg), with a smooth orange skin, ideal for Halloween lanterns.
- The ‘Marina di Chioggia’ pumpkin whose thick, ribbed, very dark blue and warty skin will take on a fearsome appearance once hollowed out!
The musky squashes ‘Muscade de Provence’ or red kuri squashes are also well suited to being transformed into lanterns. Butternut squashes (such as the musky ‘Nutterbutter’ squash) allow you to create elongated faces.
You can also use the following varieties for something more original:
- The ‘Hubbard Baby Blue’ pumpkin with small, ribbed bluish-grey fruits.
- The Bright Red Etampes pumpkin with large, well-rounded, ribbed fruits of bright red colour.
- The ‘Uchiki Kuri’ red kuri squash for its fairly round fruits with dark orange skin.
→ Discover Sophie’s tips to make a successful Halloween lantern.
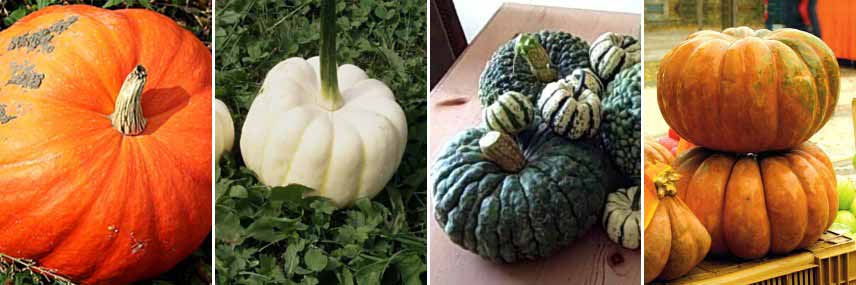
The squashes ‘Jack O’Lantern’, ‘Baby Boo’, ‘Marina Di Chioggia’ (photo © Ellethwyn) and ‘Muscade de Provence’
Read also
How to make pumpkin butter?What can you do with a pumpkin for Halloween?
There are many ways to decorate pumpkins — it all depends on what you want, your creativity and your dexterity!
Making pumpkin lanterns
You can of course carve frightening faces into your pumpkins, with menacing snarls, but there are also many equally luminous alternatives that can celebrate either the spirit of Halloween or simply autumn. By carefully hollowing out the pumpkin and carving geometric shapes or little animal faces, you will create a fascinating light that comes to life once illuminated. Start by choosing a pumpkin preferably medium to small in size (any of the pumpkins mentioned earlier will do). Make sure it is stable to avoid any risk of tipping over. Once you have chosen the pumpkin, use a sharp knife to cut the top to create a lid, wider or narrower depending on the desired effect, then use a spoon to carefully scoop out the inside, removing the seeds and fibres. Hollow it out until the inside of the squash has a homogeneous thickness. Using a removable black marker or stencils, draw the desired design on the pumpkin. Plan for holes that are large enough or numerous enough to let the light diffuse properly. For cutting, you can use a sharp knife, an apple corer or melon baller (to make small holes), or a pumpkin carving kit (available in craft stores). To create a pretty lantern, you can cut into the pumpkin flesh:
- Stars and moons: they will let the light through in a poetic way.
- Geometric patterns: a myriad of lace-like circles, squares or diamonds for a modern, elegant effect.
- Words: carve welcoming words such as “Happy Halloween”, “Welcome” or “Boo”.
- Animals: silhouettes of bats, cats or little owl faces are fun or mysterious elements.
Once the pumpkin is dry, place a tea light, an LED light or a pillar candle inside to illuminate your creation. Then put it on a table for a dinner with friends, on the steps of a stairway, on the mantelpiece, on windowsills or at the entrance to the house.
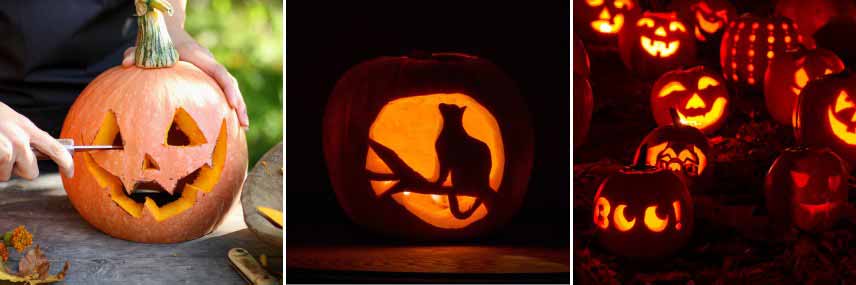
You can carve the classic scary faces into your pumpkins, but also animals (bats, cat, owl…), witches, geometric shapes, circles, stars, moons…
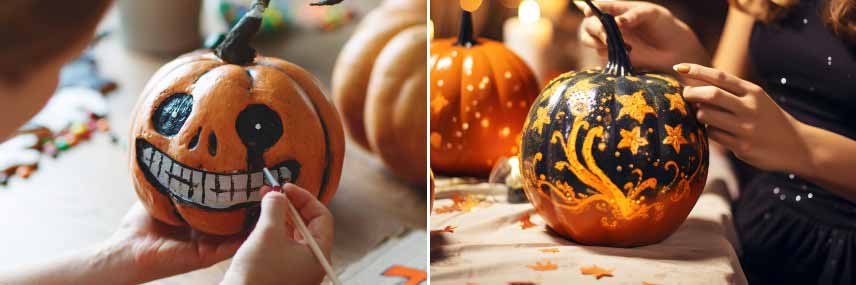
Painting your pumpkin
Painting provides a creative alternative for those who prefer to avoid using a knife or to involve children in the decoration without risk. From abstract designs to detailed portraits, from a black cat to a haunted house, the possibilities are endless to transform your pumpkin into a work of art without cutting it. Preferably choose a pumpkin with smooth skin (which will make painting easier), such as:
- The Yellow Pumpkin ‘Gros de Paris’ whose very large fruits (25 to 65 cm, 15 to 50 kg) have very smooth yellow skin.
- The Pumpkin ‘Gele Reuzen’ which produces large yellow‑orange fruits of 30 to 60 kg, all smooth.
- The Squash ‘Jack O’Lantern’ whose skin is less ribbed than that of its cousins and also suits painting.
As with carving, you are free to create freehand drawings or to use a marker or stencils to pre-draw more complex shapes. Masking tape can help: apply the tape following the pattern you want, then paint the pumpkin with acrylic paint, which is very easy to use, or with permanent markers. Once the paint is dry, carefully remove the tape to reveal clean, precise designs.
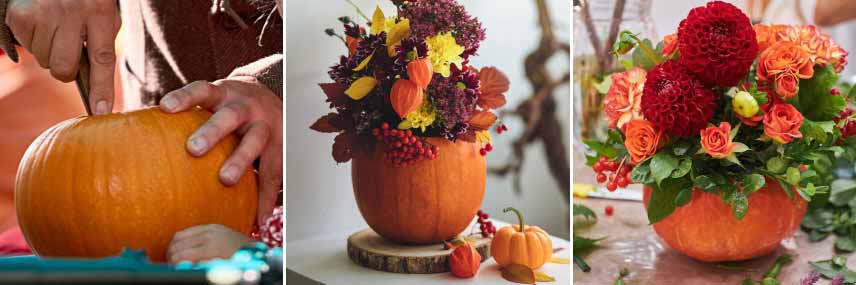
Make a pumpkin vase
The pumpkin can even be turned into a vase that is as original as it is 100% natural! With a knife, cut off a large portion of the pumpkin top, then use a spoon to hollow it out. Place then a container as a vase inside the pumpkin (bowl, small mixing bowl…) and fill it with water: all that remains is to arrange your flowers. You can also simply carve a few holes in the squash’s skin: tuck in floral foam (previously soaked in a little water) and stick in the flowers of your choice or seasonal ones such as autumn asters, Japanese anemones, late dahlias or chrysanthemums. You can also fill your pumpkin with a little potting soil to plant small succulents. To turn a pumpkin into a vase, favour small ones or even mini squashes which will create a lovely group effect and are easier to flower:
- The Pattypan ‘Polo’ which produces white fruits with a star shape and tender flesh to hollow out, 20–25 cm in diameter.
- The Pumpkin ‘Potimarron’ with its lovely small, fairly round fruits and dark orange skin.
- The Squash ‘Jack Be Little’ perfect for making mini vases.
- The Squash ‘Baby Boo’ which at 5 to 8 cm in diameter will become a pretty single-flower vase!
Personalise your pumpkin
To give your pumpkin even more character, you can customise it once carved or once the paint is completely dry. You can perfect your creation by gluing plastic eyes, rhinestones, pom-poms, beads, ribbons, false eyelashes and synthetic cobwebs onto the surface… And if you don’t want to carve or paint it, applying stickers can be a good solution.
Read also
How to make pumpkin soup?Where to place your pumpkin?
For Halloween, where you place your pumpkins can vary depending on the effect you want. You can place them at the entrance to your home, either on the steps or on either side of your front door to welcome your guests with a pretty or spooky decorative touch. Garden paths or walkways are also good places to put pumpkins. Inside the house, a pumpkin can serve as a centrepiece or be placed on a shelf alongside other decorations. Finally, they can be hung from the trees in your garden for a more enchanting effect.
How can you keep a Halloween pumpkin from rotting?
A carved pumpkin typically lasts about a week. To prevent your pumpkin from rotting too quickly, here are some tips:
- Choose a pumpkin that shows no signs of mould or rot. Also make sure it is firm to the touch.
- Wash it in soapy water to remove bacteria and mould spores from the surface.
- Soak it for a few hours in a 10% solution of white vinegar diluted in cold water.
- The day before carving, fill the pumpkin with newspaper to absorb excess moisture.
- When you hollow it out, remove as much flesh as possible; the pumpkin will keep better.
- When your carving is ready, spray lemon juice on the outside and inside which will act as a natural preservative.
- A layer of vegetable oil or petroleum jelly brushed onto the skin also offers extra protection against drying out and decomposition.
Indoors, place your pumpkin in a cool, dry spot. Avoid damp or overly warm places that would speed up the decomposition process. If you put it outside, place it out of direct sunlight and rain, otherwise it won’t last long.
To avoid condensation, it is recommended not to put the lid on the pumpkin when placing a candle inside. By following these few tips, you’ll enjoy your Halloween creation for longer.
How should you harvest and store pumpkins for Halloween?
You can grow your own squashes to decorate them. To make sure they stay in good condition until Halloween, here are some tips :
- A pumpkin ready to be picked will have a homogeneous colour and a firm stem. A slight pressure on the fruit should allow the pumpkin to be easily detached from its stem.
- When picking, take care not to scratch or damage the pumpkin’s surface. This will help to prolong its lifespan by preventing rapid decay.
- Rather than simply storing them in a cool, dry place, consider wrapping them individually in newspaper. Then place them in a dark place with good air circulation and an ambient temperature of around 10 to 15°C.
→ Discover our growing tips : Sow and grow squashes, courgettes, pumpkins and other gourds: it’s easy and now is the time!
My extras
If you took care to remove as much flesh as possible when carving your pumpkin, remember that it can have a second life in the kitchen! Instead of throwing it away, consider cooking it into delicious soups, purees or even pies. Similarly, don’t hesitate to prepare the pumpkin seeds which, once removed, are placed in the oven for a few minutes to roast them. They will add crunch to a salad or a soup.
- Subscribe!
- Contents
Comments