


How to grow Caper bush?
Our tips for successfully planting and maintaining, whether in the ground or in pots
Contents
The caper bush (Capparis spinosa) is a Mediterranean-origin perennial shrub, known for its charming and long summer flowering. It is valued for its ornamental qualities, but it is especially known in cooking for its flower buds (capers) and its fruits (caper berries). There are dozens of varieties, ranging from the wild caper bush found naturally in the Mediterranean basin to the spine-free cultivar Capparis spinosa ‘Inermis’ available on the market.
Due to its origins, the caper bush tolerates heat, drought, and the poorest soils. Conversely, it is sensitive to severe frosts and also to poor watering management, which can be fatal.
Sowing capers is possible, but it is not the easiest to succeed and will require a lot of patience: this undershrub has a slow growth rate and takes time to establish. If you wish to embark on growing this plant, we recommend obtaining a young plant in a clump or container. And to ensure success, learn how to care for your caper bush and enjoy its flowers or fruits in cooking by following our tips!
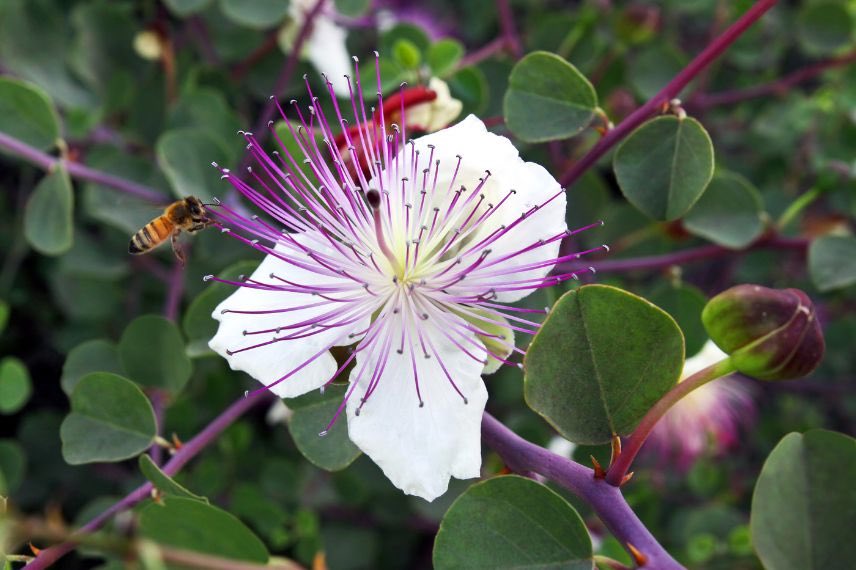
The caper bush is a highly ornamental plant

Planting the caper bush in open ground
Needing plenty of sun and warmth to thrive, the caper bush can only be grown in open ground in the milder southern regions of France: Provence, Corsica, Languedoc-Roussillon, or Gironde.
The Ideal Planting Period
The caper bush can be planted in open ground in spring (from February to April) or in autumn (from September to October). Avoid periods of frost or extreme heat.
Location
The caper bush thrives in well-drained soils that allow water to drain deeply without stagnating. It does not tolerate heavy soils or excess water, especially in winter. However, it can withstand certain harsh conditions: poor, even stony soils, calcareous soils, aridity, and even sea spray.
Plant it above a dry stone wall, in a rock garden, in a raised gravel bed, or on a sunny slope. In all cases, choose a location that is very sunny, even hot, or even scorching in summer. Also, prefer a spot protected from prevailing rains, as excess water is one of the main factors leading to its cultivation failure.
If necessary, lighten overly heavy soils with a good amount of drainage materials (gravel, clay balls, pumice, etc.) or coarse sand.
Choose the final planting location carefully: like many Mediterranean bushes, the caper bush does not transplant well.
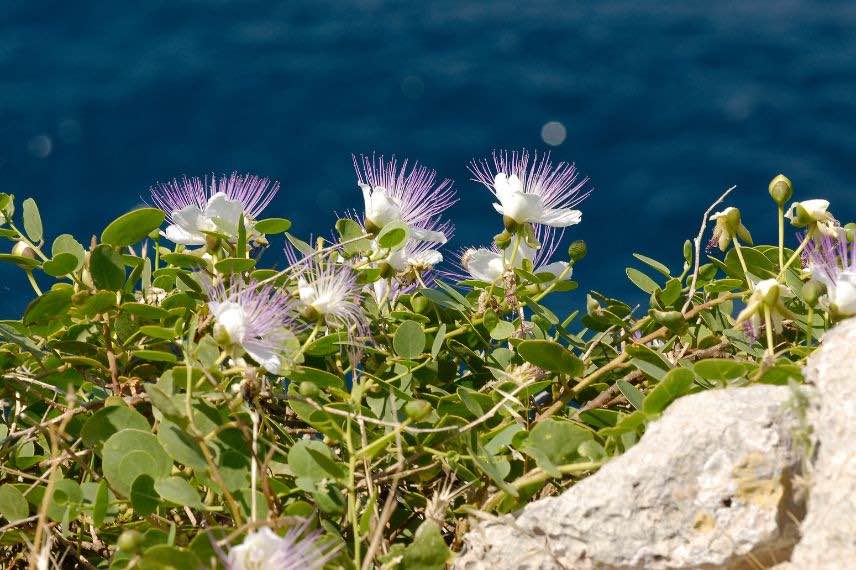
A natural habitat for the caper bush: wall, sea spray, sun
Planting
The root system of the caper bush is quite fragile, so be gentle when removing it from its container.
- Prepare the planting area. Loosen the soil that will host your caper bush to make it crumbly to a good depth. Weed if necessary and dig a planting hole about 50 cm deep.
- You can add a drainage layer at the bottom of the planting hole (gravel, coarse sand, clay balls, etc.) to ensure that water drains deeply without obstruction.
- Place the root ball in the centre of the hole, fill the space with light garden soil (or potting soil for Mediterranean plants) until the roots are covered.
- Firm the soil with your fingers.
- Water generously.
Read also
6 Mediterranean perennialsPlanting capers in pots
Outside the mild regions of southern France, where there is little to no winter frost, the caper bush will be grown in a pot.
The ideal planting period
Plant your caper bush in a pot, ideally in spring, once the last frost risks have passed. This will allow you to place the plant outside quickly after planting.
The container
The caper bush has a small silhouette that is wider than it is tall. With slow growth, it will reach about 1 metre in height and 1.5 metres in spread after a few years.
Ideally, plan for its final container from the start, to avoid repotting, which can weaken the root system.
Choose a container that is at least 50 cm deep. The caper bush will thrive in a pot, trough, or hanging basket, from which its spreading silhouette will gracefully cascade.
Make sure to use a container with drainage holes and do not add a saucer: even the slightest stagnation of moisture around the roots can be fatal.
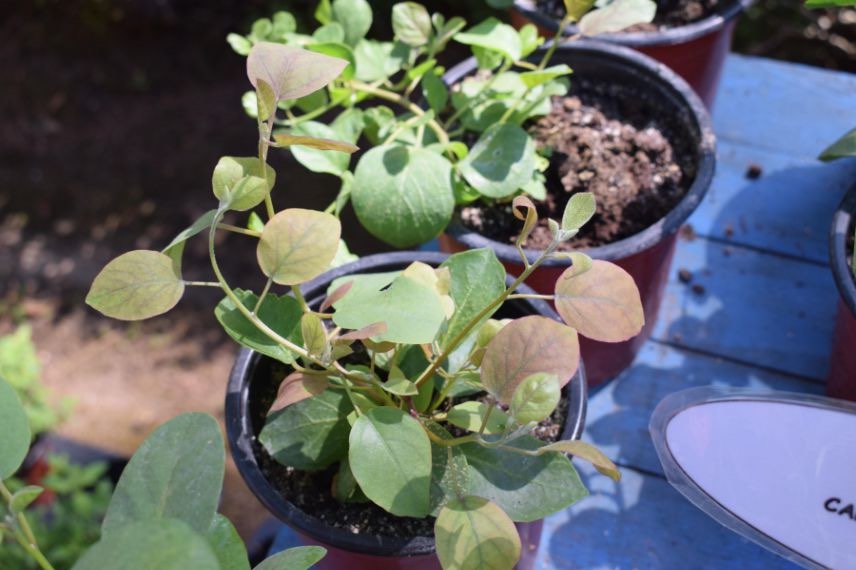
Small caper plant for purchase before transplanting into its final pot
The substrate
The caper bush requires a particularly light and well-drained substrate. Opt for a potting mix for Mediterranean plants or a potting mix for succulents and cacti.
If you are making your own mix, prepare :
- half of high-quality horticultural potting mix or non-clay garden soil;
- half of coarse sand or gravel.
The planting
- Soak the root ball in a bucket or basin of water for about ten minutes, to facilitate the removal of the original container without damaging the roots.
- Place a drainage layer of about 5 cm at the bottom of the new container (gravel, coarse sand, clay balls, terracotta shards, pumice…).
- Fill with the substrate mix up to halfway in the container.
- Gently remove the root ball and place it in the centre of the container.
- Fill with substrate until all the roots are covered.
- Firm down with your fingers.
- Water.
- Apply a mineral mulch at the base of the plant, which will help retain heat (optional).
Exposure
Place your caper bush in a pot in a warm, sunny location, such as against a south-facing wall. Choose a spot protected from prevailing winds and heavy rain.
In cooler regions, it is possible to grow the caper bush in a pot, in a conservatory or greenhouse, to provide it with more warmth.
Caring for the caper plant
The caper plant is a self-sufficient plant that grows almost without care once well established. Only watering, particularly in pots, can be tricky to manage.
Watering
Excess water is often the cause of cultivation failures with the caper plant. Our undershrub indeed dislikes water and stagnant moisture.
In open ground, just water during the first year, while the plant settles in. Water regularly during hot weather and in the absence of rain, when the soil is dry. In subsequent years, the caper should be self-sufficient and rely on rainwater.
In pots, managing watering is less straightforward. Wait until the substrate is well dry several centimetres down before adding more water. Do not place a saucer under your container, allowing water to drain away.
Fertilisation
A plant of poor and ungrateful soils, the caper does not require fertilisation in open ground.
In pots, while not essential, you can amend once a year in spring by adding a handful of household compost to the surface or ground horn. You may also opt for a special cactus and succulent fertiliser or a fertiliser for Mediterranean plants. Liquid fertiliser dissolves in watering for immediate but short-lived effects; solid fertiliser (in sticks or granules) is placed directly in the substrate for slow but long-lasting action. Follow the usage instructions specific to each product.
Pruning
Annual pruning will stimulate the production of new shoots, on which flowers will appear. Do this at the beginning or end of winter, before the resumption of growth.
For this, use previously disinfected pruning shears to:
- remove dead or damaged branches;
- cut back the other stems by about 1/3 of their length.
In spring, you can also pinch young shoots to encourage branching.
Pests and diseases
The caper plant is not known to be particularly susceptible to diseases or pests. As mentioned, it mainly fears excess water and humidity, which can rot its root system.
Watch out for possible attacks from snails and slugs in spring, which may feast on young shoots.
Wintering
The caper can withstand occasional frosts, sometimes down to -10°C, when well established and grown in perfectly draining, even dry soil. However, it will lose its foliage as soon as temperatures drop below zero. Therefore, it can only remain outdoors in the mildest regions.
Elsewhere, bring your potted caper indoors to a frost-free but bright place (greenhouse, conservatory…). Reduce watering to a minimum, ensuring the substrate dries out before watering again.
Harvesting
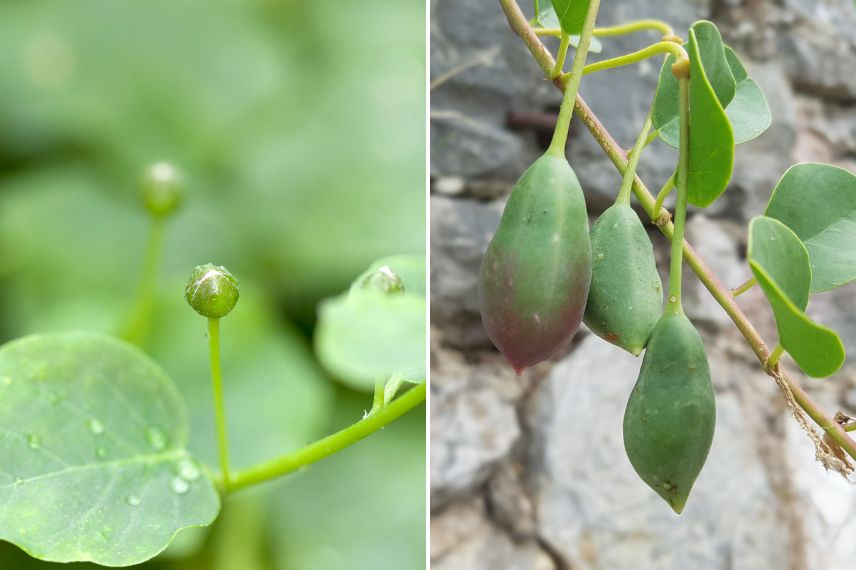
Flower buds and fruits
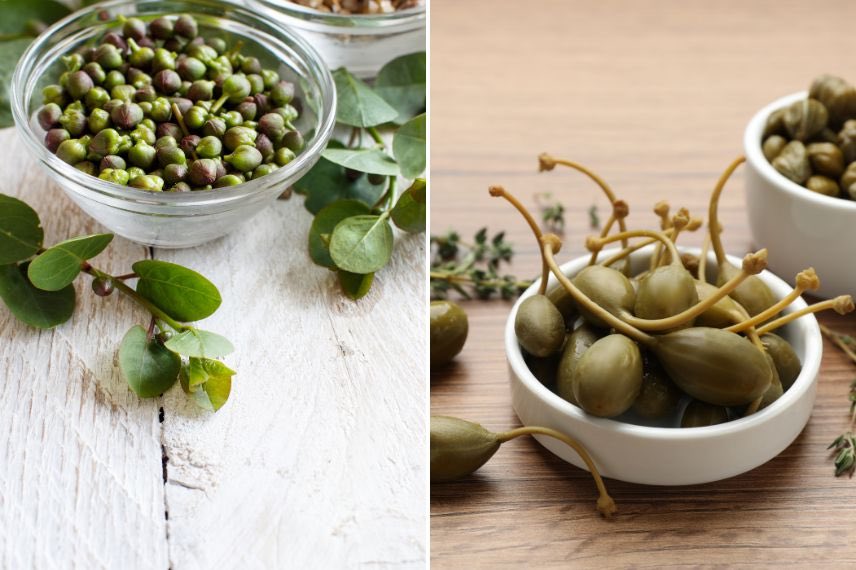
The harvest occurs before the caper flowers open, from late spring to late summer. It is indeed the flower buds that we consume. Note that harvesting them will prevent enjoying the flowers. You must wait about 2 years before the first harvest can be made.
Ideally, do this in the morning on a dry day. Cut the green flower buds using scissors.
To make the most of the benefits of capers, preserve them in coarse salt, brine, or vinegar like pickles.
You can also choose to harvest caper berries, allowing you to enjoy the flowering while indulging in cooking. These are the fruits resulting from the pollination of the flowers. They are significantly larger than the flower buds, slightly sweeter, but more textured as they contain seeds and flesh. They can be preserved in the same way as capers.
- Subscribe!
- Contents

Comments