


Have your seedlings emerged? Time to pot them on! Transplanting involves moving a young plant into a larger pot or into soil to promote root and shoot development. In this tutorial, we explain in detail the different stages of transplanting, which plants are concerned and best practices to succeed with this delicate operation.
What does it mean to transplant a plant?
Transplanting involves gently extracting a young plant from its original container, taking care not to damage its roots, then replanting it in a new pot or in soil. This operation follows sowing, most often carried out under cover. It concerns ornamental plants as well as vegetable plants and fruit trees. Transplanting can be done in open ground, in pots or in buckets. By transplanting young plants into larger containers or into the garden, more space is given for them to develop and grow harmoniously. When roots of a young plant become cramped in their initial container, they can tangle and form a root ball that prevents optimal absorption of water and nutrients. Transplanting helps to aerate and loosen roots, stimulating growth and improving nutrient uptake.
Transplanting is also an opportunity to sort plants and select healthiest, most vigorous specimens, eliminating those showing signs of disease, parasites or weakness, and keeping most promising young plants. For sowings carried out indoors, transplanting into buckets allows gradual acclimatisation of young shoots to outdoor conditions (light, temperature, humidity, etc.) before final planting.
Different types of transplanting
Each transplanting method requires specific preparation of plants and soil to ensure vigorous, healthy growth. Here are main types of transplanting:
- Transplanting of single transplants: single transplants, such as lettuces, often come from sowings in nursery trays or seedbeds. These young plants are then moved to a new location to allow full development after being watered to ease extraction without damaging roots.
- Transplanting of bare-root transplants: this concerns certain bare-root perennial plants such as agapanthus, peonies, astilbes, hostas, roses and fruit trees (gooseberry...), which are usually sold without soil around roots. These plants are transplanted during dormancy. Roots are pruned and rehydrated before planting in prepared, enriched soil.
- Transplanting of plug-plant transplants: transplants such as basil, chives, our vegetable plug plants and other clump-forming plants such as achillea, phlox, wallflowers, echinacea and delphiniums, are grown in buckets or pots before being transplanted to their final positions. This type of transplanting is ideal for herbaceous plants and culinary herbs. Plants are watered before extraction, then planted in loosened, enriched soil.
When to transplant plants?
Ideal time to transplant depends on climatic conditions and plant species. Usually, it is best to transplant in spring or autumn when temperatures are mild and risk of frost is low (generally after last frosts), to avoid weakening young plants. Seedlings should have two to three pairs of “true leaves”, i.e. leaves that appear after cotyledons (first leaves of plant), before being transplanted to reduce stress from transplantation. For bare-root plants, autumn transplanting is preferred to allow development of a vigorous root network for following spring.
Which plants should be transplanted?
Many plants can be transplanted, notably vegetables (tomatoes, peppers, aubergines, lettuces, etc.), annual flowers (cosmos, zinnias, marigolds, petunias, geraniums, etc.) and perennial plants. Some plants, notably those with taproots or slow growth, should not be transplanted and are generally sown directly in place. Those with dense, fleshy root systems (the ferns, bamboos and daylilies, for example) do not like being moved, making transplanting tricky.
How to succeed at transplanting?
Collar at ground level or buried?
Depth of transplanting varies according to plant. Generally, transplanting with collar at ground level suits most plants and they are buried up to first leaves. For plants sensitive to collar rot, such as strawberries, beetroot and lettuces, it is better to set them only lightly into soil so plant remains loose. For plants such as tomatoes, chillies and other solanaceae, deep transplanting (or burying the collar) is recommended. The collar may be buried sometimes up to first leaves, encouraging greater root development and strong anchorage.
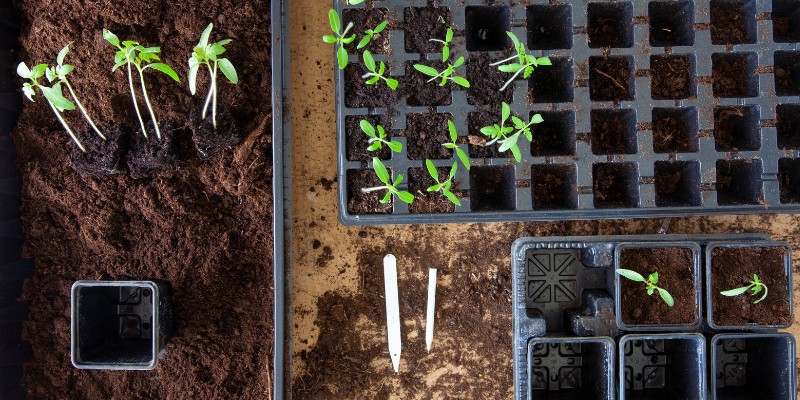
Step 1: transplanting into buckets
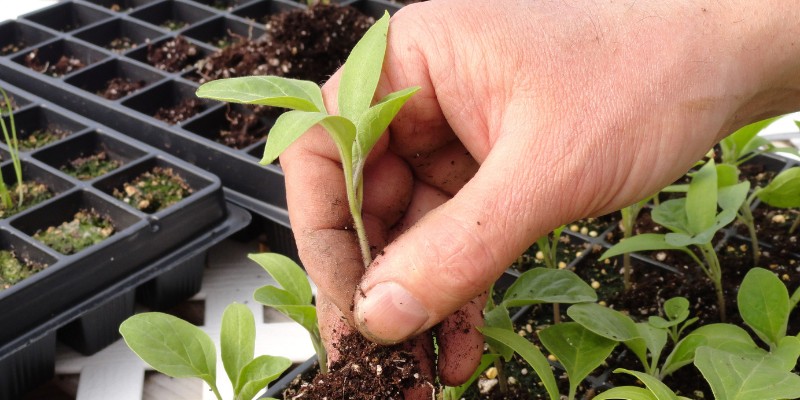
Transplanting into buckets is an intermediate step for many young plants before their final planting in open ground. It allows development of a more robust root system. In a bucket, roots have more space to spread and strengthen, improving ability to absorb water and nutrients.
Transplanting into buckets also provides extra protection against weather, temperature variations and pests. It creates a controlled environment where young plants can continue to grow without stress. It also makes handling easier for final transplantation into open ground. Soil ball around roots keeps them intact, reducing risk of damage and transplant shock. It also allows young plants to adapt gradually to outdoor conditions. They can be put outside for progressively longer periods before final planting, which helps harden them off and better withstand transplantation stress. If your young plants need transplanting into buckets before being moved to open ground, follow these steps:
- Fill buckets with suitable potting compost and firm slightly.
- Using a pencil or dibber, make a hole in compost deep enough to accommodate roots of plant.
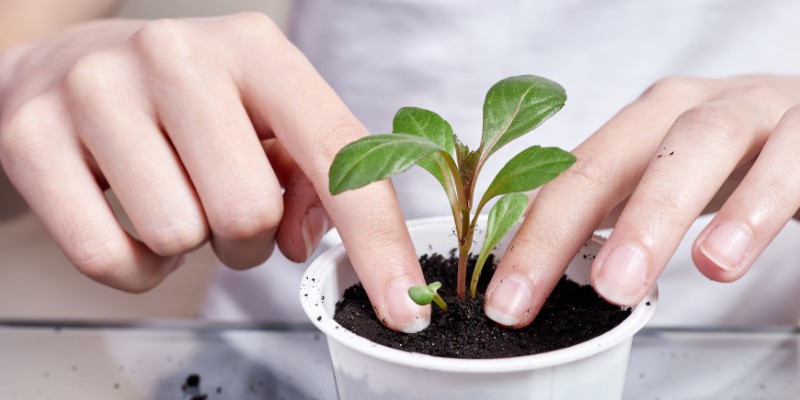
- Gently remove plant from original container (use a fork if needed) taking care not to damage roots.
- Place plant in hole, ensuring collar (base of stem) is level with compost.
- Backfill hole with compost and firm lightly around plant.
- Water thoroughly to encourage rooting.
Step 2: transplanting into open ground
When plants have grown sufficiently and conditions are favourable, you can proceed to transplant into open ground:
- Prepare soil by loosening and enriching with compost or suitable potting compost.
- Dig holes spaced according to plant requirements, respecting recommended planting distances.
- Gently remove plants from buckets.
- Set them at desired depth.
- Backfill holes with soil and firm lightly around plant.
- Water generously for good establishment and keep soil moist during first days after transplanting.
Our tips: After transplanting, water generously to settle plants and support rooting. Protect young plants if weather is unfavourable, such as frost or extreme heat, using protective covers if necessary. Regularly check young shoots for signs of stress or disease and intervene quickly if needed. After transplanting, plants may look stunted: no need to worry, vigour will return within a few days!
Also see our article for beginner gardener: how to transplant young plants in 5 easy steps


Comments