


Are your vegetable sowings finished? Are young tomato, lettuce or leek plants starting to appear and are first leaves already visible? Time to transplant! Transplanting young vegetable plants is an essential step to ensure optimal growth and an abundant harvest. We explain what transplanting is, when to do it and how to succeed.
What is transplanting?
Transplanting vegetables involves taking young plants raised from an indoor or cold-frame sowing that have already emerged and replanting them into larger buckets or into their final position outdoors, where they will continue growth until ripeness. This method is commonly used for vegetables that require early indoor or greenhouse sowing before being transplanted to the vegetable patch when climate conditions are more favourable.
Transplanting provides a controlled environment for young plants during early growth stages while giving them a chance to root and strengthen before exposure to outdoor conditions.
It also allows selection of the healthiest, most vigorous young plants for planting out. By removing weak or diseased specimens, chances of achieving an abundant, high-quality harvest increase.
When to transplant vegetables in the vegetable patch?
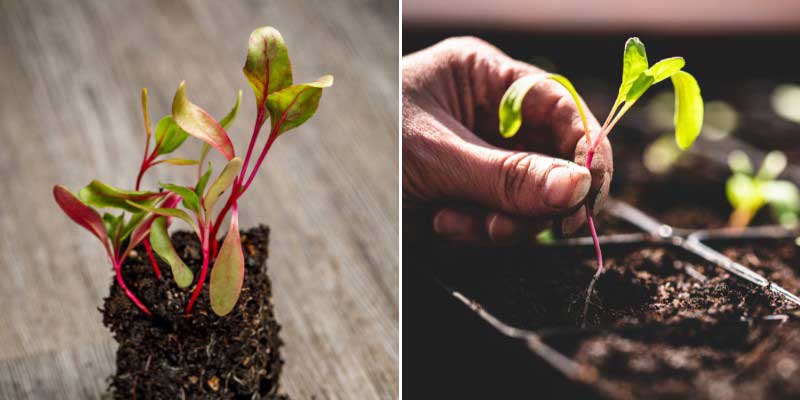
As a rule, transplant when young plants have developed their first “true leaves” (those that appear after cotyledons, the first rudimentary leaves) and after last spring frosts. For most vegetables, this corresponds to late spring when temperatures stabilise. Transplanting too early can expose young plants to frost or cold temperatures, which can harm growth and even kill them. Some, such as brassicas, are transplanted in autumn.
Acclimatise young plants to outdoor conditions gradually by putting them outside for a few hours a day in fine weather. When warm, we recommend transplanting late in the day to avoid heat stress. By transplanting vegetables at different times of season, you can stagger harvests and extend production period. This allows enjoying greater diversity of fresh vegetables for longer. However, each vegetable has its own growing calendar showing sowing, transplanting and harvest periods. Check specific growing calendars for each type of vegetable you plan to transplant and adapt them to your region and climate.
Succeeding at transplanting vegetable young plants case by case
Each vegetable has specific needs regarding planting depth, spacing and aftercare. Not all vegetables tolerate transplanting well. Some, such as radishes, carrots, spinach, beans and peas, prefer direct sowing in situ. These vegetables grow quickly and handle transplanting poorly. Beetroot and melons, although sometimes started indoors, are generally sown directly outdoors and do not need transplanting. Transplanting method varies slightly according to vegetable type:
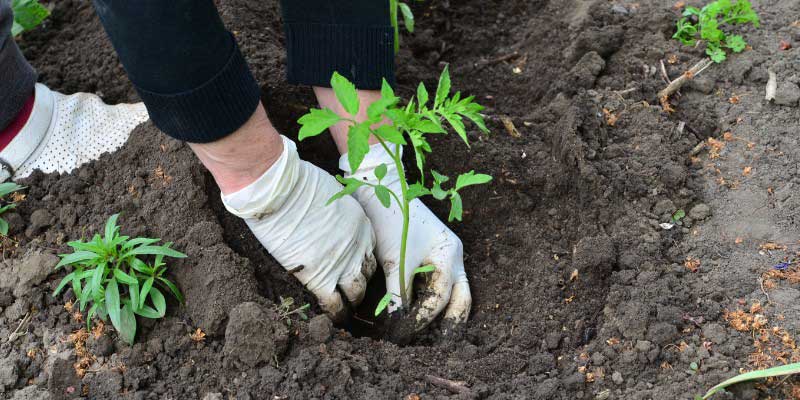
- Tomatoes: we recommend planting deeply. The deeper the stem is planted, the more new roots it will develop, which strengthens the plant. Plant up to first leaves, leaving about 50 cm between each plant to allow good air circulation and reduce disease. Water well after transplanting and mulch soil to conserve moisture.
- Salads: require spacing of 20–30 cm between each plant to develop properly. Collars should be left slightly above soil level. Prepare well-drained soil enriched with compost. After transplanting, water generously and monitor soil moisture, especially during first weeks.
- Courgettes and squashes: require more space. Plant in clumps of 2–3 young plants, with 1 m between clumps. These plants like rich, well-drained soil. When transplanting, ensure each young plant is buried up to first leaves. Water immediately after planting and regularly to keep soil moist.
- Peppers and chillies: transplant at similar depth to their original sowing. Space plants 40–50 cm apart to allow good development. These plants like warmth and regular but moderate watering. Use mulch to retain moisture and reduce soil temperature fluctuations.
- Brassicas: (cauliflower, cabbage, broccoli) should be transplanted leaving 40–60 cm between each plant. These vegetables prefer soil rich in organic matter and well drained. Ensure collar (where stem meets roots) is level with soil. Water well after transplanting and continue regular watering, especially during dry periods.
- Case of leeks: Transplanting leeks is essential for obtaining well-formed, robust stems. When leek sowings reach pencil thickness, they are ready to be transplanted. Loosen soil deeply to allow good root development and enrich with manure. To transplant leeks, start by trimming one third of leaves and roots. This encourages establishment and vigorous growth. Then dig 10–15 cm deep holes using a dibber, spacing plants 10–15 cm along the row and about 30 cm between rows. Place young plants in holes without completely filling them in, so that only leek stems are buried. This helps stems blanch more easily. After transplanting, water plentifully to settle plants.
How to carry out a transplant?
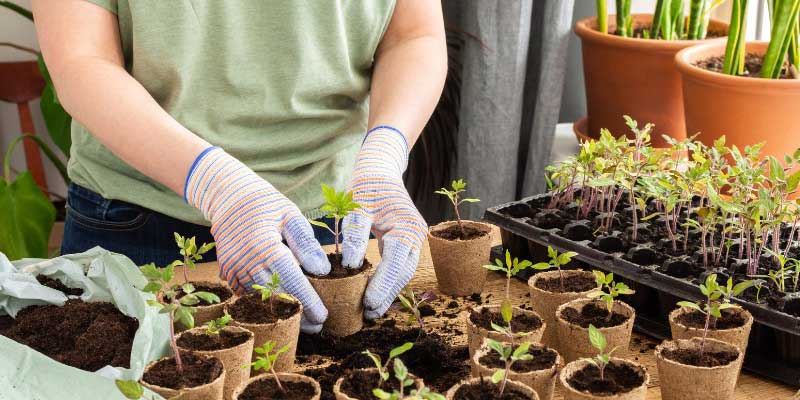
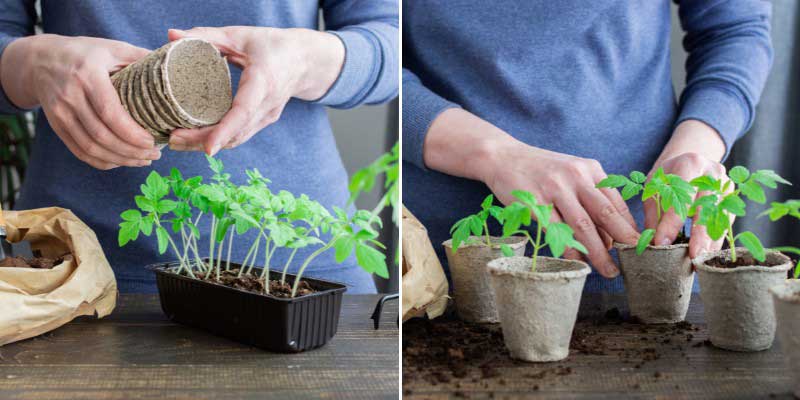
Step 1: pricking out into buckets
- Before planting out in vegetable patch, once seedlings are well developed, at two to four true leaves stage, carry out a first pricking out into buckets.
- Fill buckets with good potting compost, slightly enriched with well-rotted compost.
- Gently lift seedlings.
- Place seedlings into substrate and firm gently with fingers.
- Water gently.
- Let young plants strengthen for about a month, in light, under heated cover.
Step 2: final planting in vegetable patch
- Prepare soil by loosening with a broadfork or fork. Remove weeds and stones, then incorporate compost, well-rotted manure or a suitable fertiliser to enrich soil and encourage young plant growth.
- Water plants to be transplanted just before moving them. This will ease extraction of rootballs and reduce water stress.
- Gently remove plants from their container taking care not to damage roots. To do this, turn bucket upside down and tap base lightly. Keep soil ball around roots when transplanting.
- Using a dibber or small spade, dig holes to depth and spacing recommended for each vegetable variety. Generally, holes should be slightly deeper than rootball.
- Place plants in holes ensuring collar (where stem meets roots) is level with soil. Backfill holes and firm soil gently around plants to ensure good root-to-soil contact.
- Water transplanted plants generously to encourage rooting and establishment. They may look a little wilted; this is normal as transplanting stresses young plants. They recover within a few days. Regular watering is important during first weeks.
- After transplanting, monitor vegetable growth and protect from pests, diseases or bad weather. Use protective nets, cloches or tunnels to create favourable environment for development.


Comments