


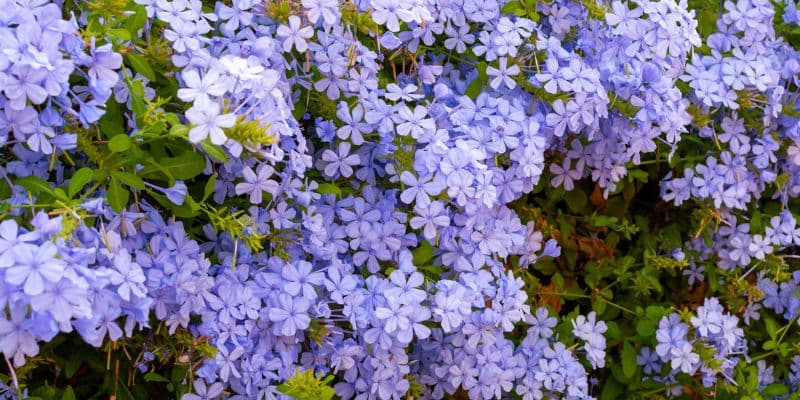
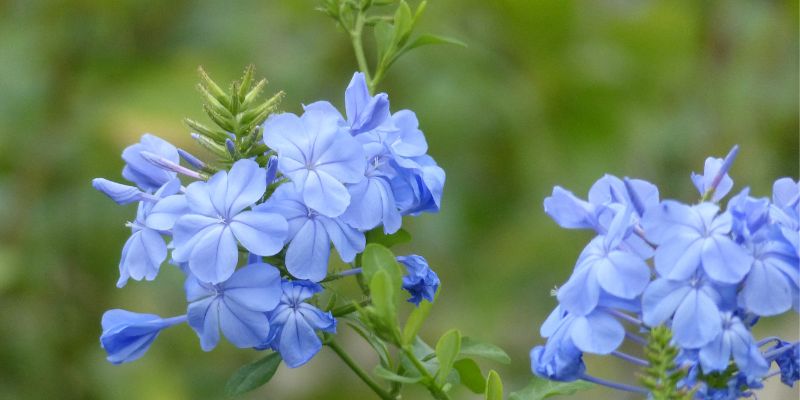
With its superb bright-blue flowers and vigorous growth, Plumbago capensis is prized by gardeners wishing to add a splash of colour to their garden. Also known as Cape leadwort (or Plumbago auriculata), this semi-climbing plant is valued for its generous flowering through summer. Did you know you can also multiply it by propagation by cuttings to further enhance your outdoor space? Follow this tutorial: we reveal the secrets to successfully take Plumbago capensis cuttings.
When to propagate Plumbago by cuttings?
As with all cuttings, choose the ideal time of year to propagate Plumbago capensis. The best period is generally late summer, preferably after flowering, when the plant begins to enter dormancy. At that time stems are mature and humidity and temperature conditions are optimal to encourage root formation. In addition, taking cuttings at this time allows young plants to establish before winter frosts arrive.
Steps to propagate Plumbago by cuttings
1- Start by preparing your pots to install cuttings. Pour a layer of clay pebbles into the base of the container to improve drainage of standing water.
2- Fill them up to 2 cm from the rim, with seed compost and firm gently by hand.
3- Moisten the compost with a mister, preferably using rainwater. Substrate should be damp but not waterlogged.
4- Using a pencil, make one or several holes 4–5 cm deep in the substrate.
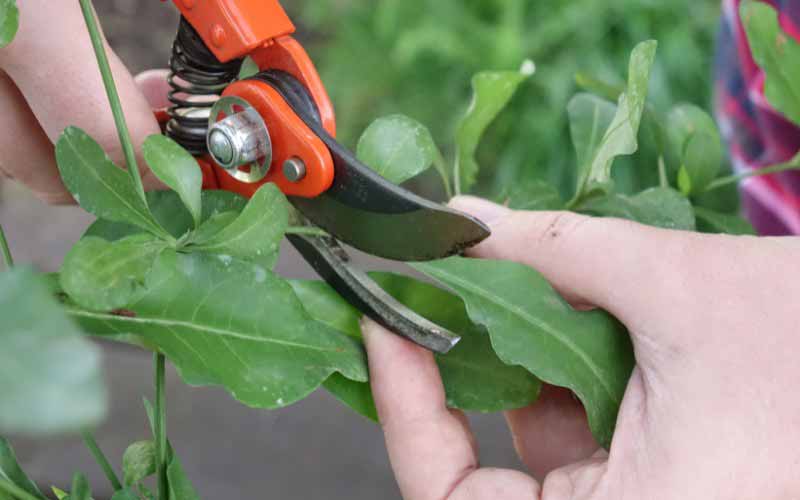
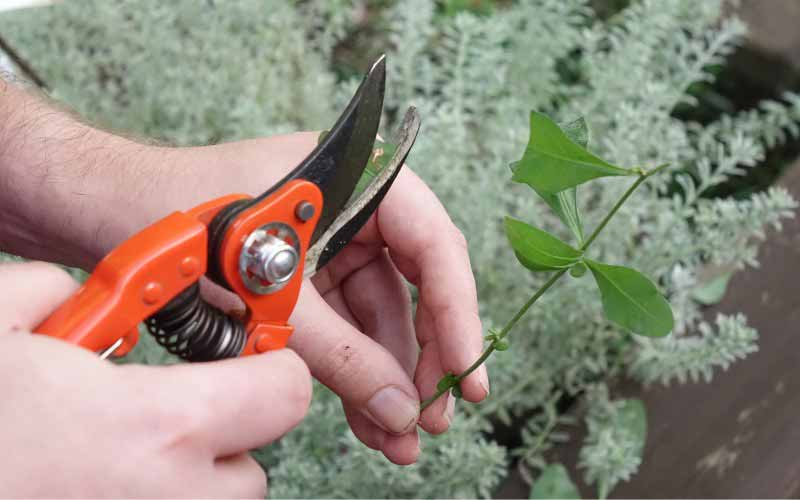
5- Select healthy, vigorous current-season Plumbago stems without flowers, about 10–15 cm long.
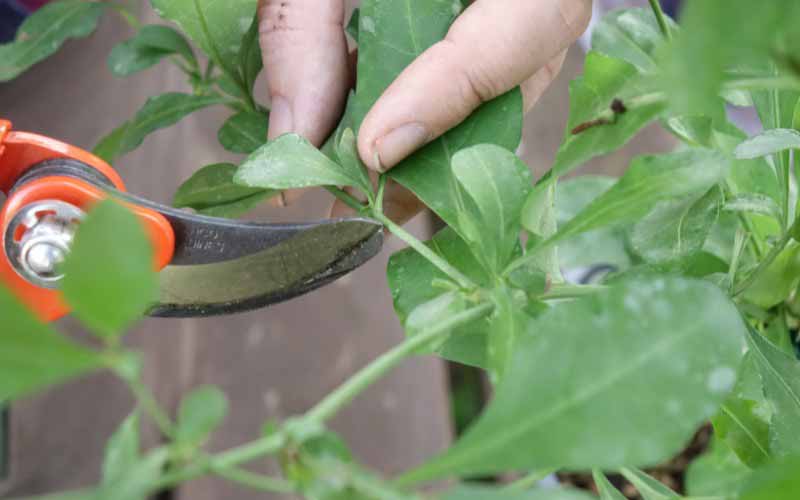
6- Cut stems just below a node (junction of leaf and stem) with a clean, sharp pruning shear. For best results take 4–5 cuttings.
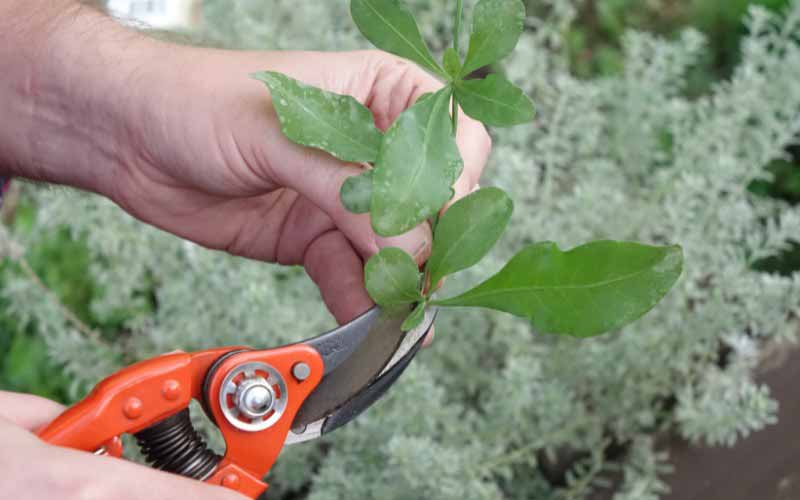
7- Remove lower leaves, leaving only a few at the top of the stem. This prevents the cutting from tiring itself by transpiring through its foliage.
8- Facultative: you can dip the cut end of cuttings in a rooting plant hormone to stimulate root formation.
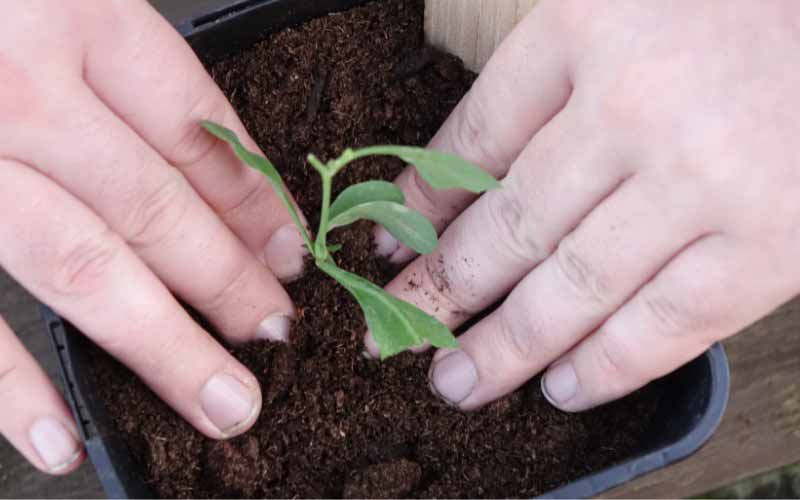
9- Plant the cuttings in the pot.
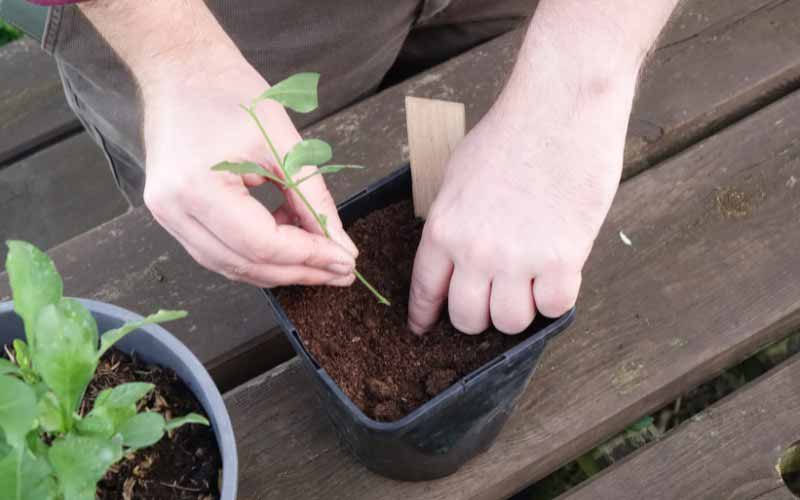
10- Firm the compost gently around the stem to hold it upright and in contact with the substrate.
11- Place a cloche over the stem to create a humid atmosphere favourable to propagation by cuttings. This is called propagation by cuttings "enclosed". If you do not have a cloche, a plastic bottle with its base cut off or a clear bag supported by stakes will work. Ensure neither stem nor leaves touch the walls of the cloche to avoid mould.
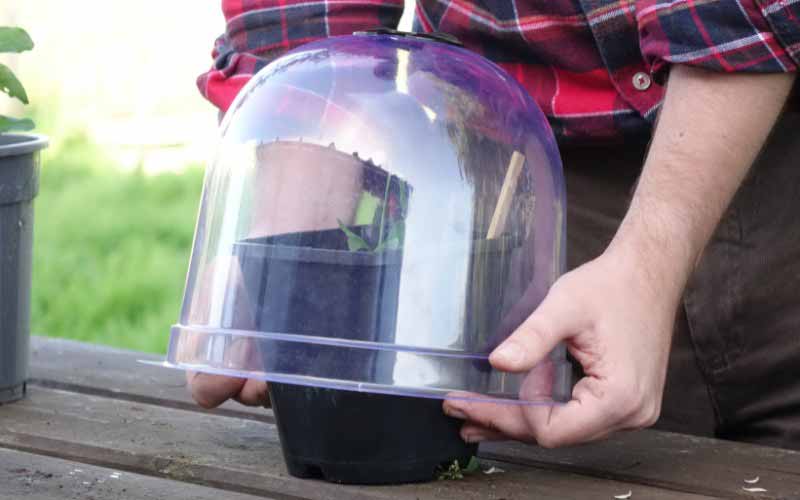
12- Place cuttings in a bright spot but protected from direct sun (ideally light shade).
13- Keep compost slightly moist but not waterlogged. Remove cloche for thirty minutes every three to four days to refresh air around cuttings.
Care after taking cuttings
- After two to three months, cuttings will have developed adequate roots. It will then be time to remove cloche and transplant young plants into a larger pot.
- During winter months, protect young Plumbago capensis plants by placing them in a bright, cool, frost-free spot, such as an unheated conservatory or cold greenhouse. Significantly reduce watering, taking care to avoid excess moisture. Note that Plumbago does not tolerate winter frosts!
- With the arrival of spring, move your young Plumbago to open ground. Choose a site with light, well-drained soil, and where the plant will receive sun or partial shade. Plumbago capensis is not demanding: simply enrich the soil with a handful of well-rotted compost when planting.
- During first two years after planting, water during heatwaves or prolonged drought. Once established, Plumbago capensis will tolerate occasional drought periods without difficulty.
- You can also grow Plumbago in a pot, especially in regions with harsh winters so it can be brought indoors for the cold season.
Required equipment
To succeed in propagating Plumbago capensis, you will need the following equipment :
- Pruning shear : Ensure it is clean and disinfected.
- Substrate : Seed compost or a mix of 3/4 compost and 1/4 perlite or sand to promote drainage and aeration.
- Plant hormone for rooting : Although facultative, it can speed root formation.
- Pots or cutting trays : Choose containers with adequate drainage holes.
- Clay pebbles : To help evacuate excess irrigation water.
- Labels (facultative) : Mark cuttings to track their progress.


Comments