


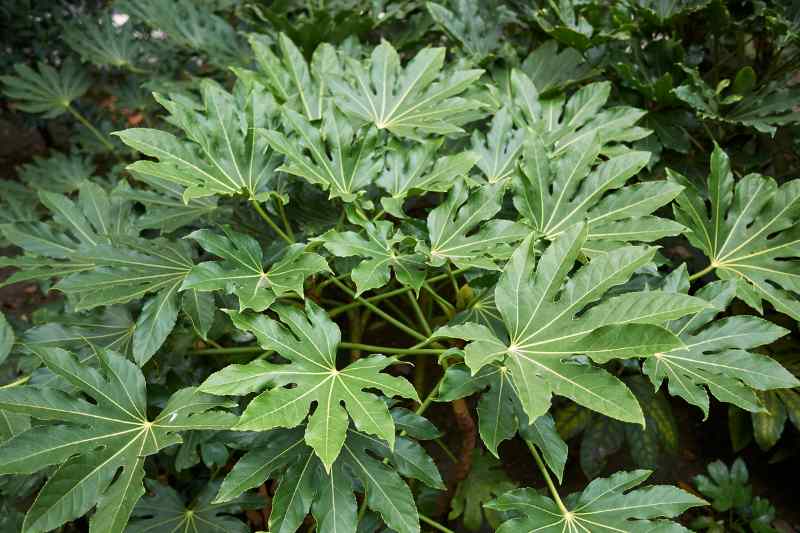
The Fatsia japonica, or Japanese Aralia, is an ornamental plant much appreciated for its large, glossy, dissected leaves that bring an exotic touch to garden and interior. Easy to grow, it is ideal for shady or semi-shaded areas. It adapts well to pot culture or planting in ground, provided it benefits from fresh, well-draining soil.
If you wish to multiply this plant, two main methods are available: propagation by cuttings and sowing. Propagation by cuttings remains the quickest and most effective method. Follow this guide to succeed in your multiplications with ease.
Fatsia at a glance
Native to Japan and Korea, Fatsia japonica is an evergreen bush with glossy green foliage, composed of large palmate, dissected leaves. It thrives in shade or partial shade, while tolerating some sun if soil remains cool. Easy to care for, it withstands moderate cold down to −10°C and requires little attention. Versatile, it suits both indoor decoration and shaded garden beds.
Find everything you need to know about Japanese Aralia in our full fact sheet.
Equipment needed
- Pruning shear or sharp, disinfected knife: important to avoid infections
- Rooting activator : facultative, but recommended to speed root formation
- Small pot filled with well-draining potting compost: a mix of all-purpose potting compost and sand or perlite
- Plastic bag or transparent cloche to maintain humid atmosphere
- Spray bottle for gentle watering
When to propagate Fatsia?
Best time to take cuttings is spring or summer, when plant is in active growth. At this time, semi-ripe stems (partially lignified) are sturdy enough to form roots while remaining flexible and vigorous. Avoid taking cuttings in autumn or winter, as slowed growth due to cold and reduced light makes rooting much more difficult.
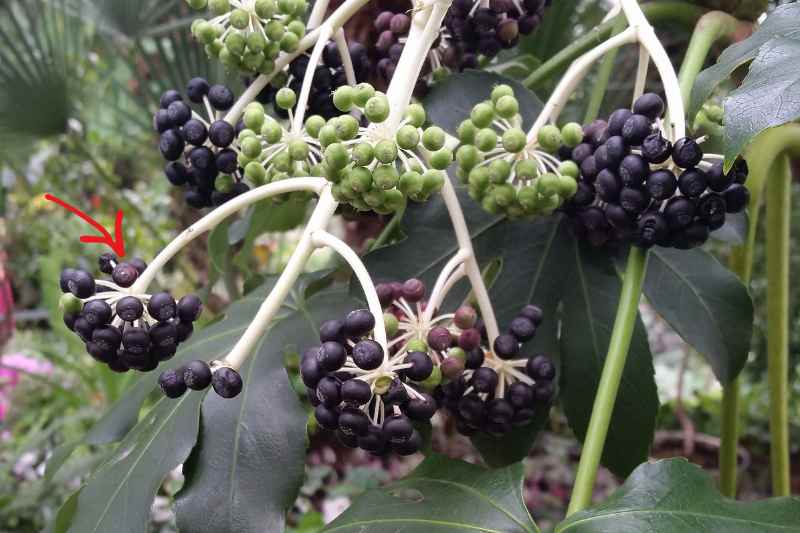
If you choose propagation by sowing, watch plant in autumn for berry production. Seeds are ripe and ready to harvest in late autumn, once berries turn black and feel soft to touch.
Method 1: stem cuttings
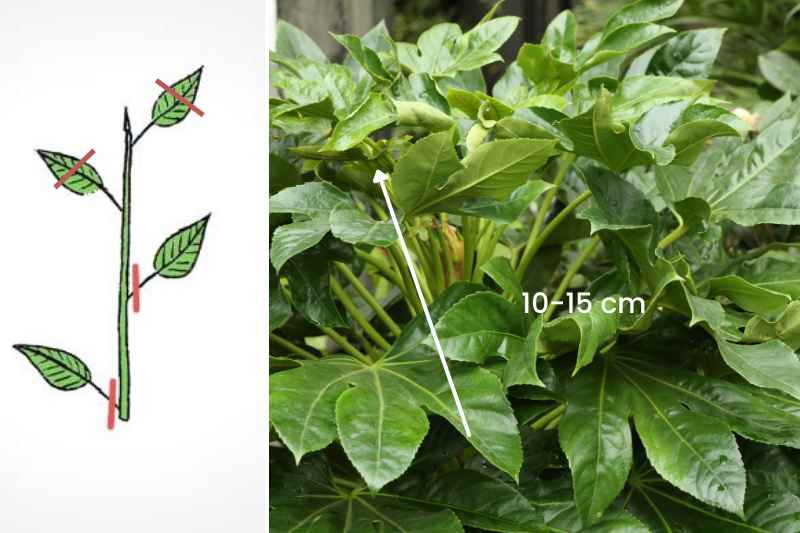
Choose right stem
Take a semi-ripe stem (neither too soft nor too hard) about 10–15 cm, with at least 2–3 nodes (areas where leaves arise).
Prepare cutting
- Cut just below a node.
- Remove lower leaves leaving only 1 or 2 leaves at tip.
- If leaf is large, cut it in half to limit dehydration.
Plant cutting
Insert stem base into pot filled with lightly moist, well-draining potting compost.
Create mini greenhouse
Cover pot with transparent plastic bag (without touching cutting) or place under cloche to maintain high humidity.
Place in right spot
Position pot in bright location, out of direct sun, at temperature between 18 and 22°C.
Care and patience
- Water lightly if compost dries out.
- Check regularly that cutting is not rotting.
- After 4 to 8 weeks, roots should appear.
Method 2: sowing
Propagation of Fatsia japonica by sowing is the slowest and most demanding method. To start, harvest seeds when berries are fully ripe, recognised by black colour and soft texture at season end.
Once seeds are extracted from pulp, soak them in lukewarm water for 24 hours to stimulate germination. Sow then in a light mix, combining potting compost and sand, covering seeds lightly with one to two millimetres of compost.
Place pot in warm spot, around 20°C, out of direct light, and keep compost moist by regular misting. Germination can take several weeks or even months, requiring patience and vigilance to succeed.
Method 3: separating a sucker
Fatsia japonica tends to produce suckers at its base when well established, particularly in ground. These suckers can be separated from parent plant to obtain new plants. Separation is ideally done in spring or early autumn.
Choose a well-developed sucker with several leaves and, if possible, visible roots at its base. A sucker that is too young or too small may not survive separation.
Prepare environment
- Water parent plant thoroughly the day before to ease extraction and reduce water stress for sucker.
- Prepare a pot with well-draining mix (compost and sand) or a spot in garden if planting directly in ground.
Detach sucker
- Using a spade or sharp knife, separate sucker carefully from parent plant. Dig around to preserve as many roots as possible.
- Make clean cuts to avoid damaging roots or creating wounds that invite infection.
Replant sucker
- Plant immediately in new location or pot.
- Firm compost gently around roots to stabilise young plant.
Watering and care
- Water generously after planting to help roots settle.
- Keep plant in shaded spot, away from direct sun, for a few weeks to limit stress.
Common mistakes and tips to avoid them
Propagating Fatsia may seem straightforward, but some mistakes can compromise cuttings. Here are the most frequent pitfalls and how to avoid them:
- Substrate too wet: excess water is main cause of cutting rot. Ensure pot is well drained and that compost stays just moist, not waterlogged. Prefer light, frequent watering rather than heavy single soakings.
- Lack of light: cuttings need light to develop strong roots, but not direct sun that can scorch leaves or dry plant. Place in bright spot out of direct rays, such as behind east- or west-facing window.
- Cuttings too soft: if stems are too young and green, they may break down before rooting. Prefer semi-ripe stems, slightly stiff but still flexible, to maximise success chances.
- Sudden environmental changes: moving too quickly from humid environment (under cloche) to drier air can rapidly desiccate cuttings. Acclimatise young plants gradually.
- Ignoring stress signs: leaf yellowing, wilting or basal rot are warning signals. Act quickly: adjust watering, replace waterlogged compost or improve ventilation if necessary.


Comments