


Clematis are climbing plants prized for their colourful flowers and their ability to adorn walls, trellises and pergolas. They come in many varieties, offering great diversity of shapes, colours and flowering periods. If you want to multiply clematis, two main methods are available: propagation by cuttings and layering. Both techniques allow you to obtain new clematis while preserving characteristics of the parent plant. Sowing, although possible, is delicate and unpredictable and seeds can take a very long time to germinate, which is why we do not recommend it. Discover how to propagate clematis step by step!
Propagation by cuttings of clematis: when and how?
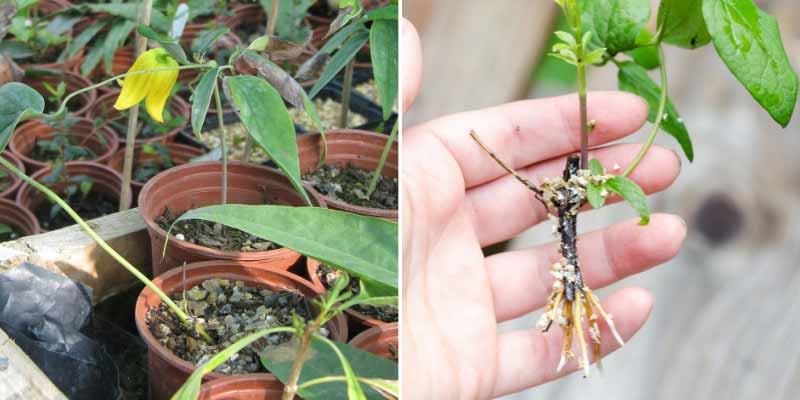
Propagation by cuttings of clematis is done in June or July, when plants are in active growth and stems are vigorous enough to produce new roots.
Necessary equipment
- A sharp, disinfected pruning shears
- Pots with drainage holes
- Expanded clay balls
- Special compost for sowing and propagation by cuttings, or a mix of compost and sand
- Plant hormone for cuttings (facultative)
- Clear plastic bags, a mini greenhouse or plastic bottles
- A watering can fitted with a rose or a spray bottle
How to take cuttings of clematis?
- To start, prepare a pot with a drainage layer (gravel or clay balls) topped with a light mix of compost and sand.
- Cut a 15 cm stem, preferably non-flowering. Take it from a healthy plant using a sharp, disinfected pruning shear.
- Remove leaves from the base to limit evaporation and keep only a few at the top. Also remove any flowers on the stem.
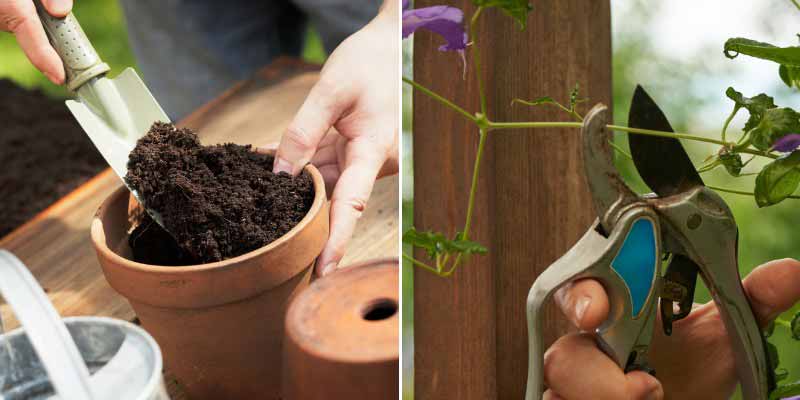
- Insert the cutting into the prepared pot, pushing the base in a few centimetres.
- Water lightly to moisten the growing medium. It must never dry out.
- Cover the pot with a cut plastic bottle or a clear bag to maintain a humid atmosphere favourable to rooting.
- Place the pot in a bright spot, but out of direct sun.
- Ventilate every 3–4 days to prevent development of mould.
- Wait until the following spring to see young, robust roots appear. You can then plant your clematis out in ground.
To learn more, read our practical guide on propagation by cuttings of clematis. Also discover our advice sheet: “Propagation by cuttings: everything to know about different techniques and our tips to succeed with your cuttings”
Layering clematis: when and how?
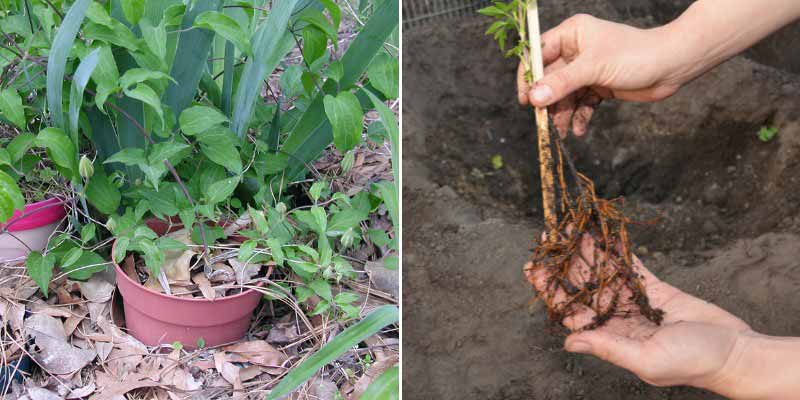
Layering by burying is an equally effective method, to be carried out in summer, preferably in August, on lignified shoots (that is, those beginning to turn into hard wood). This technique involves burying a portion of stem without detaching it from the parent plant so it can produce roots.
Necessary equipment
- A hoe or a transplanting trowel
- A grafting-type knife, disinfected
- A U-shaped peg such as a tent peg, a stone or a large cobble
- Sand to lighten the growing medium
- a stake
How to layer clematis?
- Choose a long stem on a mature, healthy plant.
- Remove leaves along the portion to be buried, leaving those at the tip.
- On the part to be buried, make a slight incision in the bark to stimulate root production.
- In soil near the mother plant, with the hoe, dig a furrow 5–10 cm deep to place the stem.
- Place the prepared stem in the soil and hold it in the furrow by covering with light growing medium. Secure the layered stem with a U-peg or, if unavailable, a large stone.
- Lift the stem tip out of soil and tie it to a stake.
- Water regularly to ensure good establishment.
- In the following spring, the layered plant can be separated from the parent stem and transplanted into the garden.
Want to know more about the layering technique? Follow Alexandra's advice.
Can I root clematis in water?
It is possible to root a clematis in water, but this method is less reliable than taking cuttings in substrate. Clematis need a humid environment, but they prefer a mix of compost and sand, which promotes good aeration of developing roots. Water alone does not provide all necessary nutrients and can encourage development of disease. If you still want to try, simply place a healthy stem in a glass of water, ensuring the node is submerged, because roots will emerge from there. Change the water every 2–3 days to avoid development of bacteria or fungi. If roots begin to appear (usually after several weeks), carefully transfer the cutting into a pot filled with compost and sand. However, be aware this method can produce fragile roots less suited to direct planting.


Comments