


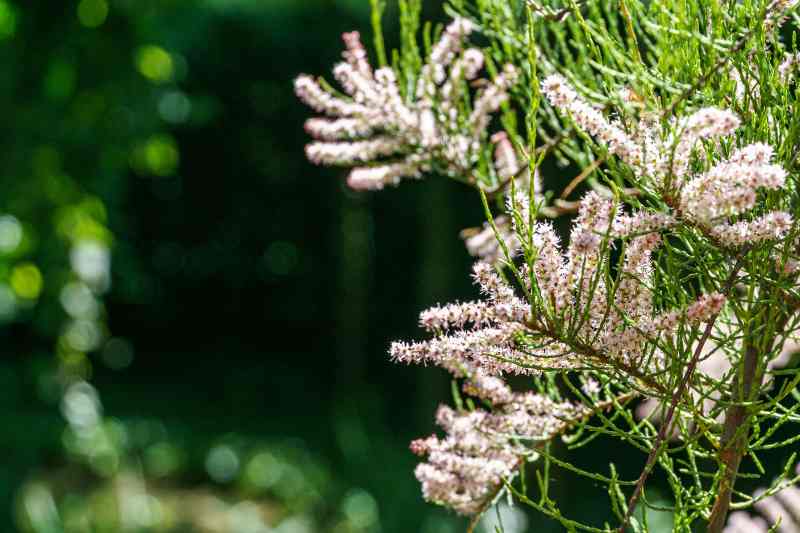
Tamarisk, known botanically as Tamarix, is a bush or small tree remarkable for its robustness and elegance. Native to Mediterranean and Asian regions depending on species, this plant is characterised by fine, scaly leaves and delicate flower clusters, often tinged pink or white, which usually appear between spring (for spring-flowering tamarisks) and autumn (for autumn-flowering tamarisks). Adapted to a range of climate conditions, tamarisk is particularly valued for its tolerance of saline soil and its ability to withstand strong winds, making it an ideal choice for coastal gardens or areas with harsh weather. Let’s find out how to propagate tamarisk!
Tamarisk in a nutshell
Tamarisk adapts well to a wide diversity of environmental conditions, but it thrives particularly in specific settings. These bushes are ideally planted in locations benefiting from full light exposure, which is essential to encourage abundant, healthy flowering. They prefer well-drained soil, and can even tolerate drought once established. However, moderate watering will encourage more vigorous growth, especially during prolonged dry periods.
Tamarisks tolerate salt spray well, making them especially suitable for coastal gardens. They also withstand slightly saline soil and can be used to stabilise soil and prevent erosion. Protection from the strongest winds may be necessary for young plants, although mature specimens are remarkably wind-resistant.
For more on cultivating Tamarix, read Tamarisk: planting, pruning and care.

Equipment needed
- Pruning shear well sharpened for taking cuttings. Ensure these tools are clean and disinfected to avoid spreading disease.
- Rooting hormone (optional) to improve success rate by encouraging rapid, healthy root formation.
- Planting pots filled with a light, well-drained substrate, ideally a mix of potting compost and sand or perlite, to ensure good root aeration.
- Cuttings tray or mini-greenhouse (optional): a controlled-humidity environment can greatly improve cutting success by maintaining needed humidity without saturating young roots.
- Watering can or spray bottle to keep substrate moist but not waterlogged.
- Garden labels to mark cuttings with variety name and date.
How to propagate tamarisk: techniques and tips
When to propagate tamarisk?
Propagation by cuttings of tamarisk can be done at three key periods, each corresponding to a specific type of cutting:
- in spring (April–May), take herbaceous or semi-woody cuttings from young shoots that are still flexible. This method requires good humidity control and a light, well-drained substrate.
- late summer (August–September), take semi-ripe cuttings when shoots begin to lignify. They root well if placed under cover in a humid, sheltered environment. This period coincides with the end of the active growth season, when stems have had time to mature but are not fully woody. Taking cuttings at this time allows them to establish and develop a robust root system before winter, optimising chances of survival and growth the following spring.
- in winter, from November to February, take hardwood cuttings or dry-wood cuttings. This is a hardy, simple method: select well-ripened shoots about 20 cm long and plant them directly outdoors or into pots.
Each period can give good strike rates if conditions are right, but propagation by cuttings of tamarisk is often most effective when carried out in late summer or early autumn. September is therefore ideal.
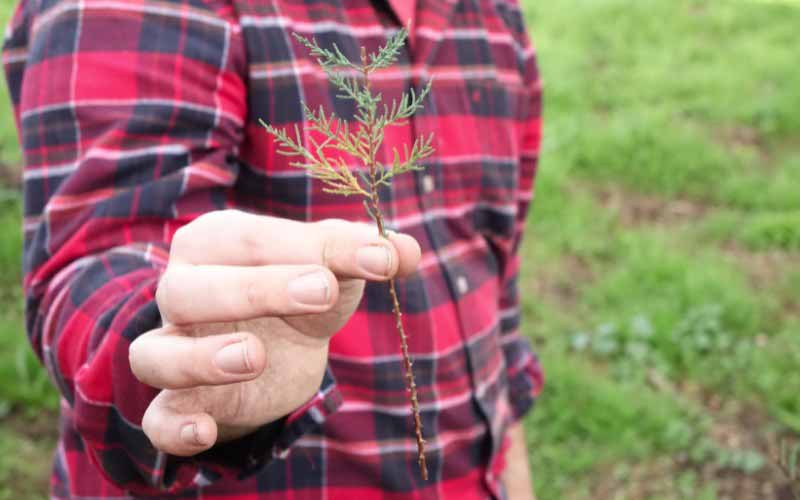
To maximise success, choose healthy, vigorous stems. Ideal stems at this time are semi-woody—partially hardened and not entirely green or soft. Avoid stems showing signs of disease, weakness or damage. Recommended length for each cutting is about 15–20 centimetres, which allows easy handling and sufficient space for root formation.
Preparing cuttings
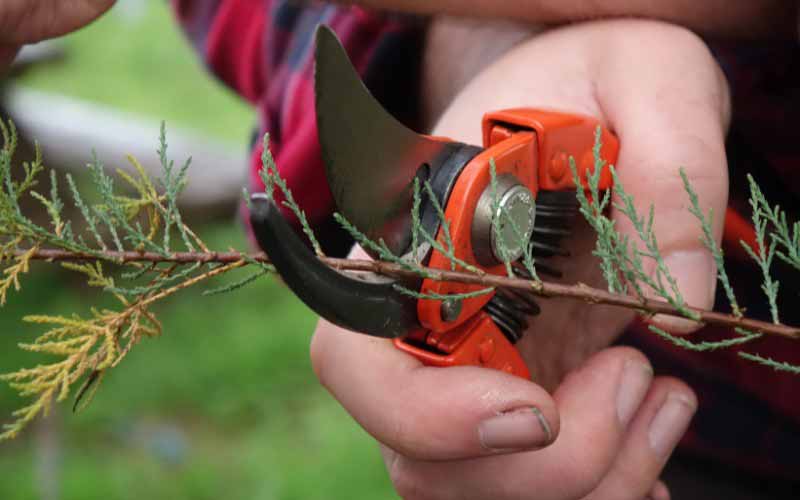
- Cutting stems: use a clean, sharp pruning shear to make neat cuts just below a node, as roots tend to develop more easily from these points.
- Preparing stems: remove lower leaves to reduce transpiration (water loss) and leave only a few leaves at the top of the cutting to allow photosynthesis.
- Treatment with rooting hormone: dip lower end of cutting into a rooting hormone. This stimulates root growth and increases chances of successful rooting.
Taking the cuttings
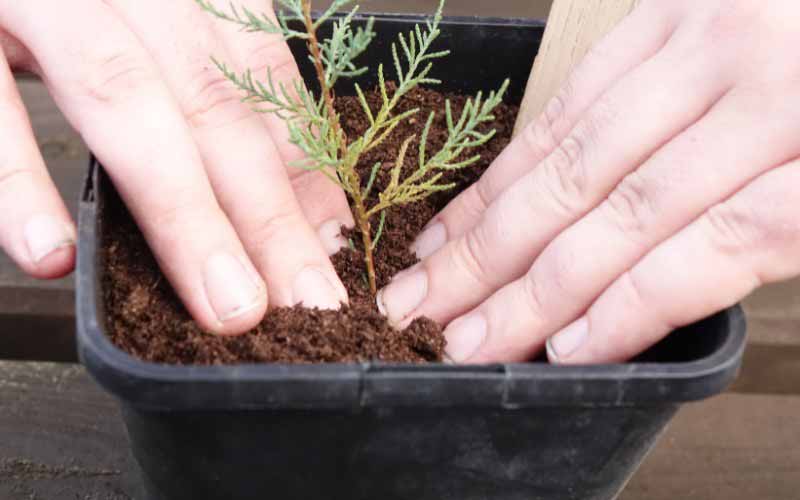
- Planting: place treated cuttings in a pot filled with a mix of potting compost and sand or perlite or a propagation compost to ensure good drainage. Insert cuttings to about one third of their length into the substrate.
- Watering: keep substrate evenly moist, but not waterlogged.
- Location: place cuttings in a bright spot, sheltered from direct sun, where they receive sufficient indirect light without risk of leaf scorch.
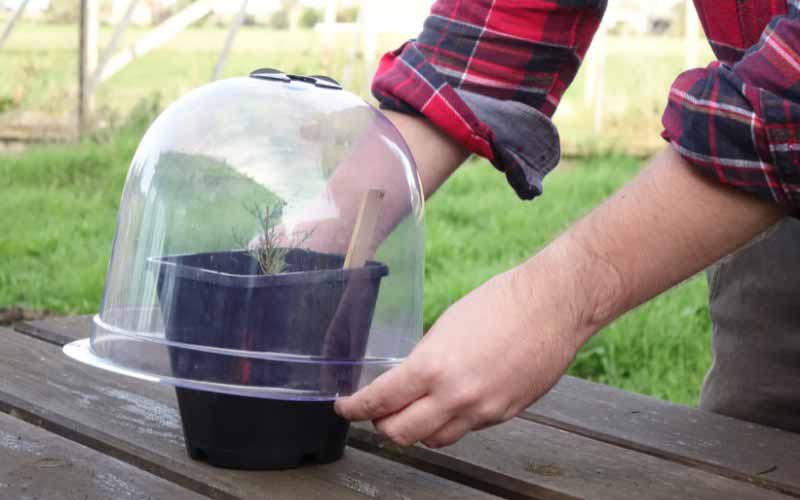
- Microclimate: covering cuttings with a clear plastic bag or placing them in a mini-greenhouse (closed propagation) helps maintain high humidity around cuttings, which is crucial for rooting.
Care of cuttings
Young tamarisk plants require regular watering to keep substrate evenly moist until they are well established. It is important to avoid both prolonged drought and excess water, which can lead to root disease. Once established, tamarisk becomes more tolerant of drought, but moderate watering during dry periods promotes continuous growth and good health.
Young tamarisk plants thrive in full sun. This not only promotes abundant flowering but also strengthens the plant's resistance to pests and diseases. If planted in very hot regions, protection from afternoon sun may be necessary during early stages to avoid heat stress.
And sowing?
Self-sown seedlings are not uncommon in wild tamarisk species. This can be an opportunity to obtain a young plant at low cost. However, sowing tamarisk seeds yields variable results and is really worth considering only for botanical species, such as Tamarix tetrandra. If you wish to try, here are our recommendations:
- Seed harvesting: tamarisk seeds are contained in small capsules that open at ripeness, in autumn for spring-flowering tamarisk. Harvest capsules when dry and brown, then extract seeds by gently rubbing them between your fingers.
- Seed preparation: before sowing tamarisk seeds, it is recommended to stratify them to improve germination. Place seeds in a moist mix of sand and turf, then keep them in the fridge for 2–3 months.
- Sowing: in spring, sow stratified seeds outdoors or in pots at a depth of about 0.5 cm. Choose a sunny, well-drained site with slightly acidic to neutral soil.
- Watering: water seedlings regularly to keep soil moist, but avoid excess water. Tamarisk is drought-resistant, but young plants need regular watering to establish.
- Transplanting: if you sowed seeds in pots, transplant plants outdoors when they are large and sturdy enough, generally after one year of cultivation.

 long section of the shoot, making sure it has at least two sets of leaves.
3. Remove the leaves from the lower half of the cutting.
4. Dip the cut end of the cutting in rooting hormone to encourage root development.
5. Plant the cutting in a pot filled with a well-draining potting mix.
6. Water the cutting thoroughly and place it in a warm, bright location with indirect sunlight.
7. Keep the soil consistently moist but not waterlogged.
8. After a few weeks, roots should start to develop. You can gently tug on the cutting to check for resistance, indicating root growth.
9. Once roots have established, you can transplant the cutting into a larger pot or directly into the garden.
By following these steps, you can successfully propagate tamarisk through cuttings.")
Comments