


No gardening text is complete without mentioning compost! As a gardener, you are likely already convinced of the benefits of this natural amendment for your soil: compost structures and lightens the soil while enriching it with organic matter. Additionally, it allows us to recycle our kitchen organic waste, our crop residues, grass clippings, and even our animal manures. It’s worth noting that, according to the Environmental Code, composting organic waste will be mandatory from 1st January 2024 for everyone!
There are various methods for composting waste, some faster than others. Indeed, you can compost your waste cold using a simple heap, stored outdoors, in a bin, or in a composter, which is regularly turned. Another method, much quicker but also more time-consuming and exhausting, is to compost hot. The vermicomposter is also an interesting solution, perhaps more suited to urban dwellers, just like surface composting.
Another technique allows for trench composting. Let’s see how to proceed step by step.
What is trench composting exactly?
This composting technique, more common in English gardens than in French vegetable plots, involves burying your waste directly in the soil of your vegetable garden. These kitchen or gardening waste materials are directly incorporated into the soil. It is therefore an underground composting method, also known as "trench or channel composting". Thus, bacterial activity occurs directly in the soil of the vegetable garden, and the vegetable plants can extend their root systems into this bounty.
Trench composting relies on a rotation over two or three years, during which part of the vegetable garden will not be cultivated. This is why it is more easily adaptable to larger cultivation areas.
The advantages of trench composting
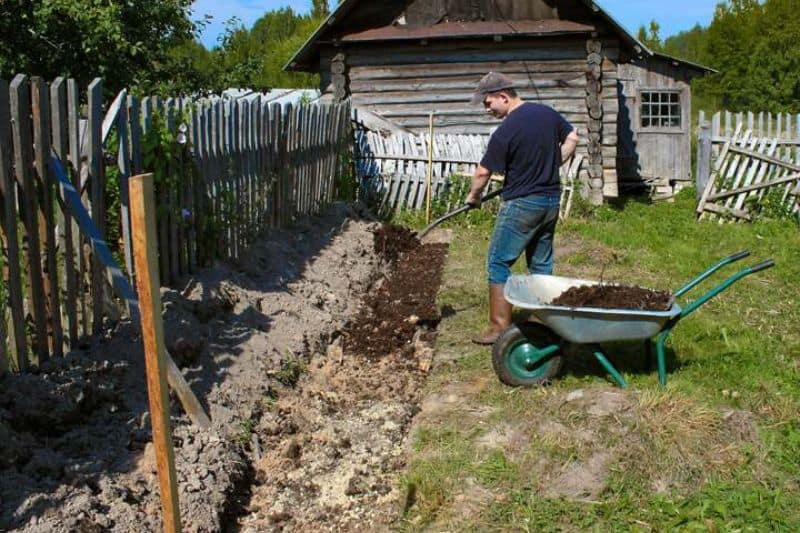
Traditional composting in heaps, whether cold or hot, requires regular turning with a fork or with a compost aerator to speed up the decomposition process of the waste. Similarly, especially in hot composting, it is advisable to regularly monitor the temperature and water the heap just as regularly. Finally, once the compost is sufficiently decomposed and mature, it needs to be spread in the vegetable garden. This task involves handling with a fork and possibly numerous trips with a wheelbarrow.
With trench composting, all these actions, often associated with effort, are eliminated. Even though you need to dig trenches with a spade beforehand... The second advantage also lies in the decomposition time, which can be much shorter. Indeed, depending on the soil temperature, the presence of microorganisms (earthworms and other bacteria), the quality of the waste, and their carbon content, the decomposition can be much more efficient than in a composter. And therefore faster.
Finally, trench composting, which takes place over three seasons, allows the soil to be continuously enriched with nutrients. And plants exhaust the soil less quickly as it is "fed" throughout the year.
The trench composting technique step by step
Trench composting is done over three years or three seasons.
The first season
- Divide your entire vegetable garden or just a part into three distinct rows or bands. Ideally, each band should not exceed one metre in width. Bands of 50 cm are sufficient. The first band is designated for the trench for composting, the second band remains empty and will be used for movement, and the third for crops.
- Dig a pit in the first band 50 to 70 cm deep, placing the excavated soil to the side.
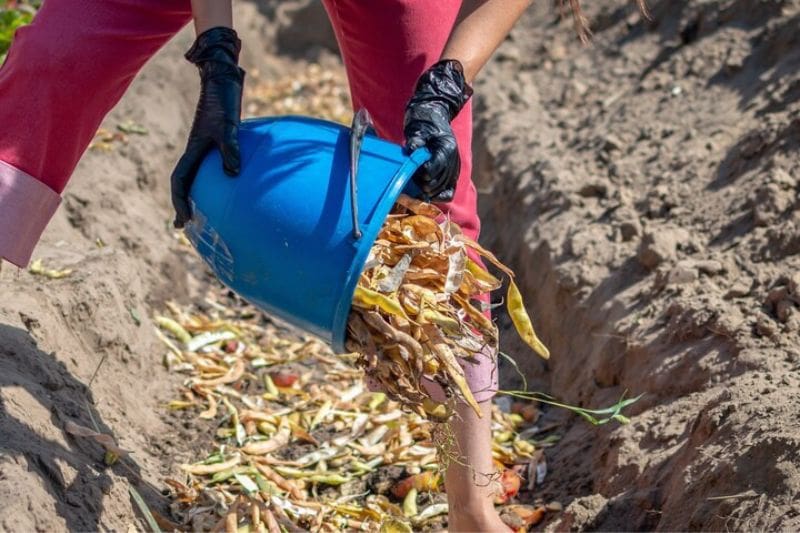
- Over the weeks, fill the trench two-thirds full with organic waste from the kitchen, as well as organic waste from animal excrement, such as horse manure or chicken droppings. All garden waste can also be added, trying to maintain a balance between carbon-rich and nitrogen-rich waste.
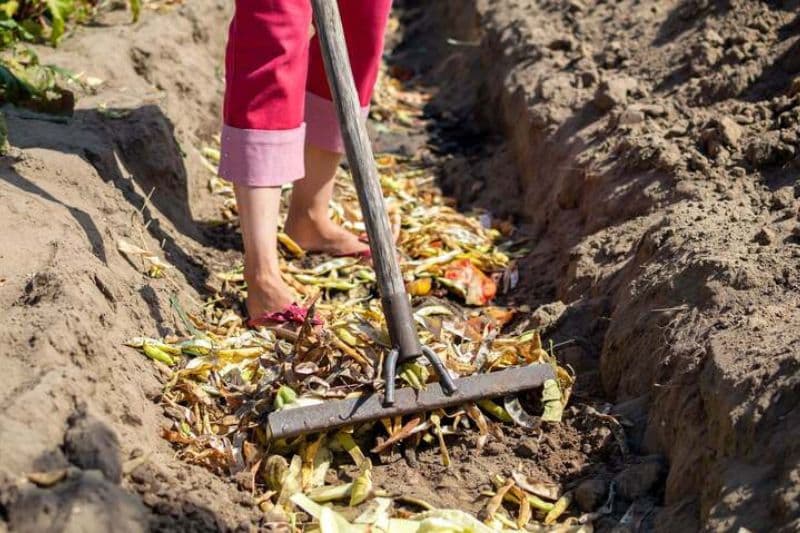
- Cover with soil for one-third of the trench as it is filled. Meanwhile, you can start or continue your sowing or planting in the third band. Only the middle band is not used, but you can place mulch there.
- At the end of the season, the composting trench is completely filled and covered with soil. Don’t hesitate to water the trench regularly if the season is dry to speed up the decomposition process. You can also place mulch to cover the trench.
The second season
In the second season, we shift the trenches.
- The composting trench becomes the pathway to allow the buried organic waste time to decompose properly.
- The band that served as a pathway will be used for crops.
- The third band that hosted the crops in the previous season becomes the composting trench. You need to dig again to the same dimensions and bury your waste as in the previous season.
The third season
- The first composting trench hosts the crops that benefit from perfectly decomposed and nutrient-rich organic matter.
- The other two bands are shifted as before.
This trench composting system over three seasons can also be done in just two years. You simply need to remove the pathway. This way, you alternate between two bands, one for composting and the other for sowing and planting, from one season to the next.
Single trench composting
- Dig one or more hole(s) in your vegetable garden 30 to 40 cm deep, depending on the amount of waste to be composted.
- Chop and finely slice kitchen waste and shred green garden waste using a lawn mower.
- Fill the hole with waste, mixing nitrogen-rich waste (grass clippings, vegetable peels, crop residues) and carbon-rich waste (shredded twigs and branches) for 10 cm.
- Cover with soil and water regularly if the season is dry.
- Mulch the surface of the hole to prevent weed growth.
After about six months, it is possible to plant directly on the location of the compost trench.


Comments