


With Easter approaching, garden awakens, dormant plants revive under sun rays and it's also time for creative garden activities with children. These crafty activities are a great way to spend time as a family while discovering gardening and nature. And what better way to start the season than with an easy, fun tutorial to make a pretty Easter nest with your children? This playful, educational activity will help develop fine motor skills while learning to sow and observe plant development. Follow steps in our tutorial to create a charming, unique Easter nest with your children.
What do you need to make an Easter nest?
To make this pretty Easter nest, you will need:
- Eggshells, because egg is undisputed star of Easter (aside from chocolate for sweet lovers, of course!).
- An egg box (keep only lower part).
- Potting compost, ideally for sowing.
- A spoon to put compost into the shells.
- A needle.
- Seeds.
- A water sprayer.
- A small nest ready to use or made by yourself with hay, straw or flexible twigs (wisteria, willow, hazel, vine woody climbing stem...)
- Stuffing for nest: moss, straw or hay. You can also fill nest with dried flowers (gypsophilas, Helichrysum italicum, spikes of ornamental grasses, etc.)
Tip: If you don't have a nest, no panic! You can also use the egg box for a super-cute result!
Note: As part of an ecological approach, we favour use of recycled materials and natural elements. Reusing these materials also saves money. Items listed are indicative and can easily be substituted with what you find in the garden: bark, hay, straw, twigs, etc. Let creativity lead the way!
Which seeds to choose?
Eggshells are small, shallow containers. Choose seeds suited to this mini format. Here is a short selection:
- Herb seeds: basil, thyme, rosemary, parsley, chives, etc.
- Seeds of annual flowers: nasturtium, marigold, pansy, cosmos, etc.
- Vegetable seeds: radish, lettuce, spinach, pepper, pea, beans, etc.
Steps to make the Easter nest:
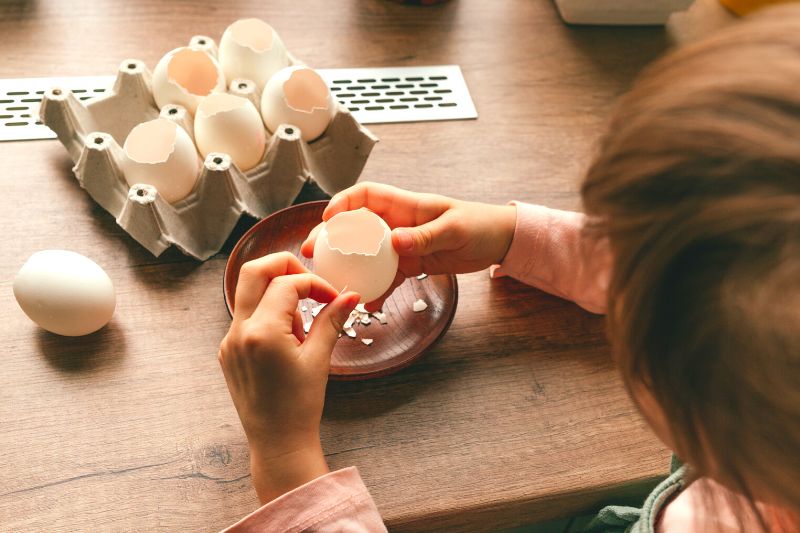
1- Empty your eggshells (perfect for making homemade cake later!) and clean them gently with soapy water. Let them dry on a towel or absorbent paper. Prepare a few extra in case of breakage!
2- Step for older children or parents: using a needle, pierce a small hole in base of the shell, a few millimetres in diameter, to allow excess water to drain.
3- If needed, enlarge shell opening. It is a good dexterity and delicacy exercise for your child!
4- With spoon (or fingers), fill shell three quarters full with seed compost and press down gently.
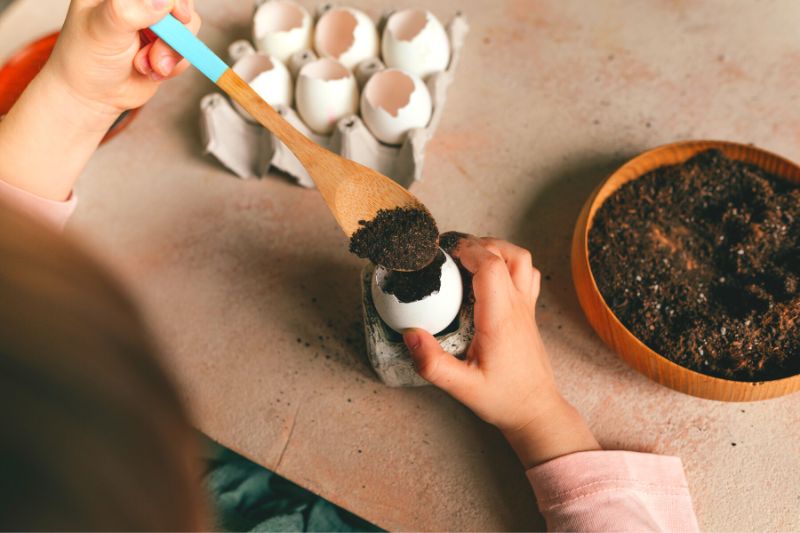
5- Plant 3 to 5 seeds for a pretty look in each shell. Good counting exercise! Ideally, vary seed variety from one shell to another.
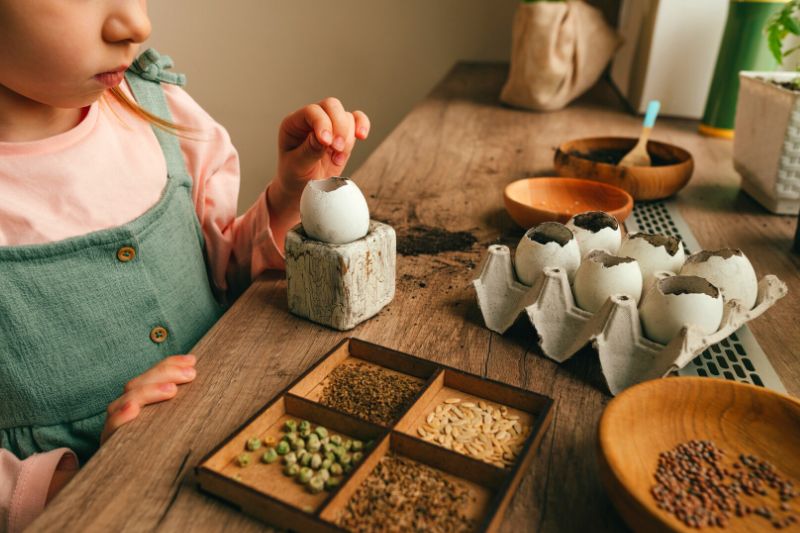
6- Cover seeds with compost.
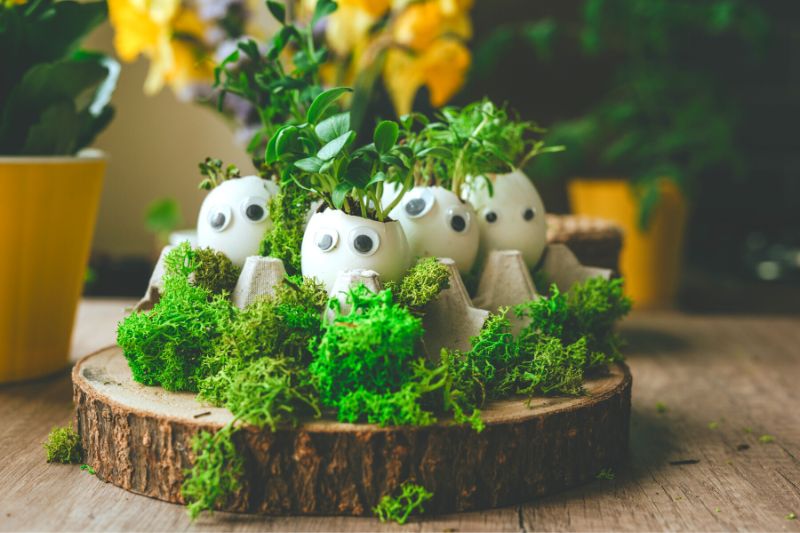
7- Place shell in its egg box to keep it upright.
8- Moisten compost using a sprayer. Prefer rainwater for watering.
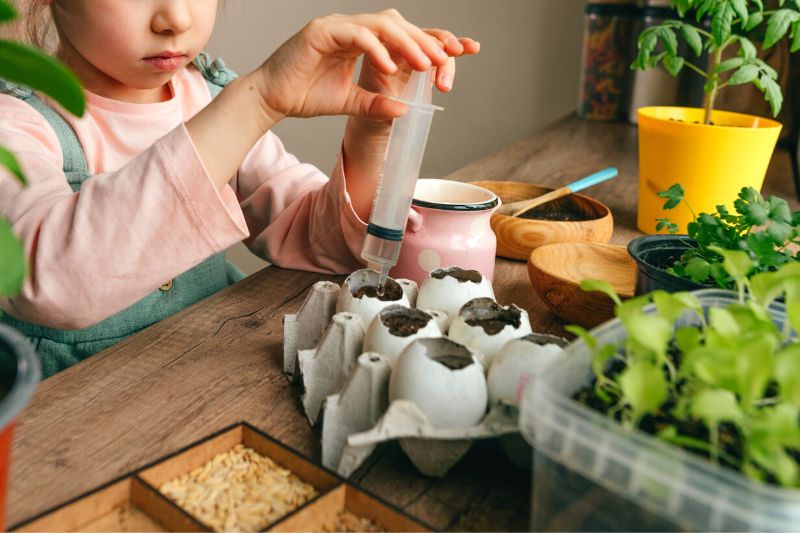
9- Optional: you can write names of sown varieties in pencil on shell or on a small label. And voilà! a little writing exercise!
10- Place your shells with their support in a bright spot, for example by a window, and water regularly with sprayer to keep compost slightly moist but not waterlogged.
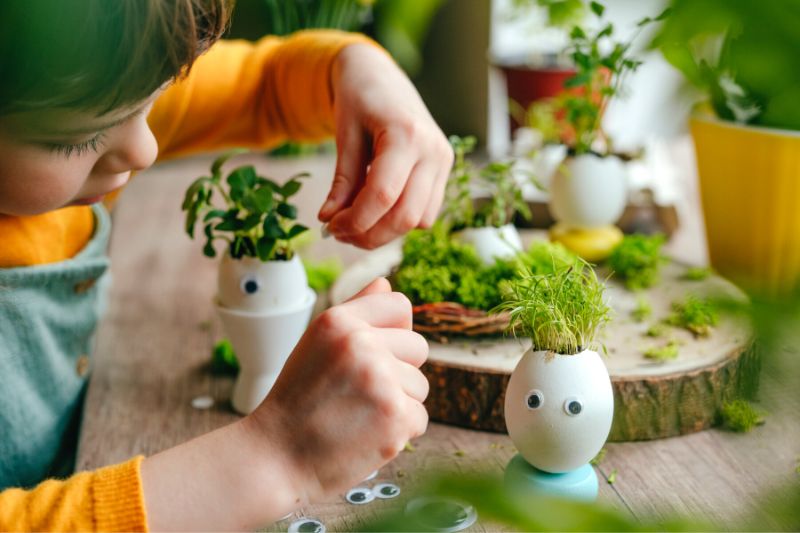
Your seeds will germinate quickly within a few days. Observe progress with your child. Once young plants reach a few centimetres, move on to nest stage.
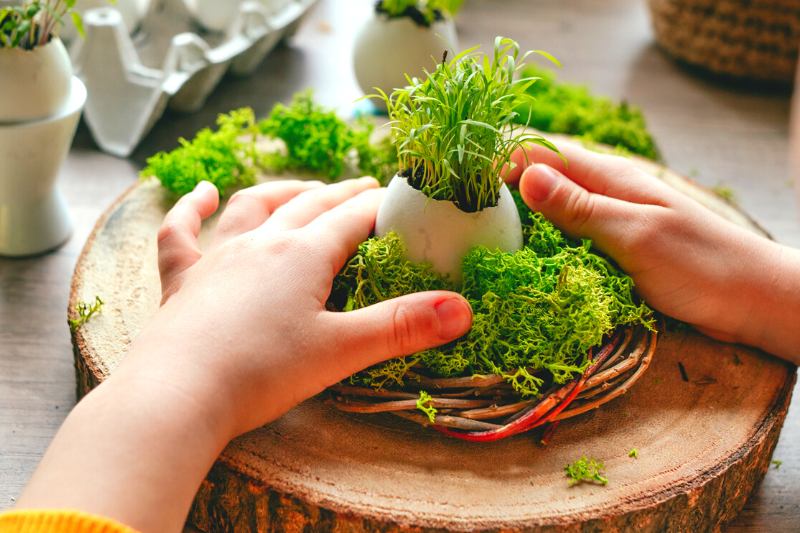
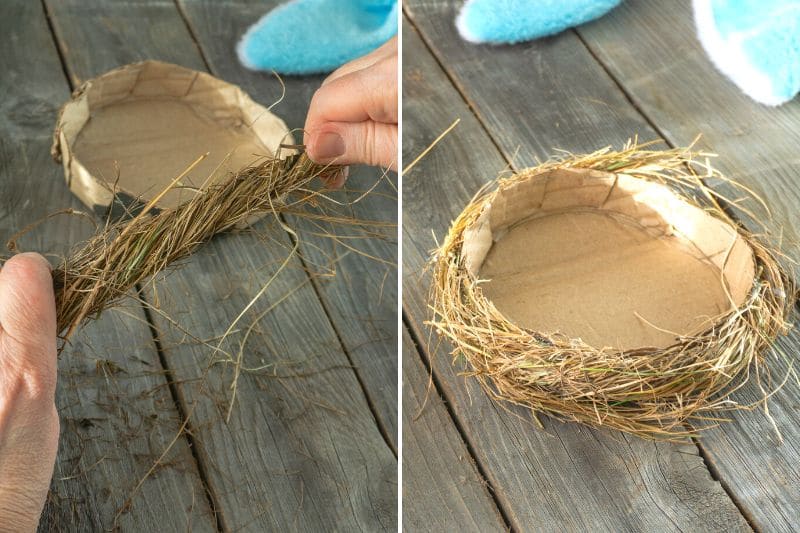
11- Take a small ready-made nest or make one with flexible twigs, straw or hay. Place it on a support or glue it onto a cardboard template or around an empty camembert box.
12- Fill nest with moss, straw or hay, then place eggs, taking care to wedge them securely. Your child will learn balance and dexterity. Tip: a small piece of sticky tack can help stabilise egg.

And there you have it, your little nest is ready! Perfect to brighten the home and create a charming Easter decoration or centrepiece.
Caring for plants in Easter eggs
- Ensure compost of young shoots remains slightly moist, but not waterlogged.
- Place plants in a bright room, preferably close to a window.
- When shoots become cramped in shells, transplant into a larger pot. A great opportunity for a second family workshop!
Tips:
- You can also make a nest by twisting hay. Then glue it to a cardboard template as shown here or onto a camembert box. Simple and easy to do!
- If child is very young or if you prefer not to make a wreath, simply add little decorative touches around eggs. For example, place a little green moss, dried flowers or a few feathers. Child can also paint or decorate shells. Or simply place in an egg cup?


Comments