


Dream of multiplying your Alocasia or elephant ear for yourself or to give a little piece of jungle to loved ones? Good news: this indoor plant, with its large spear-shaped leaves, is well suited to propagation! This tutorial will guide you step by step to reproduce your Alocasia by division under the best conditions.
What is an Alocasia?
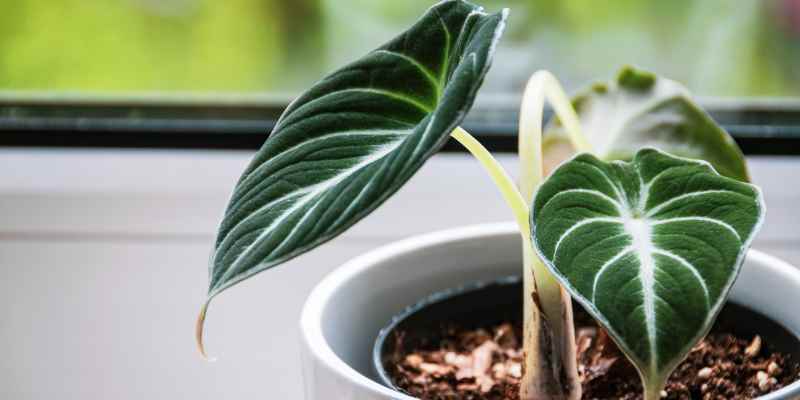
Alocasia is a spectacular tropical plant that never goes unnoticed thanks to its unique foliage. Its large leaves, often called "elephant ears" because of their shape, are a real decorative asset for modern interiors and lovers of exotic plants. Several species and many varieties exist.
Native to the humid forests of South-East Asia, Alocasia grows naturally under the canopy, where it benefits from dappled light and high humidity. That is why, as an indoor plant, it appreciates bright conditions without direct sun, and requires particular attention to recreate its natural habitat.
There is great diversity among Alocasias, ranging from giants such as Alocasia macrorrhiza, whose leaves can exceed one metre in length, to more compact varieties like Alocasia amazonica 'Polly', prized for its clear veins and deep green leaves. Other popular species include Alocasia zebrina, with its elegant zebra-striped stems. Some Alocasias can be grown outdoors in regions with mild winters, for example Alocasia odora.
please note: Alocasia is not the easiest plant to care for. It demands appropriate light, regular but controlled watering, and high ambient humidity. Watering mistakes or drafts can quickly stress the plant, causing leaves to yellow. However, for indoor gardening enthusiasts, successfully keeping an Alocasia healthy is a rewarding and pride-worthy achievement.
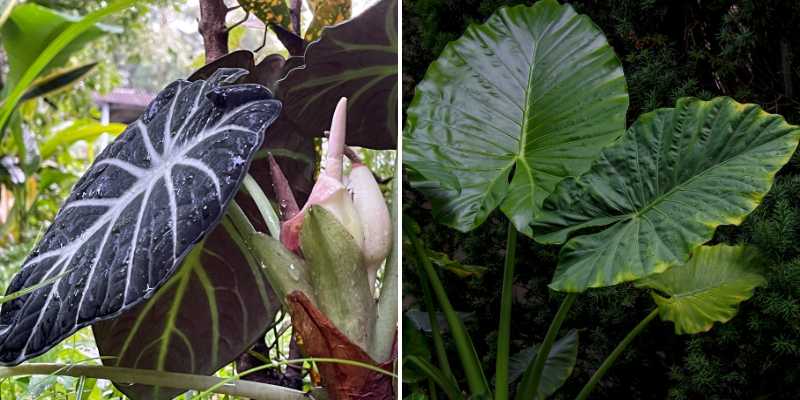
Alocasia or Colocasia?
Alocasias and Colocasias belong to same family, the Araceae, and share a family resemblance with their large imposing leaves. However, Colocasias are generally better suited to outdoor growing and prefer moist, even waterlogged soils, unlike Alocasias, which dislike waterlogged ground. As for multiplication, the method is similar: Colocasias are also multiplied by separating rootstocks or offsets. Nevertheless, Colocasias are often more prolific and robust, so they tolerate more frequent division and sometimes less precise handling than their more delicate Alocasia cousins.
When to multiply Alocasia?
Alocasia multiplication is done in spring or early summer. At this time, the plant is coming out of winter dormancy and is in active growth, which maximises chances of a quick recovery. Avoid multiplying your Alocasia in autumn or winter, when the plant is more vulnerable and may take longer to adapt.
Required equipment
- A clean, sharp pruning shear
- Gardening gloves (Alocasia sap can be irritating)
- A pot or container with drainage holes
- Light, well-draining substrate: mix of potting compost and sand or perlite.
How to multiply an Alocasia?
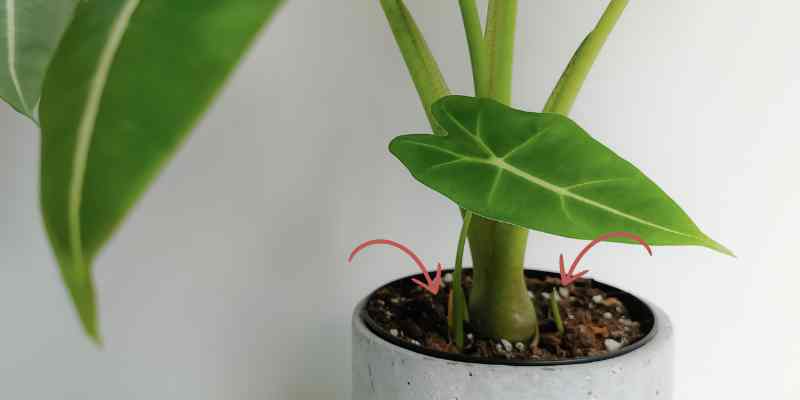
- Locate offsets or rootstocks: look around base of your mother plant. You should see small offsets ("baby Alocasias") or rootstocks that can be separated.
- Carefully remove plant from pot: take Alocasia out of its pot gently to avoid damaging main roots. Gently remove compost around rootstocks to identify them more clearly.
- Separate rootstocks or offsets: using your pruning shear or a garden knife, cut cleanly an offset or rootstock with some roots attached. Make sure it is well formed and vigorous.
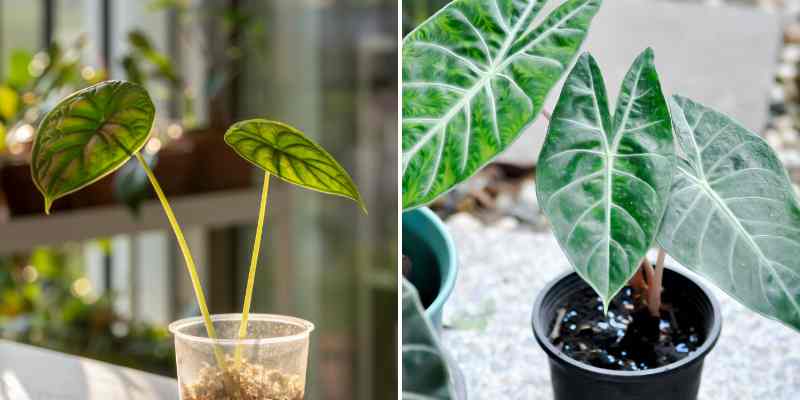
- Plant the new cutting: place offset or rootstock in a pot filled with moist, well-draining substrate. Keep offset upright and firm compost lightly around it.
- Water and place in a bright spot: water lightly and position new plant in bright location without direct sun. Maintain good humidity around plant, but avoid excess water.
Caring for the cutting
Once your cutting is installed:
- Keep substrate consistently moist, without excess water.
- Place plant in a bright spot, but avoid direct light.
- Regularly mist water around plant to mimic humid conditions of its natural habitat.
- Watch for signs of stress such as yellowing or limp leaves. If needed, adjust care (less water or more light).
Mistakes to avoid
Multiplying an Alocasia may seem simple, but a few common mistakes can compromise success of your cuttings.
- Cutting too early or too late
It is essential to choose right moment to separate offsets or rootstocks from mother plant. If cut too early, before they have developed sufficiently strong roots, they will struggle to adapt and may not survive. Conversely, waiting too long can weaken mother plant or make extraction more difficult because roots will be deeply entangled. Ideal is to wait until offsets are well formed, with some visible roots, which will allow them to establish quickly once planted. - Overwatering
After separation, it may be tempting to water cuttings heavily to "give them a boost". Yet, excess water is one of main causes of failure: it favours root rot, a problem often fatal for young plants. Ensure substrate drains well (a mix of potting compost, perlite and coir fibre, for example) and water lightly, just to maintain consistent moisture. Check that pot has drainage holes to avoid stagnant water. - Exposing to direct sun
Young Alocasia cuttings are much more fragile than adult plants and cannot tolerate direct sun. This can scorch their delicate leaves or dry substrate too quickly, compromising recovery. Place cuttings in bright but sheltered spot, for example near a window with a light curtain. - Neglecting tool disinfection
A poorly cleaned pruning shear can introduce bacteria, fungi or other pathogenous agents into your cuttings or mother plant. This can cause infections that slow recovery or, in worst cases, kill the plant. Always disinfect tools with 70% alcohol before cutting.


Comments