


We sometimes wonder how to occupy our children's days and, fortunately, children have plenty of imagination! What if we harnessed that creative potential by combining art and gardening, guiding children to make a woven plant frame? A welcome change from grass soups (if you have children, you know what I mean!) and improvised dens. This activity is playful and fun, and it also helps discover different names and scents of plants. It also raises environmental awareness in young ones. So, get garden tools out and create a lovely plant picture as a family!
1- Materials needed
For this project, you will need a few basic tools:
- Scissors;
- String;
- 4 rigid branches about 15 centimetres long to make the frame (adapt size to your project and child's age);
- Flowering stems or flexible branchlets collected from garden to decorate frame.

2- Preparation
Before starting and to prevent children from scattering about, prepare tools on a table. For younger children, prepare frame in advance or use an old wooden picture frame. Watch safety: even with round-tipped scissors, adult supervision is always necessary.
Also use vocabulary suited to child. For example, rather than saying "we're going to make crossings with the string", I prefer to say "we're going to make a mountain with the string". This stimulates imagination and little artists love it!
3- Steps to create
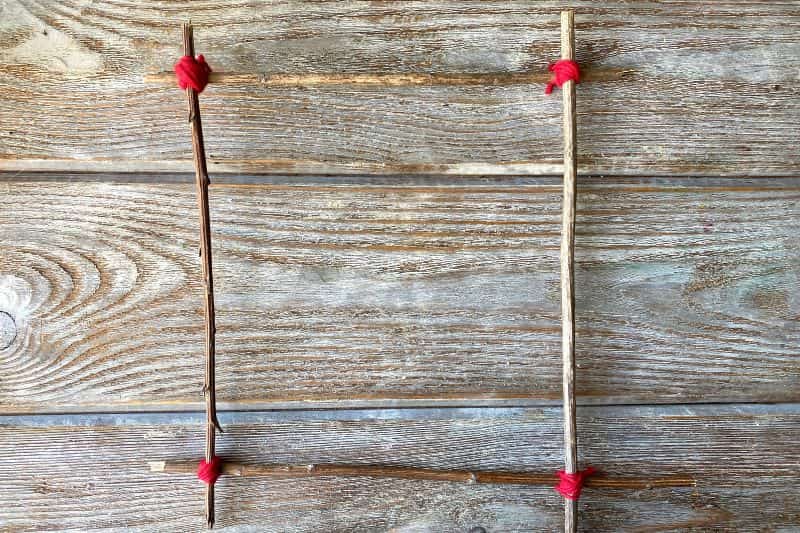
1- Start by choosing four sturdy branches (hazel, chestnut, pear, or whatever you have to hand!) to make base frame.
2- Arrange branches into a square or rectangle, depending on size wanted for plant frame.
3- Use string to tie each corner, ensuring frame is stable and secure.
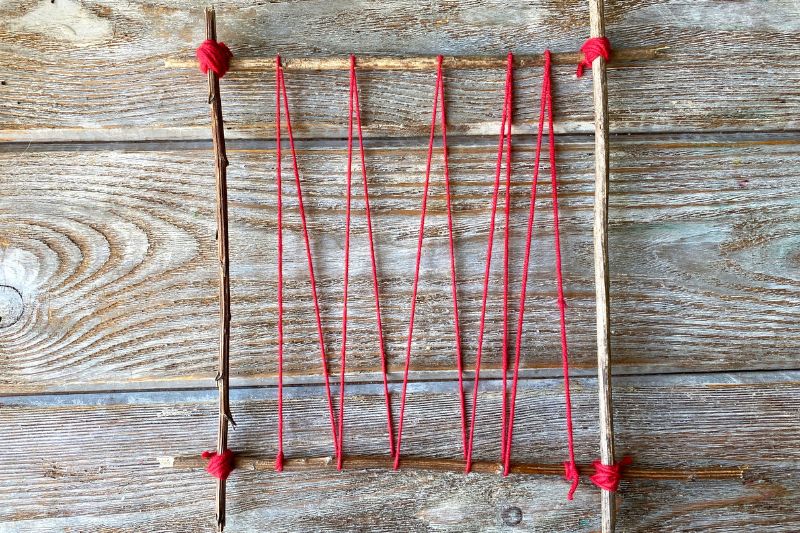
4- Once frame is ready, use string (preferably coloured so child can easily see it) to create a web inside frame. Start at one corner and run string from side to side in zigzags or mountain shapes (or "M" shapes for early readers!). Make sure string is taut. This web will support plants.
5- Next, out to garden! Let child explore and guide them on what can be cut (or not!) and help trim branches or stems to roughly frame length. You can use various plant varieties, such as horsetail for its pretty plume shape (a "wolf tail", as my daughter calls it!), meadowsweet, mint, etc. Let imagination guide plant choices!
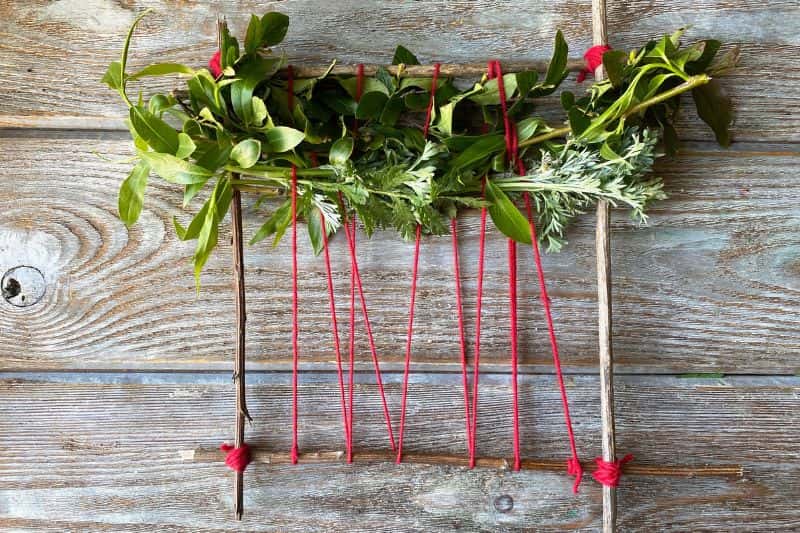
6- Once collecting finished, begin to insert plants gently into string web, as if weaving. Start with a branch or stem from first plant. Position stem so it goes over first string line, then under second, and continue alternating to end of line.
For next branch or stem, do opposite: start by passing under first string line, then over second, and continue to alternate. This weaving process will help hold plants in place and create an attractive pattern.
Continue adding plants following same weaving process, taking care to alternate pattern for each new stem. This creates overlapping effect that will hold plants in place.
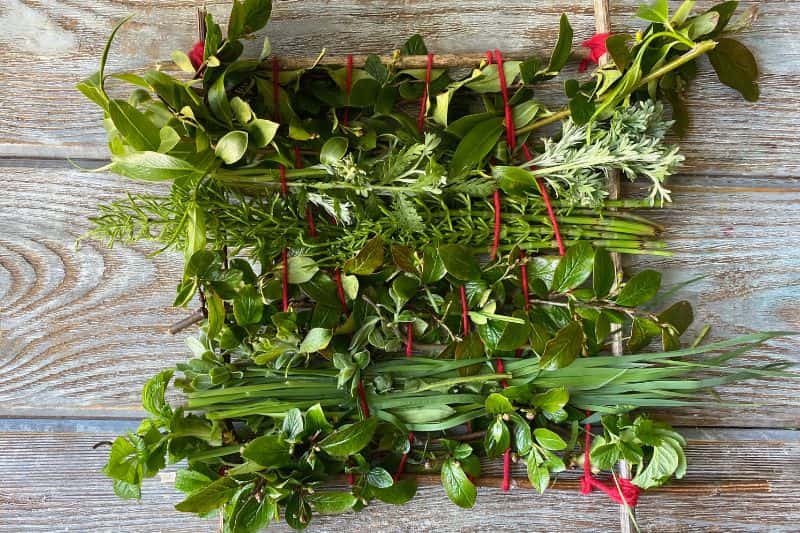
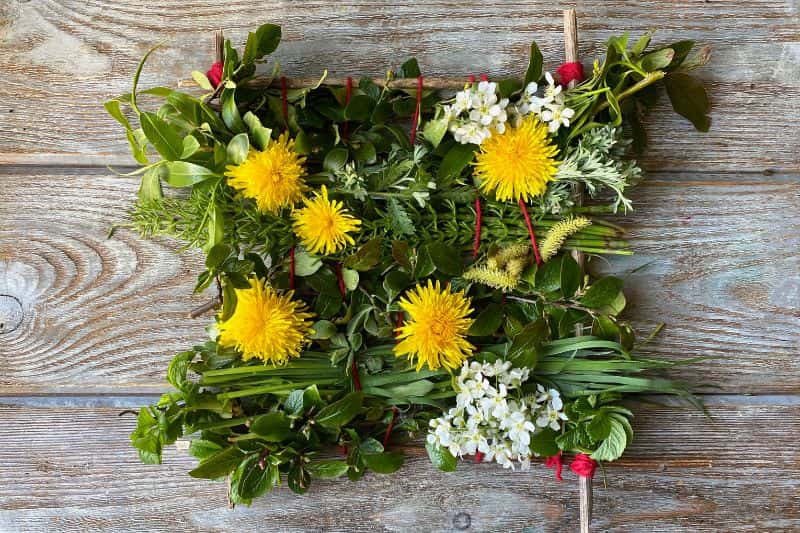
7- Once all plants in place, step back with your budding artist and assess work. Make adjustments if needed. Add finishing touches such as dandelions, daisies, oxeye daisies, or other decorative elements to personalise plant panel, like pine cones or beads.
4- Care for plant frame
Charm of this ephemeral plant frame is that it evolves over time. To prolong lifespan, you can spray a little water each day to keep plants hydrated until they wilt. Place frame in spot with indirect light. Avoid direct sun, places that are too hot or too cold which will make leaves and flowers wilt quickly. Then remake frame as many times as you like!

")
Comments