


How to plant a hedge?
Design, plant selection, planting
Contents
In the garden, planting a hedge is not a trivial act. It requires consideration regarding the style, the choice of bushes, as well as its location, especially if it runs along a property boundary. Once the decision is made, the planting can begin, but it should not be improvised.
When to plant a hedge? What distances should be observed in relation to a fence or property line? How to properly prepare the ground? How to correctly install the bushes in the soil? I invite you to discover the answers and my tips for successfully planting your hedge!

Where to plant a hedge?
This is the first point to address. Where will your hedge be located? And also, what height should it reach once the bushes have matured?
First of all, let’s recall the main general rules that govern the planting of a party hedge:
- If your hedge is intended to be planted along the boundary of your property, it must be placed 50 cm from the property line for bushes not exceeding 2 m in height.
- If the bushes exceed this height (more than 2 m), they must be planted 2 m away from the property line of your land.
These are general guidelines and they may vary depending on the regions and urban planning regulations in force in your municipality. Be sure to check with your local council to find out the recommended planting distances in your area.
If your hedge is only meant to delineate areas within your garden, you will have much more flexibility regarding the use and height of the essential oils planted.
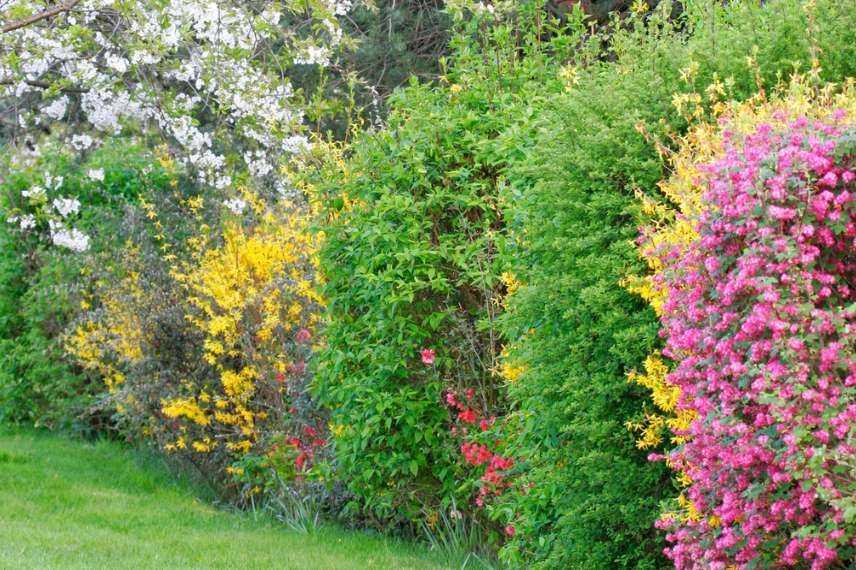
Beautiful flowering hedge in spring (©Christophe Fouquin-Fotolia)
To learn more about the planting distances according to the situation, please consult our advice sheet.
When to plant a hedge?
“At Saint Catherine, all wood takes root.” This old French saying is still relevant today. The best time to plant trees or bushes is in autumn. As a reminder, Saint Catherine is celebrated on 25th November.
You can plant evergreen bushes (such as Privet, Photinia, Cherry Laurel, etc.) in early September. When bushes are planted early in autumn, the young roots can benefit from warm, moist soil before the onset of frost. For very hardy bushes, that is to say, those that are less sensitive to cold, you can continue planting throughout winter, but always outside of frost periods.
If you are really concerned about the winter chill for your future hedge, you can then plant at the end of winter or very early in spring after the heavy frosts. In cold regions, such as mountainous areas, you will plant either in October before the severe cold or in early spring when the snow has melted.
As a reminder, during frost periods, water is no longer accessible to the roots as it has turned solid, and your bushes will suffer from drought; it is therefore important to plant before these periods so that your plant’s root system has had enough time to develop. Additionally, and this is an important point, the watering necessary for planting could damage the roots if the water were to freeze afterwards. So, caution is advised!
There are different packaging options for hedge bushes: in containers of several litres, ideal for large specimens and having a very wide planting period (all year round except during frost and heatwaves); bare-rooted, perfect for hardy bushes but with a reduced planting period (between November and February); in buckets, very economical if you have many bushes to plant; and in clumps, a good compromise between containers and bare roots.
To learn more, check out our advice sheet: “Hedge bushes: bare roots, clumps, buckets, potted bushes… What to choose?”
Discover other Hedge shrubs
View all →
Available in 1 sizes

Available in 2 sizes

Available in 1 sizes

Available in 1 sizes

Available in 2 sizes

Available in 1 sizes

Available in 1 sizes

Available in 1 sizes

Available in 1 sizes

Which bushes or shrubs for my hedge?
The choice of essential oils is vast and should not be taken lightly. Evergreen or deciduous bushes? With flowers or colourful foliage? Monospecific or mixed hedge? Trimmed or free? In a single line or double rank? Bare roots or in containers? As you can see, it can sometimes be difficult to navigate and effectively choose your future acquisitions.
Your hedge may only aim to partition your garden, but… there are so many different types of hedges: flowering hedges, decorative fruit hedges, a bit wild, classic strict hedges, free hedges, hedges with colourful foliage, evergreen hedges, … All of this will depend on your personal tastes and the style of your garden.

Evergreen hedge (©hcast-Fotolia)
Don’t follow trends too closely! Your hedge will remain in your garden much longer than the fleeting enthusiasm for this or that essential oil…
Don’t plant just anything anywhere! Remember to check the hardiness and the needs of your bushes (soil, sunlight, etc.) before choosing and planting them: a coastal hedge will be difficult to grow in… the Alps.
Moreover, you also need to consider the time and energy required for maintenance. A strict and impeccably trimmed hedge will require much more effort than a free hedge.
Fortunately, Promesse de Fleurs won’t let you down and offers you to browse these few articles that will help you in your choices: discover our complete range of hedge bushes!
Preparing the ground
Preparing the ground is essential. It largely determines the successful establishment and rapid growth of your bushes.
You have two methods to choose from:
- The slow and easy method
Five to six months before planting, you can cover the area where you will plant your bushes with old cardboard (without lead ink to avoid heavy metal contamination in your soil). These old cardboard pieces should be held down with stones or bricks (covering with soil or sand is not advisable in windy areas!). The principle is simple: the cardboard will block the light, preventing the plants underneath from growing and even causing them to die. Once the cardboard is removed, you will find that the soil has been completely “stripped” and that the structure of your soil has improved. The only two drawbacks of this method are its relative slowness and the fact that you will have several square metres of brown cardboard “decorating” your garden for many months.
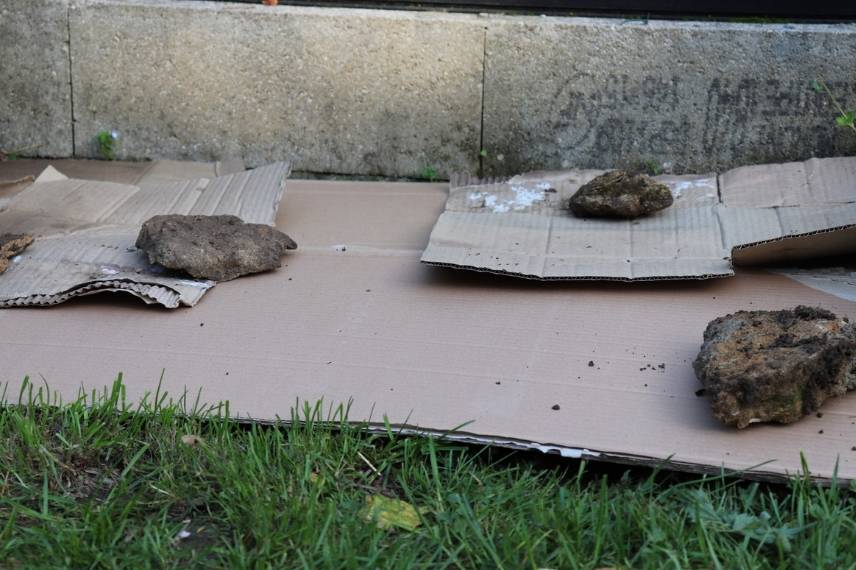 The gentle method: covering with cardboard to block the light
- The quick and… more physical method
Get out the hoe! It will allow you to strip the grass and effectively eliminate other plants. The “waste” produced will quickly end up on your compost heap for later recycling. The main advantage of this method is its speed. Once the soil is laid bare, you can practically plant right away.
Caution! Think of your back (and the rest of your body while you’re at it). Before you start hoeing, do some warm-up and stretching exercises for all your muscles and joints. This will take a few minutes but will save you from aches and injuries. This advice applies to most gardening tasks that can be just as physical, if not more so, than some sports.
- Soil decompaction and site cleaning
If the soil seems very compact, which is often the case, decompact it using a fork. The method involves digging with your tool to a depth of about twenty to thirty centimetres without turning the clods over. The clods should be broken but not turned over to avoid burying organic matter and mixing the soil layers; otherwise, the microorganisms will die and will no longer contribute to improving your soil.
A compact soil will struggle to absorb water, and soil life will be less active. Additionally, it will be difficult for you to dig the holes or trench needed for planting.
For your information, if the problem of soil compaction persists, consider regularly adding organic matter, ideally in the form of compost. This will help reactivate soil life.
Nota bene: Avoid using a broadfork in these areas, as you will “break its teeth”.
Once the soil is laid bare, all you have to do is use a rake to remove the last remaining roots in that area and continue breaking up the last clods.
- The “false sowing” technique
A technique commonly used in vegetable gardens but worth applying to other types of plantings (trees, flower beds, etc.). It involves preparing the ground as if you were going to plant immediately, but… you will wait two weeks. The adventive plants, whose seeds in the soil will have germinated, will be very easy to remove with a hoe as soon as they show the tips of their leaves.
Read more on the subject: “False sowing, an effective technique to reduce weeds”
- Planting on a tarp
Planting on a tarp to avoid being overrun by adventive plants may seem like a good idea. However, it will quickly develop cracks where various small unwanted plants can slip in, which will prove very difficult to eliminate. Additionally, potting soil may form over time on the tarp, also welcoming those infamous “weeds”. We prefer to advise our clients to use a good mulch or plant perennial ground covers (see the “finishing touches” section).
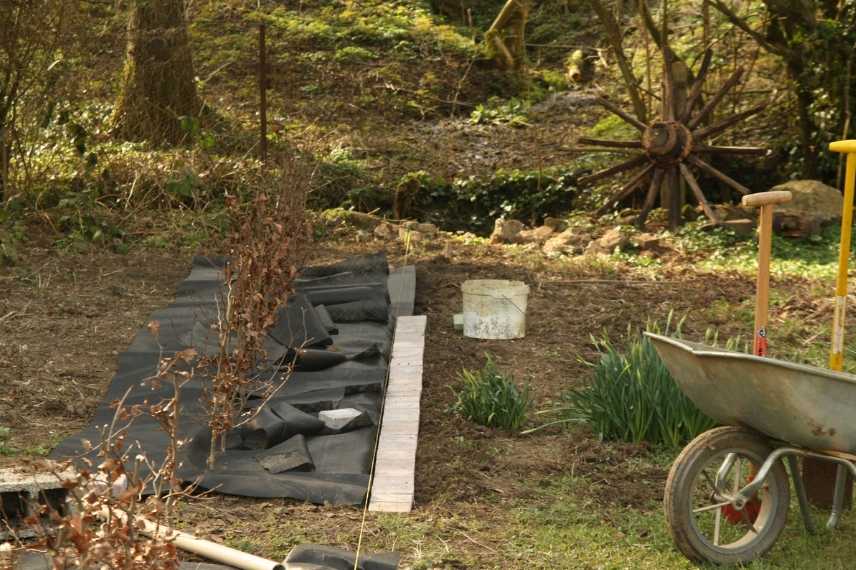 Laying a mulch fabric
For your information, there are biodegradable mulch fabrics made from jute or hemp that degrade over time and thus replace a traditional tarp advantageously. These types of fabrics combine the benefits of a tarp (uniform coverage and ease of placement) and an organic mulch (nourishes the soil, natural degradation of the fabric, aesthetic).
To learn more: “Mulch fabric, for or against?”
Planting in practice
Depending on the type of plant and the strength, you can plant your hedge bushes one by one, hole by hole if they are container or ball bushes or dig a trench if they are bare root bushes.
- For container or ball bushes
Soak your container bushes in water for an hour to thoroughly moisten the ball. Then remove the bush from its pot and start to loosen the ball using your fingers. Also free the root hairs (the finest and most fragile ones) gently with an old fork. If it appears that some roots are damaged, rotten, or dry, you can cut them with a pruning shear.
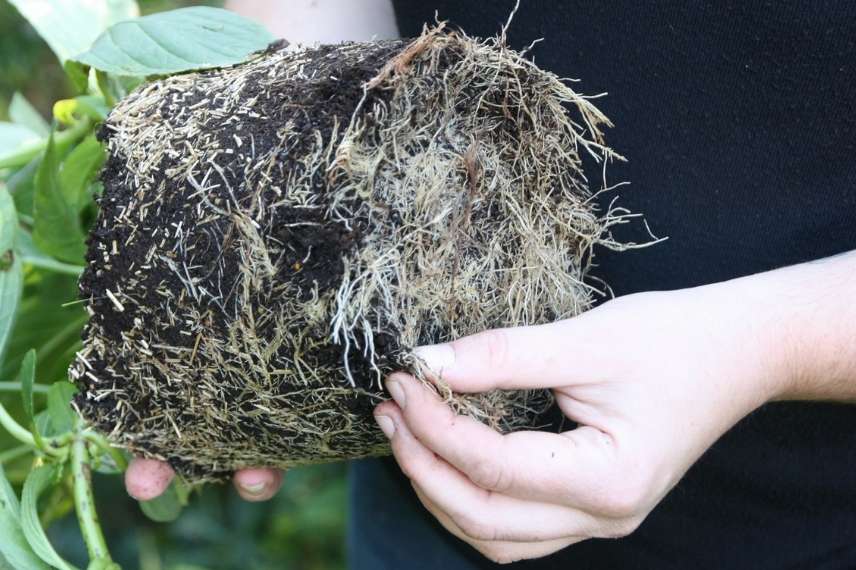 Loosen the ball
Dig a hole about twice the size of the volume of the container. Set the extracted soil aside and mix it if you wish with some well-matured compost.
Place the ball at the bottom of the hole and keep the bush upright. Ensure that the collar is at the same level as the soil surface. This is when you can place a stake if necessary.
Fill the rest of the hole with the extracted soil, possibly enriched with compost. Firm it down well with your hands. Avoid compacting with your feet as you might damage the surface roots. Then provide a good watering can (10 l) to each bush planted to fill any “air pockets” that may appear between the roots and the soil.
Balled plants do not require all this preparation. Simply remove the net and place the ball at the bottom of the hole. Backfill the hole, firm it down, and provide a good watering can of water.
Note! Stakes are useful but… sometimes poorly placed, they can damage the roots. If attached with a “damaging” fastening (such as wire), the bark may be damaged, especially if left too long. It is difficult to remove a stake that has been in place for several years. Given all these inconveniences, it is often preferable not to stake. In particularly windy areas, you can simply reduce the wind catch of your new bush by reducing the volume of branches or, in the case of a whip (a young elongated shoot), by cutting the “trunk” to twenty or thirty centimetres above the ground. This way, the tree or bush of your hedge will offer little wind resistance, it will branch out quickly to thicken and will be well anchored in the soil for its future growth.If you really want to stake, I can only advise you to place it at an angle facing the prevailing winds. This way, it will not damage the roots while firmly supporting the bush. Remember to loosen the ties a bit in spring and September to allow for proper sap circulation.
-
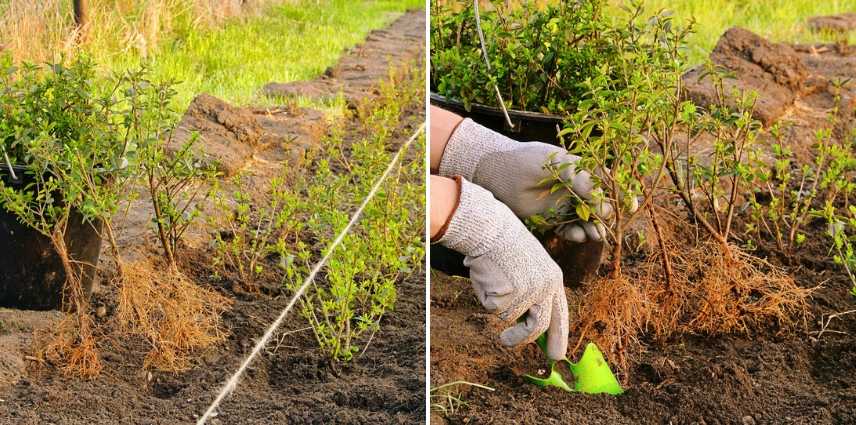
- For bare root bushes
First, start by “dressing” the roots. This means you will need to cut with a sharp pruning shear 1/3 of the length of the roots to encourage the appearance of rootlets.
 Planting a low hedge with bare roots (©LianeM-Fotolia)
Prepare a praline made of garden soil, water, and manure. A “cow – chicken – horse” mix will be perfect: there is no need to live on a farm, dehydrated manure is sold in all garden centres. This praline will help protect the roots and hydrate them. Additionally, the nutrient richness of the praline will “boost” the formation of rootlets in your bushes. You can also plant them hole by hole, but it may be quicker and simpler to dig a trench.
So dig a trench along the length of the hedge planting and a depth slightly greater than the length of the roots of your bushes.
Place your bushes at the bottom of the trench so that the collar is at soil surface level. Fill with soil. Firm it down and provide water to eliminate any remaining “air pockets” (the praline also helps to limit them).
Planting distances: how far apart should each bush be?
Planting distance refers to the space left between each bush. This space varies based on several criteria: the type of hedge (trimmed, free), the conditioning of the plants, the size of the bush at maturity, and the desired density level (impenetrable hedge or semi-transparent hedge…).
However, generally, it is agreed that a space of:
- 60 cm for bushes in buckets and bare roots
- 70 to 80 cm for plants in 2 or 3-litre pots
- 80 cm to 1 metre for pots ranging from 4 litres to 10 litres
- 1 metre to 1.2 metres for pots over 10 litres.
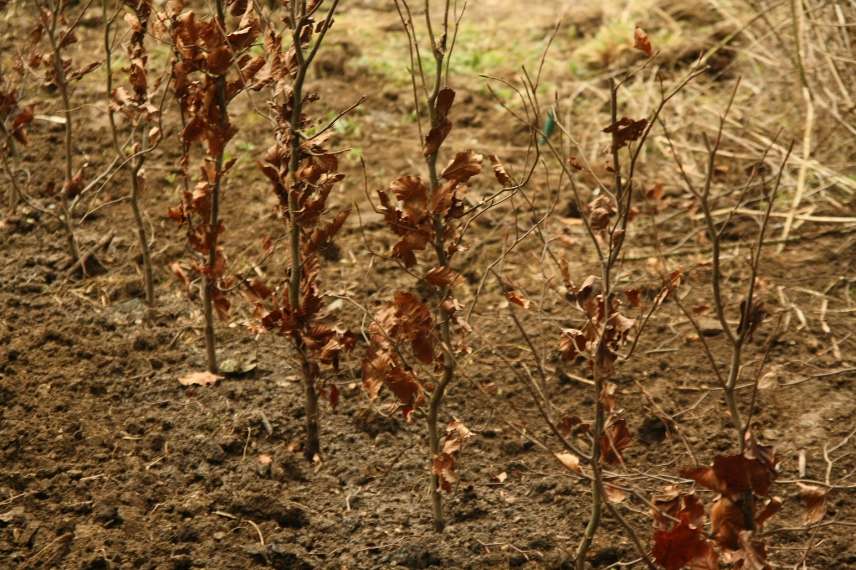
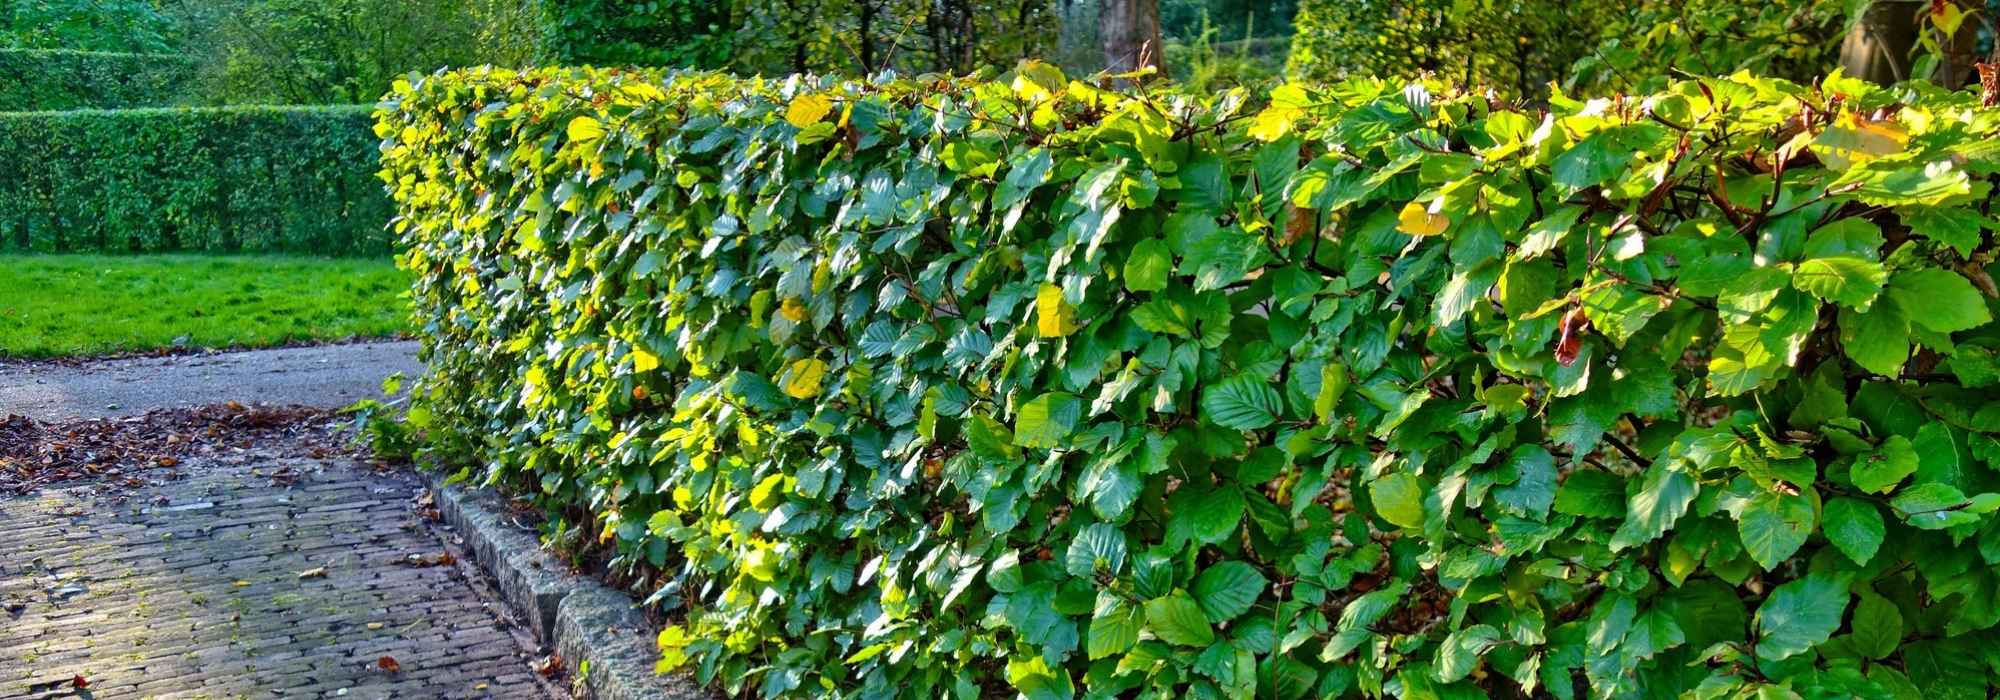
Planting a hedge of beech in bare roots
After planting, the finishing touches
Your bushes are planted, and you will enjoy them for many years. But don’t forget to “dress” the base of them with a good mulch: wood chips, pine bark, … to limit the proliferation of adventive plants that will compete with your bushes, prevent excessive water evaporation, and improve the structure of the soil.

Bark mulch
However, be careful not to use fresh materials as mulch, such as large quantities of grass clippings or even a mulch of ramial chipped wood (BRF) on newly planted young subjects. Indeed, the fungi and bacteria that decompose fresh organic matter need nitrogen to do their job. They will draw this mineral nitrogen directly from the soil to the detriment of your newly planted young bushes, which may appear unhealthy and stunted (yellowing foliage, growth delay, …). This is known as “nitrogen hunger.”
To remedy this problem, simply remember to feed your bushes from the start with a bit of compost or well-decomposed manure, placed at the bottom of the hole or trench at planting.
Nota bene: this phenomenon can also occur when you incorporate immature compost into your plantings.
Need to know more about mulching? Discover our tips: “Mulching, why? How”
One or two years later, when the mulch has practically disappeared (for the less durable), you can try planting some perennial ground covers for dry shade: Epimediums, Brunnera macrophylla, Geranium macrorrhizum, … This will look nicer while retaining all the benefits of mulching.
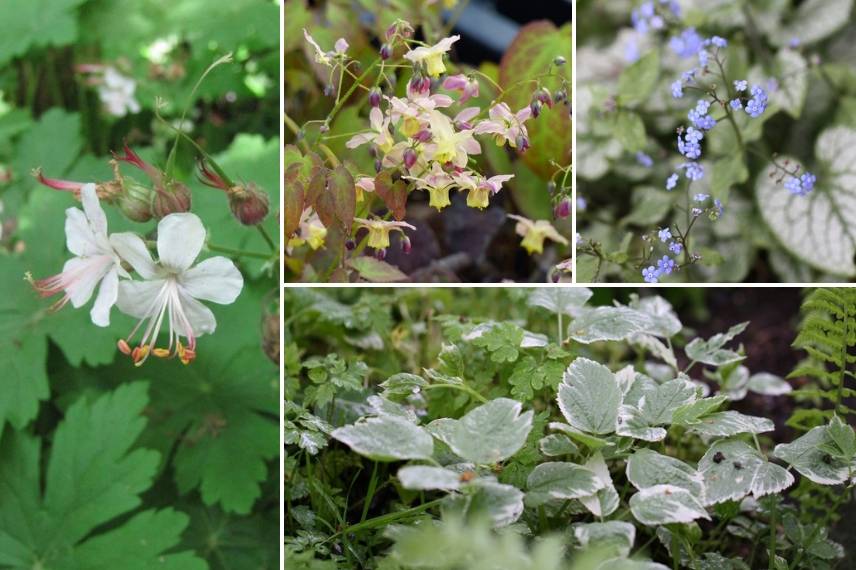
Some perennial ground covers: Geranium macrorrhizum ‘Spessart’, Epimedium x versicolor ‘Curpreum’, Brunnera macrophylla ‘Jack Frost’, Aegopodium podagraria ‘Variegata’
- Subscribe!
- Contents

Comments