


Installing a bird nest box in your garden is a good way to protect surrounding biodiversity. Although nest boxes are readily available commercially, these bird shelters are easy to make yourself from recycled materials. Terracotta flower pots turned into nest boxes become safe places for birds to nest. In this tutorial, we explain how to make a nest box from a terracotta pot, a DIY single and fun project to support biodiversity!
Tips for correctly installing nest boxes
Birds have specific comfort requirements when choosing a nesting site. A well‑designed and correctly installed nest box is an open invitation for birds to make their home with you. By offering them living space suited to their needs, you increase chances of attracting them to your garden.
Birds look for places where they feel safe to raise their young. A good nest box therefore must be protected from predators, such as cats and rodents, and from bad weather. Nest box size must be adapted to species you wish to attract. For example, tits will need smaller space than blackbirds. A sensible entrance‑hole size and good waterproofing are also essential.
Where to install the nest box?
A nest box facing south‑east offers ideal protection from direct bad weather and reduces exposure to excessive sun heat. Nest box should be sufficiently shaded during summer.
- If you install several nest boxes, keep sufficient distance between them to minimise territorial competition between birds.
- Avoid locations too close to branches where predators can easily access the nest box.
- Avoid areas heavily frequented by people and pets to give birds the tranquillity needed during nesting.
- Optimal height for installing a nest box can vary depending on species you want to attract. Generally, it is recommended to install the nest box on a post or suspended from a branch, at least 2 to 4 metres above ground to make it accessible to birds while protecting them from pests. Robins and blackbirds, however, prefer more accessible nest boxes located less than 1.5 m above ground, often hidden in dense vegetation, tall weeds or under the blanket bog of bushes.
- Avoid painting your nest box in bright colours, as they drive birds away.
When to install a nest box?
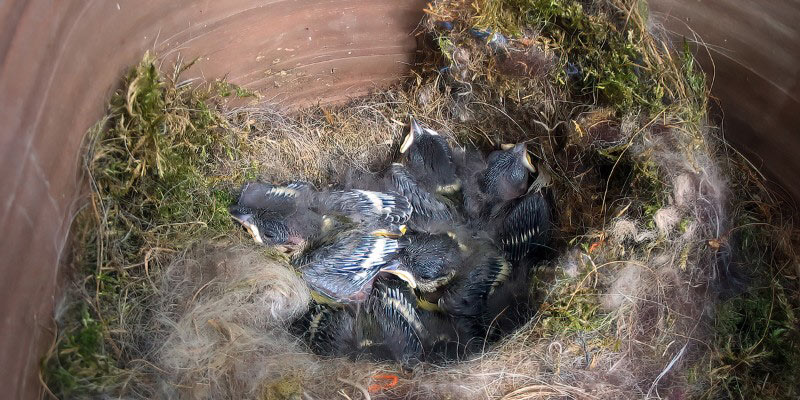
Install the nest box in autumn or winter so it is ready for nesting season in spring. Birds begin to look for nesting sites from late winter and early spring. By installing a nest box in autumn, you ensure it will already be in place and ready to be discovered by birds as soon as they need it. Some very cold‑sensitive birds such as the wren, or foresighted species like the tits and the robins, sometimes use nest boxes as shelters during the coldest months. This gives them time to get used to the presence of the nest box in their environment and to accept it as a potential nesting site.
How to make a 100% natural nest box step by step?
You can repurpose a single terracotta pot into a welcoming, weather‑resistant nest box! We chose to leave the pot natural, without painting it, although that is possible, and to assemble everything without glue. It blends easily into the surroundings and is simple to hang on an old ivy‑covered wall, on a house façade or on a tree branch. Start by choosing a terracotta horticultural pot 16 to 20 cm in diameter. An entrance‑hole diameter of 3.5 cm is sufficient to house small birds such as robins and tits.
Necessary materials
- Terracotta pot at least 20 cm in diameter
- Terracotta saucer (depending on chosen method)
- Strong cord, thick string or a metal wire to suspend the nest box
- Drill with a bit suitable for terracotta
- Straw
- Nail to secure the nest box
Method 1
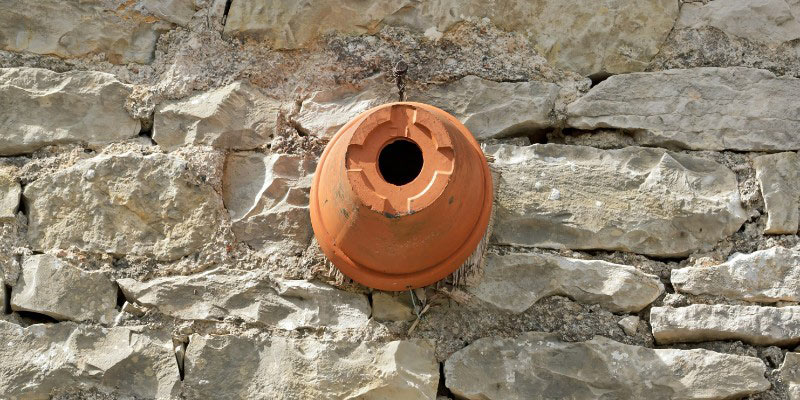
The drainage hole will serve as the entrance hole: it must be large enough to allow birds to enter, but not so large that predators can get in.
- Using a small drill bit, make two small equidistant holes in the rim of the pot to attach the nest box with cord or metal wire.
- Pass the cord or metal wire through the pot holes.
- Fill the pot with straw.
- Hang the refugium using a nail on a tree or any other solid, relatively flat support.
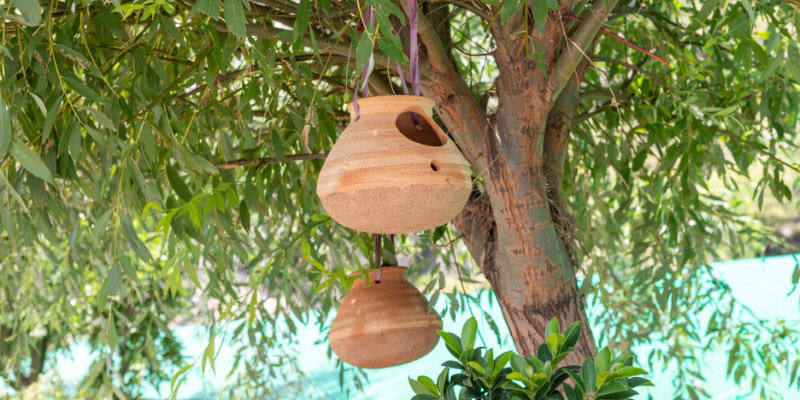
Method 2
Prepare a saucer the same diameter as the flower pot; it will serve as the floor of the nest box.
- Place your pot upside down, drainage hole facing up.
- Using a hole saw (or with a nail and a hammer, tapping gently), cut an entrance hole halfway up the pot.
- Fill the pot with straw.
- Similarly, place the saucer upside down and carefully drill a hole in the centre of the inverted saucer.
- Thread the rope through the pot's drainage hole and then through that of the saucer.
- Secure it by making a big node under the saucer.
- Hang the nest box from a branch of a tree.
Nest box maintenance
To ensure longevity of your nest box and wellbeing of birds, regular maintenance is necessary:
- Empty the nest box at the end of summer or in autumn, after nesting season, removing all used nesting materials.
- Check nest box condition regularly to ensure it remains safe and welcoming.


Comments