


Creating a rain chain for your garden is not only a rewarding DIY project but also an elegant way to manage rainwater. Inspired by Japanese tradition, these installations bring a zen, eco-friendly touch to your outdoor space. Let’s explore how to design your own rain chain, first looking at its fascinating history before guiding you through the build process.
The origin of rain chains
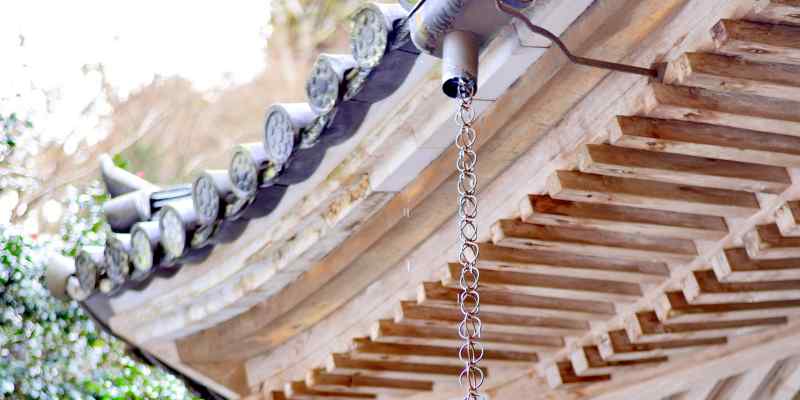
A rain chain is an alternative to traditional gutters. It consists of links or cups connected together and attached to the gutter. Rainwater flows down the chain, drop by drop, creating a pleasant visual and auditory effect.
Known as "kusari doi" in Japan, rain chains date back to the Japanese feudal era. Originally designed to channel water from temple roofs to the ground, they combine utility and aesthetics.
What is the purpose of a rain chain?
Beyond their aesthetic appeal, rain chains effectively direct water away from foundations of outdoor structures, such as garden sheds. They offer a charming alternative to traditional downpipes, particularly suited to small roof areas where water flow remains manageable.
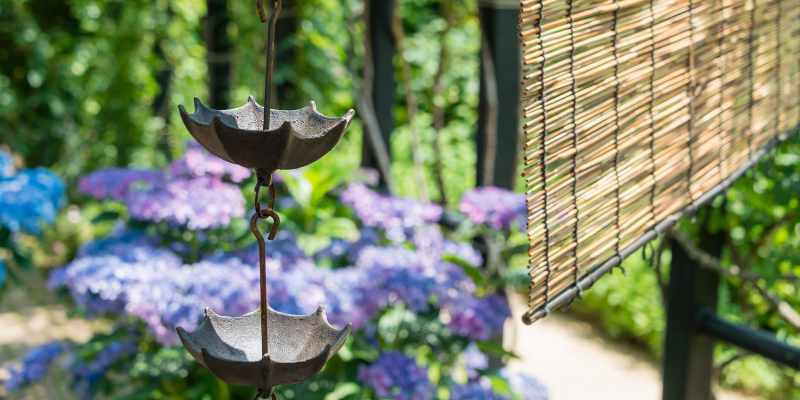
Moreover, the gentle murmur of water trickling along the links creates a serene atmosphere, ideal for relaxation and outdoor meditation. This natural, calming sound fosters a deeper connection with nature, inviting tranquillity and wellbeing in your own garden. Visually, rain chains can act as works of art, catching light and reflecting the surrounding environment. Their fluid movement and play of water add liveliness and elegance, making every corner of your garden more welcoming and fascinating.
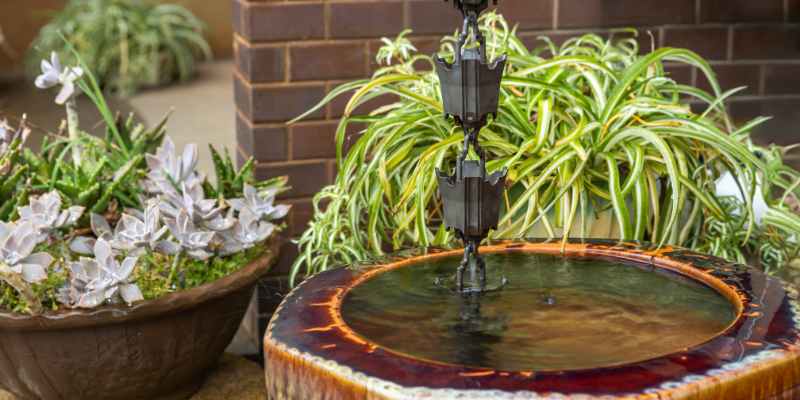
From an ecological perspective, this kind of installation helps slow rainwater runoff and thus encourages its infiltration into the soil. Channelled water can be collected in a water butt for watering, and birds and insects may also drink from it.
Note: it is important to be honest about one point—this type of water flow is less effective than a conventional gutter during heavy downpours.
Material and design
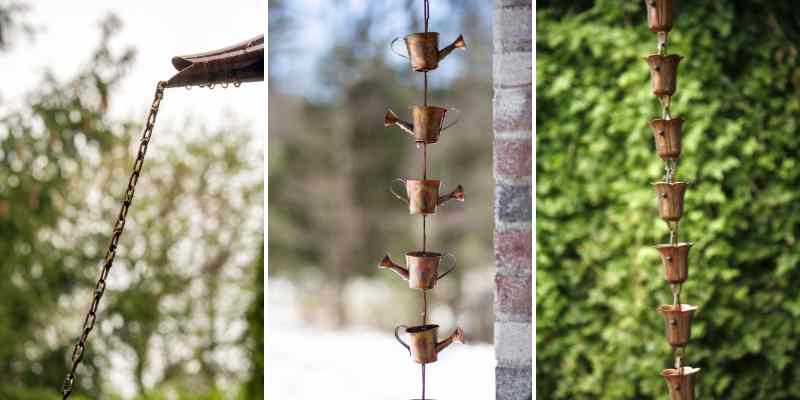
To make a rain chain, copper is an ideal material thanks to its durability, beauty and ability to develop an attractive patina over time. Galvanised steel or aluminium can also be good options, offering rust resistance and lightness.
Steps to create a rain chain:
- Material choice: Choose links in copper, galvanised steel or aluminium. Copper is especially prized for its evolving aesthetic.
- Preparation: Measure required length from roof edge to ground to determine chain length.
- Assembly: Connect links together. If using copper, you can solder links for extra strength. For a simpler project, opt for preformed links that assemble easily.
- Fixing: Install a reducer or adaptor at end of existing gutter downpipe to hang the chain. Ensure chain hangs vertically and is taut enough to guide water effectively.
- Anchoring to ground: To prevent chain moving in wind, attach lower end to a weight or anchor it in a water collection container.
Maintenance to plan
Using a crapaudine, a device placed at chain entry, is essential to filter leaves, twigs and other debris, preventing buildup in the links.
In addition, it is recommended to check chain and crapaudine condition regularly, especially at seasonal change, to remove accumulated debris and ensure smooth water flow. For metal chains such as copper or steel, occasional cleaning with suitable products can also help preserve their shine and prevent corrosion.


Comments