


Growing milkweed in pots
Our tips for success
Contents
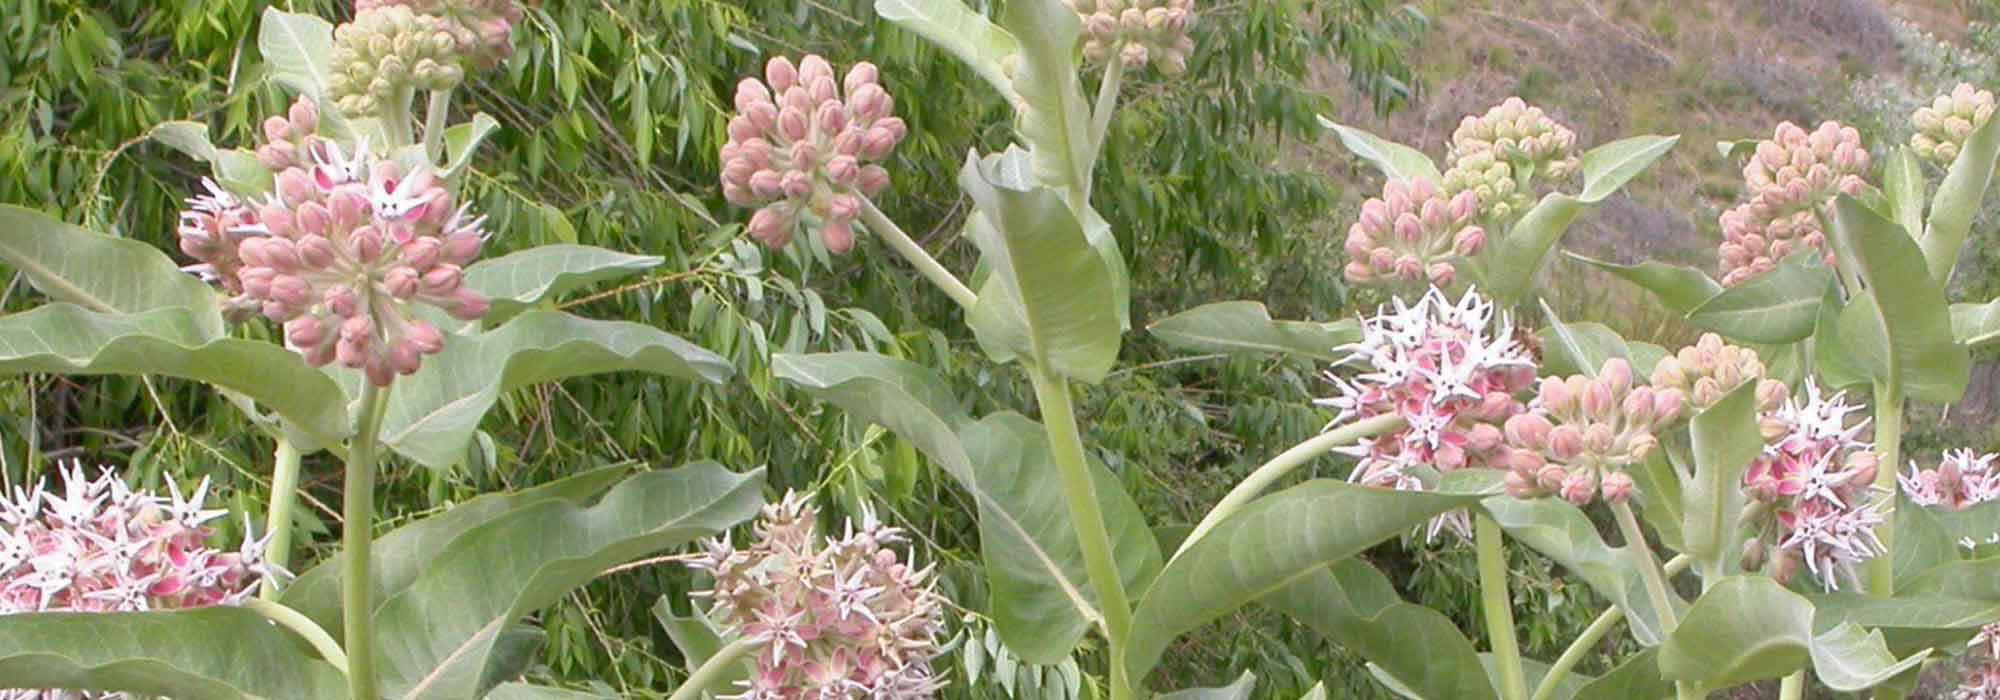
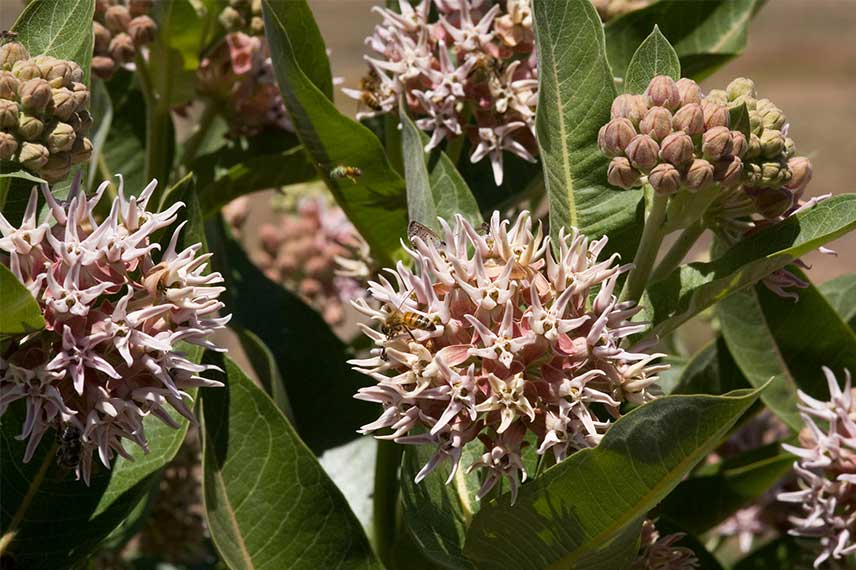
Milkweeds are woody perennial plants with star-shaped flowers grouped in inflorescences of pink with speciosa, syriaca, and sullivanti; mauve with incarnata; orange with tuberosa; or white. Their lanceolate green foliage creates a striking contrast with the myriad of decorative flowers that bloom over the days. Melliferous, their summer flowering lasts from June to September.
The flower spikes of milkweeds measure between 40 cm and 1.5 m in height. They can be successfully grown in pots, with a preference for Asclepias tuberosa, which is more compact. This allows for the possibility of bringing in the more tender species under cover and containing the spread of the more adventurous ones.
Depending on the species and the colour of their flowering, they will add a natural or exotic touch to a sunny balcony or terrace.
Here are our valuable tips for successfully planting a milkweed in a pot to enjoy it for as long as possible!
Discover our range of milkweeds.
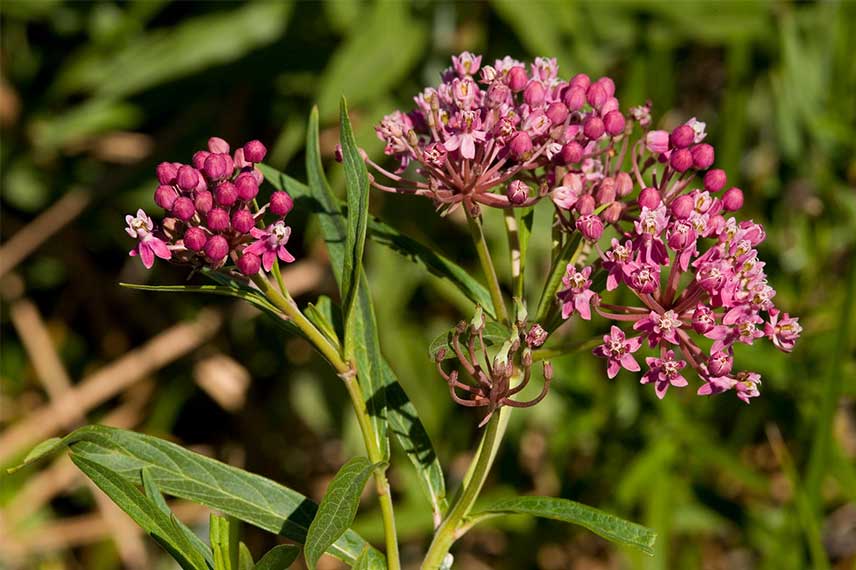
Asclepias incarnata ©Patrick Alexander, DP

Which pot to choose for Asclepias?
Choose a terracotta pot with a diameter between 40 and 60 cm that is deep enough as the root system of asclepias is well developed. Prefer terracotta, which is porate, over plastic. Ensure that the bottom is well-drained. The pot will help to channel asclepias such as syriaca (parakeet herb, parakeet grass, cotton herb) or incarnata with a sucker habit.
Read also
Asclepias: sowing, planting and careWhat exposure?
Asclepias thrive in sunny situations, with warmth and light to make the most of spectacular and breathtaking flowerings. In Mediterranean regions with blazing sun for much of the day, a partially shaded exposure may suit them well. In windy areas, place the pot sheltered from strong winds.
Position the pots near a window or a patio door to enjoy the frequent visits of pollinating insects and butterflies that come to collect nectar.
Asclepias speciosa © Patrick Alexander, DP
Discover other Asclepias
View all →
Available in 3 sizes

Available in 1 sizes

Available in 1 sizes

Available in 1 sizes

Available in 1 sizes

Available in 1 sizes

Available in 1 sizes

Available in 1 sizes

Available in 1 sizes

Available in 1 sizes
What substrate?
Adapt the nature of the substrate according to the cultivated asclepias. Asclepias incarnata and speciosa prefer a cool soil that does not dry out, while Asclepias syriaca and tuberosa prefer dry, poor soil. Use a light, draining potting mix mixed with coarse sand. Optionally, add a portion of garden soil.
Read also
Pairing swamp milkweed or AsclepiasWhen and how to plant milkweed in a pot?
Asclepias should preferably be planted in spring, once the last frosts have passed. To do this:
- Place the asclepias pot in a basin of water to rehydrate the root ball
- Next, spread a layer of drainage to allow excess water to escape (gravel, sand, or small stones will do)
- Fill the pot with a mix of horticultural compost (2/3) and coarse sand (1/3)
- Once the air bubbles have disappeared, remove the plant from the basin and plant it
- Fill any gaps with compost and firm the soil around
- Water well to encourage establishment
For tall species such as incarnata and incarnata ‘Ice Ballet’, which can reach heights of up to 1.20 m and sullivanti up to 1.50 m, place a stake at planting to prevent the stems from bending in the wind.
How to care for potted milkweed?
Wintering potted Asclepias
Potted cultivation allows for the protection of tender species such as curassavica, which can tolerate temperatures down to 5°C; incarnata down to -10°C; sullivanti, fascicularis, speciosa, and tuberosa are the hardiest, tolerating down to -15°C. However, be aware that potted plants have lower hardiness than those in the ground (count on one hardiness zone less). Pots on wheels are easier to move around.
Caring for potted Asclepias
- Don’t hesitate to pinch the stems in spring to encourage a more compact plant.
- Faded flowers can be cut back regularly or left, depending on whether you wish to enjoy the fruits and seeds that develop afterwards. Removing faded inflorescences can help extend the flowering period.
- A special note for Asclepias syriaca: allow the flowers to fade to ensure the production of very decorative and rather unique fruits, shaped like parakeets. You can harvest the fruits before ripeness to decorate vases, or wait for them to dry to produce seeds.
- The other asclepias produce pods filled with seeds, which, once dispersed, can reseed everywhere and may become invasive, even on a balcony, terrace, or patio. We recommend cutting faded flowers before they set seed.
- At the end of autumn, cut the foliage back to the ground. For tender species like Asclepias curassavica, often grown as a houseplant, cover them with a thick layer of leaves or bring them indoors. As a precaution, wrap them in fleece or a thick layer of straw to protect the base.
- When your asclepias starts to feel cramped in its pot, divide the stump in autumn, every 3 to 4 years. Replant each fragment immediately and water generously. Remember to wear gloves as the stems contain a latex that can be irritating!
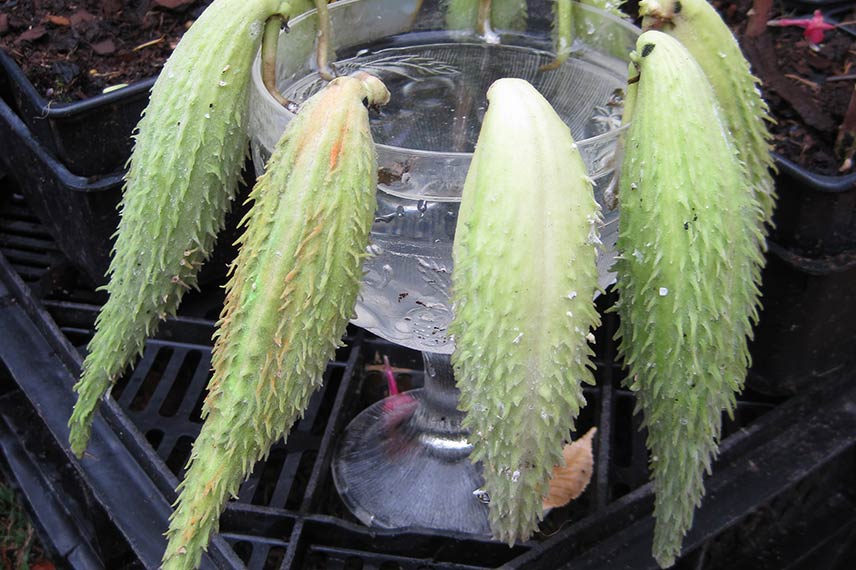
Decorative fruits of Asclepias syriaca. © S.Chaillot
Watering and fertilising
Watering
You’ll need to adjust the quantities of water and the frequency of watering based on the Asclepias being cultivated.
- Asclepias incarnata requires a moist and cool substrate. Water regularly, allowing the soil to dry out between two waterings. Also, mulch the surface of the pot to reduce the drying rate of the substrate.
- Asclepias syriaca and tuberosa can tolerate periods of drought. Occasional rain will be sufficient unless there is a prolonged dry spell. In that case, water thoroughly once a week.
Feeding
Top-dress with a bit of decomposed compost and rake it in to incorporate it into the surface, or apply liquid fertiliser once a month during the growing season.
For further reading
Discover our article Asclepias: sowing, planting and care.
- Subscribe!
- Contents

Comments