


Growing Iris reticulata in pots
To flower sunny terraces and balconies
Contents
The Iris reticulata is a bulbous plant for well-drained, dry soil in summer, which cannot survive in heavy, clay soils. So for amateur gardeners of Iris who do not have the perfect conditions to welcome it into their garden, there is only one solution: pot planting! Thanks to its small size, all varieties of reticulate Iris are perfectly suited for this. This dwarf Iris is actually considered an annual plant because, after flowering, the bulb will divide into bulbets that will not flower for 2 to 3 years. In full sun, this Iris pairs beautifully with other flowering bulbs in a display of potted plants: Cyclamen, Hyacinths, Snowdrops, and Daffodils. Discover everything you need to know to successfully grow Iris reticulata in pots or containers and achieve a beautiful flowering at the end of winter.

What type of pot to choose?
Terracotta pots are to be preferred. They are more breathable than plastic pots, which is better for the reticulate iris that rots in stagnant moisture. The bottom of the container should be pierced to allow excess water to drain away.
If you choose to plant only Iris reticulata in a classic round pot or a bowl, the diameter should be about 30 to 40 cm, with a minimum depth of 20 cm. For planting in a window box, it should be wider than it is deep.
It is also possible to grow Iris reticulata bulbs in layers with other bulbs.
Choose a wide terracotta pot
Read also
Iris reticulata : planting and growingWhat substrate for reticulate Iris in pots?
To bloom well, the Iris reticulata needs a well-draining substrate, neutral or slightly alkaline, moderately rich and drying out in summer. Waterlogged soils can be fatal for it. A drainage layer at the bottom of the container is therefore essential.
Discover other Iris Reticulata
View all →
Available in 1 sizes

Available in 1 sizes

Available in 1 sizes

Available in 0 sizes

Available in 1 sizes

Available in 1 sizes

Available in 1 sizes

Available in 1 sizes

Available in 1 sizes

Available in 1 sizes
When and how to plant Iris reticulata in a pot?
Planting period
Ideally, Iris reticulata should be planted in pots from September to October, for a flowering period from February to May depending on the varieties.
Necessary equipment
- Iris reticulata bulbs
- garden soil, sand, and potting compost, in equal quantities
- clay balls or gravel
- a pot, basin, or planter
Planting the bulbs
- Place a layer of clay balls or gravel at the bottom of your container for effective drainage.
- Mix the soil, sand, and compost.
- Fill your container with compost up to 2/3 of its height.
- Position your bulbs with the tip facing upwards, spacing them 5 cm apart. They should be planted at a depth of about twice their height, which is approximately 8-10 cm. Of course, the number of bulbs for a pot depends on the width of your container, but they must not touch.
- Cover with substrate, firm down, and water moderately.
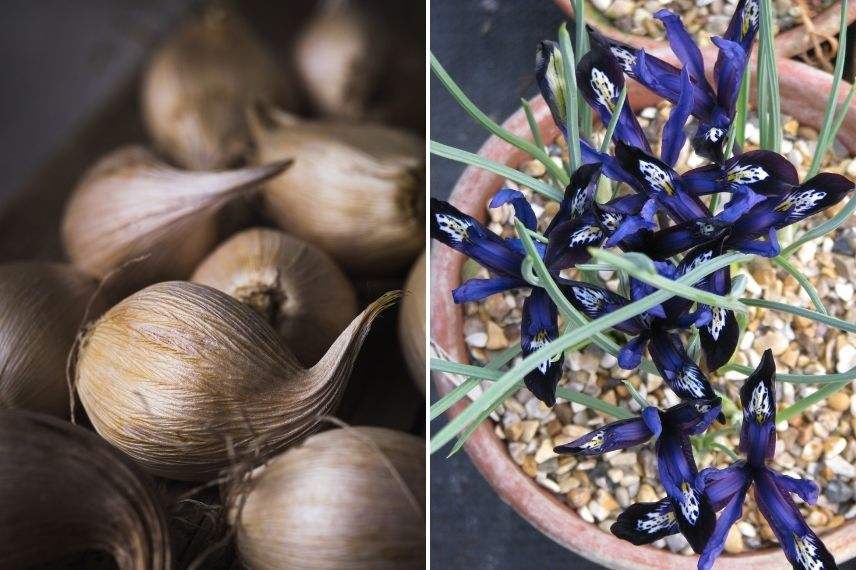
Bulbs of reticulate iris and Iris reticulata ‘Blue Note’ in pot (photo Peganum – Flickr)
Read also
Dutch iris: planting and growingWhat exposure for the reticulate Iris in a pot?
The reticulate iris prefers sunny exposures. This early bulb plant indeed produces more flowers in such conditions. These dwarf irises can also bloom in slightly shaded situations. Place the pot out of the drying wind, for example near the wall of a house. During very rainy periods, keep the pot sheltered under a roof or on a covered terrace to prevent the soil from becoming waterlogged.
How to care for Iris reticulata in pots?
- Watering of the reticulate iris should be moderate, but regular. During flowering, water the pot as soon as the substrate is dry. And remember to empty the saucer of your pot if water is stagnant. During summer, when it is in dormancy, allow the substrate to dry. This bulbous plant can indeed withstand drought.
- Fertiliser applications should be made after flowering. Choose a special fertiliser for bulbs.
- During flowering, regularly remove faded flower stems for aesthetic purposes, but also to prevent the plant from exhausting itself producing seeds. However, if your aim is to multiply your irises by sowing, do not cut the flower spikes so you can collect the seeds. You can sow them later, in autumn. As with all bulbous plants, it is important to only cut the foliage once it has withered. Allow it to yellow. This way, the plant can continue to store reserves.
- In autumn, after their first flowering, you can dig up the bulbs from their pot and replant them in the garden soil. If you wish to keep the bulbs in pots, replace the substrate. However, in both cases, you will need to wait before seeing them flower again.
- Native to the Caucasus Mountains, Iris reticulata is a hardy bulb that withstands cold well. However, the soil in the pot can freeze, especially if you live in a cold region. Therefore, store your pot in a frost-free place, such as an unheated garage. The ideal winter temperature should be between 1 and 8°C.
Potential diseases and pests
Mushrooms can cause cryptogamic diseases in Iris reticulata, such as heterosporiosis, fusariosis, or rust. Generally, excess moisture and heat are the culprits. This leads to the rotting of the bulbs. A treatment with a fungicidal is recommended in case of contamination. Planting in well-drained substrate and moderate watering can prevent the rot of these small spring bulbs (2 centimetres in diameter).
If your pots of reticulate Iris are being attacked by snails and slugs that enjoy feeding on the foliage, discover our guide to fight slugs effectively and naturally.
Also, find all our tips for caring for Irises.

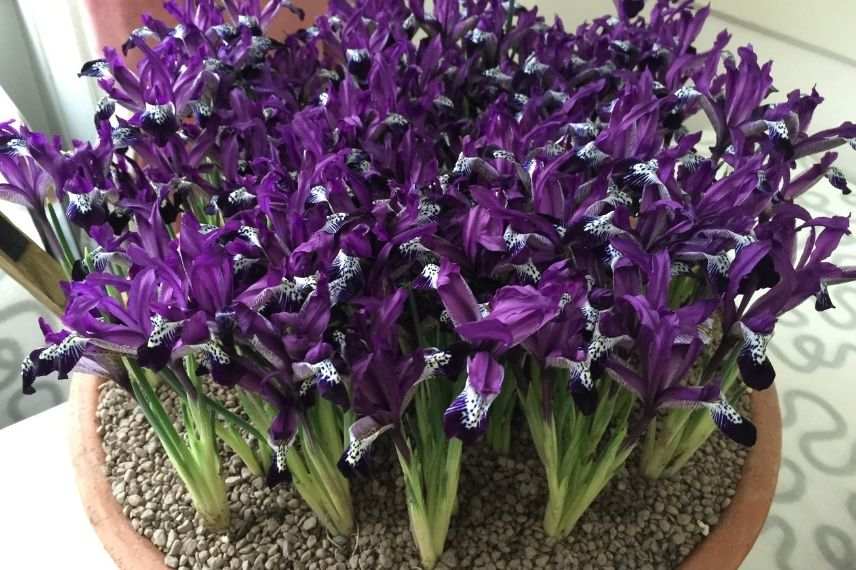
Iris reticulata ‘Katharina Hodgkin’ in pot
For further reading
- Discover all our tips for planting Iris reticulata in the ground
- Subscribe!
- Contents

Comments