


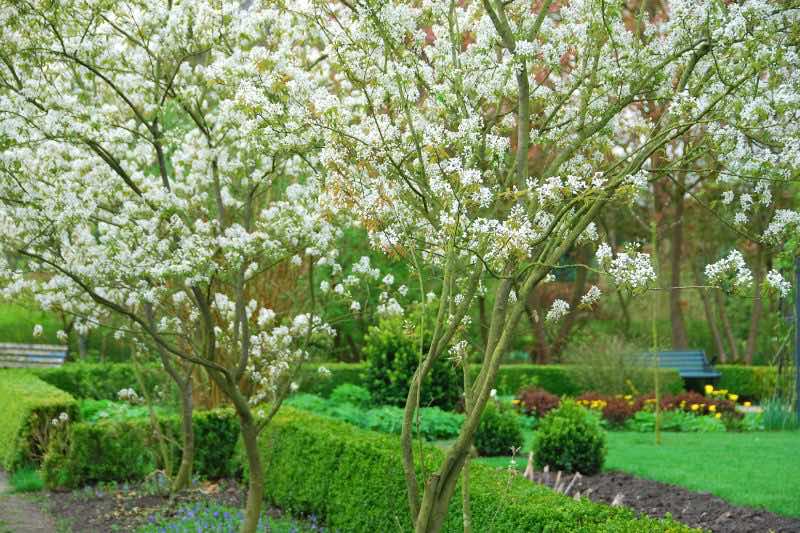
Amelanchier, this charming bush with white flowers, offers spring flowering, tasty berries and colourful autumn foliage. Amelanchier is not only an ornamental bush; it also plays an important ecological role. Its nutritious berries provide food for wildlife, and its flowers attract bees and butterflies, contributing to garden biodiversity. In this tutorial let's explore the simplest method to propagate it, propagation by cuttings, a technique both simple and effective.
Read the family sheet on amelanchier to learn more.
Why propagate amelanchier?
Propagating amelanchier offers several advantages. First, it's an economical way to propagate this bush without having to buy new young plants. Next, amelanchier, with its bright white spring flowers and berries attractive to wildlife, brings undeniable aesthetic and ecological value to the garden. By propagating amelanchier, gardeners can also preserve existing varieties.
Different propagation techniques
There are several methods to propagate amelanchier: propagation by cuttings, layering and separation of suckers. Each technique has its own advantages and can be chosen according to the gardener's specific needs and garden conditions.
- Propagation by cuttings: This is the most effective method to propagate amelanchier. It involves taking a branch from the parent plant to root and form a new young plant. This method is particularly effective at preserving characteristics of the original plant.
- Layering: Layering is a propagation method that encourages root formation on a part of the plant that remains attached to the parent plant.
- Separation of suckers: Suckers are shoots that emerge from amelanchier's root system and can be separated to form new young plants.
Layering is ideal for low, flexible branches, while separation of suckers suits plants that naturally produce shoots. These techniques preserve characteristics of the parent plant and are relatively simple to carry out. Let's focus mainly on propagation by cuttings, which simply requires taking semi-hardwood stems, providing detailed steps and tips to succeed with this propagation method.
When to take cuttings?
Propagation by cuttings of amelanchier, although relatively simple, requires careful preparation to ensure success. The ideal time to take cuttings is generally late summer or early autumn. Avoid periods of extreme heat or frost, as they can stress the plant and reduce chances of success for propagation by cuttings.

How to take cuttings?
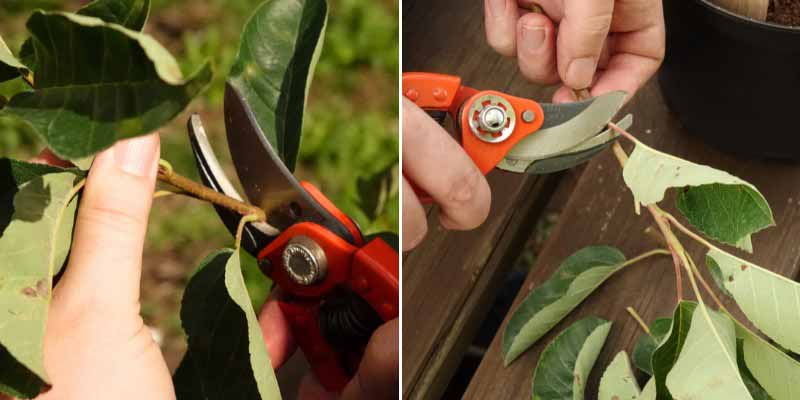
When taking cuttings from amelanchier, choose healthy, vigorous branches. Cuttings should have several nodes, from which new roots will emerge. Select semi-hardwood shoots — neither too young nor too mature — as they offer an optimal balance between flexibility and strength.
- Use a clean, sharp pruning shear to cut segments 15–20 cm long. Make the cut on the slant, just below a node, to maximise rooting surface.
- Remove leaves from the lower half of each cutting to reduce water loss through transpiration.
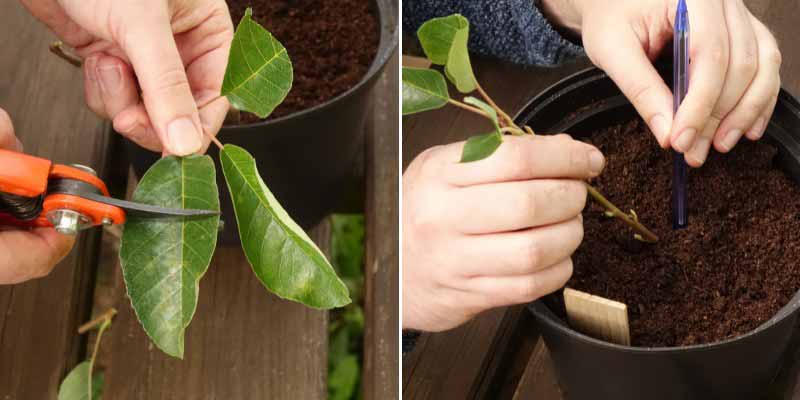
- If using a rooting plant hormone, dip the cut end of the cuttings into the solution or powder.
- Fill pots or trays with clay balls for the first few centimetres, then a mix of turf and perlite.
- Make a hole in the substrate with a pencil or stick and gently insert the cutting, ensuring several nodes are below the substrate surface.
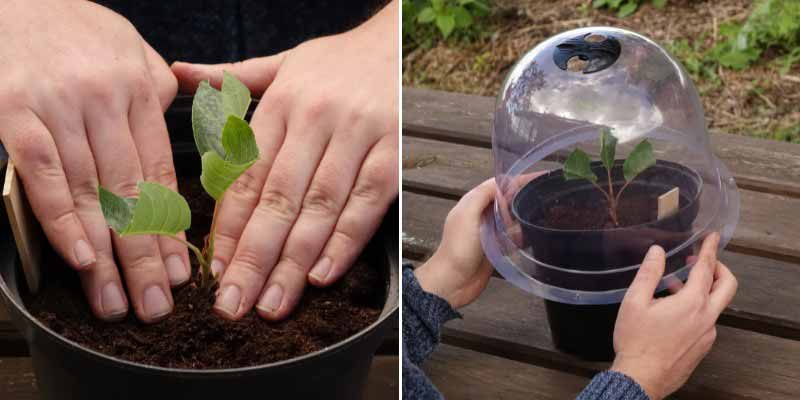
- Water substrate lightly to moisten without saturating.
- Place pots where cuttings will receive indirect light. Avoid full sun exposure, which could dry out cuttings.
- To maintain high humidity, cover pots with a clear plastic bag or place under a glass cloche. Ensure regular ventilation to avoid mould build-up and check leaves do not touch glass or plastic walls.
First signs of rooting can take several weeks. During this time keep substrate slightly moist. Avoid overwatering, as waterlogged substrate can cause rotting of cuttings.
After a few weeks, gently test cuttings' resistance by pulling lightly. Resistance indicates roots are beginning to form. Once cuttings are well rooted, they can be transplanted into richer substrate and gradually exposed to a wider range of light and temperature conditions to harden them to their future outdoor environment.
Care
After successfully propagating amelanchier by cuttings, providing appropriate care is crucial :
- Watering: vital for survival of cuttings. Important to keep substrate evenly moist, but not waterlogged. Use a spray bottle to gently moisten substrate without disturbing cuttings.
- Light: once cuttings show signs of vigorous growth, gradually accustom them to stronger light conditions.
- Fertilisation: in early stages after taking cuttings avoid fertilising them. After a few months, when cuttings are well established, start applying a low-dose balanced fertiliser to encourage healthy growth.
When cuttings are strong enough, start hardening process to prepare them for outdoor life. Place them outside for a few hours a day in a sheltered spot, then gradually increase duration and intensity of exposure.
Equipment
You will need:
- A clean, sharp pruning shear for taking cuttings. Essential to disinfect pruning shear to avoid disease transmission.
- A cutting substrate, such as a mix of turf and perlite, which promotes drainage while retaining necessary moisture.
- Clay balls to place at the bottom of the pot.
- Pots or cutting trays to place cuttings.
- A rooting plant hormone, although optional, can increase chances of success with cuttings.
- A spray bottle to maintain humidity around cuttings.


Comments