


Making a herbarium is a creative, fun, eco-friendly and easy activity to carry out. It is ideal for keeping children occupied at weekends or during the holidays, while introducing them to botany. When and how should you collect and dry leaves or flowers, and how can you easily create a pretty notebook and stick the dried specimens inside? Discover in our tutorial the step-by-step process to make a herbarium for children, young and old!
Collecting plants
Collecting the leaves and flowers that will make up your herbarium is the most important step.
The best time and places to pick
Ideally, choose a sunny, fairly dry day to look for the flowers and leaves that will fill your herbarium and make sure it has not rained for several days. The drier the leaves or flowers at the time of picking, the shorter the subsequent drying time will be. Spring and summer are perfect for gathering charming flowers, while autumn days are ideal for collecting pretty coloured leaves in a variety of sizes and shapes.
Enjoy a nature walk with the family: a stroll in a forest or along a stream, places where opportunities to discover all kinds of vegetation abound. You do not necessarily need to travel far to find suitable spots, but always respect private property, nature reserves and protected areas. A walk in the garden or a trip to the park can also be enough, especially with younger children.
Bring a pruning shear, or if not available, a pair of scissors to cut leaves and flowers cleanly rather than tearing them off. Also take a basket or small paper bags to store your finds as you go, so you don’t crush the more fragile specimens.
Picking tree leaves and flowers with children can be an opportunity for many learning moments. It’s a chance to talk about the life of a leaf: how it is born and grows, how it dies and falls, and how it can later be recycled. With older children, you can also use the time to identify the different leaves and flowers you collect. To help, look for a guide with precise descriptions for identification: you can then take the time to observe your specimens to learn which plants they come from. If you don’t have a suitable book, you can also use smartphone apps that identify plants.
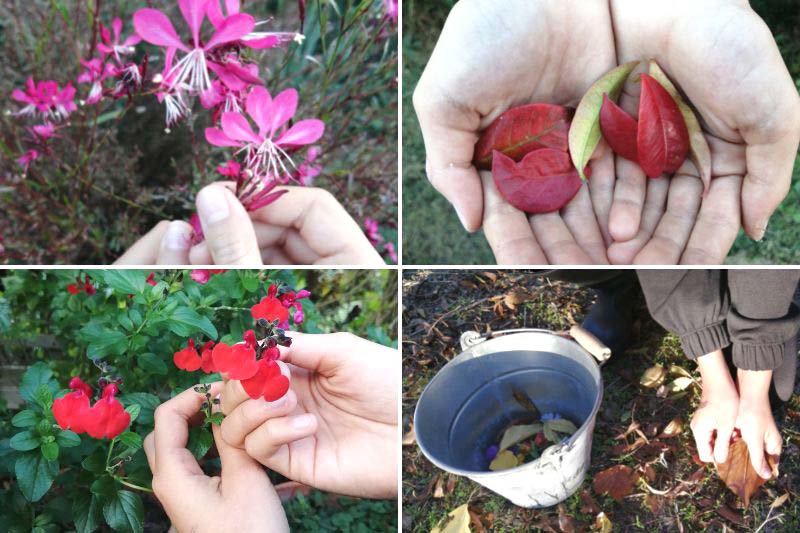
Where possible, gather leaves and flowers that are reasonably thin and small so they will fit into a herbarium. In any case, choose the best-formed specimens, those that deserve a place in your herbarium.
→ For the notebook-making step described below, you will also need to find a few small straight branches that are solid enough.
Several outings to learn more
Generally, a single outing is not enough to make a leaf or flower herbarium. It can be useful to visit different sites to vary the species, and to go out in different seasons to diversify the collection. Each time, you have a new chance to awaken children to nature, teach them to observe, unplug from screens and live more harmoniously with their environment.
Drying flowers and leaves
What do you need to dry your finds?
- the leaves and flowers from your collection
- newsprint or kitchen paper
- a heavy object such as a wooden board, a large book or, if you have one, a plant press
Drying flowers and leaves, step by step:
- As soon as you return from your nature walk, sort your haul: remove damaged specimens, strip excess leaves from flower stems...

- Place leaves and flowers so they can dry between two sheets of newsprint or kitchen paper, without overlapping. Arrange them with a few centimetres between each so they do not stick together as they dry
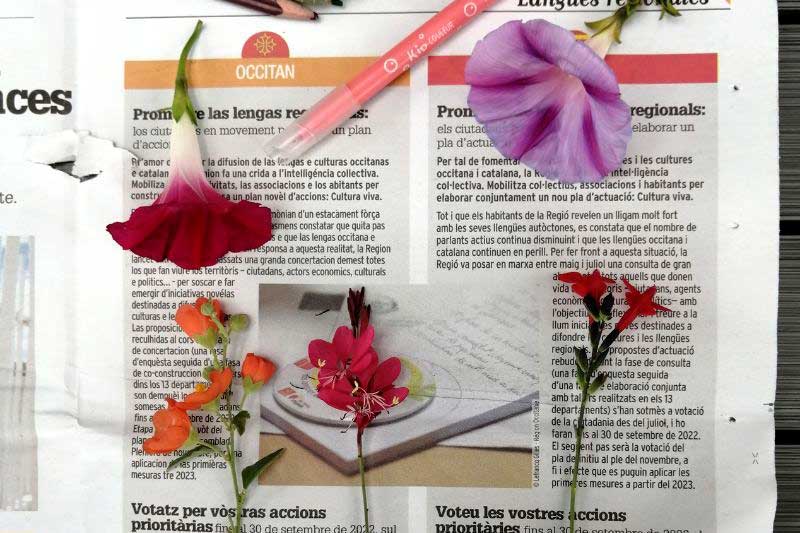
- Put the heavy object on top: this weight will flatten your plants. If space is limited, you can stack several layers of paper containing your specimens or place them between the pages of a large book. Take care that leaves and flowers stay in position when the pages are closed, and be aware of possible stains in the book (sap, water, flower pigments, mould...).
Allow two to three weeks for optimal drying. Do not underestimate this step: drying times vary between species and some leaves take longer than others. For good preservation, leaves must be completely dry. Check the plants regularly during drying: if you spot any signs of mould, change the sheets of newsprint or absorbent paper to prevent moisture build-up.
Making the herbarium
The work that follows collecting leaves and flowers is just as enjoyable... for children and the adults who accompany them! You will be able to create and decorate a notebook together and prepare the spaces where you will stick the leaves and flowers once they are dry. For example, a four-seasons herbarium is particularly interesting to make: add leaves and flowers month by month and watch vegetation change. You can make a herbarium themed on wildflowers, "flowers from my garden" to keep long memories, or an autumn herbarium with all shades of autumn colour. If you want to break away from traditional herbariums, feel free to present yours in a collage style, according to your children’s creativity.
What you need to make your herbarium
I suggest making a personalised homemade herbarium to stimulate creativity; it is easy to do even with very young children and with very little material. Depending on children’s ages, you will simply need to help them during the notebook assembly steps.
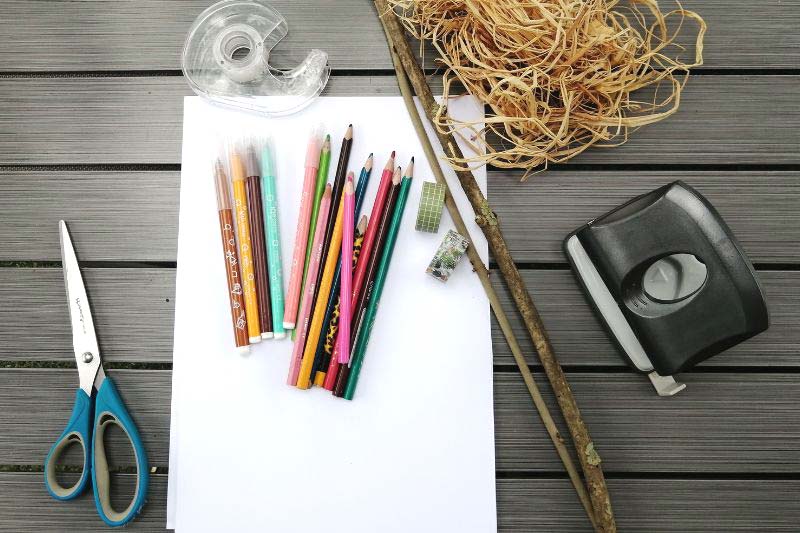
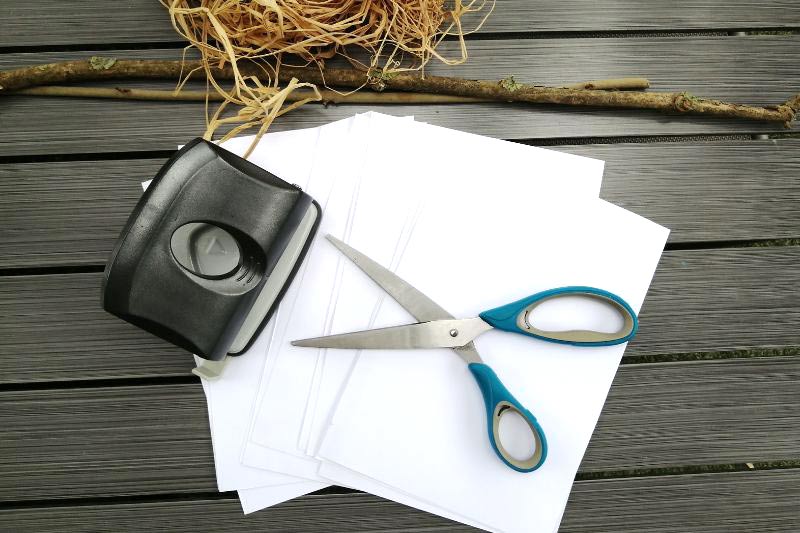
- thick A4 paper (Canson-style)
- adhesive tape to stick dried leaves and flowers in your notebook. It can be plain or decorative (scrapbooking tape)
- a hole punch
- felt-tip pens and/or coloured pencils
- raffia or string
- the small branches collected on your walk
- pruning shear
Making the herbarium, step by step:
- Fold the A4 sheets in half and cut them along the fold into two equal pieces. The number of sheets will depend on what you have available and/or the number of pages you want in your herbarium (around ten is enough to keep children engaged without boring them)
- Group the sheets together
- Punch two small holes along the left-hand edge of your half-sheets (all in the same place) using the hole punch (work with two half-packs of sheets if they are too thick)
- Cut a twig to the vertical length of the pages with your pruning shear
- Attach the twig to the sheets by threading raffia or string through the holes. Tie nice secure knots, but do not tighten too much so the pages turn easily
- Start by asking children to choose a title for their herbarium and make a lovely cover, inspired by them: "my garden herbarium", "the herbarium of..." with the child’s name, etc.

- You can then stick the dried leaves and flowers according to the chosen theme... or freely! Attach them with small pieces of adhesive tape, transparent or decorated, following the children’s inspiration. Explain that the result should not be overcrowded, but should highlight their lovely flowers and leaves.
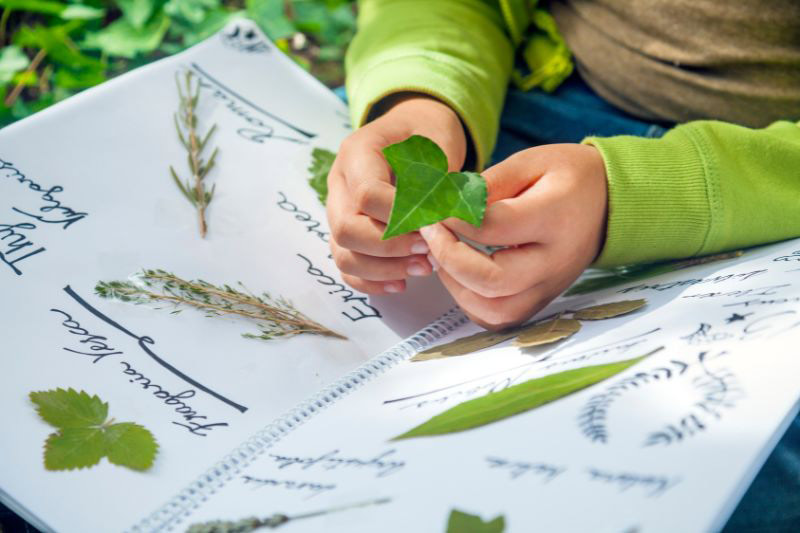
- If you have identified your specimens, have the children write their names underneath or beside them. It’s fun to see that some plants have rather strange names such as "Gueule-de-loup", "Barbe-de-bouc" or "Arbre aux 40 écus"!
Ready-made notebooks, to structure the design steps
If you lack inspiration, time or materials, you can easily find ready-made herbarium notebooks online or simply buy pretty small blank notebooks and use existing models as inspiration to prepare yours.
Ready-made herbarium books, often designed with attention to layout and presentation, will encourage children to take care over their work. They can be found in specialist shops. They will give you ideas of which leaves to collect and objectives to aim for, which can be both motivating and educational. They may also include spaces to add information about the collected leaf or flower, making the activity as enriching as possible!


Comments