


Iris reticulata: Planting and Growing
Contents
Iris reticulata in a nutshell
- Iris reticulata are among the first irises to flower, as early as late winter!
- They adapt well to dry gardens and rockeries, as well as container cultivation
- These miniature irises are perfect for enlivening the front of a flower bed or border
- They offer pretty flowers of rare delicacy, with delicately coloured patterns
- These are easy-to-grow small bulbs; Iris reticulata are hardy, drought-resistant and rarely susceptible to disease
Our Expert's Word
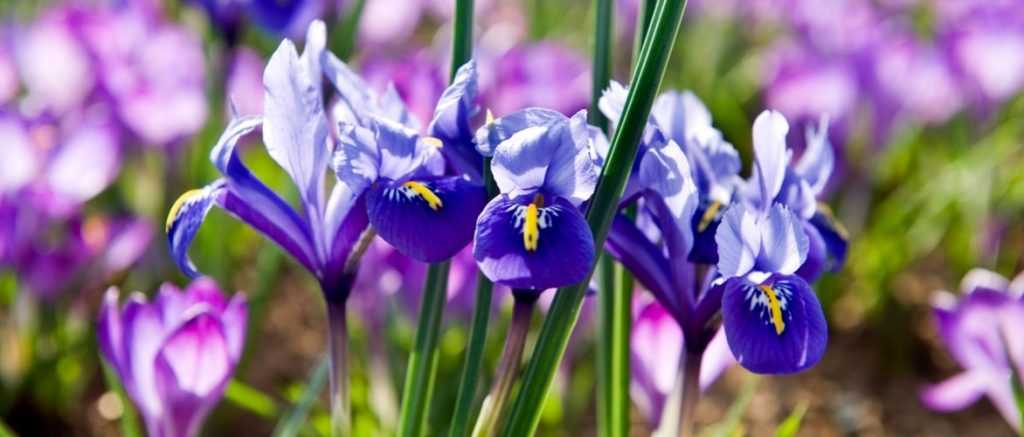
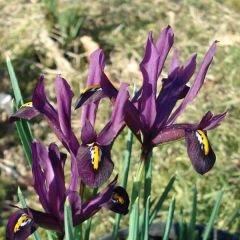
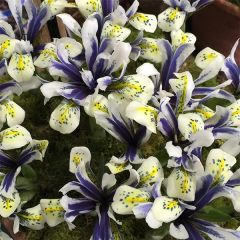
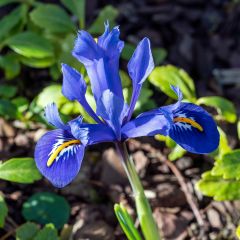
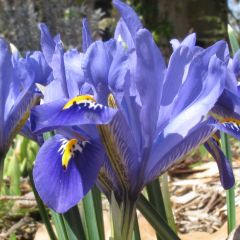
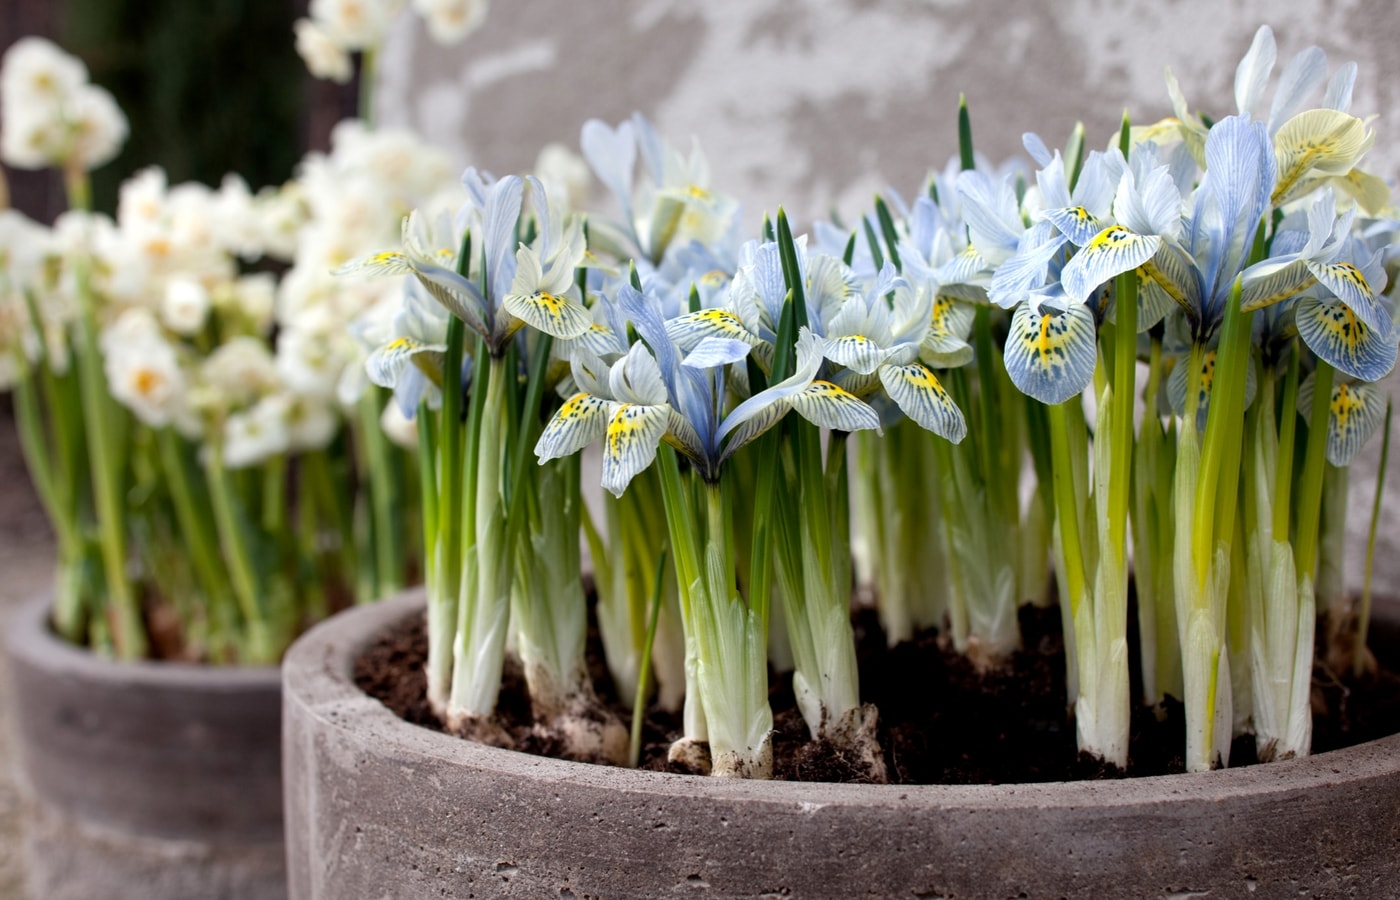
Iris reticulata are dwarf irises that bloom in late winter, in February or March. We love the stunning deep blue flowers of Iris reticulata ‘Harmony’ or the delicately coloured blooms of Iris ‘Katharine Hodgkin’. The flowering of these small bulbs is often blue or violet, sometimes white or yellow. These flowers boast exceptional details, with petals speckled in orange-yellow, white or black, giving them a distinctive style and rare delicacy.
This is a miniature iris, which must be placed at the front of borders or in pots. It adapts very well to rock garden planting. It is fully hardy and requires little maintenance. It tolerates drought well but dislikes excess moisture, which can cause the bulbs to rot. Grown in well-drained, sunny soil, it is quite resistant to disease.
Reticulated irises are perfect for bringing colour to the garden even before spring arrives! They offer a much earlier flowering than garden irises (Iris germanica). They brighten up borders and rockeries, adding small splashes of vivid colour. They pair beautifully with other spring bulbs: ipheions, chionodoxas, crocuses… Once their flowering is over, Iris reticulata go dormant and fade into the background. They are easy to divide and can even naturalise if conditions suit them. Discover the different varieties and all our tips for growing them successfully!

Botany
Botanical data
- Latin name Iris reticulata
- Family Iridacées
- Common name Iris réticulé
- Flowering février, mars
- Height environ 15 cm
- Sun exposure soleil
- Soil type drainant
- Hardiness - 30 °C
The Iris reticulata is a small bulbous perennial plant native to the Caucasus Mountains: it grows wild in Georgia, Iran, Iraq, Turkey, and even as far as Russia, in open, often rocky environments. It is fully hardy and can withstand temperatures as low as -30°C.
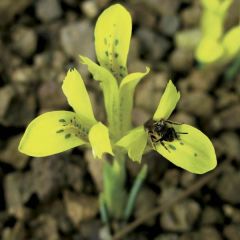
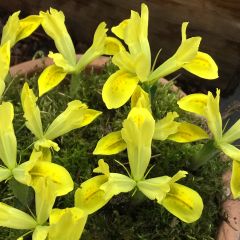
The Iris reticulata belongs to the Iridaceae family, which includes 1,800 species of plants, often with elegant and colourful blooms: crocosmias, gladioli, crocuses… Irises themselves offer a wonderful diversity, with over 200 species and numerous cultivated varieties. The most common in cultivation is the Bearded Iris (Iris germanica), but there is also the Japanese Iris (Iris ensata), the Dutch Iris, Iris sibirica, or Iris pseudacorus. The name Iris comes from Greek and means “rainbow”. The Iris danfordiae is a dwarf iris very similar to Iris reticulata, with yellow flowers and grown in the same way.
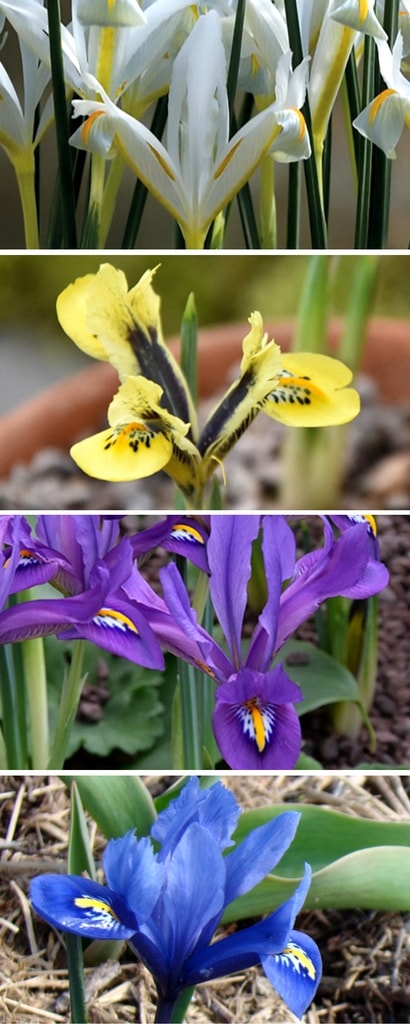
Netted Irises offer a beautiful range of colours! From top to bottom: Iris reticulata ‘Natascha’, ‘Orange Glow’, ‘Scent Sational’, and ‘Harmony’
Iris reticulata are small-sized plants, quite discreet. They typically grow to around 15 cm in height, occasionally reaching up to 20 cm. (Nothing like the Iris germanica, which can grow up to 1 m tall!) They form small clumps of upright leaves.
The Iris reticulata bears stunning flowers, large in proportion to the rest of the plant: they can measure up to 7–8 cm in diameter. They are solitary and carried on bare stems. Like other irises, the flowers of Iris reticulata have a very unique structure. They consist of six tepals (undifferentiated petals or sepals): three are positioned on the outside, reflexed or pointing downward; and three others are placed on the inside, standing upright. The flowers also have three stamens.
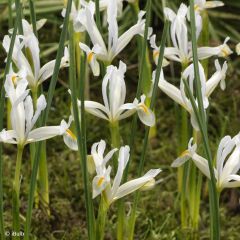
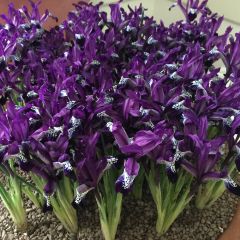
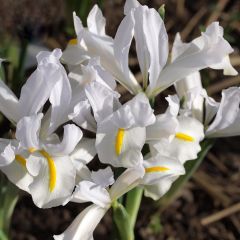
The petals are often shades of blue, but they can also be purple, yellow, or white. They usually have a central yellow-orange band and white spots, creating a striking contrast. They are sometimes speckled with darker spots, black or deep blue. These patterns give the flower exceptional delicacy, a refined and precious quality. The blooms are so detailed they appear hand-painted.
The Iris reticulata has a delicate fragrance. Irises are sometimes used in perfumery, though primarily Iris germanica.
Iris reticulata blooms very early, before spring begins, in February or March. They can be forced by growing them in pots indoors to flower earlier in winter. Once flowering is over, they may take several years to bloom again.
The leaves of Iris reticulata are slender and elongated, like grass blades. They are upright and measure 10–15 cm long, with a four-angled cross-section. The leaves reach the height of the flowers initially, but after flowering, they lengthen to 30–40 cm. They then dry out, and the plant goes dormant, reappearing in autumn.
The Iris reticulata has small, rounded bulbs, about 2 cm in diameter and 3–4 cm tall, pointed at the top and covered in a netted tunic. This plant is often grown as an annual, as after flowering, the bulbs typically divide into small bulblets. Each bulblet will need a few years to grow large enough to flower again. To ensure blooms every year, it’s best to plant new bulbs each autumn.
After flowering, Iris reticulata produces a three-part capsule-shaped fruit containing rounded seeds.
The main varieties of Iris reticulata
Iris reticulata Katharina Hodgkin
- Flowering time March, April
- Height at maturity 15 cm
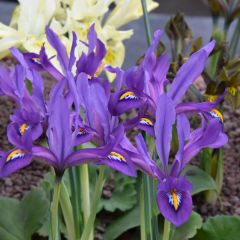
Iris reticulata Blue Note - Netted iris
- Flowering time March, April
- Height at maturity 15 cm
Iris reticulata Dijt
- Flowering time March, April
- Height at maturity 15 cm
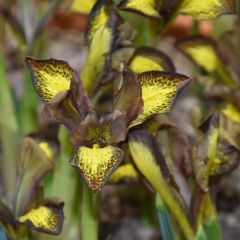
Iris reticulata Eyecatcher
- Flowering time March, April
- Height at maturity 15 cm
Iris reticulata Harmony
- Flowering time March, April
- Height at maturity 15 cm
Iris reticulata danfordiae - Netted iris
- Flowering time March, April
- Height at maturity 10 cm
Iris reticulata Natascha
- Flowering time March, April
- Height at maturity 12 cm
Iris reticulata Spot On - Netted iris
- Flowering time March, April
- Height at maturity 15 cm
Iris reticulata White Caucasus - Netted iris
- Flowering time March, April
- Height at maturity 15 cm
Iris reticulata Cantab - Netted iris
- Flowering time April, May
- Height at maturity 10 cm
Iris reticulata Sunshine
- Flowering time March, April
- Height at maturity 15 cm
Iris reticulata Scent Sational
- Flowering time March, April
- Height at maturity 15 cm
Iris reticulata Mars Landing
- Flowering time April, May
- Height at maturity 15 cm
Discover other Iris Reticulata
Planting Iris reticulata
Where to plant?
Plant your Iris reticulata in full sun, this is the ideal situation for them, although they can also tolerate partial shade. Plenty of sunlight will ensure a beautiful flowering display.
Iris reticulata absolutely require well-draining soil, otherwise the bulbs may rot! The soil should dry out in summer when the plant is dormant. If your soil is heavy and retains moisture, improve drainage by adding a layer of gravel at planting time or by planting the bulbs on a mound. Iris reticulata prefer neutral or slightly alkaline soils.
As Iris reticulata enjoys sun and well-drained soil, it thrives in rock gardens, paired with other small drought-tolerant plants or bulbs such as sedums, houseleeks, Ipheions, crocuses… Plant them at the front of borders to give them an open position and better appreciate their flowers. For a natural effect, plant them in groups, spacing the bulbs randomly rather than in straight lines. Finally, don’t hesitate to grow them in pots on your patio. This showcases their beauty despite their small size! You can enjoy their late winter blooms by placing them close to your home.
If you need to move iris bulbs, do so in summer during their dormant period to avoid disrupting their growth cycle. This will help them re-establish more easily.
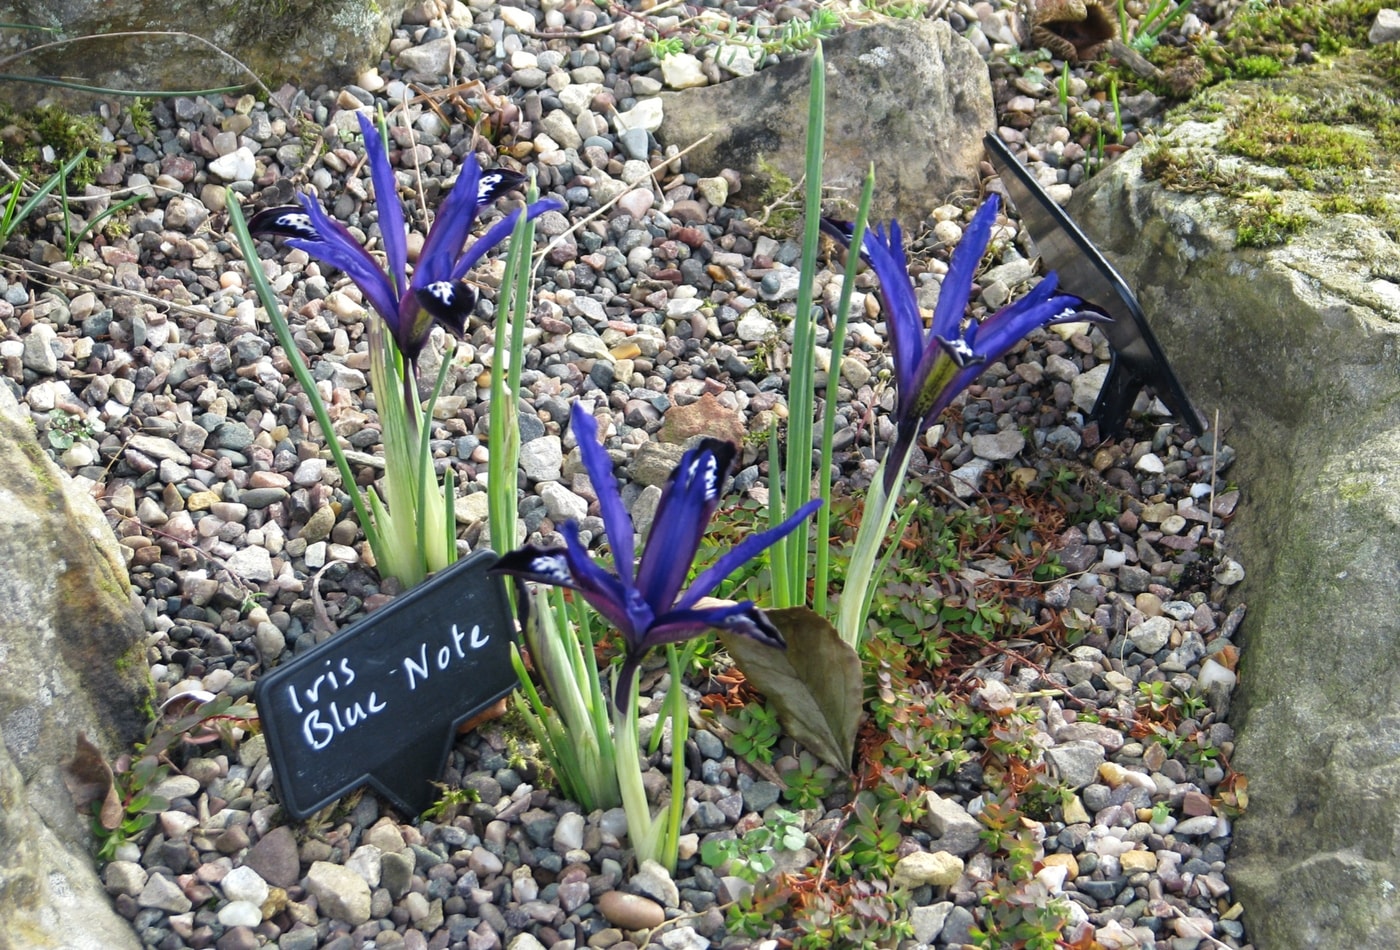
Iris reticulata ‘Blue Note’ in a rock garden! (Photo Peganum)
When to plant?
Plant Iris reticulata in autumn, ideally in September or October. This gives them time to establish before flowering in late winter.
Planting can be done until around December, but flowering will be significantly delayed in the first year.
How to plant Iris reticulata?
As these are small plants, we recommend planting them in groups for a more striking effect. Don’t hesitate to cluster 15 to 20 bulbs together. However, space them 7 to 10 centimetres apart. A bulb planter can make the job easier. Planting is straightforward, but good drainage is crucial as excess moisture may cause the bulbs to rot.
- Loosen the soil with a spade and remove weeds. You can create a small mound and plant the bulbs on top to improve drainage.
- Dig small holes in the soil, 8 to 10 centimetres deep. If your soil is heavy, add a drainage layer of gravel to prevent bulb rot from excess moisture.
- Plant your bulbs the right way up, with the pointed end facing upwards.
- Cover with soil and firm gently.
- Water.
For container planting:
- Place a layer of gravel at the bottom of the pot for drainage.
- Add potting compost mixed with a little sand.
- Position the bulbs, pointed end up, close together but not touching.
- Cover with compost and firm.
- Water.
You can force Iris reticulata bulbs to encourage earlier flowering. Do this in autumn, around October. Choose a wide pot, add a layer of clay pebbles at the bottom, then fill with compost. Place the bulbs close together without touching, cover with compost leaving the tips slightly exposed, firm lightly and water. Cover the pot with a plastic bag. The bulbs need a cold period: place them somewhere dark and cool (e.g., a refrigerator or cellar) at 2–8°C. After about three months, when shoots appear, move them to a cool, bright spot (15–20°C), ideally by a window.
Iris reticulata ‘Katharine Hodgkin’ in a pot (Photo Wilfried Overwater – iBulb)
Maintenance
Once flowering is over, the iris foliage lengthens while the bulb replenishes its reserves before going dormant. Leave the leaves in place and apply a special bulb fertiliser, rich in potash, to help it build up its reserves. You can cut back the foliage once it has completely withered, but not before!
Iris reticulata are not very susceptible to diseases and pests. Occasionally, snails and slugs may nibble on young leaves. You can protect your irises by using slug pellets (such as Ferramol) or by setting up a slug trap. They can also be affected by heterosporium leaf spot, a fungal disease characterised by brown spots on the foliage, which eventually dries up completely. Iris reticulata are susceptible to fusarium wilt, another fungal disease. If you notice these diseases, treat with a fungicide (Bordeaux mixture, sulphur, etc.). They are encouraged by excess moisture, so the best way to avoid them is to plant the bulbs in a well-draining substrate. If the soil is too wet, the bulb may rot.
If you grow your Iris reticulata in pots, water occasionally. The substrate dries out faster than in the ground! When watering, avoid wetting the leaves and instead direct the water towards the base of the plants.
Propagation
To propagate Iris reticulata, we recommend dividing the bulbils. Growing from seed is slightly more challenging.
Dividing Bulbils
Iris reticulata produce small bulbils around the main bulb. They are easy to propagate by collecting these bulbils. Divide them after flowering, once the foliage has withered and the plant is dormant. Select the largest clumps. Dig them up and carefully separate the bulbils. Prepare the soil and replant them, ensuring they are positioned correctly with the pointed end facing upwards. Cover with soil and firm gently. Water lightly.
Sowing Seeds
You can propagate Iris reticulata by sowing seeds in autumn. We recommend soaking the seeds in rainwater for a few days to soften them before sowing. This will aid germination. Next, fill a pot with compost mixed with a little sand. Scatter the seeds on the surface and cover lightly with substrate. Water well. Place the pot in a cold frame or outdoors (in which case germination will take longer). Keep the soil moist by watering regularly until germination occurs.
Association
Due to their small size, we recommend planting Iris reticulata at the front of borders to showcase them and give them an open position. This will prevent them from being lost among larger plants. You can even plant your Iris reticulata in containers placed on your patio or windowsill. Create beautiful, colourful displays by mixing different varieties or pairing them with snowdrops, pansies, chionodoxas or crocuses…
Whether in borders or pots, we recommend combining your Iris reticulata with other small spring bulbs. They will brighten your garden with their delicate blooms from late winter onwards. To complement your irises, choose chionodoxas (glory-of-the-snow) or ipheions, small bulbous plants with starry flowers. You could also pair them with the delicate blooms of Greek anemones (Anemone blanda). Iris reticulata have very similar growing conditions to spring crocuses – like them, they thrive in full sun and well-drained soil. They beautifully complement their delicate flowering. All these bulbs adapt well to container growing, allowing you to showcase them and keep them close to the house to better enjoy them in early spring.
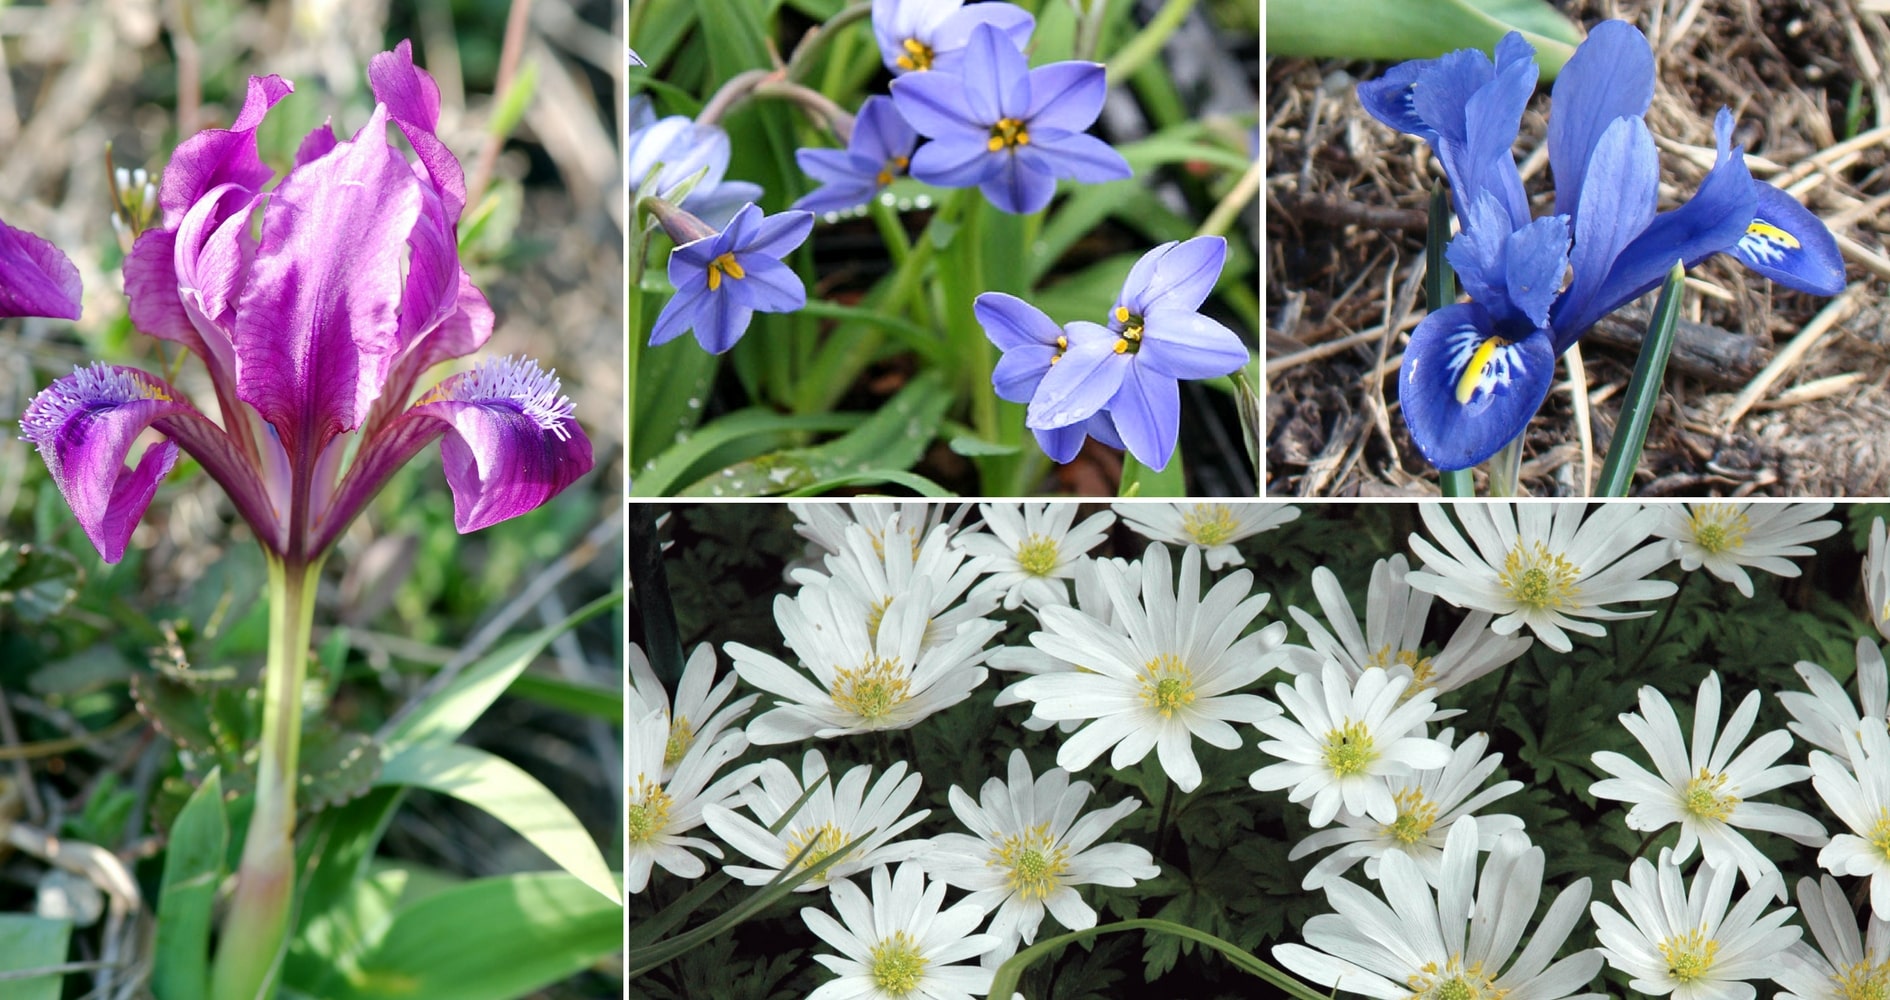
Iris pumila (photo Herzi Pinki), Ipheion uniflorum ‘Jessie’, Iris reticulata ‘Harmony’ and Anemone blanda ‘White Splendour’
Iris reticulata thrive in well-drained soil and full sun, making them perfect for rock gardens. Plant them alongside clumps of ornamental grasses (such as Stipa tenuifolia or Festuca glauca), small bulbs (muscari, ipheions…), sedums, houseleeks or saxifrages. Create a low-maintenance, water-wise garden with a mineral theme, featuring small ground-covering plants.
You can also pair them with other irises, such as Iris pumila or Iris unguicularis, which share the same growing conditions. These dwarf irises also prefer well-drained, sunny spots.
Don’t hesitate to plant irises in large groups, mixing different varieties. Scatter them randomly for a natural effect. Iris reticulata may naturalise after a few years if conditions are right! Discover our collection featuring 90 Iris reticulata, including the finest varieties: ‘Katharina Hodgkin’, ‘Harmony’, ‘Dijt’ and ‘Natascha’.
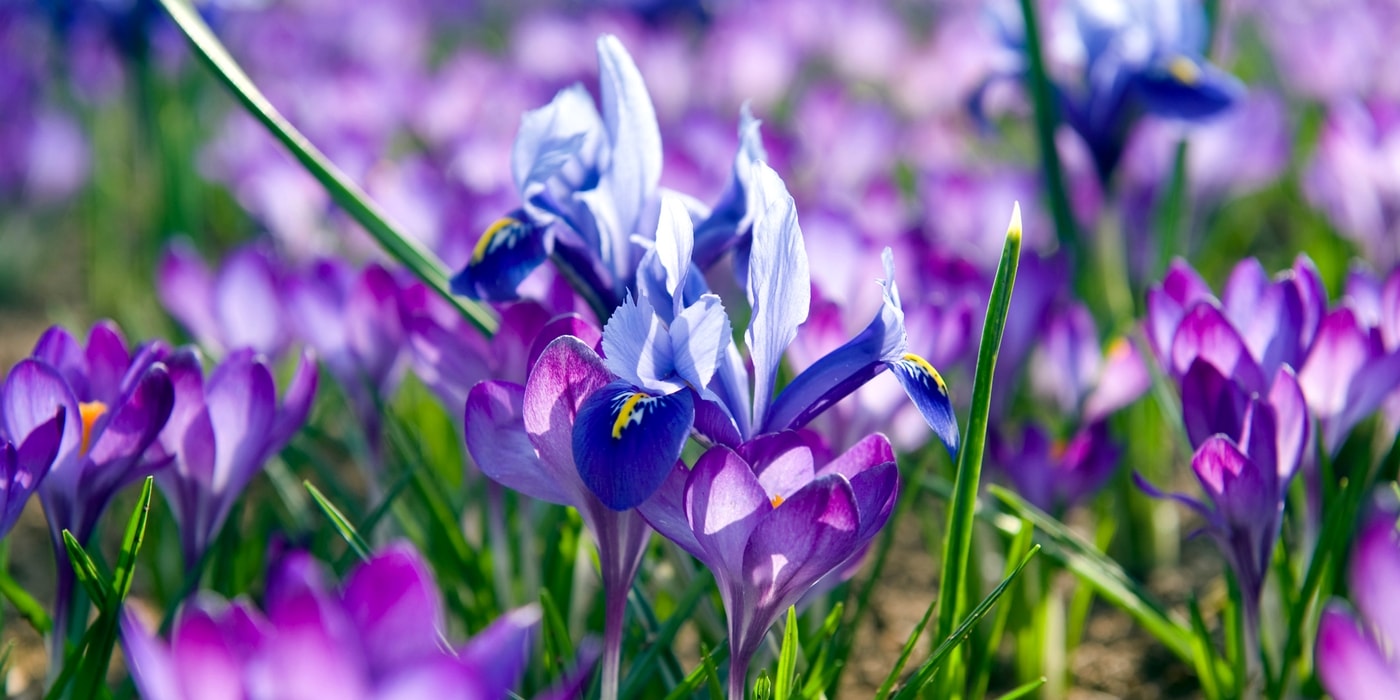
Iris reticulata ‘Harmony’ and Crocus tommasinianus (photo Wouter Koppen – iBulb)
→ Discover more ideas for pairing Iris reticulata in Christine’s advice sheet.
Useful resources
- Our lovely range of Iris reticulata!
- An article by Pierre on our blog: Small Bulbs, Big Impact!
- Our advice sheet: Iris reticulata, the Most Beautiful Varieties
- Find all our tips for growing Iris reticulata in pots
- Discover all our advice for planting Iris reticulata in open ground
- Our advice sheet: 9 Blue-Flowering Bulbs You Must Have in Your Garden
- Iris: Our 2023 New Varieties
Frequently asked questions
-
The flowering is over, should I cut back the foliage?
No, leave the foliage in place as it allows the plant to build up its reserves before going dormant. After flowering, the leaves will elongate and then wither. You can remove the leaves once they have completely dried out.
-
Should I dig up bulbs to store them safely in winter?
No, unlike other bulbs such as dahlias, gladioli or cannas, which prefer to be brought indoors for winter, we recommend leaving Iris reticulata bulbs in place. Indeed, the Iris is completely hardy and will have no trouble overwintering in the ground.
-
My Reticulated Iris Isn't Flowering. What Should I Do?
After their first flowering, Iris reticulata need several years before blooming again. The best way to enjoy their flowers every year is to replant bulbs each autumn. If your iris isn't flowering, you may have planted it in too shady a spot. The reticulated iris needs sunlight to produce beautiful blooms! We recommend dividing them during summer and replanting in a sunnier location.
-
Should I add fertiliser?
It is unnecessary to add fertiliser when planting, as the reserves contained in the bulb are sufficient for the iris to flourish. However, we recommend applying fertiliser after flowering, when the plant is replenishing its reserves. Choose a special bulb fertiliser, rich in potash.
-
My Iris reticulata aren't growing. What should I do?
Excess moisture can sometimes cause the bulbs of Reticulated Iris to rot. If your soil tends to retain water, add a layer of gravel when planting, or position the bulbs on a mound to ensure proper drainage.
- Subscribe!
- Contents

Comments