


As an environmentally conscious gardener, are you wondering about sowing in biodegradable pots? And you wouldn't be wrong! These containers, designed to decompose in soil, offer an ecological and practical solution for growth of young plants. Besides making transplanting easier without disturbing delicate roots, they enrich soil with nutrients as they break down and promote sustainable gardening.
Discover in this guide the different biodegradable pots, how to sow seeds in them and how to ensure a smooth transition of your sowings into soil, while caring for our planet.
Different types of biodegradable pots
Biodegradable pots come in several materials, each with specific advantages and drawbacks.
Turf pots
These pots are valued for their ability to retain moisture and to provide nutrients to plants. However, their use is controversial because of environmental impact of turf extraction.
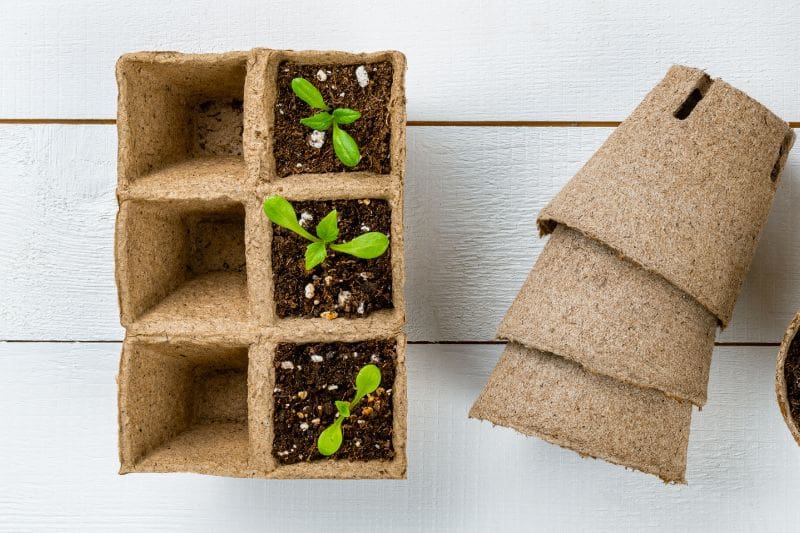
Cellulose or recycled paper pots
Lightweight and economical, they are perfect for indoor sowing. They offer good aeration but can break down quickly and require careful handling.
Some pots made from cellulose can be PEFC-certified (Programme for the Endorsement of Forest Certification). This label guarantees that cellulose used to make these pots comes from forests managed sustainably and responsibly.
Pots made from corn or potato starch
These pots are biodegradable and offer a sustainable alternative to conventional plastics. They break down effectively in soil, but can be less resistant to moisture and frequent handling.
Pots in plant fibres
Pots in plant fibres are made from natural materials such as coconut fibre, straw, bamboo, rice hulls, as well as flax or hemp. Each of these materials offers unique benefits in terms of durability, aeration and biodegradability, making these pots particularly suitable for environmentally friendly gardening. To reduce ecological impact, favour local materials, such as flax, hemp and straw.
Preparing biodegradable pots for sowing
1- Choose a seed compost for sowing, specially formulated to be rich and offering a good balance between moisture retention and drainage.
2- Gently fill pots with substrate, avoiding over-packing to allow good air circulation. Leave about one centimetre at top of pot to facilitate watering.
3- Slightly moisten substrate with water at room temperature, ideally rainwater.
4- Sow seeds following instructions on packet for sowing depth and spacing. As a general rule, sow two to three seeds per pot to ensure germination.
5- Lightly cover seeds with substrate and press gently to ensure good contact with soil.
6- Finally, place pots in a warm spot, at around 20 °C, in bright light but out of direct sunlight, to encourage germination.
Caring for sowings
During growth, keep substrate moist without saturating it. Ideally use a mister to lightly wet the soil, taking care not to drown the pot.
Recyclable pots dry out faster than plastic pots, so adjust frequency accordingly. To do this, check surface of substrate: if dry to touch, time to water.
Transplanting sowings
When to transplant my sowings?
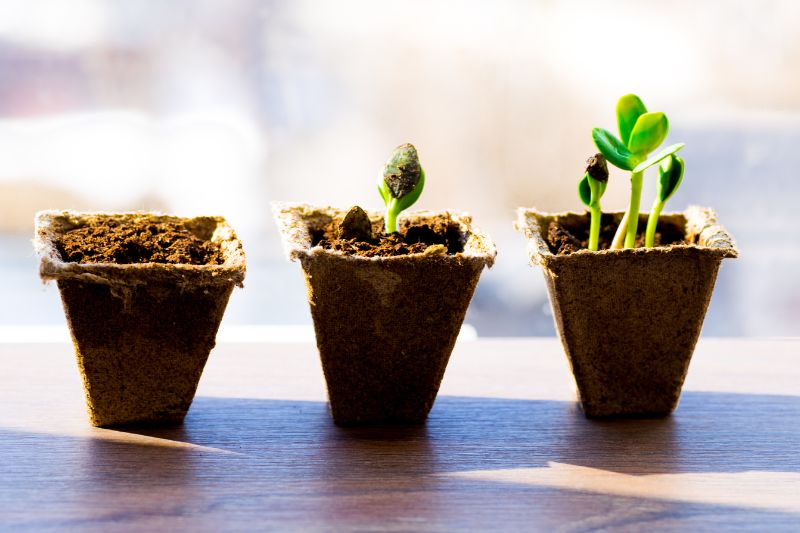
Sowings are ready to be transplanted when their roots have begun to fill the pot. You can sometimes even see some roots starting to pierce the pot.
Another good indicator is presence of several sets of true leaves (not cotyledons, the first leaves that appear). This generally means plant has developed a root system robust enough to withstand transfer.

How to transplant my sowings?
Advantage of biodegradable pots is that you can plant them directly into soil, which minimises disturbance to roots.
If you must remove pot for any reason, do so carefully to avoid damaging roots.
1- Dig a hole in garden soil or in a larger pot, large enough to accommodate the sowing and its root system.
Tip: you can quickly moisten the pot in a basin of water to speed up its decomposition in soil.
2- Place the sowing with its pot into the hole and fill with soil, firming slightly around base of plant to ensure good contact with soil.
3- Water and keep soil moist, but not waterlogged, to encourage roots to develop in their new environment.
4- Ideally, apply a mulch around base of plant to help retain soil moisture and to protect roots from temperature fluctuations.
By following these steps and taking care to minimise stress for plants during transplanting, you will encourage a smooth transition and healthy growth in their new environment.


Comments